Work in progress
The content of this page was not yet updated for Godot
4.2
and may be outdated. If you know how to improve this page or you can confirm
that it's up to date, feel free to open a pull request.
Gerando monstros
Nesta parte, vamos fazer os monstros surgirem aleatoriamente ao longo de um caminho. No final, você terá monstros vagando pelo tabuleiro de jogo.
Double-click on main.tscn in the FileSystem dock to open the Main scene.
Before drawing the path, we're going to change the game resolution. Our game has
a default window size of 1152x648. We're going to set it to 720x540, a
nice little box.
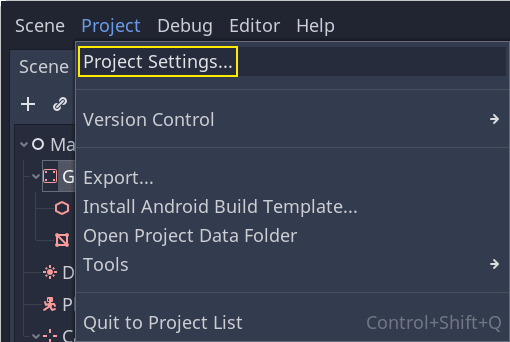
Vá para Project -> Project Settings.
No menu à esquerda, navegue até Exibir -> janela. À direita, defina a Largura como ''720'' e a Altura como ''540''.

Criando o caminho de surgimento
Like you did in the 2D game tutorial, you're going to design a path and use a PathFollow3D node to sample random locations on it.
No entanto, em 3D, é um pouco mais complicado desenhar o caminho. Queremos que ele esteja em torno da vista do jogo para que os monstros apareçam fora da tela. Mas se desenharmos um caminho, não o veremos pela pré-visualização da câmera.
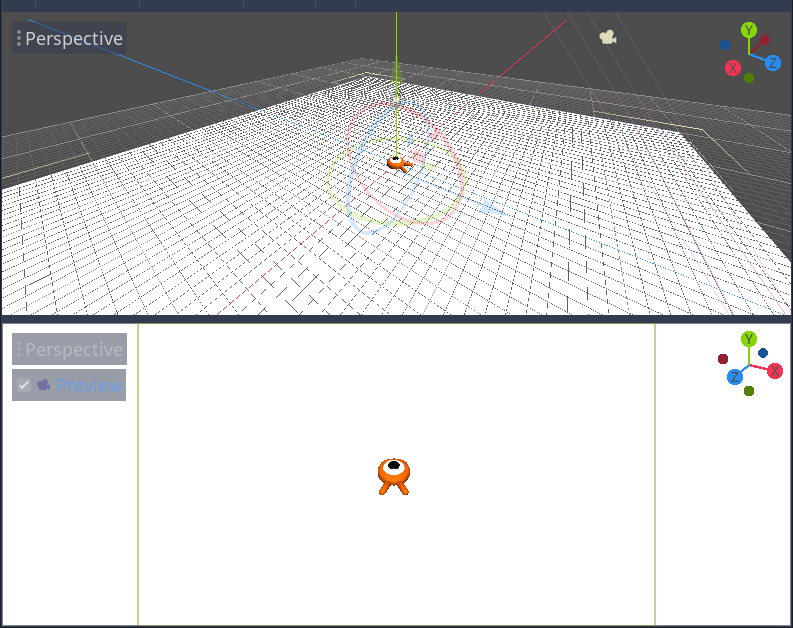
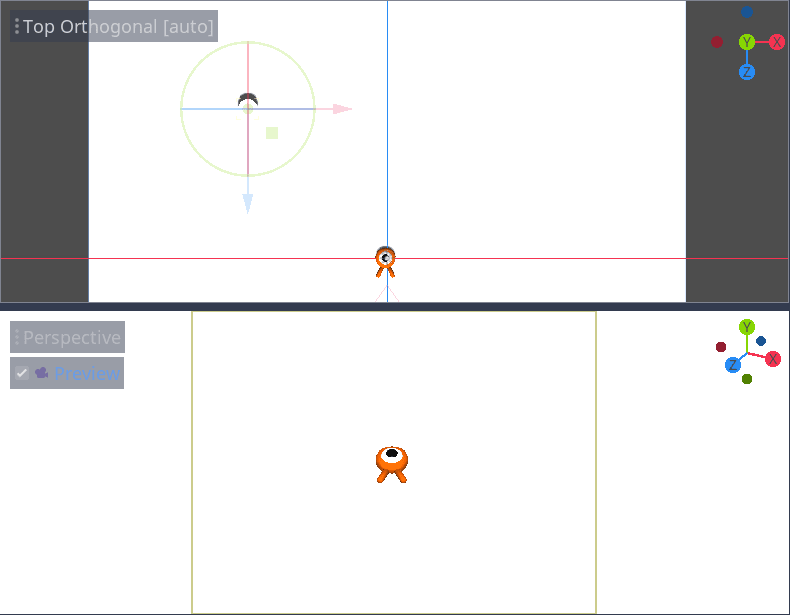
To find the view's limits, we can use some placeholder meshes. Your viewport should still be split into two parts, with the camera preview at the bottom. If that isn't the case, press Ctrl + 2 (Cmd + 2 on macOS) to split the view into two. Select the Camera3D node and click the Preview checkbox in the bottom viewport.
Adicionando cilindros de substituto
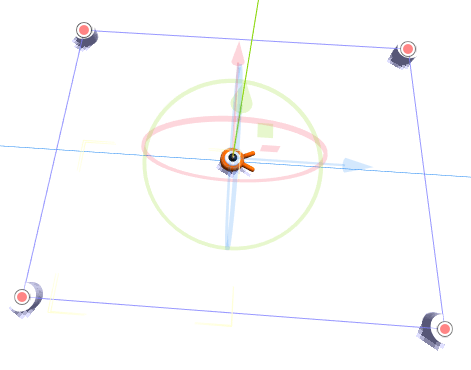
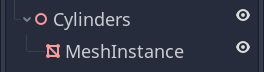
Let's add the placeholder meshes. Add a new Node3D as a child of the
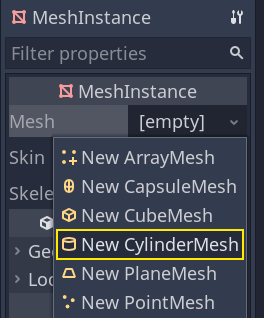
Main node and name it Cylinders. We'll use it to group the cylinders. Select Cylinders and add a child node MeshInstance3D
No Inspetor, atribua um CylinderMesh à propriedade Malha.
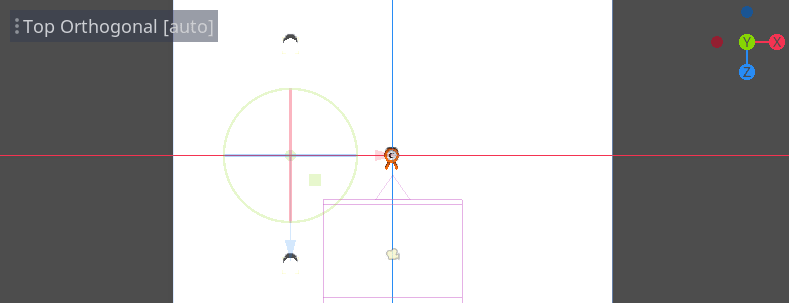
Defina a janela de exibição superior com a visualização ortogonal superior usando o menu no canto superior esquerdo da janela de exibição. Como alternativa, você pode pressionar a tecla 7 do teclado.
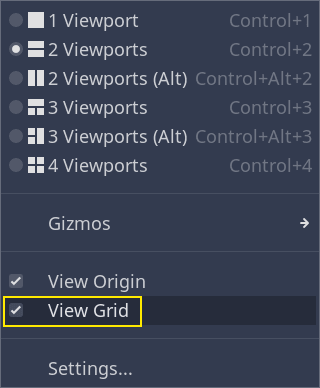
The grid may be distracting. You can toggle it by going to the View menu in the toolbar and clicking View Grid.
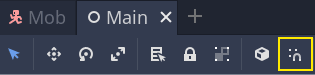
Agora você quer mover o cilindro ao longo do plano do solo, observando a visualização da câmera no inferior da janela de visualização. Eu recomendo usar o encaixe de grade para fazer isso. Você pode alterná-lo clicando no ícone do ímã na barra de ferramentas ou pressionando Y.
Move the cylinder so it's right outside the camera's view in the top-left corner.
Vamos criar cópias da malha e colocá-las ao redor da área do jogo. Pressione Ctrl + D (Cmd + D no macOS) para duplicar o nó. Você também pode clicar com o botão direito do mouse no nó no painel*Cena* e selecionar Duplicar. Mova a cópia para baixo ao longo do eixo Z azul até que esteja fora da visualização da câmera.
Selecione ambos os cilindros pressionando a tecla Shift e clique no não selecionado e duplique-os.
Mova-os para a direita arrastando o eixo X vermelho.

Eles estão um pouco difíceis de ver em branco, não estão? Vamos fazer com que eles se destaquem dando a eles um novo material.
Em 3D, os materiais definem as propriedades visuais de uma superfície, como sua cor, como ela reflete a luz e muito mais. Podemos usá-los para mudar a cor de uma malha.
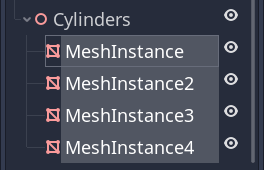
Podemos atualizar todos os quatro cilindros de uma vez. Selecione todas as instâncias de malha no painel Cena. Para fazer isso, você pode clicar no primeiro e com o Shift apertado clicar no último.
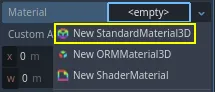
In the Inspector, expand the Material section and assign a StandardMaterial3D to slot 0.
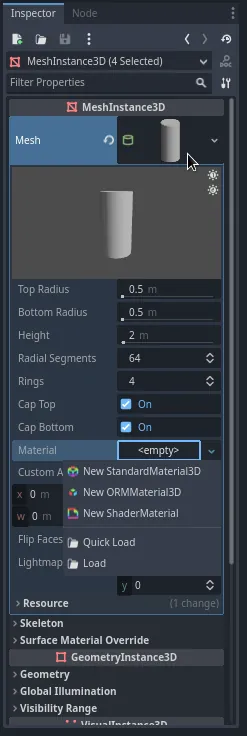
Clique no ícone da esfera para abrir o recurso material. Você obtém uma visualização do material e uma longa lista de seções preenchidas com propriedades. Você pode usá-los para criar todos os tipos de superfícies, de metal a rocha ou água.
Expanda a seção Albedo.
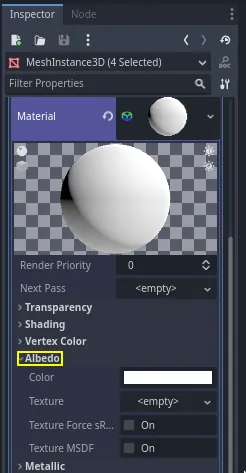
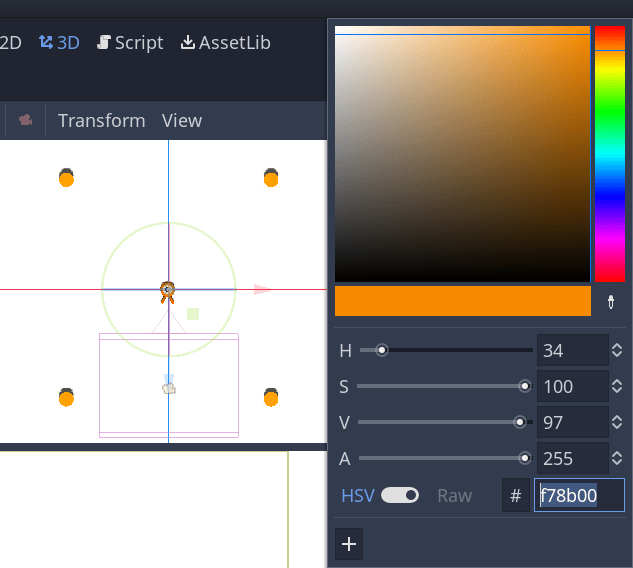
Defina a cor para uma que contraste com o fundo, como uma laranja brilhante.
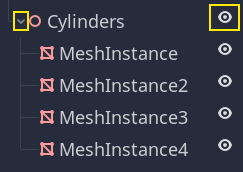
Agora podemos usar os cilindros como guias. Dobre-os no painel Cena clicando na seta cinza ao lado deles. Continuando, você também pode alternar sua visibilidade clicando no ícone de olho ao lado de Cilindros.
Add a child node Path3D to Main node. In the toolbar, four icons appear. Click
the Add Point tool, the icon with the green "+" sign.

Nota
Você pode passar o mouse sobre qualquer ícone para ver uma dica de ferramenta descrevendo a ferramenta.
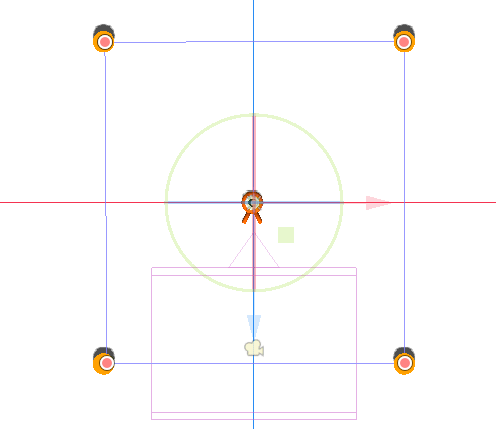
Clique no centro de cada cilindro para criar um ponto. Em seguida, clique no ícone Fechar curva na barra de ferramentas para fechar o caminho. Se algum ponto estiver um pouco fora, você pode clicar e arrastar sobre ele para reposicioná-lo.

Seu caminho deve se parecer com isso.
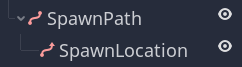
To sample random positions on it, we need a PathFollow3D node. Add a
PathFollow3D as a child of the Path3D. Rename the two nodes to SpawnPath and
SpawnLocation, respectively. It's more descriptive of what we'll use them for.
Com isso, estamos prontos para programar o mecanismo de geração.
Gerando monstros aleatóriamente
Right-click on the Main node and attach a new script to it.
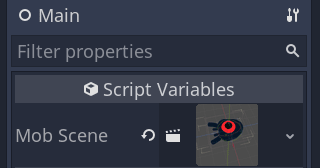
We first export a variable to the Inspector so that we can assign mob.tscn
or any other monster to it.
extends Node

@export var mob_scene: PackedScene
using Godot;

public partial class Main : Node
{
    // Don't forget to rebuild the project so the editor knows about the new export variable.

    [Export]
    public PackedScene MobScene { get; set; }
}
We want to spawn mobs at regular time intervals. To do this, we need to go back
to the scene and add a timer. Before that, though, we need to assign the
mob.tscn file to the mob_scene property above (otherwise it's null!)
Head back to the 3D screen and select the Main node. Drag mob.tscn from
the FileSystem dock to the Mob Scene slot in the Inspector.
Add a new Timer node as a child of Main. Name it MobTimer.

No Inspetor, defina seu Tempo de Espera para ''0,5'' segundos e ative o Autoiniciar para que ele seja iniciado automaticamente quando executarmos o jogo.
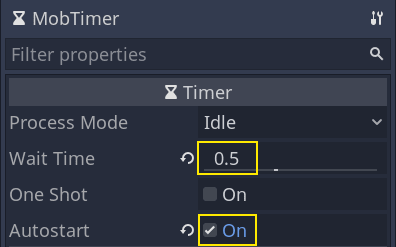
Os temporizadores emitem um sinal timeout cada vez que chegam ao final de seu Tempo de espera. Por padrão, eles reiniciam automaticamente, emitindo o sinal em um ciclo. Podemos nos conectar a este sinal a partir do nó Principal para gerar os monstros a cada 0.5 segundos.
With the MobTimer still selected, head to the Node dock on the right, and
double-click the timeout signal.
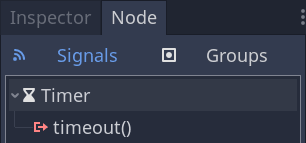
Conecte-o ao nó Principal.
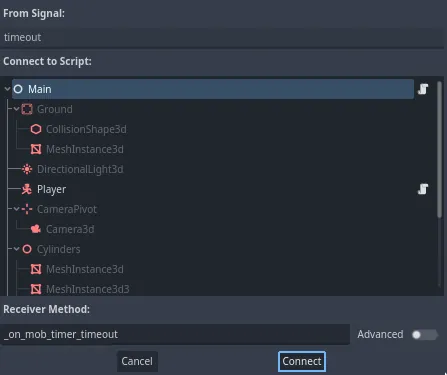
This will take you back to the script, with a new empty
_on_mob_timer_timeout() function.
Vamos programar lógica de surgimento do mob. Nós vamos:
Instanciar a cena da mob.
Gera uma posição aleatória no caminho de surgimento.
Obtenha a posição do jogador.
Chame o método
initialize()do mob, passando a ele a posição aleatória e a posição do jogador.Adicione o mob como um filho do nó Principal.
func _on_mob_timer_timeout():
    # Create a new instance of the Mob scene.
    var mob = mob_scene.instantiate()

    # Choose a random location on the SpawnPath.
    # We store the reference to the SpawnLocation node.
    var mob_spawn_location = get_node("SpawnPath/SpawnLocation")
    # And give it a random offset.
    mob_spawn_location.progress_ratio = randf()

    var player_position = $Player.position
    mob.initialize(mob_spawn_location.position, player_position)

    # Spawn the mob by adding it to the Main scene.
    add_child(mob)
// We also specified this function name in PascalCase in the editor's connection window
private void OnMobTimerTimeout()
{
    // Create a new instance of the Mob scene.
    Mob mob = MobScene.Instantiate<Mob>();

    // Choose a random location on the SpawnPath.
    // We store the reference to the SpawnLocation node.
    var mobSpawnLocation = GetNode<PathFollow3D>("SpawnPath/SpawnLocation");
    // And give it a random offset.
    mobSpawnLocation.ProgressRatio = GD.Randf();

    Vector3 playerPosition = GetNode<Player>("Player").Position;
    mob.Initialize(mobSpawnLocation.Position, playerPosition);

    // Spawn the mob by adding it to the Main scene.
    AddChild(mob);
}
Acima, randf() produz um valor aleatório entre 0 e 1`, que é o que o progress_ratio do nó PathFollow espera: 0 é o início do caminho, 1 é o fim do caminho. O caminho que temos definido é em torno do viewport da câmera, então qualquer valor aleatório entre 0 e 1 é uma posição aleatória ao lado das bordas do viewport!
Aqui está o script main.gd completo até agora, para referência.
extends Node

@export var mob_scene: PackedScene


func _on_mob_timer_timeout():
    # Create a new instance of the Mob scene.
    var mob = mob_scene.instantiate()

    # Choose a random location on the SpawnPath.
    # We store the reference to the SpawnLocation node.
    var mob_spawn_location = get_node("SpawnPath/SpawnLocation")
    # And give it a random offset.
    mob_spawn_location.progress_ratio = randf()

    var player_position = $Player.position
    mob.initialize(mob_spawn_location.position, player_position)

    # Spawn the mob by adding it to the Main scene.
    add_child(mob)
using Godot;

public partial class Main : Node
{
    [Export]
    public PackedScene MobScene { get; set; }

    private void OnMobTimerTimeout()
    {
        // Create a new instance of the Mob scene.
        Mob mob = MobScene.Instantiate<Mob>();

        // Choose a random location on the SpawnPath.
        // We store the reference to the SpawnLocation node.
        var mobSpawnLocation = GetNode<PathFollow3D>("SpawnPath/SpawnLocation");
        // And give it a random offset.
        mobSpawnLocation.ProgressRatio = GD.Randf();

        Vector3 playerPosition = GetNode<Player>("Player").Position;
        mob.Initialize(mobSpawnLocation.Position, playerPosition);

        // Spawn the mob by adding it to the Main scene.
        AddChild(mob);
    }
}
Você pode testar a cena pressionando F6. Você deve ver os monstros surgirem e se moverem em linha reta.
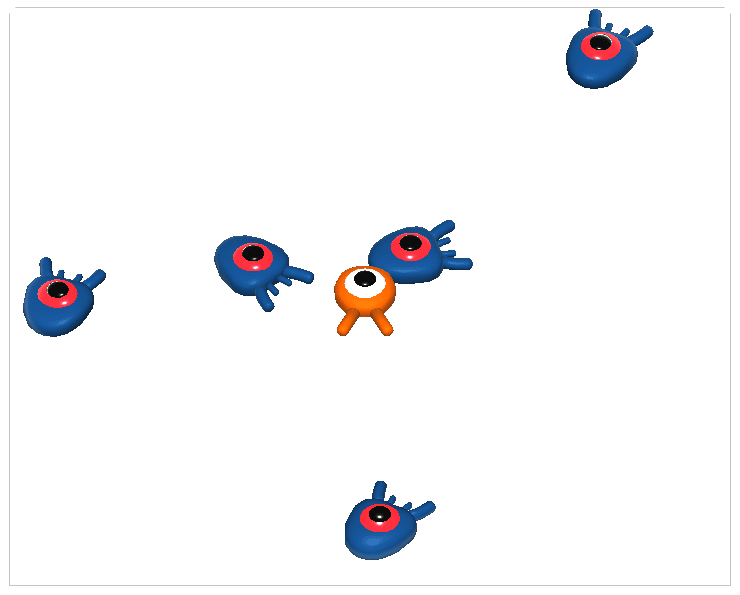
Por enquanto, eles se chocam e deslizam um contra o outro quando seus caminhos se cruzam. Trataremos disso na próxima parte.