Using VisualShaders
Just as VisualScript is an alternative for users that prefer a graphical approach to coding, VisualShaders are the visual alternative for creating shaders.
As shaders are inherently linked to visuals, the graph-based approach with previews of textures, materials, etc. offers a lot of additional convenience compared to purely script-based shaders. On the other hand, VisualShaders do not expose all features of the shader script and using both in parallel might be necessary for specific effects.
Примечание
If you are not familiar with shaders, start by reading Introduction to shaders.
Creating a VisualShader
VisualShaders can be created in any ShaderMaterial. To begin using
VisualShaders, create a new ShaderMaterial in an object of your choice.
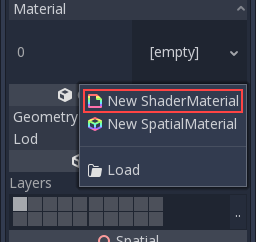
Затем назначьте ресурс VisualShader свойству Shader.

Click on the new VisualShader resource and the Visual Shader Editor will
open automatically. The layout of the Visual Shader Editor comprises two parts:
the upper toolbar and the graph itself.
From left to right in the toolbar:
Кнопка
Add Nodeотображает всплывающее меню, позволяющее добавлять узлы в шейдерный граф.The drop-down menu is the shader type: Vertex, Fragment and Light. Like for script shaders, it defines what built-in nodes will be available.
The following buttons and number input control the zooming level, grid snapping and distance between grid lines (in pixels).
The last icon shows the generated shader code corresponding to your graph.
Примечание
Although VisualShaders do not require coding, they share the same logic with script shaders. It is advised to learn the basics of both to have a good understanding of the shading pipeline.
The visual shader graph is converted to a script shader behind the scene, and you can see this code by pressing the last button in the toolbar. This can be convenient to understand what a given node does and how to reproduce it in scripts.
Using the Visual Shader Editor
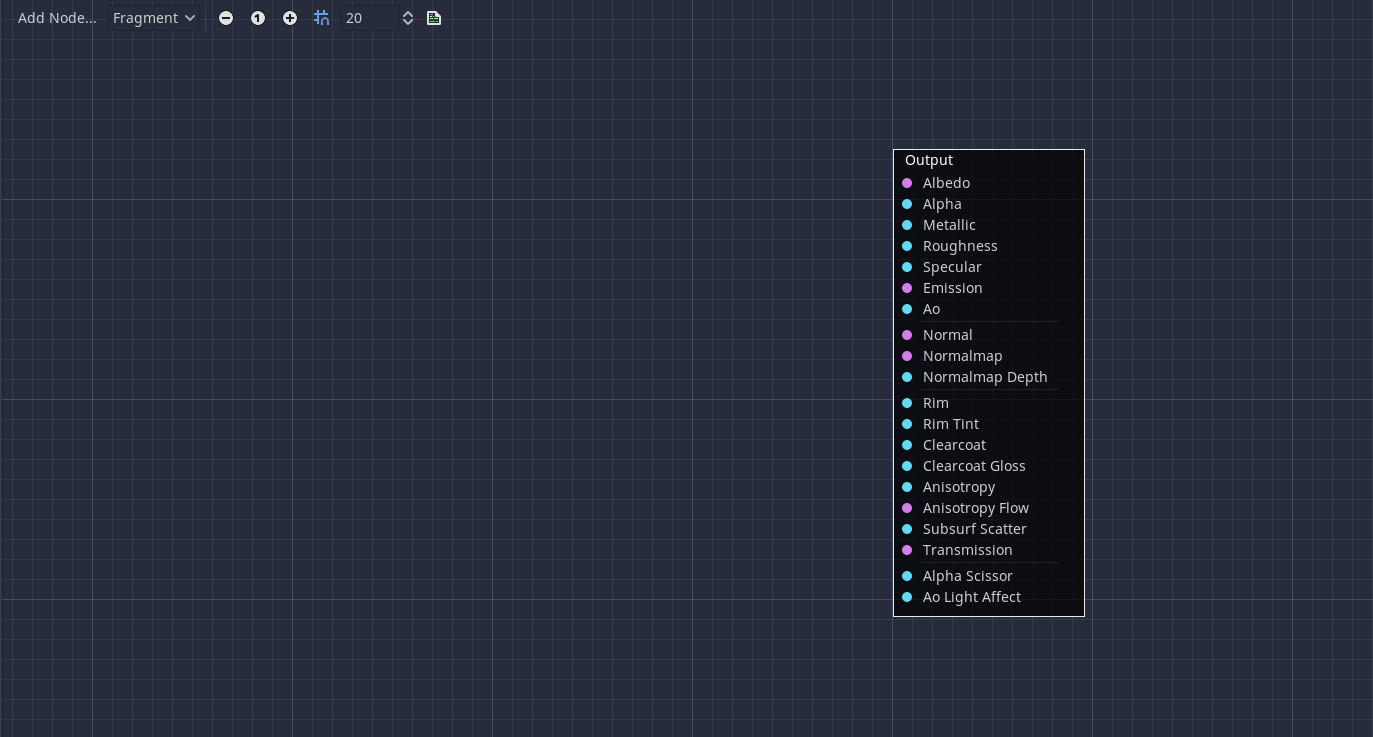
By default, every new VisualShader will have an output node. Every node
connection ends at one of the output node's sockets. A node is the basic unit to
create your shader. To add a new node, click on the Add Node button on the
upper left corner or right click on any empty location in the graph, and a menu
will pop up.
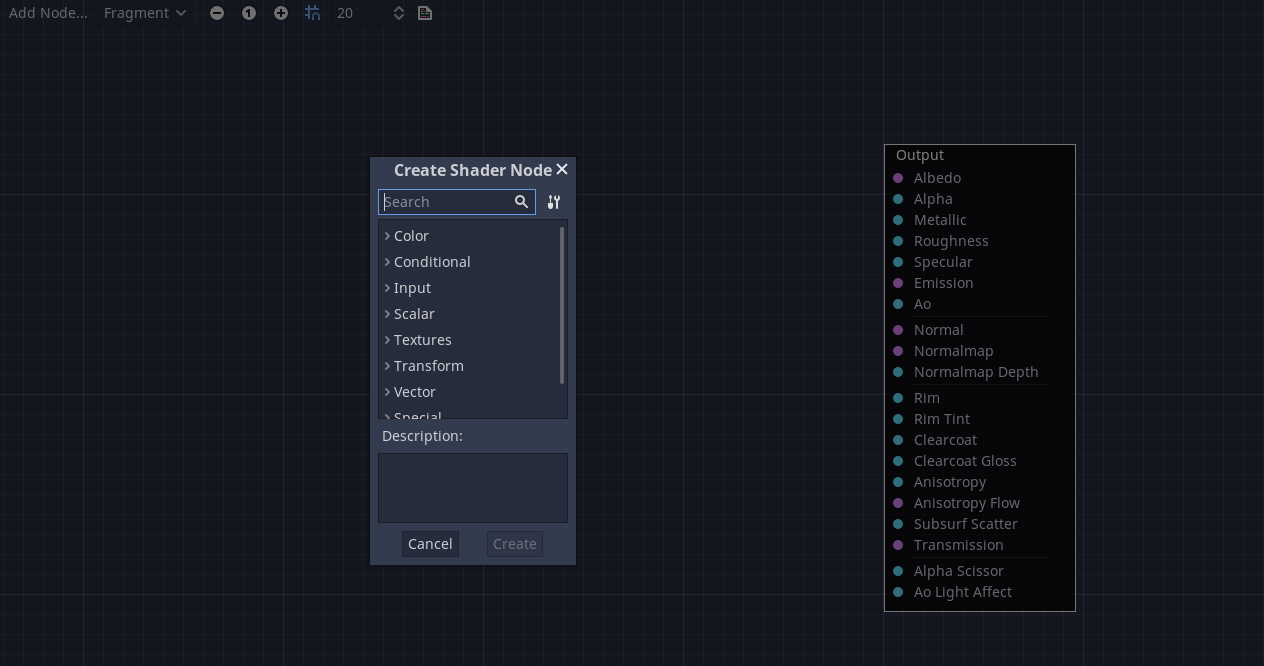
Это всплывающее окно имеет следующие свойства:
If you right-click on the graph, this menu will be called at the cursor position and the created node, in that case, will also be placed under that position; otherwise, it will be created at the graph's center.
Его размер может быть изменен по горизонтали и вертикали, что позволяет отображать больше содержимого. Трансформация размера и положение содержимого дерева сохраняются между вызовами, поэтому если вы внезапно закрыли всплывающее окно, вы можете легко восстановить его предыдущее состояние.
The
Expand AllandCollapse Alloptions in the drop-down option menu can be used to easily list the available nodes.Вы также можете перетаскивать узлы из всплывающего окна на график.
Хотя во всплывающем окне узлы отсортированы по категориям, поначалу это может показаться чрезмерно сложным. Попробуйте добавить несколько узлов, подключите их к выходному разъему и понаблюдайте, что произойдет.
When connecting any scalar output to a vector input, all components of
the vector will take the value of the scalar.
When connecting any vector output to a scalar input, the value of the
scalar will be the average of the vector's components.
Visual Shader nodes
Below are some special nodes that are worth knowing about. The list is not exhaustive and might be expanded with more nodes and examples.
Expression node
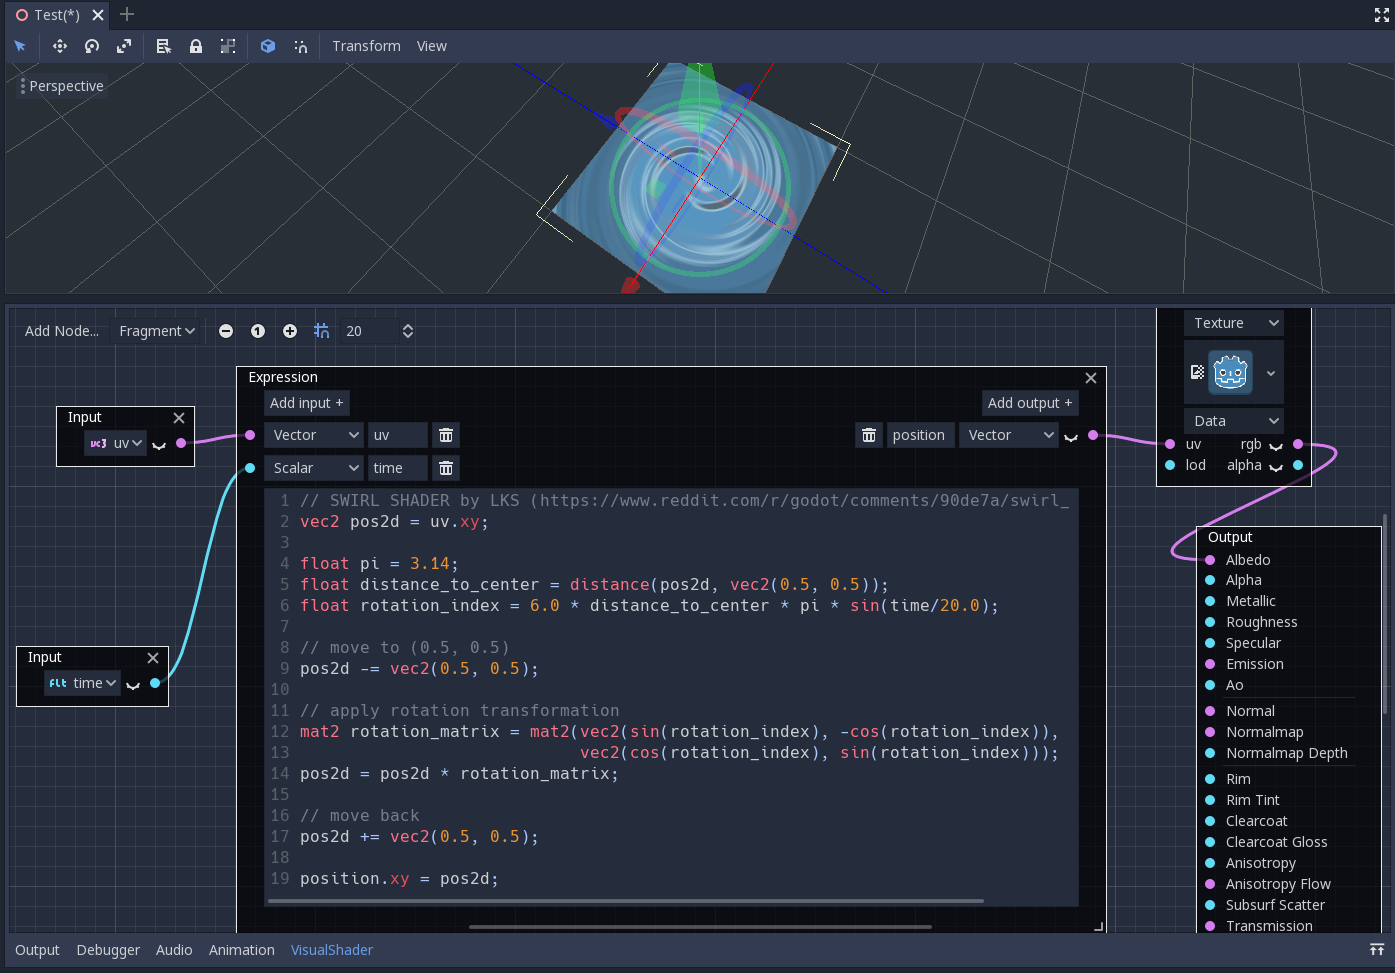
Узел Expression позволяет вам писать выражения на языке Godot Shading Language (GLSL-подобном) внутри ваших визуальных шейдеров. Узел имеет кнопки для добавления любого количества необходимых портов ввода и вывода и может быть изменен в размерах. Вы также можете задать имя и тип каждого порта. Введенное вами выражение будет немедленно применено к материалу (как только фокус покинет текстовое поле выражения). Любые ошибки синтаксического анализа или компиляции будут выведены на вкладку Output. По умолчанию выходы инициализируются нулевым значением. Узел находится на вкладке Special и может использоваться во всех режимах шейдера.
The possibilities of this node are almost limitless – you can write complex
procedures, and use all the power of text-based shaders, such as loops, the
discard keyword, extended types, etc. For example:
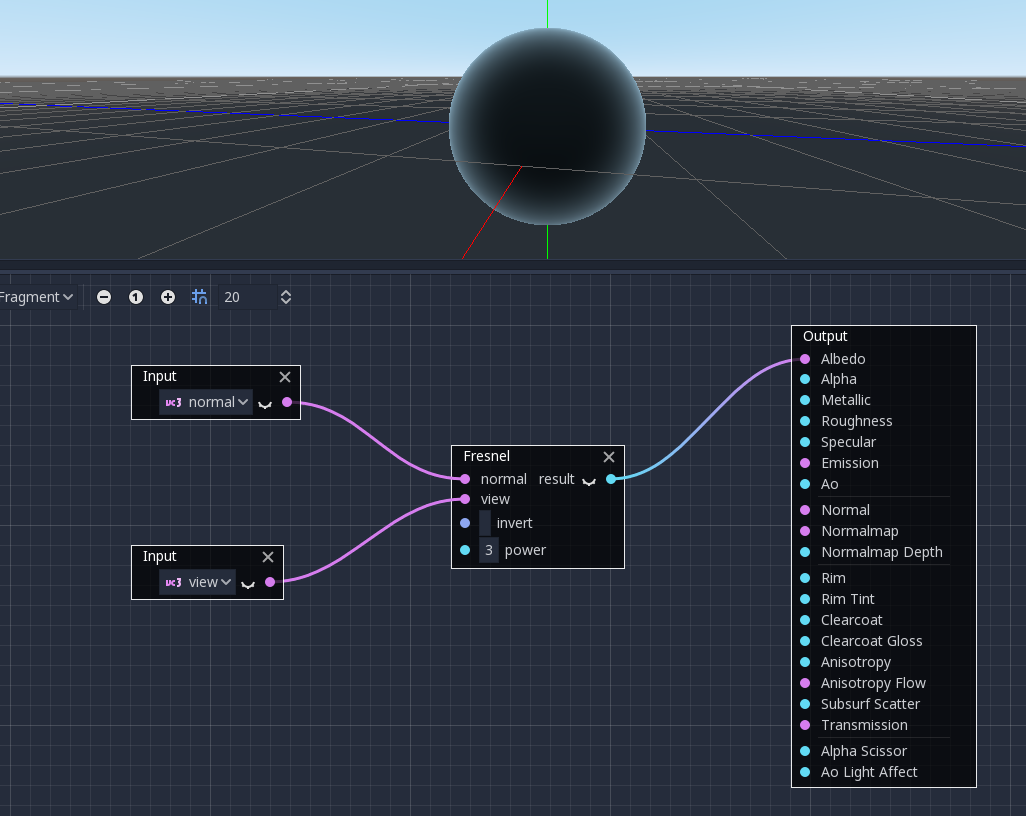
Fresnel node
The Fresnel node is designed to accept normal and view vectors and produces
a scalar which is the saturated dot product between them. Additionally, you can
setup the inversion and the power of equation. The Fresnel node is great for
adding a rim-like lighting effect to objects.
Boolean node
The Boolean node can be converted to Scalar or Vector to represent
0 or 1 and (0, 0, 0) or (1, 1, 1) respectively. This property
can be used to enable or disable some effect parts with one click.
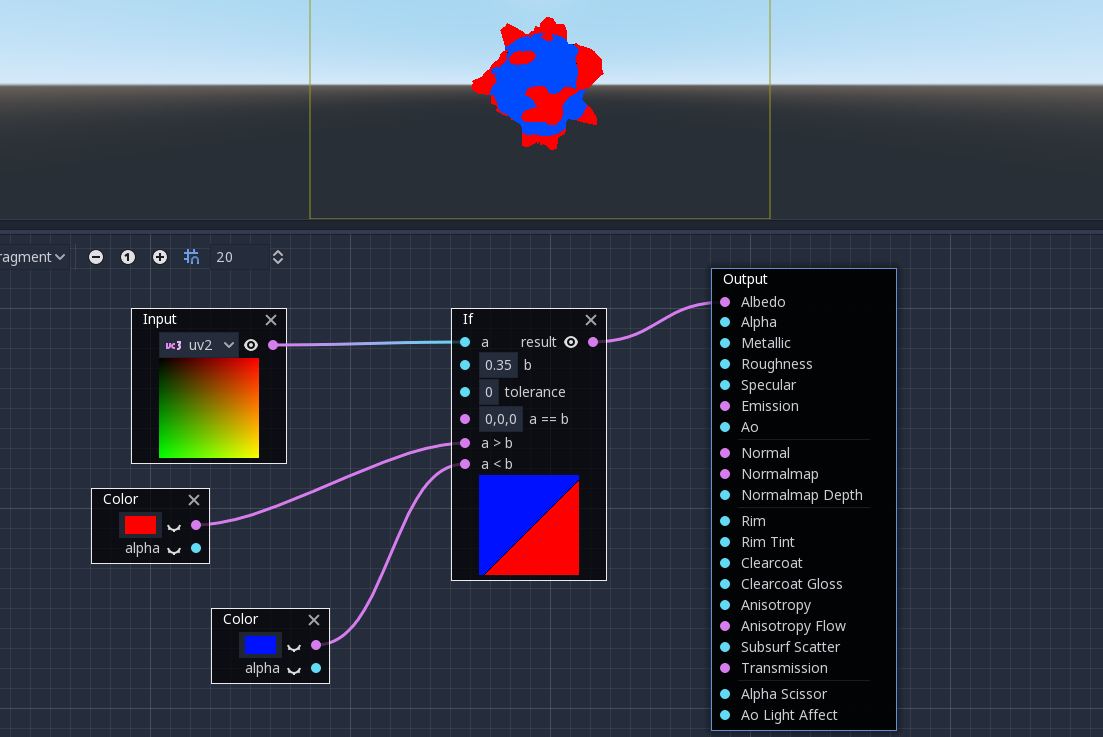
If node
The If node allows you to setup a vector which will be returned the result
of the comparison between a and b. There are three vectors which can be
returned: a == b (in that case the tolerance parameter is provided as a
comparison threshold – by default it is equal to the minimal value, i.e.
0.00001), a > b and a < b.
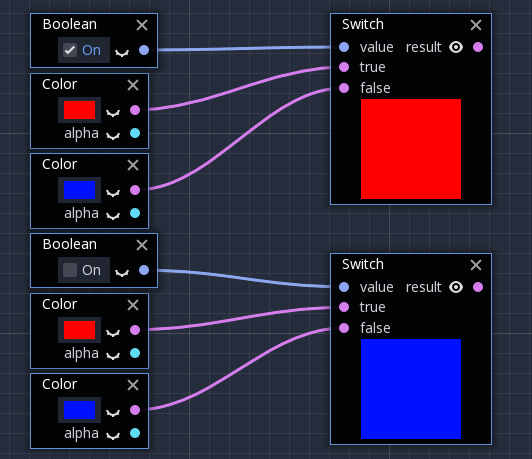
Switch node
The Switch node returns a vector if the boolean condition is true or
false. Boolean was introduced above. If you convert a vector to a true
boolean, all components of the vector should be above zero.
Примечание
The Switch node is only available on the GLES3 backed. If you are
targeting GLES2 devices, you cannot use switch statements.