Work in progress
The content of this page was not yet updated for Godot
4.2
and may be outdated. If you know how to improve this page or you can confirm
that it's up to date, feel free to open a pull request.
Сцена игрока и входные действия
В двух следующих уроках мы будем создавать сцену игрока, оформлять пользовательские действия и кодировать движения игрока. К концу у Вас будет персонаж, за которого можно играть и который будет двигаться в восьми направлениях.
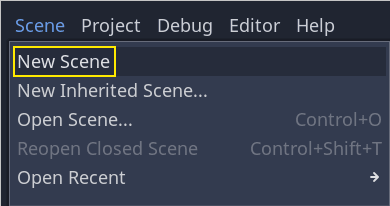
Создайте новую сцену, перейдя в меню «Сцена» в левом верхнем углу и нажав «Новая сцена».
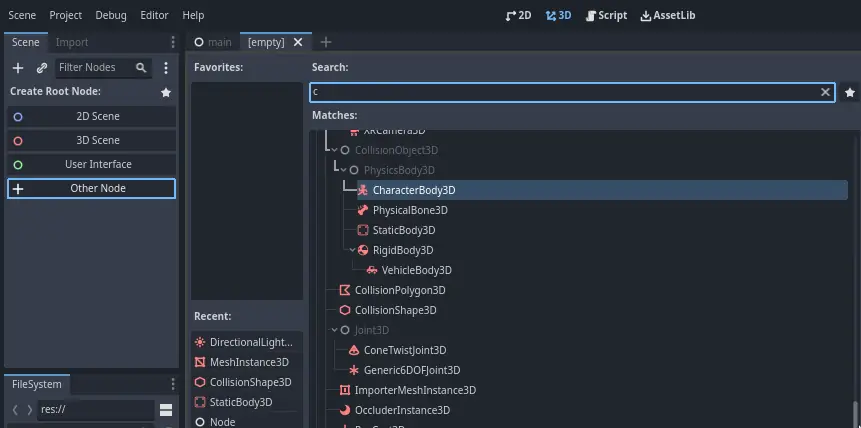
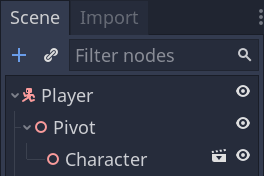
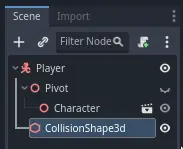
Создайте узел :ref:`CharacterBody3D <class_CharacterBody3D>`в качестве корневого узла
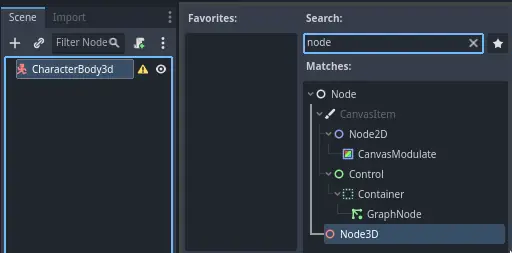
Name the CharacterBody3D to Player.
Character bodies are complementary to the area and rigid bodies used in the 2D
game tutorial. Like rigid bodies, they can move and collide with the
environment, but instead of being controlled by the physics engine, you dictate
their movement. You will see how we use the node's unique features when we code
the jump and squash mechanics.
См.также
Этот документ предполагает, что вы знакомы с различными физическими телами Godot. В противном случае сначала прочитайте Введение в физику.
Для начала мы собираемся создать базовый каркас для 3D-модели нашего персонажа. Позже это позволит нам вращать модель через код, пока он проигрывает анимацию.
Add a Node3D node as a child of Player and name it Pivot
Then, in the FileSystem dock, expand the art/ folder
by double-clicking it and drag and
drop player.glb onto Pivot.
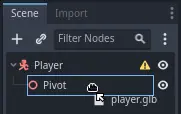
This should instantiate the model as a child of Pivot.
You can rename it to Character.
Примечание
The .glb files contain 3D scene data based on the open source GLTF 2.0
specification. They're a modern and powerful alternative to a proprietary format
like FBX, which Godot also supports. To produce these files, we designed the
model in Blender 3D and exported it to GLTF.
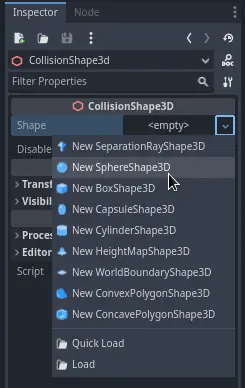
As with all kinds of physics nodes, we need a collision shape for our character
to collide with the environment. Select the Player node again and add a child node
CollisionShape3D. In the Inspector, on the Shape property, add a new SphereShape3D.
The sphere's wireframe appears below the character.
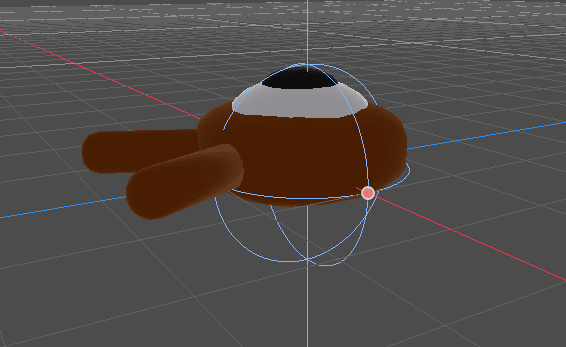
Это будет форма, которую использует физический движок, чтобы столкнуться с окружением, поэтому мы хотим, чтобы она лучше походила именно для 3D-модели. Уменьшите её, перетащив оранжевую кнопку в окне просмотра. Моя сфера имеет радиус около ``0.8``метра.
После этого передвиньте фигуру вверх так, чтобы её низ приблизительно совпадал с плоскостью сетки.
You can toggle the model's visibility by clicking the eye icon next to the
Character or the Pivot nodes.
Save the scene as player.tscn
С готовыми узлами мы почти можем перейти к кодированию. Но для начала нам необходимо определить некоторые действия ввода.
Разработка действий ввода
Чтобы персонаж начал двигаться, мы обратим внимание на пользовательский ввод, например, на нажатие стрелок на клавиатуре. В Godot, пока мы можем писать все привязки к клавишам в коде, существует мощная система, которая позволяет Вам маркировать набор клавиш и кнопок. Это облегчает наши скрипты и делает их более читаемыми.
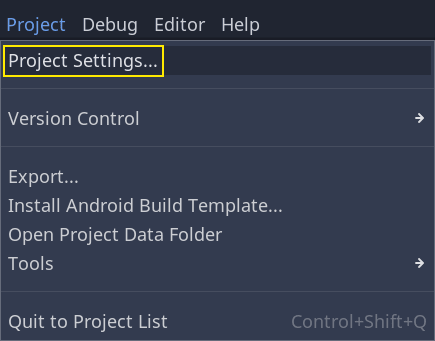
This system is the Input Map. To access its editor, head to the Project menu and select Project Settings.
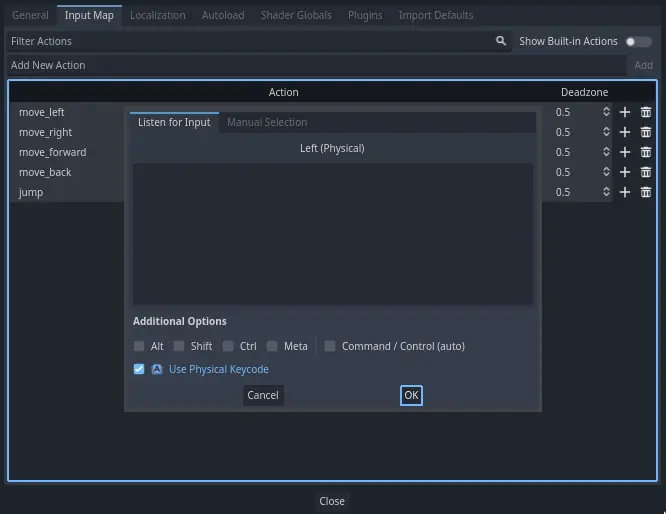
Вверху располагается множество вкладок. Нажмите на Input Map. Это окно позволяет добавить новые действия вверху; они являются названиями. Снизу вы можете привязать клавиши к этим действиям.

Проекты Godot оснащены предопределенными действиями, созданными для дизайна пользовательского интерфейса, которым мы можем здесь пользоваться. Но мы определяем наши собственные действия для поддержки геймпадов.
Мы назовем наши действия move_left, move_right, move_forward, move_back, и jump.
Чтобы добавить действие, напишите его название в шкалу сверху и нажмите Enter.

Create the following five actions:

To bind a key or button to an action, click the "+" button to its right. Do this
for move_left. Press the left arrow key and click OK.
Bind also the A key, onto the action move_left.

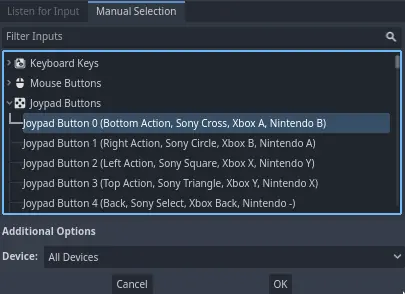
Let's now add support for a gamepad's left joystick. Click the "+" button again but this time, select Manual Selection -> Joypad Axes.

Select the negative X axis of the left joystick.
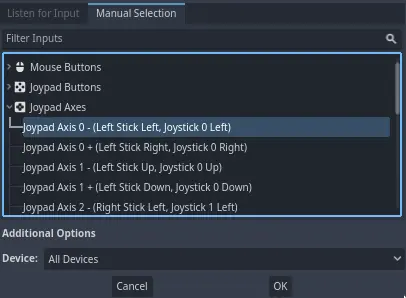
Leave the other values as default and press OK
Примечание
If you want controllers to have different input actions, you should use the Devices option in Additional Options. Device 0 corresponds to the first plugged gamepad, Device 1 corresponds to the second plugged gamepad, and so on.
Do the same for the other input actions. For example, bind the right arrow, D,
and the left joystick's positive axis to move_right. After binding all keys,
your interface should look like this.
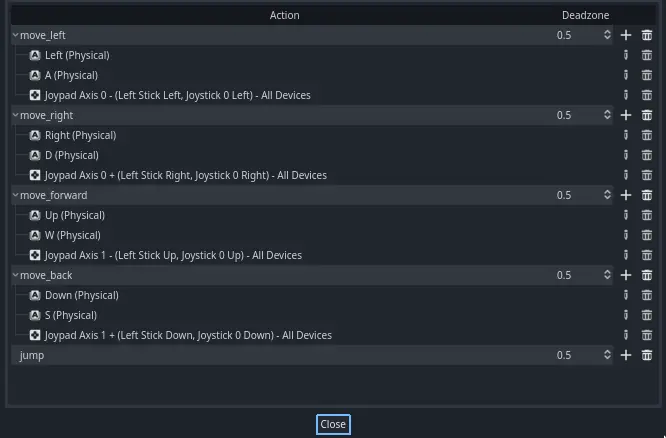
The final action to set up is the jump action. Bind the Space key and the gamepad's
A button.
Действие ввода прыжка должно выглядеть следующим образом.

Это все действия, которые необходимы нам для данной игры. Вы можете использовать меню, чтобы маркировать любые группы клавиш или кнопок в Ваших проектах.
В следующей части мы будем кодировать и тестировать движения персонажа.