Attention: Here be dragons
This is the latest
(unstable) version of this documentation, which may document features
not available in or compatible with released stable versions of Godot.
Checking the stable version of the documentation...
输入示例
介绍
在本教程中,你将学习如何使用 Godot 的 InputEvent 系统来捕获玩家输入。你的游戏可以使用多种不同类型的输入——键盘、游戏手柄、鼠标等——并且有多种不同的方法将这些输入转化为游戏中的动作。本文档将向你展示一些最常见的场景,你可以将其用作自己项目的起点。
备注
要详细了解 Godot 的输入事件系统是如何工作的,请参阅《使用 InputEvent》。
事件和轮询
有时你希望游戏响应某个输入事件——例如按下“跳跃”按钮。在其他情况下,你可能希望只要按下某个键就会发生某些事情,例如移动。在第一种情况下,你可以使用 _input() 函数,该函数将在输入事件发生时被调用。在第二种情况下,Godot 提供了 Input 单例,你可以使用它来查询一个输入的状态。
示例:
func _input(event):
    if event.is_action_pressed("jump"):
        jump()


func _physics_process(delta):
    if Input.is_action_pressed("move_right"):
        # Move as long as the key/button is pressed.
        position.x += speed * delta
public override void _Input(InputEvent @event)
{
    if (@event.IsActionPressed("jump"))
    {
        Jump();
    }
}

public override void _PhysicsProcess(double delta)
{
    if (Input.IsActionPressed("move_right"))
    {
        // Move as long as the key/button is pressed.
        position.X += speed * (float)delta;
    }
}
这使你能够灵活地混合和匹配所执行输入的处理类型。
在本教程的剩余部分,我们将重点介绍如何捕获 _input() 中的各个事件。
输入事件
输入事件是从 InputEvent 继承的对象。根据事件类型,对象将包含与该事件相关的特定属性。要查看事件的实际样子,请添加一个节点并附加以下脚本:
extends Node


func _input(event):
    print(event.as_text())
using Godot;

public partial class Node : Godot.Node
{
    public override void _Input(InputEvent @event)
    {
        GD.Print(@event.AsText());
    }
}
当你按下按键、移动鼠标和执行其他输入时,你会看到每个事件在输出窗口中滚动。以下是一个输出示例:
A
Mouse motion at position ((971, 5)) with velocity ((0, 0))
Right Mouse Button
Mouse motion at position ((870, 243)) with velocity ((0.454937, -0.454937))
Left Mouse Button
Mouse Wheel Up
A
B
Shift
Alt+Shift
Alt
Shift+T
Mouse motion at position ((868, 242)) with velocity ((-2.134768, 2.134768))
如你所见,对于不同类型的输入,结果非常不同。按键事件甚至会打印为其按键符号。以 InputEventMouseButton 为例,它继承自以下类:
InputEvent——所有输入事件的基类
InputEventWithModifiers——增加了检查是否按下 Shift 或 Alt 等修饰键的功能。
InputEventMouse——增加了如
position等鼠标事件属性InputEventMouseButton——包含按下的按钮的索引、是否是双击等。
小技巧
在处理事件时保持类引用打开是一个好主意,这样你就可以检查事件类型的可用属性和方法。
如果你尝试访问不包含该属性的输入类型上的属性,则可能会遇到错误——例如在 InputEventKey 上调用 position。为避免这种情况,请务必先测试事件类型:
func _input(event):
    if event is InputEventMouseButton:
        print("mouse button event at ", event.position)
public override void _Input(InputEvent @event)
{
    if (@event is InputEventMouseButton mouseEvent)
    {
        GD.Print("mouse button event at ", mouseEvent.Position);
    }
}
InputMap
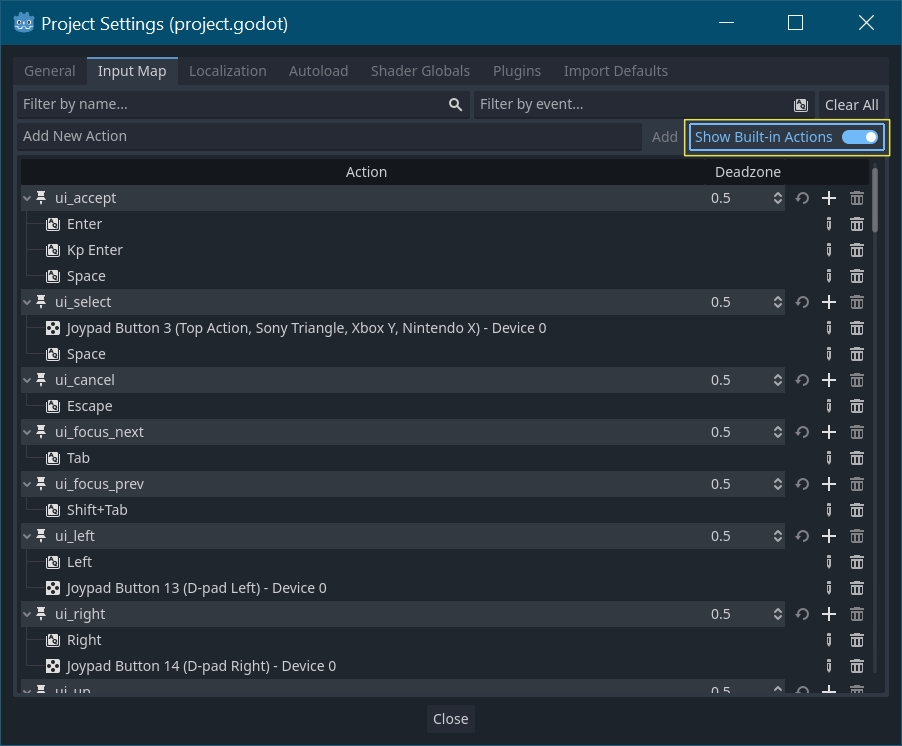
InputMap 是处理各种输入的最灵活方式。你可以通过创建具名的输入动作来使用它,你可以为其分配任意数量的输入事件,例如按键或鼠标点击。要查看它们并添加你自己的动作,请打开“项目 -> 项目设置”并选择“输入映射”选项卡:
小技巧
新的 Godot 项目包含许多已定义的默认动作。要查看它们,请在“输入映射”对话框中打开 。
虽然不是强制要求的,但还是建议大家在给输入动作命名时,使用 snake_case (蛇形命名法)的命名规范。
捕捉动作
定义好动作后,你可以通过传递你要查找的动作的名称,使用 is_action_pressed() 和 is_action_released() 在脚本中处理它们:
func _input(event):
    if event.is_action_pressed("my_action"):
        print("my_action occurred!")
public override void _Input(InputEvent @event)
{
    if (@event.IsActionPressed("my_action"))
    {
        GD.Print("my_action occurred!");
    }
}
键盘事件
键盘事件在 InputEventKey 中被捕获。虽然建议改用输入动作,但在某些情况下,你可能会想专门查看按键事件。对于该示例,让我们检查 T:
func _input(event):
    if event is InputEventKey and event.pressed:
        if event.keycode == KEY_T:
            print("T was pressed")
public override void _Input(InputEvent @event)
{
    if (@event is InputEventKey keyEvent && keyEvent.Pressed)
    {
        if (keyEvent.Keycode == Key.T)
        {
            GD.Print("T was pressed");
        }
    }
}
小技巧
请参阅 @GlobalScope_Key 以获取键码常量列表。
警告
由于键盘冲突,如果你一次性按下了太多的键,那么在特定时间点,可能是无法将所有按键输入都进行注册的。根据按键在键盘上位置的不同,某些按键产生冲突的可能性会比其他的要高。有些键盘在硬件层面会提供抗冲突功能,不过在低端键盘和笔记本键盘上很少见。
因此,建议使用默认键盘布局,该布局被设计用于在没有抗冲突功能的键盘上正常工作。详情请参阅这个 Gamedev Stack Exchange 问题。
键盘修饰键
修饰键属性继承自 InputEventWithModifiers ,可使用布尔属性检查修饰键的组合。试想,如果需要在按下 T 时发生一件事,而按下 Shift + T 时发生不同的事:
func _input(event):
    if event is InputEventKey and event.pressed:
        if event.keycode == KEY_T:
            if event.shift_pressed:
                print("Shift+T was pressed")
            else:
                print("T was pressed")
public override void _Input(InputEvent @event)
{
    if (@event is InputEventKey keyEvent && keyEvent.Pressed)
    {
        switch (keyEvent.Keycode)
        {
            case Key.T:
                GD.Print(keyEvent.ShiftPressed ? "Shift+T was pressed" : "T was pressed");
                break;
        }
    }
}
小技巧
请参阅 @GlobalScope_Key 以获取键码常量列表。
鼠标事件
鼠标事件继承自 InputEventMouse 并被分成 InputEventMouseButton 和 InputEventMouseMotion 两种类型。注意,这意味着所有鼠标事件都包含 position 属性。
鼠标运动
InputEventMouseMotion 事件在鼠标移动时发生。可以使用 relative 属性找到移动的距离。
下面是一个使用鼠标事件拖放 Sprite2D 节点的示例:
extends Node


var dragging = false
var click_radius = 32 # Size of the sprite.


func _input(event):
    if event is InputEventMouseButton and event.button_index == MOUSE_BUTTON_LEFT:
        if (event.position - $Sprite2D.position).length() < click_radius:
            # Start dragging if the click is on the sprite.
            if not dragging and event.pressed:
                dragging = true
        # Stop dragging if the button is released.
        if dragging and not event.pressed:
            dragging = false

    if event is InputEventMouseMotion and dragging:
        # While dragging, move the sprite with the mouse.
        $Sprite2D.position = event.position
using Godot;

public partial class MyNode2D : Node2D
{
    private bool _dragging = false;
    private int _clickRadius = 32; // Size of the sprite.

    public override void _Input(InputEvent @event)
    {
        Sprite2D sprite = GetNodeOrNull<Sprite2D>("Sprite2D");
        if (sprite == null)
        {
            return; // No suitable node was found.
        }

        if (@event is InputEventMouseButton mouseEvent && mouseEvent.ButtonIndex == MouseButton.Left)
        {
            if ((mouseEvent.Position - sprite.Position).Length() < _clickRadius)
            {
                // Start dragging if the click is on the sprite.
                if (!_dragging && mouseEvent.Pressed)
                {
                    _dragging = true;
                }
            }
            // Stop dragging if the button is released.
            if (_dragging && !mouseEvent.Pressed)
            {
                _dragging = false;
            }
        }
        else
        {
            if (@event is InputEventMouseMotion motionEvent && _dragging)
            {
                // While dragging, move the sprite with the mouse.
                sprite.Position = motionEvent.Position;
            }
        }
    }
}
触摸事件
如果你使用的是触摸屏设备,就可以生成触摸事件。InputEventScreenTouch 相当于鼠标点击事件,而 InputEventScreenDrag 的工作原理与鼠标移动一致。
小技巧
要在非触摸屏设备上测试触摸事件,请打开“项目设置”并转到“输入设备/指点”部分。启用“用鼠标模拟触摸”,你的项目将把鼠标点击和运动解释为触摸事件。