Creating documentation images and videos
Throughout the documentation, images are often needed to make the explanation of a feature or concept as clear as possible for a reader. This page will explain the process from beginning to end.
Images
Capturing an image
To take a picture of something in Godot, a screen capture tool can be used.
On Windows 10 and 11 that would be the Snip & Sketch program. Pressing Windows + Shift + S lets you take a screenshot of a portion of the screen and save it to the clipboard. After pressing those keys, click and drag over the area you wish to take a picture of.
On macOS, pressing Shift + Command + 3 does the same. To take a picture of the entire screen press Shift + Command + 4. All screenshots taken will be saved to the desktop.
Each Linux desktop environment has it's own screenshot tool. For example, on KDE Plasma the program Spectacle is used for taking screenshots. If your distribution doesn't come with one by default try searching its package repository, or Flathub if that's supported.
All screenshots should ideally be taken on a 1080p screen. Anything higher resolution is adding detail that doesn't make the documentation better and dramatically increases file size. If you're taking screenshots on a higher resolution screen the screenshot should be scaled down. There are instructions on how to do this later on this page.
Format conversion
El formato actual para imágenes en la documentación de Godot es WebP (.webp). Si bien algunos programas de Linux admiten guardar capturas de pantalla en este formato, macOS y el programa Snip & Sketch en Windows no lo hacen. Para imágenes que no necesitan edición, como recorte preciso o adición de contornos, se puede utilizar Squoosh. Squoosh es un convertidor desarrollado por Google, es de código abierto y no le otorga a Google ningún derecho de imagen por usarlo. Al elegir la compresión, si puede obtener una imagen de menos de 300 KB de tamaño, use la compresión sin pérdida. Si tienes más de 300 KB, use la compresión con pérdida suficiente para que quede por debajo de ese tamaño. Si esto da como resultado artefactos de compresión notables, está bien usar menos compresión, incluso si el tamaño del archivo es mayor.
If you already have an image editor such as GIMP, Krita or Photoshop installed it may have the ability to open an image then save it as a WebP file.
Nota
Since WebP supports animations and the documentation can display videos, GIFs should be avoided. Their compression is inefficient and they only support a 256-color palette with 1-bit transparency.
Cropping
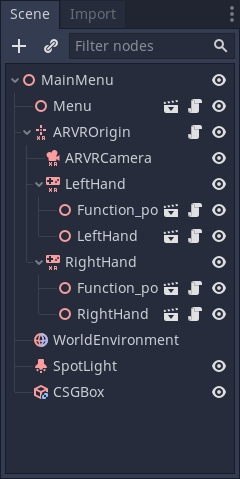
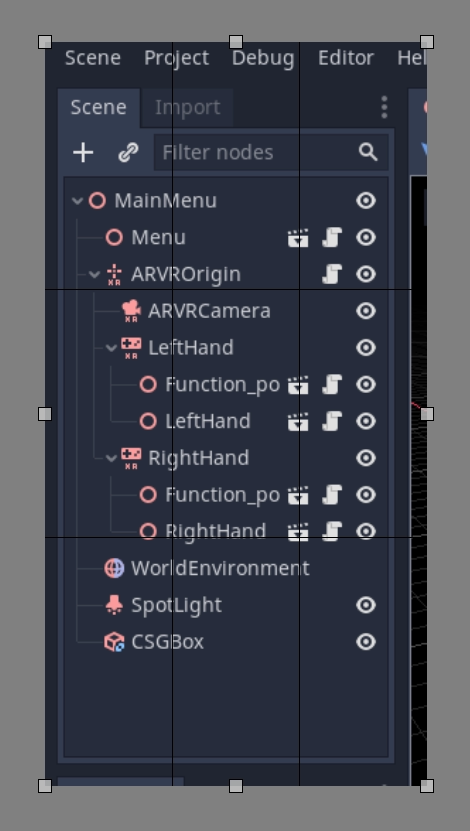
For a screenshot of a 2D or 3D scene in the editor, the above steps will be enough. But for most UI images some extra work should be done, specifically cropping to make an image look clean. Below is an example of good cropping.
For cropping Krita is the recommended program. While some screenshot programs do have cropping built-in it's not always easy to get something precise. And while Krita is designed as a painting program the cropping tool gives you pixel precision by default. Of course, feel free to use a different program you are familiar with.
Si nunca has usado Krita antes, descárgalo del sitio oficial de Krita, en Linux también puedes descargarlo desde el repositorio de tu distribución. Flathub también es una opción. Una vez instalado en tu computadora, abre Krita y después abre la imagen que deseas recortar. Este botón en el panel izquierdo es la herramienta de recorte.

After selecting it, click on the image, you should now have cropping tools available.
Click and drag the white boxes to adjust what gets cropped, if you zoom in close to the image you will see the individual pixels in an image, which is useful for precision.
If you make a mistake and overcrop don't worry, cropping is non-destructive in Krita and can be adjusted. Click on the image with your cropping tool still selected and the controls will return.
Scaling down an image
Como se explicó anteriormente en esta página, todas las imágenes capturadas en una pantalla con una resolución superior a 1080p deben reducirse. Para hacerlo en Krita, haz clic en Imagen en la barra superior y, en el menú desplegable, selecciona Escalar Imagen a Nuevo Tamaño. Este menú también se puede abrir presionando Ctrl + Alt + I. En este menú, debe ajustar las dimensiones en píxeles. Para cualquier imagen capturada en un monitor 4K, cambie el valor del ancho y alto a la mitad de su valor actual; para cualquier imagen capturada en un monitor 1440p, multiplique el ancho y alto por 0,75. Asegúrese de que la casilla Mantener Proporciones en la parte inferior del menú esté marcada para que solo tenga que cambiar uno de los valores.
Saving as WebP in Krita
To save an image as webp if it isn't already one, Go to File > Save As. Select webp from the Save as type: dropdown, then choose wherever you want to save it. After clicking Save a menu will popup with webp options. Make sure Lossless is checked and Quality is set to 100%. This means the image will not lose detail and will be as small as possible.
If the image is over 300KB in size try compressing it losslessly using Squoosh. If it's still over 300KB change to lossy compression and slowly increase the compression until it's under 300KB. If this results in noticeable compression artifacts using less compression is fine, even if the file size is bigger.
Outlines, arrows and text
Sometimes an image needs something extra to properly direct the readers attention, or make something clear. Outlines and arrows can be used for this purpose. For these types of edits Inkscape is the recommended open source program, it can be downloaded from the official Inkscape website. Like Krita, if you're on Linux you can also check your distributions repository or get it from Flathub.
Aquí no se proporciona un tutorial completo sobre cómo crear contornos, recomendamos buscar varios tutoriales sobre cómo usarlo en la comunidad. Sin embargo, hay dos estándares para los contornos y las flechas de las imágenes de documentos. Primero, el color debe ser amarillo, específicamente este color hexadecimal: fffb44 (fffb44ff si hay un valor de transparencia como en Inkscape). Este color se eligió específicamente para asegurarse de que las personas daltónicas no tengan problemas para leer la documentación; se pueden usar otros colores además de este amarillo si se necesitan múltiples contornos en una imagen; se debe evitar el rojo. El segundo estándar es que todos los contornos y las líneas de flecha deben tener 2 píxeles de ancho.
Finally, some images might require text to differentiate multiple parts of an image. There are no strict requirements other than use an easy to read non fancy font. As for color the yellow color from before should also be used, but black or other colors can be used if appropriate. For example, if yellow blends into the image, or if there are multiple outlines in multiple colors.
Adding an image to a documentation page
Once you've finished working on your image, it can be added to the documentation.
All images are stored in folders named img next to the page they are used in.
To add your image, add it to the img folder that's in the same folder as the
.rst file for the page (create it if it doesn't exist). In the .rst page,
images should be included with the following code snippet:
.. image:: img/documentation_image.webp
Where documentation_image.webp would be changed to the name of the image you
created. Name your images in a way that makes their meaning clear, possibly with
a prefix that makes their relationship to a documentation page explicit.
Videos
Capturing a video
To record a video of something in Godot, a screen capture tool can be used. Operating systems generally don't come with tools that are flexible enough for this, so you'll need to install a third-party utility.
OBS Studio is the most popular option, but SimpleScreenRecorder can be used as an alternative on Linux. ShareX can be used as an alternative on Windows. All these tools can be configured to record the entire screen, a specific window or a predetermined rectangle.
The recommended framerate for video recordings is 60 FPS, although you can use 30 FPS for longer videos to reduce their file size. For fullscreen videos, use a resolution of 1280×720.
Nota
Godot's Movie Maker mode can be used to record the output of a running project, including its audio. This doesn't require installing any third-party software and avoids any frame drops (even when recording on a slow device), but it's less flexible.
Compressing the captured video
The recommendation is to record your video in the highest quality possible (without dropping frames due to excessive CPU/GPU utilization), then re-encode it later to reduce its file size. This results in more efficient compression than directly aiming for a small file size, as real-time compression methods are less efficient than slower compression methods.
To re-encode videos for a smaller file size, use HandBrake or the FFmpeg <https://ffmpeg.org/> command line below:
ffmpeg -i input.mp4 -crf 23 output.webm
The number after -crf adjusts the video quality, with higher numbers
resulting in lower quality (and smaller file sizes). A CRF of 23 is a good
starting point, but you may need to use a higher value for longer videos to
ensure the file size remains reasonable. Try to aim for a file size under 2 MB
if possible.
If the video was recorded in a higher resolution or framerate, you can adjust its output resolution and framerate as follows:
ffmpeg -i input.mp4 -crf 23 -vf scale=1280:-2 -r 30 output.webm
This results in a video resolution around 1280×720 at 30 FPS. The exact video resolution will vary depending on the source's aspect ratio.
Truco
If the video was recorded with an audio track but this audio track is not
necessary, consider stripping it by adding the -an option to the FFmpeg
command line (before the output file name). This will reduce file size and
also ensure audio controls don't show up on the video when played in a
browser.
Adding a video to a documentation page
Once you've finished working on your video, it can be added to the documentation.
All videos are stored in folders named video next to the page they are used in.
To add your video, add it to the video folder that's in the same folder as the
.rst file for the page (create it if it doesn't exist). In the .rst page,
videos should be included with the following code snippet:
.. video:: video/csg_tools.webm
   :alt: Put a text description of the video here
   :autoplay:
   :loop:
   :muted:
   :align: default
Where documentation_video.webp would be changed to the name of the video you
created. Name your videos in a way that makes their meaning clear, possibly with
a prefix that makes their relationship to a documentation page explicit.
The :autoplay:, :loop: and :muted: flags should always be specified
unless the video needs to play audio. In this case, do not specify any of these flags.
The :align: default flag should always be specified.