Використання GridMap (Карт ґратки)
Вступ
Gridmaps є інструментом для створення 3D-рівнів гри, подібно до того, як TileMap працює у 2D. Ви починаєте з попередньо визначеної колекції 3D-сіток (a MeshLibrary) які можна розмістити на сітці, ніби ви будуєте рівень із необмеженої кількості блоків Lego.
Як і плиткам з карти плиток, мешам також можна додати зіткнення та навігацію.
Приклад проекту
Щоб дізнатися, як працюють GridMaps, почніть із завантаження прикладу проекту: gridmap_starter.zip.
Unzip this project and add it to the Project Manager using the "Import" button. You may get a popup saying that it needs to be converted to a newer Godot version, click Convert project.godot.
Створення MeshLibrary (Бібліотеки мешів)
Для початку вам потрібна MeshLibrary, яка є колекцією окремих сіток, які можна використовувати в карті сітки. Відкрийте сцену "mesh_library_source.tscn", щоб побачити приклад налаштування бібліотеки сіток.
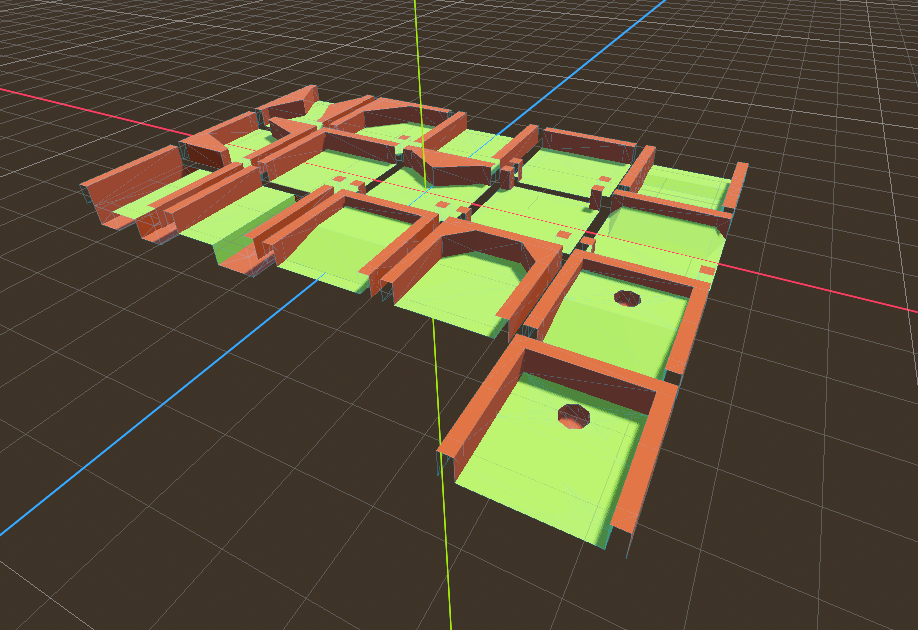
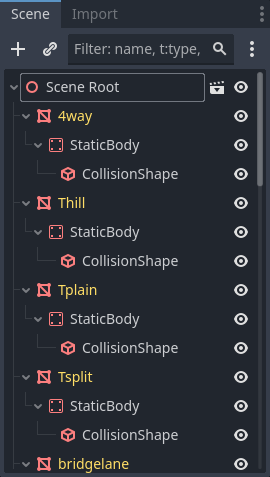
Як бачите, ця сцена має кореневий вузол Node3D і кілька дочірніх вузлів MeshInstance3D.
Якщо вам не потрібна фізика у сцені, то ви закінчили. Однак у більшості випадків вам захочеться призначити мешам тіла зіткнення.
Зіткнення
Ви можете вручну призначити StaticBody3D і CollisionShape3D кожній сітці. Крім того, ви можете використовувати меню «Сітка», щоб автоматично створити тіло зіткнення на основі даних сітки.
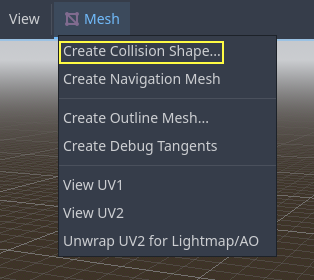
Відзначимо, що Опукле тіло зіткнення буде краще працювати для простих мешів (сіток). Для складніших фігур виберіть Створити увігнуте статичне тіло. Після того, як кожен меш отримає фізичне тіло та форму зіткнення, ваша бібліотека мешів буде готова до використання.
Матеріали
При генеруванні бібліотеки мешів використовуються тільки матеріали мешів. Матеріали, встановлені на вузлі, будуть проігноровані.
Навігаційні меші (сітки) (NavigationMeshes)
Як будь які меші, компоненти MeshLibrary можуть мати NavigationMesh, що можна створити власноруч чи автоматично, як описано далі.
Щоб створити NavigationMesh з експорту сцени MeshLibrary, розмістіть дочірній вузол NavigationRegion3D під основним MeshInstance3D для елемента GridMap. Додайте дійсний ресурс NavigationMesh до NavigationRegion3D і деяких вихідних вузлів геометрії нижче та запікайте NavigationMesh.
Примітка
При використанні невеликих комірок сітки, часто необхідно зменшити параметри радіуса агента та мінімального розміру області NavigationMesh.
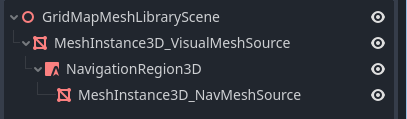
Вузли нижче NavigationRegion3D ігноруються для експорту сцени MeshLibrary, тому додаткові вузли можна додати як вихідну геометрію лише для запікання навігаційної сітки.
Попередження
Розмір запеченої клітинки NavigationMesh має відповідати розміру клітинки карти NavigationServer, щоб правильно поєднати навігаційні сітки різних клітинок.
Формат MeshLibrary
Підсумовуючи конкретні обмеження формату MeshLibrary, сцена MeshLibrary має Node3D як кореневий вузол і кілька дочірніх вузлів, які стануть елементами MeshLibrary. Кожен дочірній елемент кореневого вузла повинен:
Бути MeshInstance3D, який стане елементом MeshLibrary. Буде експортовано лише цю візуальну сітку.
Майте матеріал у слоті матеріалу сітки, а не у слотах матеріалу MeshInstance3D.
Майте до одного дочірнього елемента StaticBody3D для зіткнення. StaticBody3D має мати одного чи кількох дочірніх елементів CollisionShape3D.
Майте до одного дочірнього NavigationRegion3D для навігації. NavigationRegion3D може мати одну або більше додаткових MeshInstance3D дочірніх елементів, які можна запікати для навігації, але не експортувати як візуальну сітку.
Розпізнається лише цей конкретний формат. Інші типи вузлів, розміщені як дочірні, не будуть розпізнані та експортовані. GridMap — це не система загального призначення для розміщення вузлів на сітці, а скоріше спеціальна, оптимізована система, призначена для розміщення сіток із зіткненнями та навігацією.
Експортування MeshLibrary
Щоб експортувати бібліотеку, натисніть Сцена > Експортувати як... > MeshLibrary... і збережіть її як ресурс.
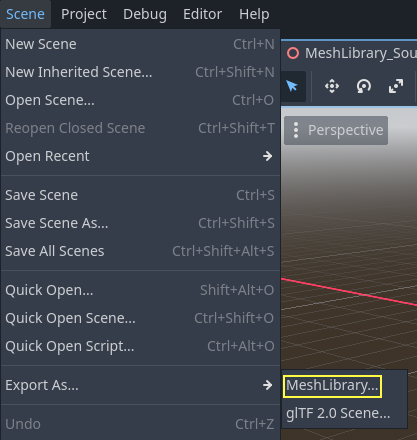
Ви можете знайти вже експортований MeshLibrary в проекті під назвою MeshLibrary.tres.
Використання GridMap
Create a new scene and add a GridMap node. Add the mesh library by dragging the resource file from the FileSystem dock and dropping it in the Mesh Library property in the Inspector.
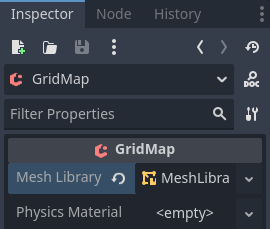
Inspector properties
The Physics Material setting allows you to override the physics material for every mesh in the NavigationMesh.
Under Cells, the Size property should be set to the size of your meshes. You can leave it at the default value for the demo. Uncheck the Center Y property.
The Collision options allow you to set the collision layer, collision mask, and priority for the entire grid. For more information on how those work see the Фізика section.
Under Navigation is the "Bake Navigation" option. If enabled it creates a navigation region for each cell that uses a mesh library item with a navigation mesh.
If you click on the MeshLibrary itself in the inspector you can adjust settings for individual meshes, such as their navigation mesh, navigation layers, or if the mesh casts shadows.
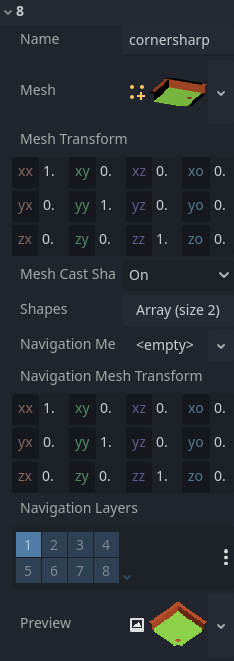
GridMap panel
At the bottom of the editor is the GridMap panel, which should have opened automatically when you added the GridMap node.

Зліва направо на панелі інструментів:
Transform: Adds a gizmo to the scene that allows you to change the relative position and rotation of the gridmap in the scene.
Selection: While active you can select an area in the viewport, click and drag to select more than one space on the grid.
Erase: While active, click in the viewport and delete meshes.
Paint: While active, click in the viewport and add whatever mesh is currently selected in the GridMap panel to the scene.
Pick: While active, clicking on a gridmap mesh in the viewport will cause it to be selected in the GridMap panel.
Fill: Fill the area that has been selected in the viewport with whatever mesh is selected in the GridMap bottom panel.
Move: Move whatever mesh or meshes are currently selected in the viewport.
Duplicate: Create a copy of whatever the selected mesh or meshes in the GridMap are.
Delete: Similar to erase, but for the entire selected area.
Cursor Rotate X: While the paint tool is selected, this will rotate the mesh that will be painted on the X-axis. This will also rotate selected areas if they are being moved.
Cursor Rotate Y: While the paint tool is selected, this will rotate the mesh that will be painted on the Y-axis. This will also rotate selected areas if they are being moved.
Cursor Rotate Z: While the paint tool is selected, this will rotate the mesh that will be painted on the Z-axis. This will also rotate selected areas if they are being moved.
Change Grid Floor: Adjusts what floor is currently being worked on, can be changed with the arrows or typing
Filter Meshes: Used to search for a specific mesh in the bottom panel.
Zoom: Controls the zoom level on meshes in the bottom panel.
Layout toggles: These two buttons toggle between different layouts for meshes in the bottom panel.
Tools dropdown: This button opens a dropdown menu with a few more options.
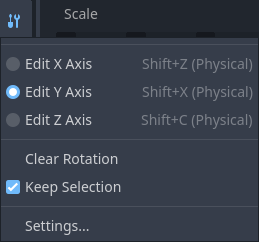
Clicking on Settings in that dropdown brings up a window that allows you to change the Pick Distance, which is the maximum distance at which tiles can be placed on a GridMap, relative to the camera position (in meters).
Використання GridMap в коді
Докладніше про методи та змінні-члени вузла дивіться в GridMap.