Work in progress
The content of this page was not yet updated for Godot
4.2
and may be outdated. If you know how to improve this page or you can confirm
that it's up to date, feel free to open a pull request.
Prototypage d'un niveau avec CSG
CSG stands for Constructive Solid Geometry, and is a tool to combine basic shapes or custom meshes to create more complex shapes. In 3D modeling software, CSG is mostly known as "Boolean Operators".
Level prototyping is one of the main uses of CSG in Godot. This technique allows users to create the most common shapes by combining primitives. Interior environments can be created by using inverted primitives.
Note
The CSG nodes in Godot are mainly intended for prototyping. There is no built-in support for UV mapping or editing 3D polygons (though extruded 2D polygons can be used with the CSGPolygon3D node).
Si vous cherchez un outil de conception de niveau facile à utiliser pour un projet, vous pouvez utiliser Qodot à la place. Il vous permet de concevoir des niveaux en utilisant TrenchBroom et de les importer dans Godot.
Voir aussi
You can check how to use CSG nodes to build various shapes (such as stairs or roads) using the Constructive Solid Geometry demo project.
Introduction aux nœuds CSG
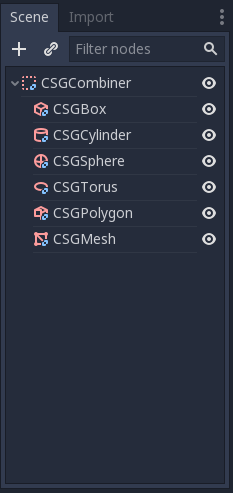
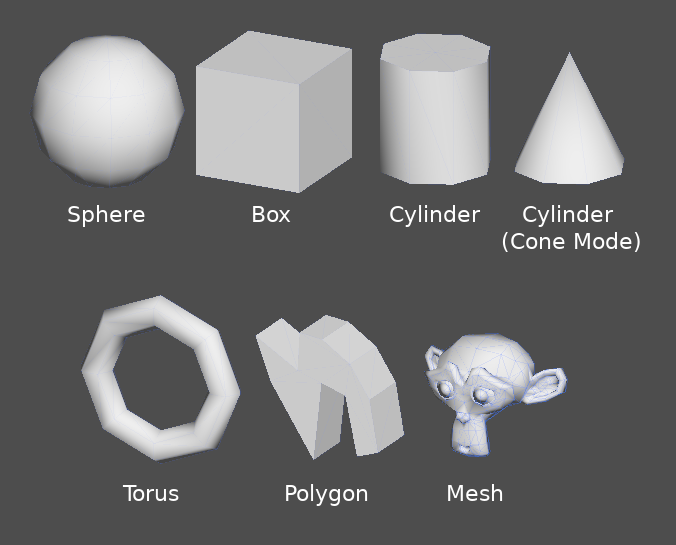
Comme les autres fonctionnalités de Godot, CSG est supporté sous forme de nœuds. Ce sont les nœuds CSG :
CSGCylinder3D (also supports cone)
Fonctionnalités des outils CSG
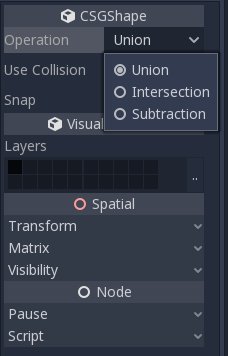
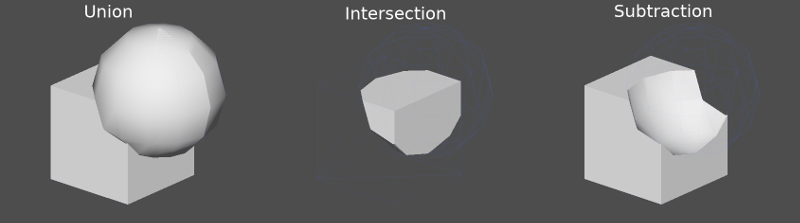
Chaque nœud CSG supporte 3 types d'opérations booléennes :
Union : La géométrie des deux primitives est fusionnée, la géométrie croisée est supprimée.
Intersection : Seule la géométrie d'intersection est conservée, le reste est supprimé.
Subtraction : La deuxième forme est soustraite de la première, laissant une bosse avec sa forme.
CSGPolygon
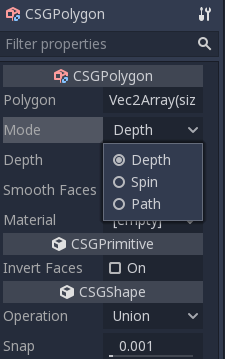
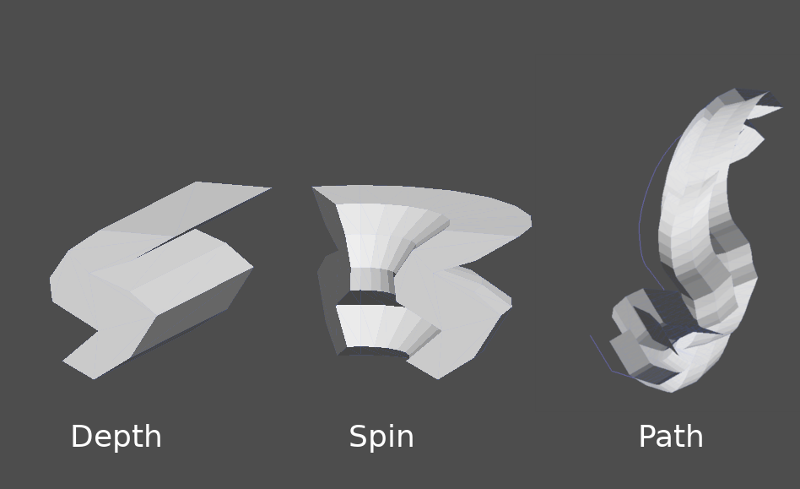
The CSGPolygon3D node extrude along a Polygon drawn in 2D (in X, Y coordinates) in the following ways:
Depth : Extrusion d'une quantité donnée.
Spin : Extrudée en tournant autour de son origine.
Path : Extrudé le long d'un nœud de chemin. Cette opération est communément appelée lofting.
Note
The Path mode must be provided with a Path3D node to work. In the Path node, draw the path and the polygon in CSGPolygon3D will extrude along the given path.
Maillages personnalisés
Any mesh can be used for CSGMesh3D; the mesh can be modeled in other software and imported into Godot. Multiple materials are supported. There are some restrictions for geometry:
Il doit-être fermer,
il ne doit pas s'auto-intersecter,
il ne doit pas contenir de faces internes,
chaque bord ne doit être relié qu'à deux autres faces.
CSGCombiner3D
The CSGCombiner3D node is an empty shape used for organization. It will only combine children nodes.
Ordre de traitement
Every CSG node will first process its children nodes and their operations: union, intersection, or subtraction, in tree order, and apply them to itself one after the other.
Note
Dans un souci de performance, assurez-vous que la géométrie CSG reste relativement simple, car les mailles complexes peuvent prendre un certain temps à traiter. Si vous ajoutez des objets ensemble (tels qu'une table et d'autres objets trouvés régulièrement dans une pièce), créez-les comme des arbres CSG séparés. Forcer trop d'objets dans un même arbre finira par affecter les performances. N'utilisez des opérations binaires que là où vous en avez réellement besoin.
Prototypage d'un niveau
Nous allons prototyper une pièce pour pratiquer l'utilisation des outils du CSG.
Astuce
Travailler en projection Orthogonal donne une meilleure vue en combinant les formes CSG.
Notre niveau contiendra ces objets :
une pièce,
un lit,
une lampe,
un bureau,
une bibliothèque.
Create a scene with a Node3D node as root node.
Astuce
L'éclairage par défaut de l'environnement n'offre pas un ombrage précis sous certains angles. Modifiez le mode d'affichage à l'aide de Display Overdraw dans le menu de la fenêtre 3D, ou ajoutez un nœud DirectionalLight pour vous aider à voir clairement.
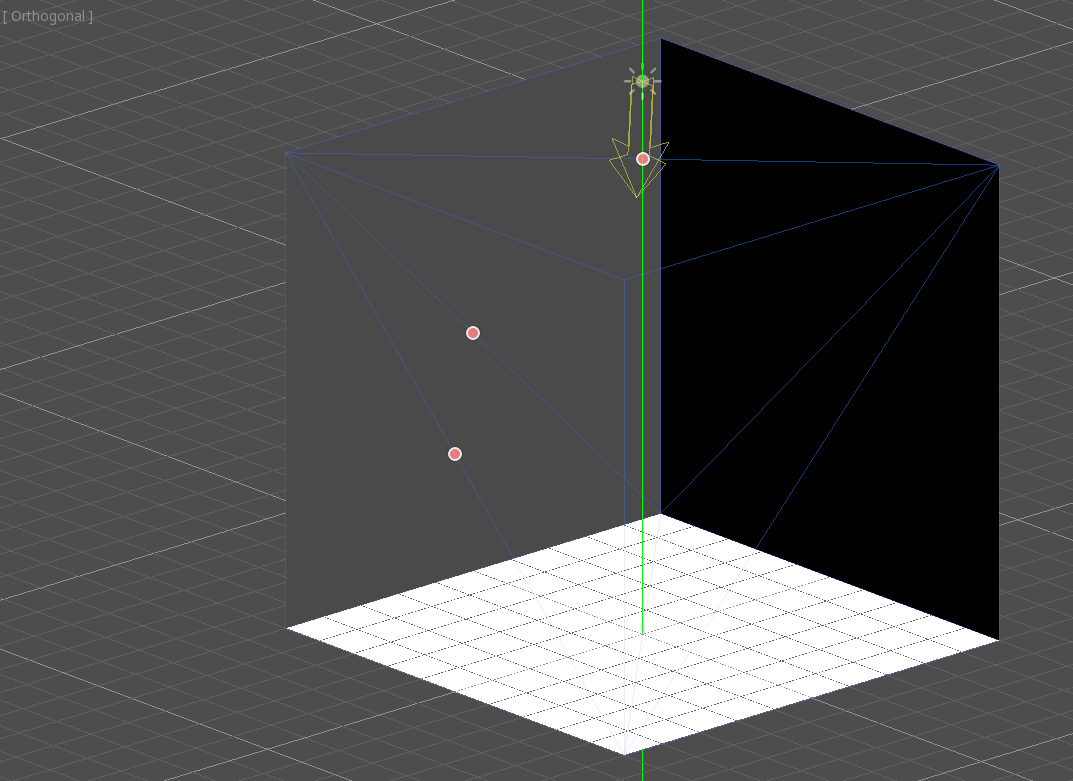
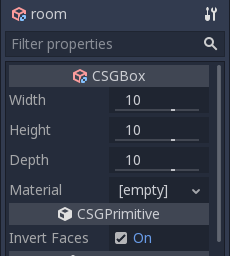
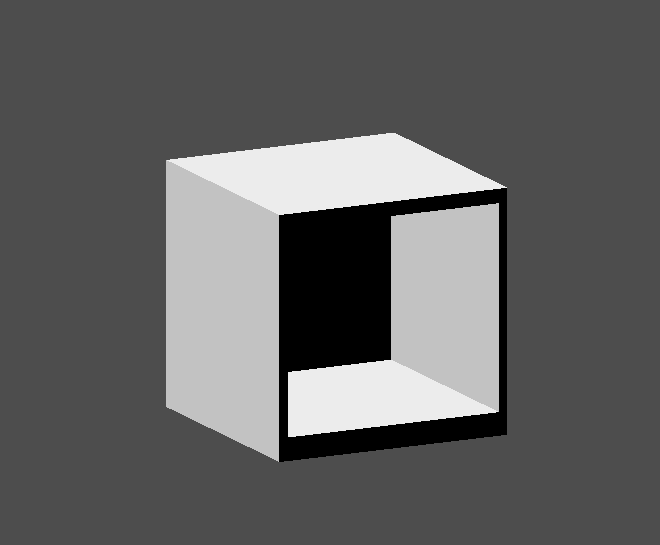
Create a CSGBox3D and name it room, enable Invert Faces and change the
dimensions of your room.
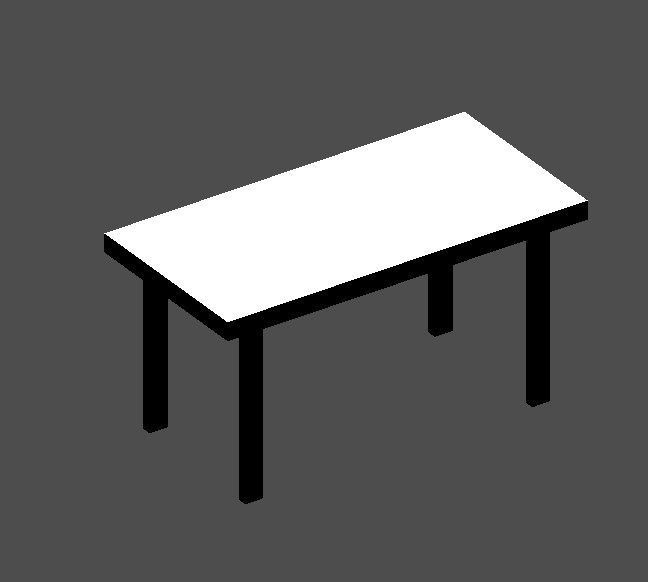
Next, create a CSGCombiner3D and name it desk.
Un bureau a une surface et 4 pieds :
Create 1 CSGBox3D children node in Union mode for the surface and adjust the dimensions.
Create 4 CSGBox3D children nodes in Union mode for the legs and adjust the dimensions.
Ajustez leur emplacement pour ressembler à un bureau.
Note
CSG nodes inside a CSGCombiner3D will only process their operation within the combiner. Therefore, CSGCombiner3Ds are used to organize CSG nodes.
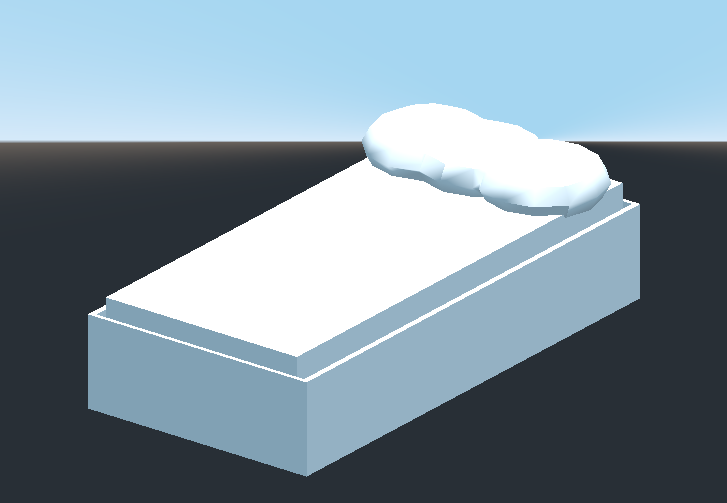
Create a CSGCombiner3D and name it bed.
Our bed consists of 3 parts: the bed, the mattress and a pillow. Create a CSGBox3D and adjust its dimension for the bed. Create another CSGBox3D and adjust its dimension for the mattress.
We will create another CSGCombiner3D named pillow as the child of bed.
The scene tree should look like this:
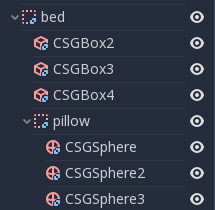
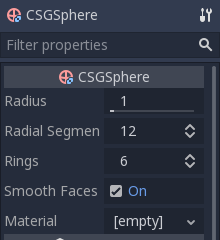
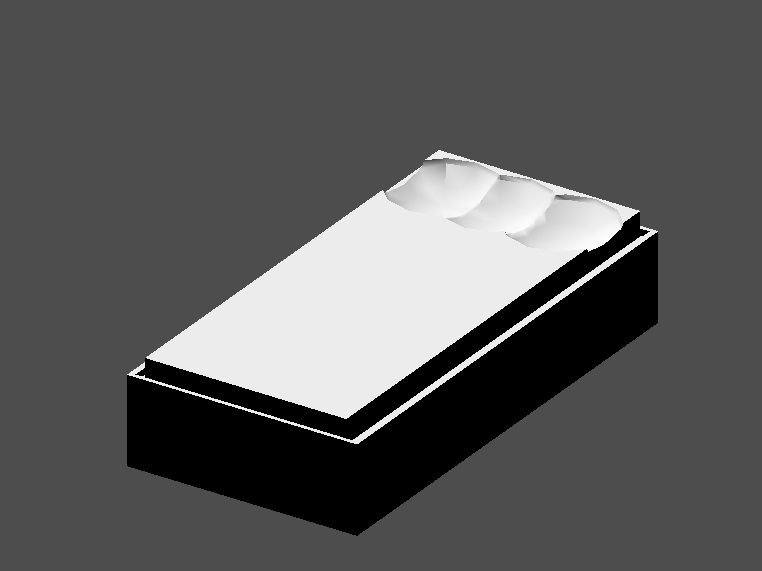
We will combine 3 CSGSphere3D nodes in Union mode to form a pillow. Scale the Y axis of the spheres and enable Smooth Faces.
Sélectionnez le nœud pillow et passez en mode Subtraction ; les sphères combinées perceront un trou dans le matelas.
Try to re-parent the pillow node to the root Node3D node; the hole will
disappear.
Note
This is to illustrate the effect of CSG processing order. Since the root node is not a CSG node, the CSGCombiner3D nodes are the end of the operations; this shows the use of CSGCombiner3D to organize the CSG scene.
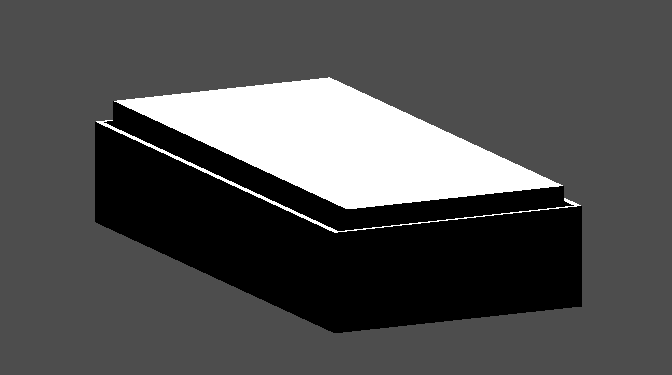
Défaire le re-parent après avoir observé l'effet. Le lit que vous avez construit devrait ressembler à ceci :
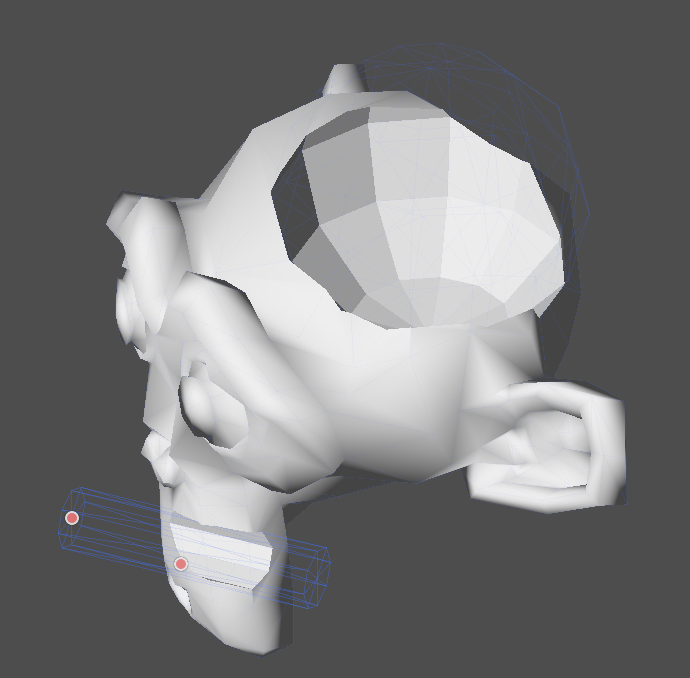
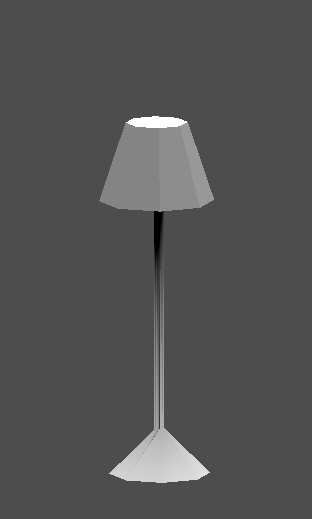
Create a CSGCombiner3D and name it lamp.
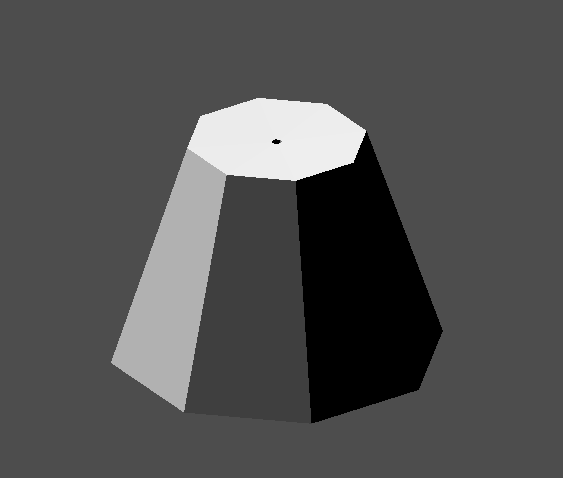
A lamp consists of 3 parts: the stand, the pole and the lampshade. Create a CSGCylinder3D, enable the Cone option and make it the stand. Create another CSGCylinder3D and adjust the dimensions to use it as a pole.
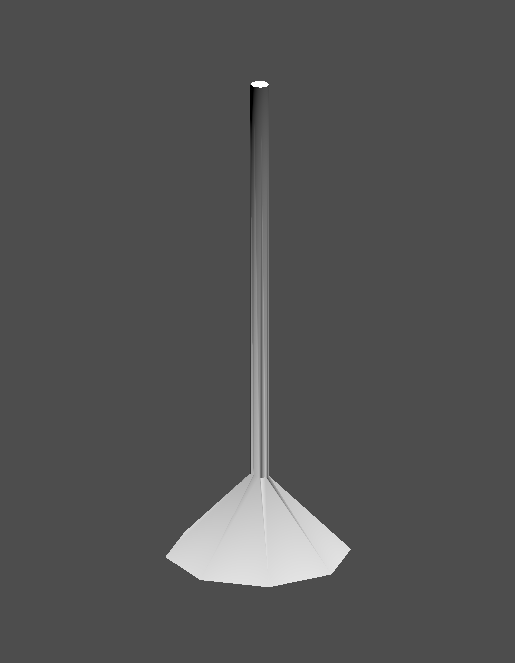
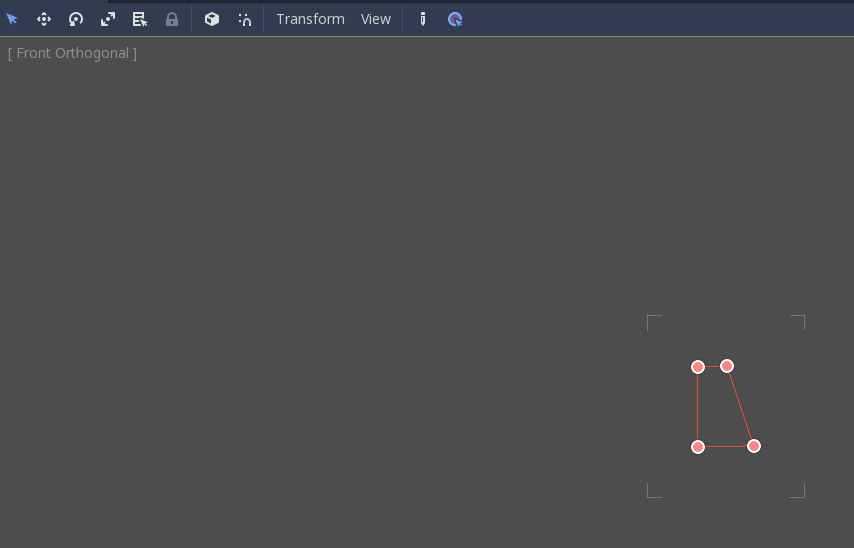
We will use a CSGPolygon3D for the lampshade. Use the Spin mode for the CSGPolygon3D and draw a trapezoid while in Front View (numeric keypad 1); this shape will extrude around the origin and form the lampshade.

Ajustez l'emplacement des 3 pièces pour qu'il ressemble à une lampe.
Create a CSGCombiner3D and name it bookshelf.
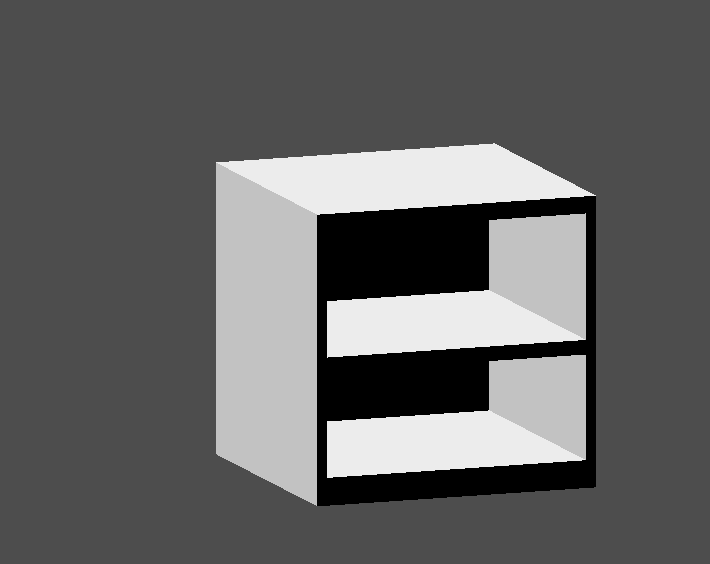
We will use 3 CSGBox3D nodes for the bookshelf. Create a CSGBox3D and adjust its dimensions; this will be the size of the bookshelf.
Duplicate the CSGBox3D and shorten the dimensions of each axis and change the mode to Subtraction.
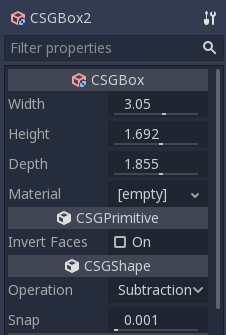
You've almost built a shelf. Create one more CSGBox3D for dividing the shelf into two levels.
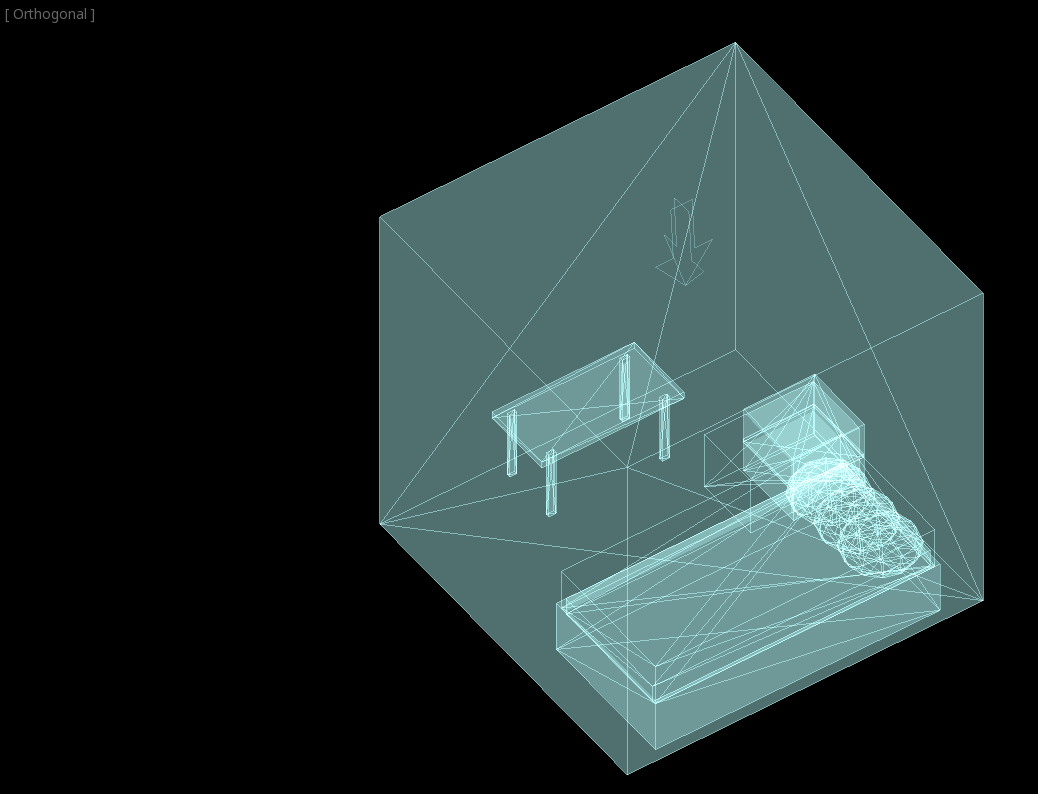
Positionner les meubles dans la chambre comme vous le souhaitez et votre scène de rassembler à cela :

Vous avez réussi à prototyper un niveau de pièce avec les outils CSG de Godot. Les outils CSG peuvent être utilisés pour concevoir toutes sortes de niveaux, comme un labyrinthe ou une ville ; explorez ses limites lorsque vous concevez votre jeu.
Utilisation de prototypes de textures
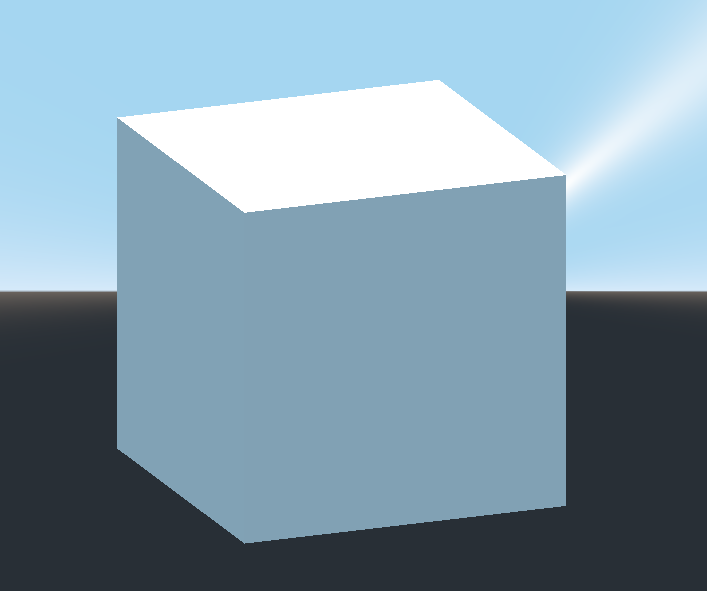
Godot's Standard Material 3D and ORM Material 3D supports triplanar mapping, which can be used to automatically apply a texture to arbitrary objects without distortion. This is handy when using CSG as Godot doesn't support editing UV maps on CSG nodes yet. Triplanar mapping is relatively slow, which usually restricts its usage to organic surfaces like terrain. Still, when prototyping, it can be used to quickly apply textures to CSG-based levels.
Note
Si vous avez besoin de textures pour le prototypage, Kenney a fait un ensemble de textures prototypes sous licence CC0.
Il y a deux façons d'appliquer un matériau à un nœud CSG :
Applying it to a CSGCombiner3D node as a material override (Geometry > Material Override in the Inspector). This will affect its children automatically, but will make it impossible to change the material in individual children.
Appliquer un matériau à des nœuds individuels (Matériau dans l'inspecteur). De cette façon, chaque nœud CSG peut avoir sa propre apparence. Les nœuds CSG soustractifs appliqueront leur matériau aux nœuds qu'ils "creusent".
To apply triplanar mapping to a CSG node, select it, go to the Inspector, click the [empty] text next to Material Override (or Material for individual CSG nodes). Choose New StandardMaterial3D. Click the newly created material's icon to edit it. Unfold the Albedo section and load a texture into the Texture property. Now, unfold the Uv1 section and check Triplanar. You can change the texture offset and scale on each axis by playing with the Scale and Offset properties just above. Higher values in the Scale property will cause the texture to repeat more often.
Astuce
You can copy a StandardMaterial3D to reuse it across CSG nodes. To do so, click the dropdown arrow next to a material property in the Inspector and choose Copy. To paste it, select the node you'd like to apply the material onto, click the dropdown arrow next to its material property then choose Paste.
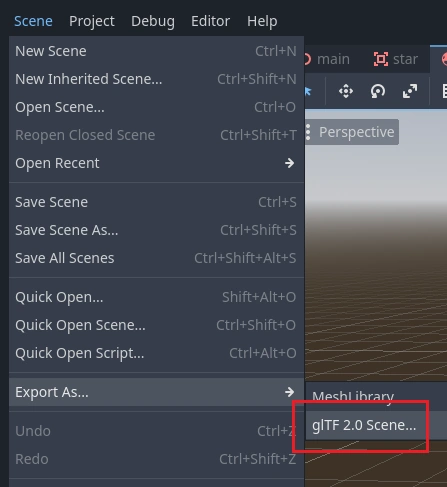
Exporting as glTF
It can be useful to block out a level using CSG, then export it as a 3d model, to import into 3D modeling software. You can do this by selecting Scene > Export As... > glTF 2.0 Scene.