Work in progress
The content of this page was not yet updated for Godot
4.2
and may be outdated. If you know how to improve this page or you can confirm
that it's up to date, feel free to open a pull request.
Движение игрока с помощью кода
Пришло время для написания кода! Мы собираемся использовать действия ввода, который мы уже создали в предыдущих частях, чтобы персонаж двигался.
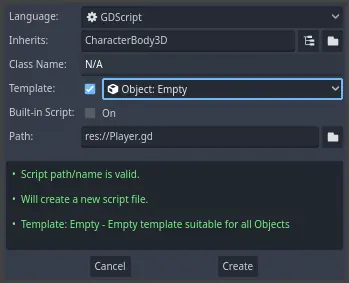
Right-click the Player node and select Attach Script to add a new script to
it. In the popup, set the Template to Empty before pressing the Create
button.
Давайте начнем со свойств класса. Мы собираемся определить скорость движения, ускорение свободного падения, представляющее гравитацию, и скорость, которую мы будем использовать для движений персонажа.
extends CharacterBody3D

# How fast the player moves in meters per second.
@export var speed = 14
# The downward acceleration when in the air, in meters per second squared.
@export var fall_acceleration = 75

var target_velocity = Vector3.ZERO
using Godot;

public partial class Player : CharacterBody3D
{
    // Don't forget to rebuild the project so the editor knows about the new export variable.

    // How fast the player moves in meters per second.
    [Export]
    public int Speed { get; set; } = 14;
    // The downward acceleration when in the air, in meters per second squared.
    [Export]
    public int FallAcceleration { get; set; } = 75;

    private Vector3 _targetVelocity = Vector3.Zero;
}
These are common properties for a moving body. The target_velocity is a 3D vector
combining a speed with a direction. Here, we define it as a property because
we want to update and reuse its value across frames.
Примечание
Значения довольно сильно отличаются от 2D-кода, потому что расстояние здесь измеряется в метрах. В то время как в 2D тысяча единиц (пикселей) может соответствовать только половине ширины Вашего экрана, в 3D же это будет равняться километру.
Let's code the movement. We start by calculating the input direction vector
using the global Input object, in _physics_process().
func _physics_process(delta):
    # We create a local variable to store the input direction.
    var direction = Vector3.ZERO

    # We check for each move input and update the direction accordingly.
    if Input.is_action_pressed("move_right"):
        direction.x += 1
    if Input.is_action_pressed("move_left"):
        direction.x -= 1
    if Input.is_action_pressed("move_back"):
        # Notice how we are working with the vector's x and z axes.
        # In 3D, the XZ plane is the ground plane.
        direction.z += 1
    if Input.is_action_pressed("move_forward"):
        direction.z -= 1
public override void _PhysicsProcess(double delta)
{
    // We create a local variable to store the input direction.
    var direction = Vector3.Zero;

    // We check for each move input and update the direction accordingly.
    if (Input.IsActionPressed("move_right"))
    {
        direction.X += 1.0f;
    }
    if (Input.IsActionPressed("move_left"))
    {
        direction.X -= 1.0f;
    }
    if (Input.IsActionPressed("move_back"))
    {
        // Notice how we are working with the vector's X and Z axes.
        // In 3D, the XZ plane is the ground plane.
        direction.Z += 1.0f;
    }
    if (Input.IsActionPressed("move_forward"))
    {
        direction.Z -= 1.0f;
    }
}
Здесь мы собираемся сделать расчет, используя виртуальную функцию _physics_process(). Так же как и _physics_process(), она позволяет Вам обновлять узел в каждом кадре, но она создана специально для кодирования в области физики, как, например, движения кинематического или негибкого тела.
См.также
Для получения дополнительной информации о разнице между _process() и _physics_process(), прочитайте Idle and Physics Processing.
Сперва инициализируем переменную direction со значением Vector3.ZERO. После этого мы проверяем, использует ли игрок один или больше вводов move_* и обновляем x и z векторов. Они соответствуют осям опорной плоскости.
Эти четыре условия дают нам восемь возможных вариантов и восемь возможных направлений.
In case the player presses, say, both W and D simultaneously, the vector will
have a length of about 1.4. But if they press a single key, it will have a
length of 1. We want the vector's length to be consistent, and not move faster diagonally. To do so, we can
call its normalized() method.
#func _physics_process(delta):
    #...

    if direction != Vector3.ZERO:
        direction = direction.normalized()
        # Setting the basis property will affect the rotation of the node.
        $Pivot.basis = Basis.looking_at(direction)
public override void _PhysicsProcess(double delta)
{
    // ...

    if (direction != Vector3.Zero)
    {
        direction = direction.Normalized();
        // Setting the basis property will affect the rotation of the node.
        GetNode<Node3D>("Pivot").Basis = Basis.LookingAt(direction);
    }
}
Здесь мы нормализуем вектор, только если направление имеет длину больше нуля, что означает, что игрок нажимает клавишу направления.
We compute the direction the $Pivot is looking by creating a Basis
that looks in the direction direction.
Then, we update the velocity. We have to calculate the ground velocity and the
fall speed separately. Be sure to go back one tab so the lines are inside the
_physics_process() function but outside the condition we just wrote above.
func _physics_process(delta):
    #...
    if direction != Vector3.ZERO:
        #...

    # Ground Velocity
    target_velocity.x = direction.x * speed
    target_velocity.z = direction.z * speed

    # Vertical Velocity
    if not is_on_floor(): # If in the air, fall towards the floor. Literally gravity
        target_velocity.y = target_velocity.y - (fall_acceleration * delta)

    # Moving the Character
    velocity = target_velocity
    move_and_slide()
public override void _PhysicsProcess(double delta)
{
    // ...
    if (direction != Vector3.Zero)
    {
        // ...
    }

    // Ground velocity
    _targetVelocity.X = direction.X * Speed;
    _targetVelocity.Z = direction.Z * Speed;

    // Vertical velocity
    if (!IsOnFloor()) // If in the air, fall towards the floor. Literally gravity
    {
        _targetVelocity.Y -= FallAcceleration * (float)delta;
    }

    // Moving the character
    Velocity = _targetVelocity;
    MoveAndSlide();
}
The CharacterBody3D.is_on_floor() function returns true if the body collided with the floor in this frame. That's why
we apply gravity to the Player only while it is in the air.
For the vertical velocity, we subtract the fall acceleration multiplied by the delta time every frame. This line of code will cause our character to fall in every frame, as long as it is not on or colliding with the floor.
Физический движок может только распознавать взаимодействия со стенами, полом или другими телами во время предоставленного кадра, если происходит движение и столкновение. Позже мы будем использовать это свойство, чтобы написать код к прыжку.
On the last line, we call CharacterBody3D.move_and_slide() which is a powerful
method of the CharacterBody3D class that allows you to move a character
smoothly. If it hits a wall midway through a motion, the engine will try to
smooth it out for you. It uses the velocity value native to the CharacterBody3D
Вот и весь код, необходимый для перемещения персонажа по полу.
Для сравнения вот так выглядит завершенный код Player.gd.
extends CharacterBody3D

# How fast the player moves in meters per second.
@export var speed = 14
# The downward acceleration when in the air, in meters per second squared.
@export var fall_acceleration = 75

var target_velocity = Vector3.ZERO


func _physics_process(delta):
    var direction = Vector3.ZERO

    if Input.is_action_pressed("move_right"):
        direction.x += 1
    if Input.is_action_pressed("move_left"):
        direction.x -= 1
    if Input.is_action_pressed("move_back"):
        direction.z += 1
    if Input.is_action_pressed("move_forward"):
        direction.z -= 1

    if direction != Vector3.ZERO:
        direction = direction.normalized()
        $Pivot.basis = Basis.looking_at(direction)

    # Ground Velocity
    target_velocity.x = direction.x * speed
    target_velocity.z = direction.z * speed

    # Vertical Velocity
    if not is_on_floor(): # If in the air, fall towards the floor. Literally gravity
        target_velocity.y = target_velocity.y - (fall_acceleration * delta)

    # Moving the Character
    velocity = target_velocity
    move_and_slide()
using Godot;

public partial class Player : CharacterBody3D
{
    // How fast the player moves in meters per second.
    [Export]
    public int Speed { get; set; } = 14;
    // The downward acceleration when in the air, in meters per second squared.
    [Export]
    public int FallAcceleration { get; set; } = 75;

    private Vector3 _targetVelocity = Vector3.Zero;

    public override void _PhysicsProcess(double delta)
    {
        var direction = Vector3.Zero;

        if (Input.IsActionPressed("move_right"))
        {
            direction.X += 1.0f;
        }
        if (Input.IsActionPressed("move_left"))
        {
            direction.X -= 1.0f;
        }
        if (Input.IsActionPressed("move_back"))
        {
            direction.Z += 1.0f;
        }
        if (Input.IsActionPressed("move_forward"))
        {
            direction.Z -= 1.0f;
        }

        if (direction != Vector3.Zero)
        {
            direction = direction.Normalized();
            GetNode<Node3D>("Pivot").Basis = Basis.LookingAt(direction);
        }

        // Ground velocity
        _targetVelocity.X = direction.X * Speed;
        _targetVelocity.Z = direction.Z * Speed;

        // Vertical velocity
        if (!IsOnFloor()) // If in the air, fall towards the floor. Literally gravity
        {
            _targetVelocity.Y -= FallAcceleration * (float)delta;
        }

        // Moving the character
        Velocity = _targetVelocity;
        MoveAndSlide();
    }
}
Проверка движения нашего игрока
We're going to put our player in the Main scene to test it. To do so, we need
to instantiate the player and then add a camera. Unlike in 2D, in 3D, you won't
see anything if your viewport doesn't have a camera pointing at something.
Save your Player scene and open the Main scene. You can click on the Main
tab at the top of the editor to do so.
If you closed the scene before, head to the FileSystem dock and double-click
main.tscn to re-open it.
To instantiate the Player, right-click on the Main node and select Instantiate
Child Scene.
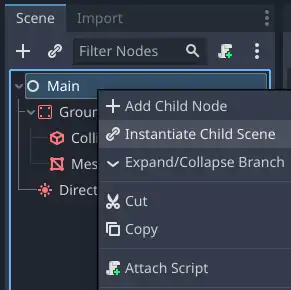
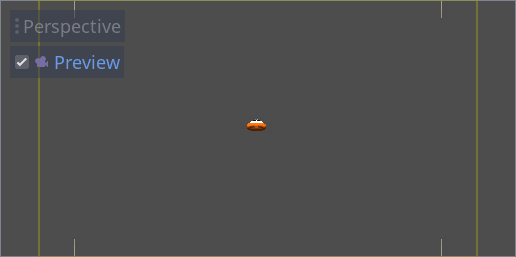
In the popup, double-click player.tscn. The character should appear in the
center of the viewport.
Добавление камеры
Let's add the camera next. Like we did with our Player's Pivot, we're
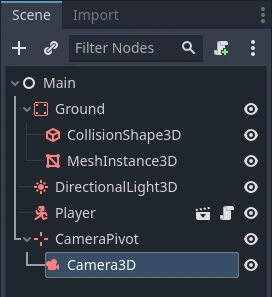
going to create a basic rig. Right-click on the Main node again and select
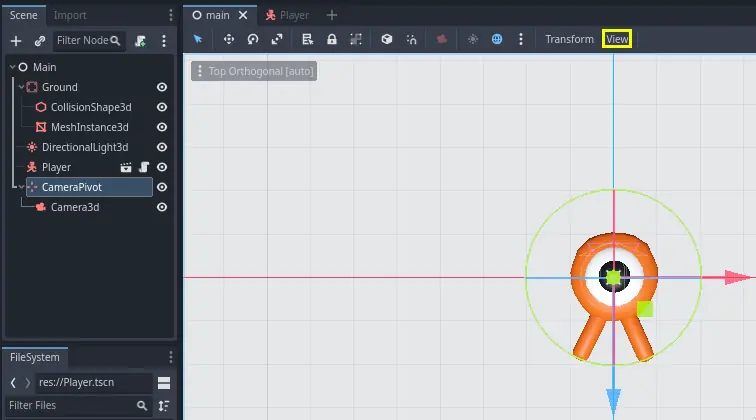
Add Child Node. Create a new Marker3D, and name it CameraPivot. Select CameraPivot and add a child node Camera3D to it. Your scene tree should look like this.
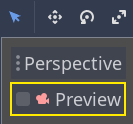
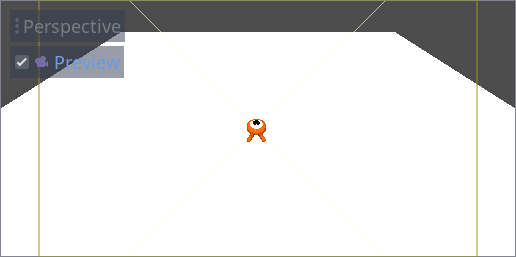
Обратите внимание на флажок Preview, который появляется в левом верхнем углу, когда выбран параметр Camera. Вы можете нажать на него, чтобы просмотреть проекцию камеры в игре.
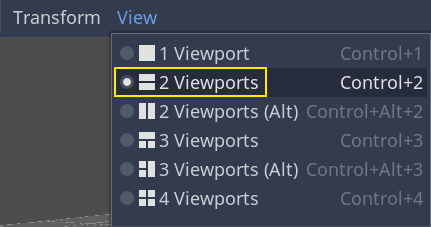
Мы будем использовать Pivot для поворота камеры, как будто она находится на кране. Сначала давайте разделим 3D-вид, чтобы иметь возможность свободно перемещаться по сцене и видеть то, что видит камера.
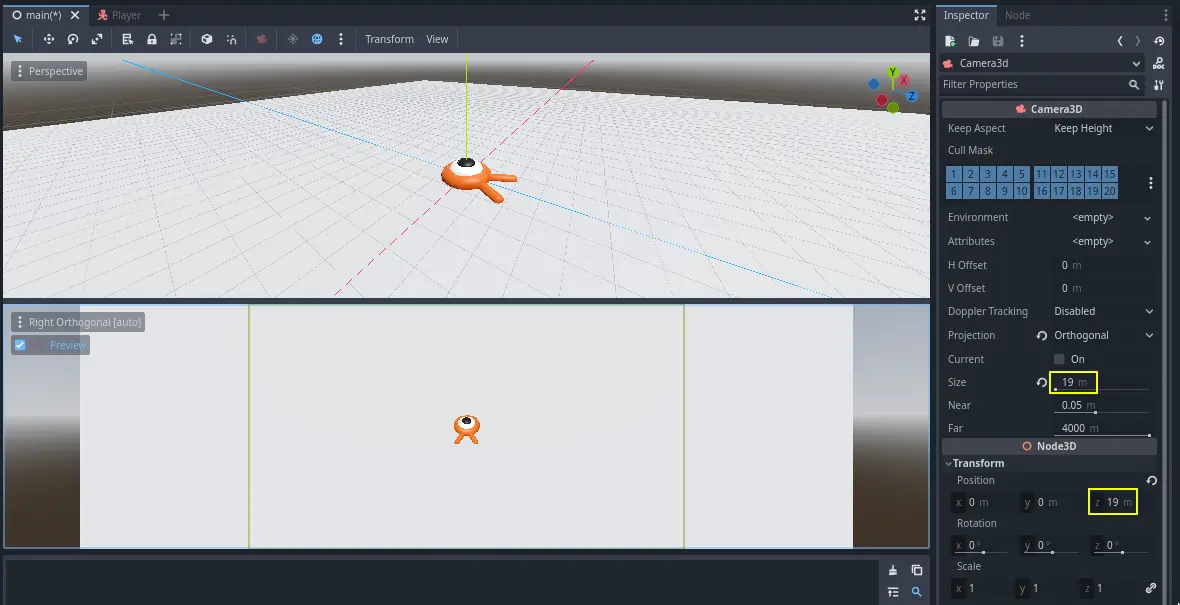
На панели инструментов прямо над вьюпортом нажмите View, затем 2 Viewports. Вы также можете нажать Ctrl + 2 (Cmd + 2 на macOS).
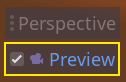
On the bottom view, select your Camera3D and turn on camera Preview by clicking the checkbox.
На виде сверху переместите камеру примерно на 19 единиц по оси Z (синяя).
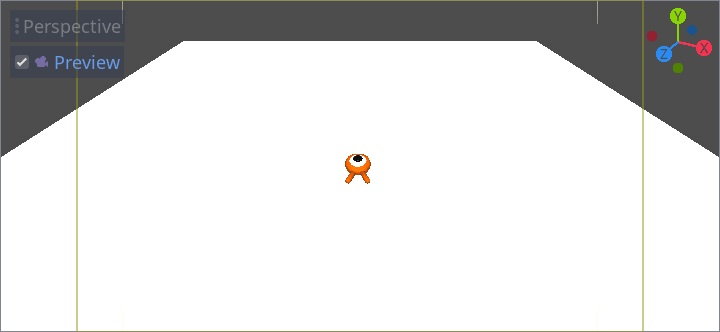
Here's where the magic happens. Select the CameraPivot and rotate it -45
degrees around the X axis (using the red circle). You'll see the camera move as
if it was attached to a crane.
Вы можете запустить сцену, нажав F6 и нажимая клавиши со стрелками перемещать персонаж.
Мы можем видеть пустое пространство вокруг персонажа из-за перспективы. В этой игре мы наоборот собираемся использовать орфографическую проекцию, чтобы лучше структурировать область геймплея и упростить для игрока считывание дистанций.
Снова выберите Camera и в Inspector установите Projection на Orthogonal и Size на 19. Теперь персонаж должен выглядеть более плоским и поверхность должна заполнять задний план.
Примечание
When using an orthogonal camera in Godot 4, directional shadow quality is dependent on the camera's Far value. The higher the Far value, the further away the camera will be able to see. However, higher Far values also decrease shadow quality as the shadow rendering has to cover a greater distance.
If directional shadows look too blurry after switching to an orthogonal
camera, decrease the camera's Far property to a lower value such as
100. Don't decrease this Far property too much, or objects in the
distance will start disappearing.
Test your scene and you should be able to move in all 8 directions and not glitch through the floor!
Ultimately, we have both player movement and the view in place. Next, we will work on the monsters.