Up to date
This page is up to date for Godot 4.2.
If you still find outdated information, please open an issue.
Tworzenie instancji
W poprzedniej części nauczyliśmy się, że scena to kolekcja węzłów ułożonych w strukturę drzewa, z jednym, głównym węzłem stanowiącym korzeń (root). Możesz podzielić swój projekt na dowolną ilość scen. Ta funkcja pomoże Ci wydzielić mniejsze części i zorganizować wszystkie składowe Twojej gry.
Możesz utworzyć dowolną liczbę scen i zapisać je jako pliki z rozszerzeniem .tscn, co jest skrótem od angielskiego wyrażenia "text scene". Przykładem jest plik label.tscn z poprzedniej lekcji. Nazywamy te pliki "spakowanymi scenami" ("Packed Scenes"), ponieważ zapakowano do nich informacje o zawartości sceny.
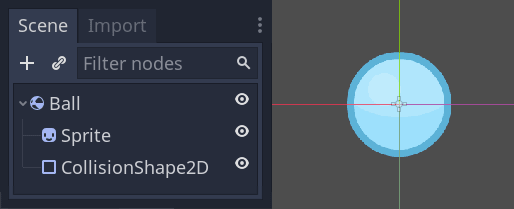
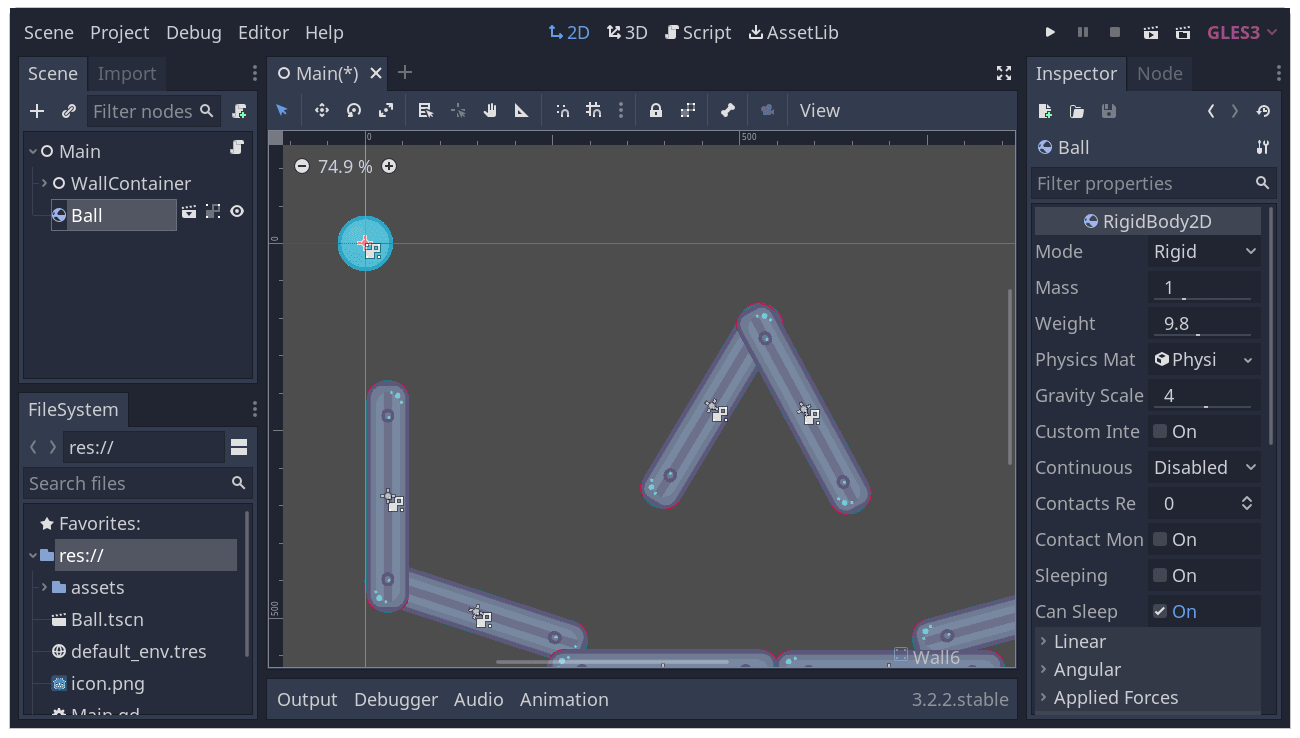
Oto przykład z piłką. Składa się z węzła RigidBody2D będącego korzeniem o nazwie Ball - element ten pozwala piłce spadać i odbijać się od ścian, węzła Sprite2D oraz CollisionShape2D.
Po zapisaniu sceny działa ona jak forma dla rzeźby: możesz odlać, odtworzyć jej zawartość na innych scenach tyle razy, ile chcesz. Replikacja obiektu z takiej formy, takiego szablonu nazywa się instancją.
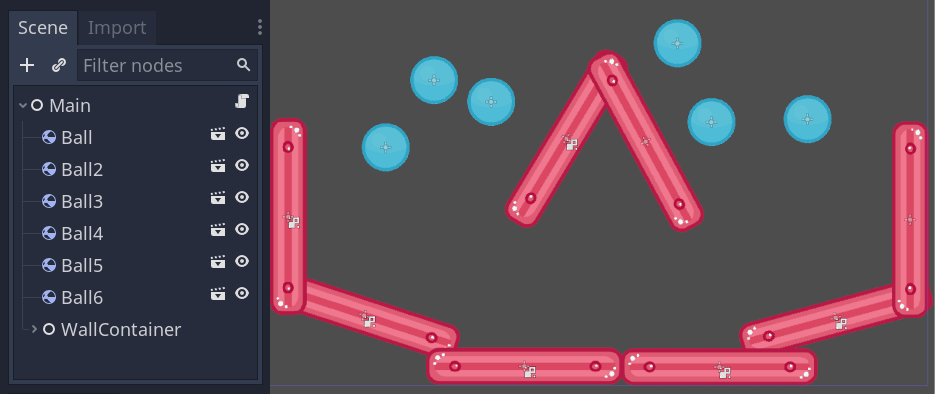
Jak wspomnieliśmy w poprzedniej części, instancje scen w edytorze zachowują się jak węzły: edytor domyślnie ukrywa ich zawartość. Kiedy utworzysz instancję Ball, zobaczysz tylko węzeł Ball. Zwróć także uwagę, że każdy duplikat ma unikalną nazwę.
Każda instancja sceny Ball powstaje mając tą samą strukturę i właściwości jak oryginalny plik ball.tscn. Można jednak modyfikować każdą instancję niezależnie, na przykład zmieniać sposób odbijania się piłki, jej ciężar lub dowolną właściwość sceny źródłowej.
W praktyce
Aby dowiedzieć się, jak w praktyce działa instancjonowanie, zacznijmy od pobrania przykładowego projektu sceny z kulą (ball):instancing_starter.zip.
Extract the archive on your computer. To import it, you need the Project Manager. The Project Manager is accessed by opening Godot, or if you already have Godot opened, click on Project -> Quit to Project List (Ctrl + Shift + Q, Ctrl + Option + Cmd + Q on macOS)
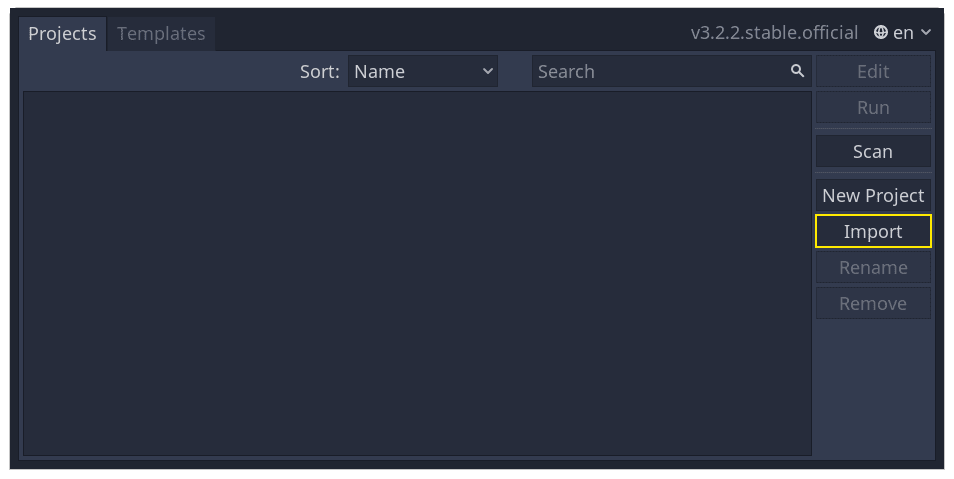
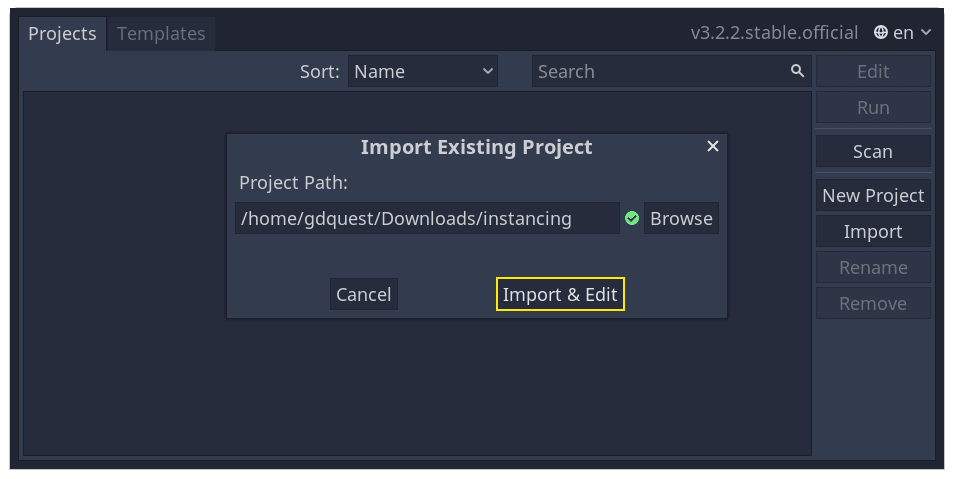
Otwórz Godot i w Menedżerze Projektu, kliknij przycisk „Zaimportuj”, aby zaimportować projekt.
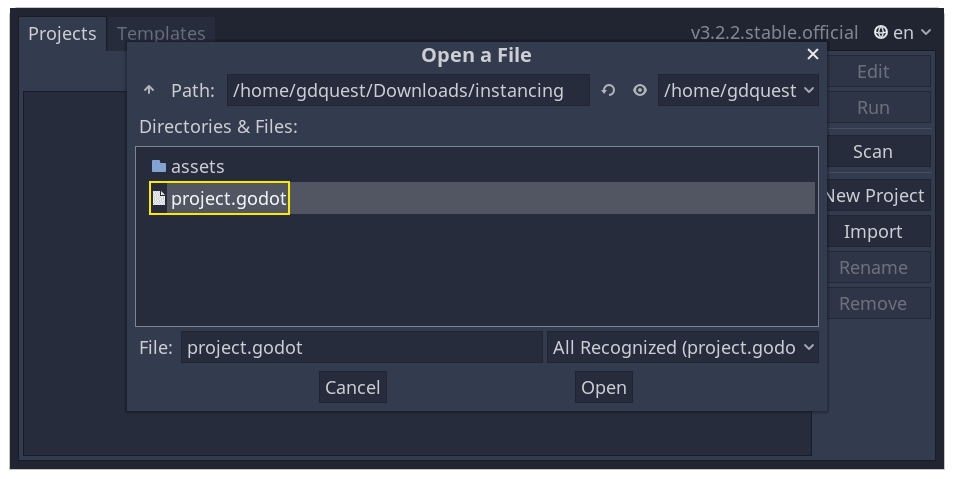
W okienku, które wyskoczy, kliknij przycisk przeglądania i przejdź do rozpakowanego folderu.
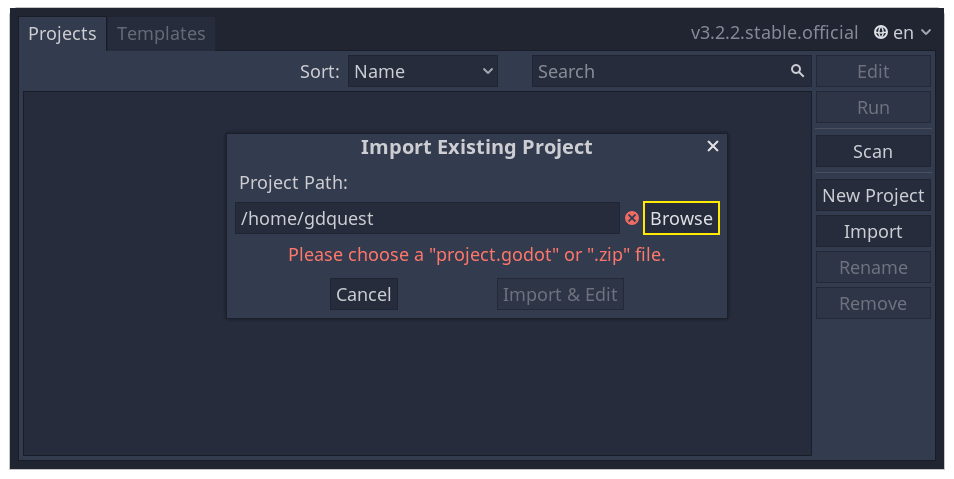
Kliknij dwa razy plik project.godot, aby go otworzyć.
Na końcu, kliknij przycisk Importuj i Edytuj.
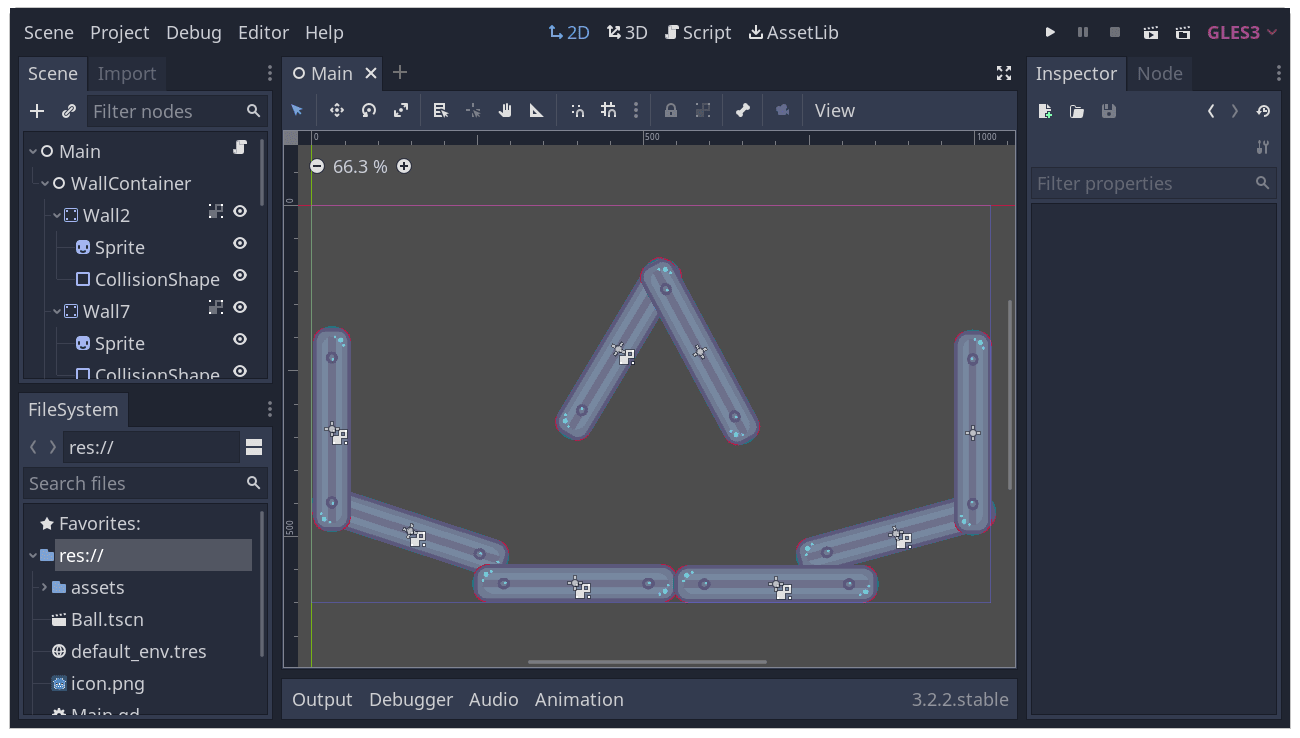
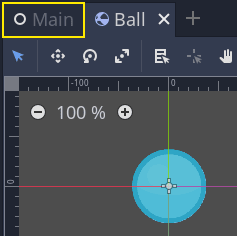
The project contains two packed scenes: main.tscn, containing walls against
which the ball collides, and ball.tscn. The Main scene should open
automatically. If you're seeing an empty 3D scene instead of the main scene, click the 2D button at the top of the screen.

Dodajmy kulkę jako element podrzędny węzła "Main". W doku "Scena" wybierz węzeł "Main". Następnie kliknij ikonę "łącze" (ten łańcuch) w doku "Scena". Przycisk ten umożliwia dodanie instancji sceny jako elementu podrzędnego (dziecko węzła) dla aktualnie wybranego węzła.
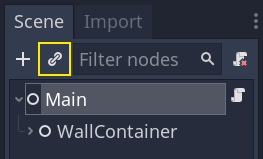
Dwukrotnie kliknij scenę z kulką ("Ball.tscn"), by ją zainstancjonować.

Kulka pojawi się w górnej części widoku perspektywy (viewport).
Kliknij na kulkę i przeciągnij ją w kierunku centrum w widoku Perspektywy.

Uruchom grę naciskając klawisz F5 (Cmd + B na macOS). Powinieneś zobaczyć jak kulka opada.
Now, we want to create more instances of the Ball node. With the ball still selected, press Ctrl + D (Cmd + D on macOS) to call the duplicate command. Click and drag to move the new ball to a different location.
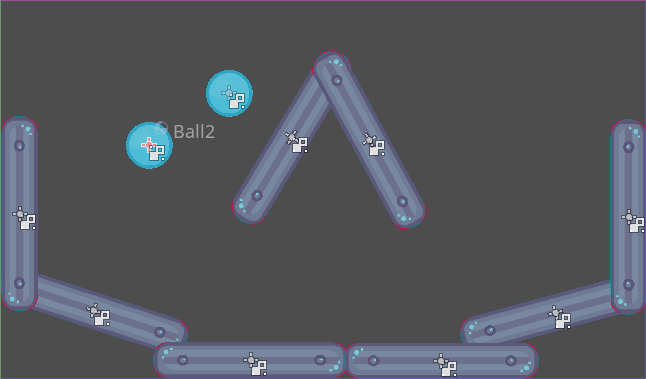
Kontynuuj to działanie tworząc kilka kulek na scenie.
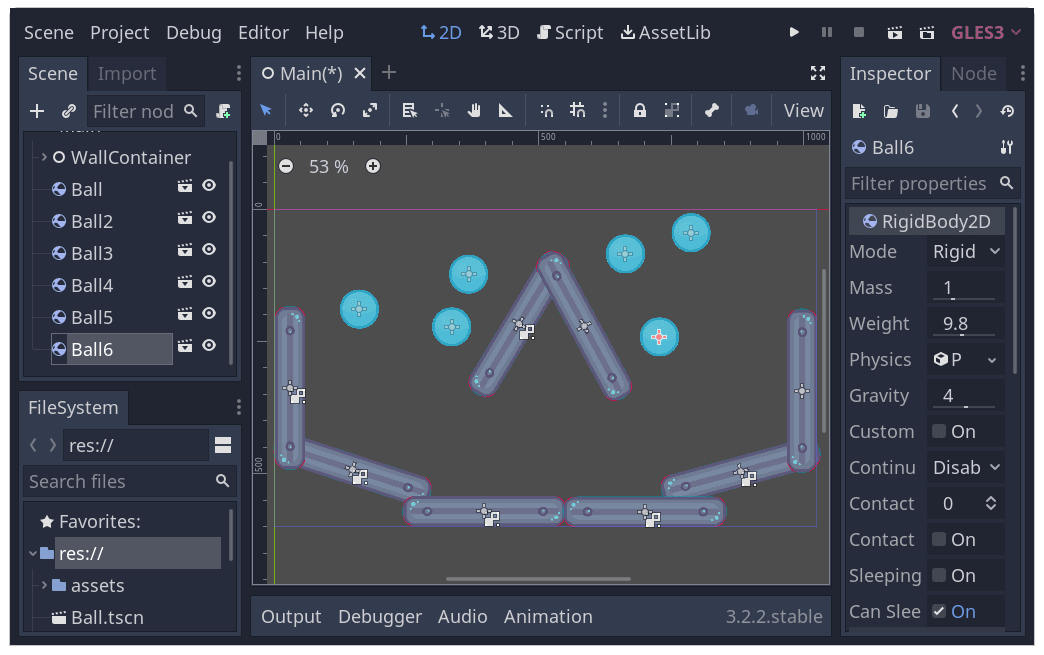
Zagraj w grę ponownie. Powinieneś teraz zobaczyć, jak każda piłka spada niezależnie od drugiej. Tak właśnie robią instancje. Każdy z nich jest niezależnym odlewem z formy jaką jest scena.
Edycja scen i instancji
To nie wszystko odnośnie instancjonowania. Ta funkcja pozwala Ci również:
Zmienić właściwości jednej kulki bez oddziaływania na inne kulki, przy pomocy Inspektora (Inspector).
Zmienić domyślne właściwości każdej z kulek, otwierając scenę
ball.tscni dokonując zmian w węźle Ball. Po zapisaniu wartości, wszystkie kulki (instancje Ball) w projekcie zostaną zaktualizowane.
Informacja
Zmiana właściwości instancji nadpisuje właściwości na scenie, na której jest umiejscowiona.
Spróbujmy. Otwórz plik ball.tscn i wybierz węzeł Ball. W Inspektorze, po prawej stronie, kliknij na właściwość PhysicsMaterial, aby ją rozwinąć.
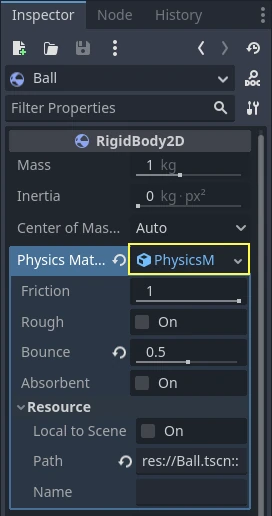
Ustaw jego właściwość Odbijanie (Bounce) na 0,5, klikając pole liczbowe, wpisując ``0,5'' i naciskając Enter.

Play the game by pressing F5 (Cmd + B on macOS) and notice how all balls now bounce a lot more. As the Ball scene is a template for all instances, modifying it and saving causes all instances to update accordingly.
Dostosujmy teraz pojedynczą instancję. Wróć do sceny głównej (Main), klikając odpowiednią kartę nad widokiem perspektywy (viewport).
Wybierz jeden z węzłów Ball i w Inspektorze ustaw jego wartość Skali Grawitacji (Gravity Scale) na 10.

Obok dostosowanej właściwości pojawi się szary przycisk z zawiniętą strzałką - przycisk "przywróć".
Zauważ, że obok dostosowanej właściwości pojawia się szary przycisk przywrócenia. Gdy przycisk ten jest obecny, oznacza to, że zmodyfikowano właściwość instancji w celu zastąpienia jej wartości w zapisanej scenie. Nawet jeśli ta właściwość zostanie zmodyfikowana w oryginalnej scenie, wartość niestandardowa pozostanie. Naciśnięcie przycisku przywracania spowoduje przywrócenie właściwości do wartości zapisanej sceny.
Uruchom grę ponownie i zwróć uwagę, że ta kulka spada teraz znacznie szybciej niż inne.
Informacja
You may notice you are unable to change the values of the PhysicsMaterial
of the ball. This is because PhysicsMaterial is a resource, and needs
to be made unique before you can edit it in a scene that is linking to its
original scene. To make a resource unique for one instance, right-click on
it in the Inspector and click Make Unique in the contextual menu.
Resources are another essential building block of Godot games we will cover in a later lesson.
Scene instances as a design language
Instances and scenes in Godot offer an excellent design language, setting the engine apart from others out there. We designed Godot around this concept from the ground up.
We recommend dismissing architectural code patterns when making games with Godot, such as Model-View-Controller (MVC) or Entity-Relationship diagrams. Instead, you can start by imagining the elements players will see in your game and structure your code around them.
For example, you could break down a shooter game like so:
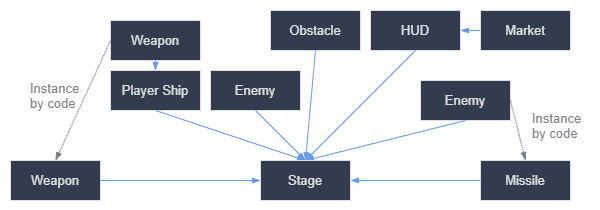
You can come up with a diagram like this for almost any type of game. Each rectangle represents an entity that's visible in the game from the player's perspective. The arrows tell you which scene owns which.
Once you have a diagram, we recommend creating a scene for each element listed in it to develop your game. You'll use instancing, either by code or directly in the editor, to build your tree of scenes.
Programmers tend to spend a lot of time designing abstract architectures and trying to fit components into it. Designing based on scenes makes development faster and more straightforward, allowing you to focus on the game logic itself. Because most game components map directly to a scene, using a design based on scene instantiation means you need little other architectural code.
Here's the example of a scene diagram for an open-world game with tons of assets and nested elements:

Imagine we started by creating the room. We could make a couple of different room scenes, with unique arrangements of furniture in them. Later, we could make a house scene that uses multiple room instances for the interior. We would create a citadel out of many instanced houses and a large terrain on which we would place the citadel. Each of these would be a scene instancing one or more sub-scenes.
Later, we could create scenes representing guards and add them to the citadel. They would be indirectly added to the overall game world.
With Godot, it's easy to iterate on your game like this, as all you need to do is create and instantiate more scenes. We designed the editor to be accessible to programmers, designers, and artists alike. A typical team development process can involve 2D or 3D artists, level designers, game designers, and animators, all working with the Godot editor.
Podsumowanie
Instancing, the process of producing an object from a blueprint, has many handy uses. With scenes, it gives you:
The ability to divide your game into reusable components.
A tool to structure and encapsulate complex systems.
A language to think about your game project's structure in a natural way.