Up to date
This page is up to date for Godot 4.2.
If you still find outdated information, please open an issue.
Singletons (Autoload)
Wprowadzenie
Godot's scene system, while powerful and flexible, has a drawback: there is no method for storing information (e.g. a player's score or inventory) that is needed by more than one scene.
It's possible to address this with some workarounds, but they come with their own limitations:
You can use a "master" scene that loads and unloads other scenes as its children. However, this means you can no longer run those scenes individually and expect them to work correctly.
Information can be stored to disk in
user://and then loaded by scenes that require it, but frequently saving and loading data is cumbersome and may be slow.
The Singleton pattern is a useful tool for solving the common use case where you need to store persistent information between scenes. In our case, it's possible to reuse the same scene or class for multiple singletons as long as they have different names.
Using this concept, you can create objects that:
Are always loaded, no matter which scene is currently running.
Can store global variables such as player information.
Can handle switching scenes and between-scene transitions.
Act like a singleton, since GDScript does not support global variables by design.
Autoloading nodes and scripts can give us these characteristics.
Informacja
Godot won't make an Autoload a "true" singleton as per the singleton design pattern. It may still be instanced more than once by the user if desired.
Wskazówka
If you're creating an autoload as part of an editor plugin, consider registering it automatically in the Project Settings when the plugin is enabled.
Autoload
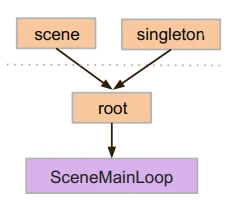
You can create an Autoload to load a scene or a script that inherits from Node.
Informacja
When autoloading a script, a Node will be created and the script will be attached to it. This node will be added to the root viewport before any other scenes are loaded.
To autoload a scene or script, select Project > Project Settings from the menu and switch to the Autoload tab.
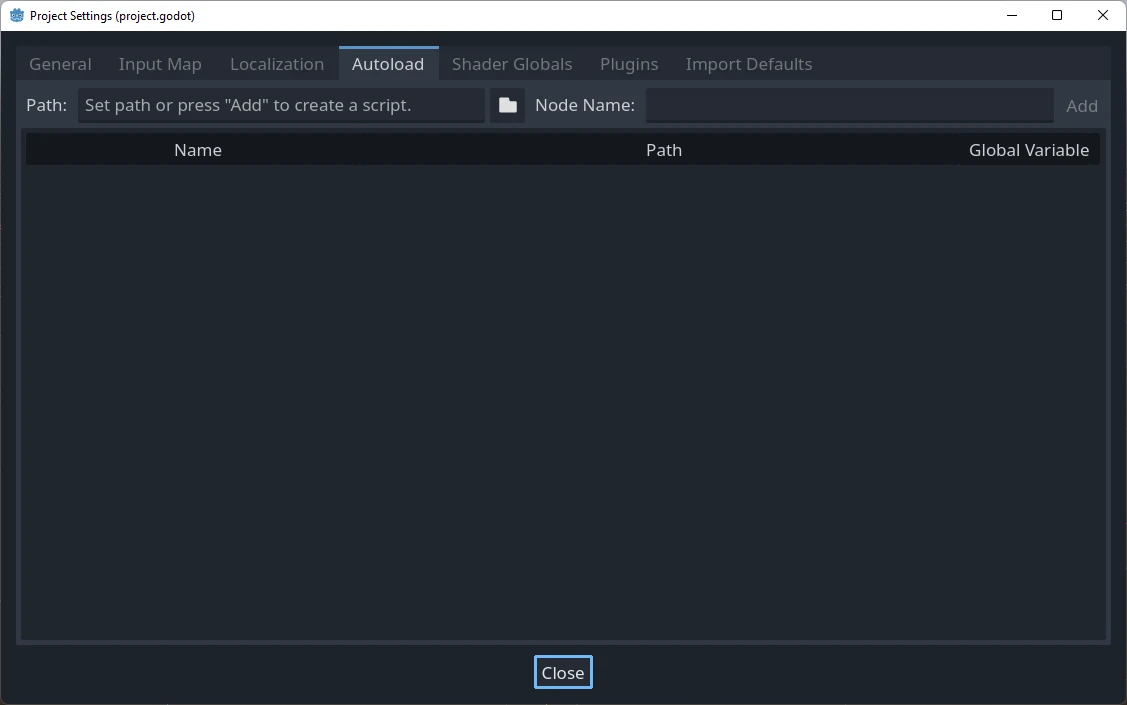
Here you can add any number of scenes or scripts. Each entry in the list
requires a name, which is assigned as the node's name property. The order of
the entries as they are added to the global scene tree can be manipulated using
the up/down arrow keys. Like regular scenes, the engine will read these nodes
in top-to-bottom order.
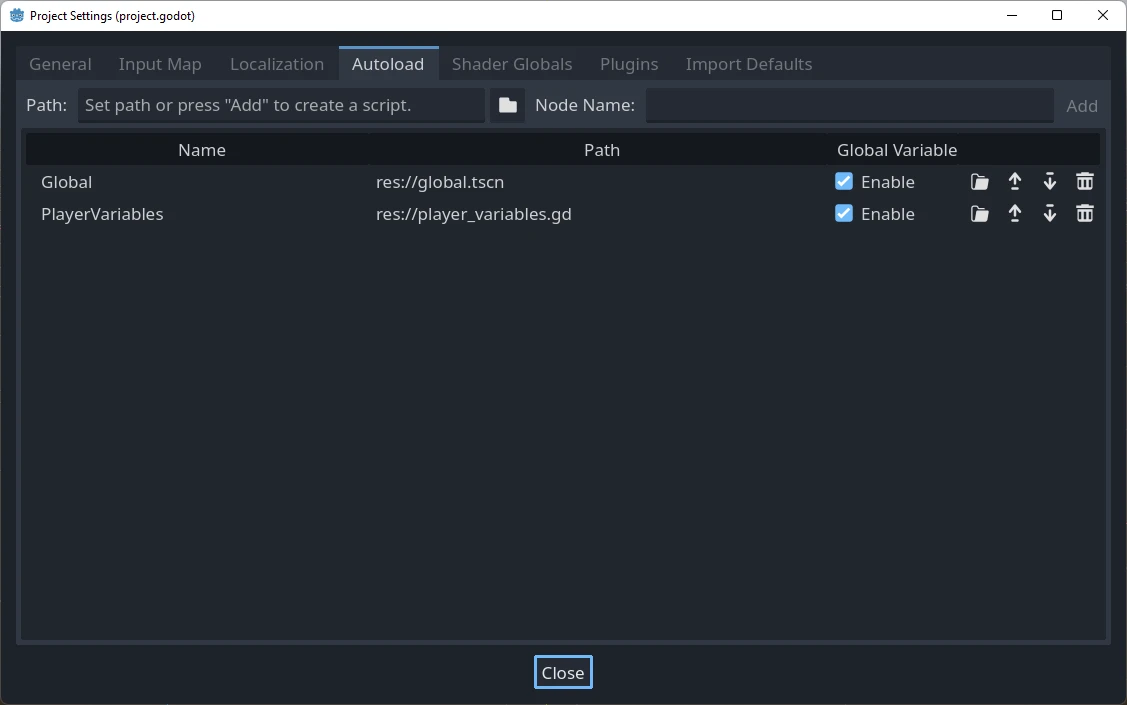
This means that any node can access a singleton named "PlayerVariables" with:
var player_vars = get_node("/root/PlayerVariables")
player_vars.health -= 10
var playerVariables = GetNode<PlayerVariables>("/root/PlayerVariables");
playerVariables.Health -= 10; // Instance field.
If the Enable column is checked (which is the default), then the singleton can
be accessed directly in GDScript, without requiring get_node():
PlayerVariables.health -= 10
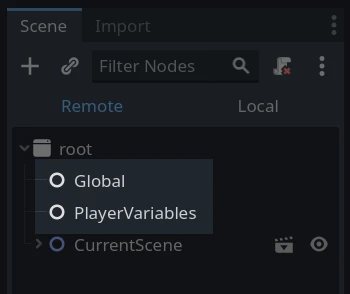
Note that autoload objects (scripts and/or scenes) are accessed just like any other node in the scene tree. In fact, if you look at the running scene tree, you'll see the autoloaded nodes appear:
Ostrzeżenie
Autoloads must not be removed using free() or queue_free() at
runtime, or the engine will crash.
Własny zmieniacz scen
This tutorial will demonstrate building a scene switcher using autoloads. For basic scene switching, you can use the SceneTree.change_scene_to_file() method (see Using SceneTree for details). However, if you need more complex behavior when changing scenes, this method provides more functionality.
To begin, download the template from here: singleton_autoload_starter.zip and open it in Godot.
The project contains two scenes: scene_1.tscn and scene_2.tscn. Each
scene contains a label displaying the scene name and a button with its
pressed() signal connected. When you run the project, it starts in
scene_1.tscn. However, pressing the button does nothing.
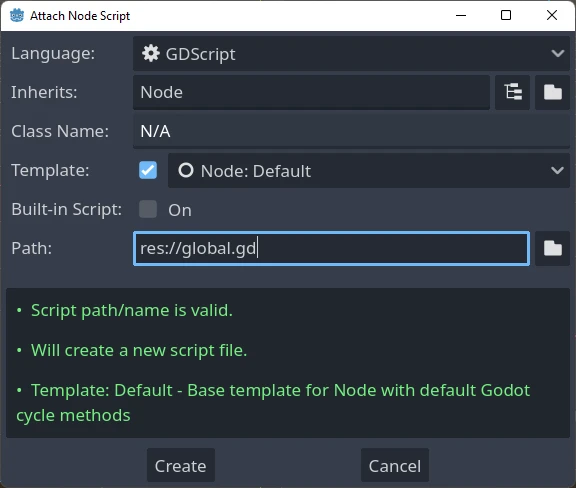
Creating the script
Open the Script window and create a new script called global.gd.
Make sure it inherits from Node:
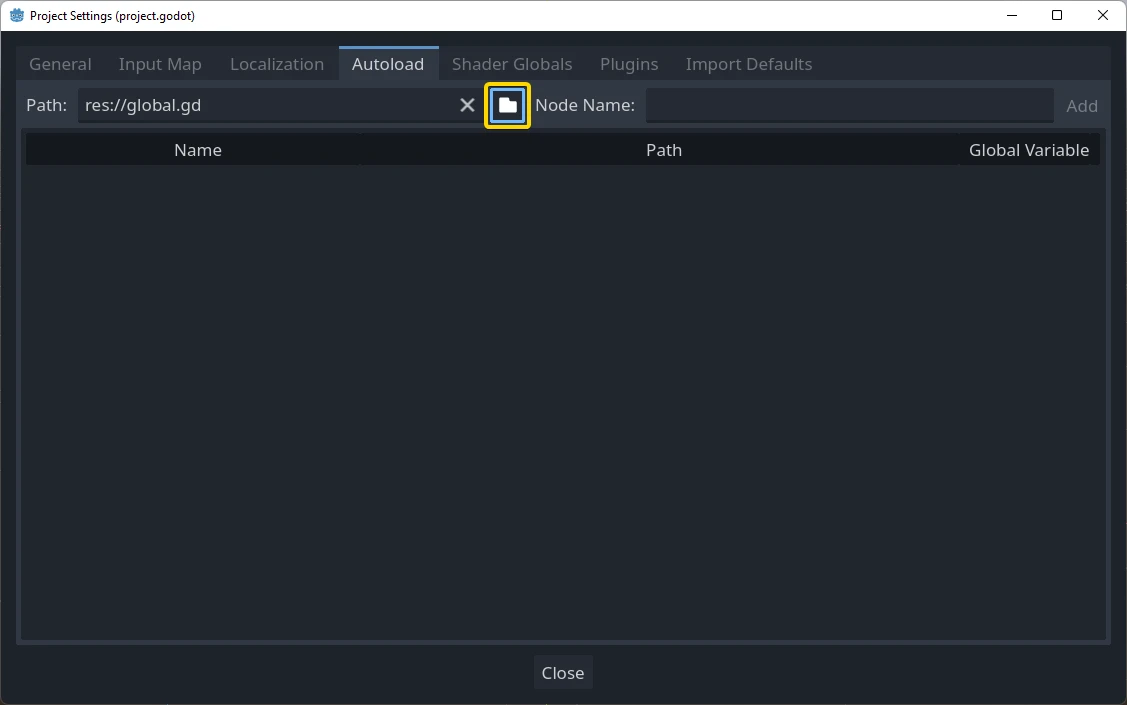
The next step is to add this script to the autoLoad list. Open
Project > Project Settings from the menu, switch to the Autoload tab and
select the script by clicking the browse button or typing its path:
res://global.gd. Press Add to add it to the autoload list:
Now whenever we run any scene in the project, this script will always be loaded.
Returning to the script, it needs to fetch the current scene in the
_ready() function. Both the current scene (the one with the button) and
global.gd are children of root, but autoloaded nodes are always first. This
means that the last child of root is always the loaded scene.
extends Node

var current_scene = null

func _ready():
    var root = get_tree().root
    current_scene = root.get_child(root.get_child_count() - 1)
using Godot;

public partial class Global : Node
{
    public Node CurrentScene { get; set; }

    public override void _Ready()
    {
        Viewport root = GetTree().Root;
        CurrentScene = root.GetChild(root.GetChildCount() - 1);
    }
}
Now we need a function for changing the scene. This function needs to free the current scene and replace it with the requested one.
func goto_scene(path):
    # This function will usually be called from a signal callback,
    # or some other function in the current scene.
    # Deleting the current scene at this point is
    # a bad idea, because it may still be executing code.
    # This will result in a crash or unexpected behavior.

    # The solution is to defer the load to a later time, when
    # we can be sure that no code from the current scene is running:

    call_deferred("_deferred_goto_scene", path)


func _deferred_goto_scene(path):
    # It is now safe to remove the current scene.
    current_scene.free()

    # Load the new scene.
    var s = ResourceLoader.load(path)

    # Instance the new scene.
    current_scene = s.instantiate()

    # Add it to the active scene, as child of root.
    get_tree().root.add_child(current_scene)

    # Optionally, to make it compatible with the SceneTree.change_scene_to_file() API.
    get_tree().current_scene = current_scene
public void GotoScene(string path)
{
    // This function will usually be called from a signal callback,
    // or some other function from the current scene.
    // Deleting the current scene at this point is
    // a bad idea, because it may still be executing code.
    // This will result in a crash or unexpected behavior.

    // The solution is to defer the load to a later time, when
    // we can be sure that no code from the current scene is running:

    CallDeferred(MethodName.DeferredGotoScene, path);
}

public void DeferredGotoScene(string path)
{
    // It is now safe to remove the current scene.
    CurrentScene.Free();

    // Load a new scene.
    var nextScene = GD.Load<PackedScene>(path);

    // Instance the new scene.
    CurrentScene = nextScene.Instantiate();

    // Add it to the active scene, as child of root.
    GetTree().Root.AddChild(CurrentScene);

    // Optionally, to make it compatible with the SceneTree.change_scene_to_file() API.
    GetTree().CurrentScene = CurrentScene;
}
Using Object.call_deferred(), the second function will only run once all code from the current scene has completed. Thus, the current scene will not be removed while it is still being used (i.e. its code is still running).
Finally, we need to fill the empty callback functions in the two scenes:
# Add to 'scene_1.gd'.

func _on_button_pressed():
    Global.goto_scene("res://scene_2.tscn")
// Add to 'Scene1.cs'.

private void OnButtonPressed()
{
    var global = GetNode<Global>("/root/Global");
    global.GotoScene("res://Scene2.tscn");
}
i
# Add to 'scene_2.gd'.

func _on_button_pressed():
    Global.goto_scene("res://scene_1.tscn")
// Add to 'Scene2.cs'.

private void OnButtonPressed()
{
    var global = GetNode<Global>("/root/Global");
    global.GotoScene("res://Scene1.tscn");
}
Teraz, jeśli uruchomisz projekt, możesz przełączać się pomiędzy obydwoma scenami, naciskając przycisk.
Informacja
When scenes are small, the transition is instantaneous. However, if your scenes are more complex, they may take a noticeable amount of time to appear. To learn how to handle this, see the next tutorial: Ładowanie w tle.
Alternatively, if the loading time is relatively short (less than 3 seconds or so), you can display a "loading plaque" by showing some kind of 2D element just before changing the scene. You can then hide it just after the scene is changed. This can be used to indicate to the player that a scene is being loaded.