Up to date
This page is up to date for Godot 4.2.
If you still find outdated information, please open an issue.
Using GridMaps
Wprowadzenie
Gridmaps are a tool for creating 3D game levels, similar to the way TileMap works in 2D. You start with a predefined collection of 3D meshes (a MeshLibrary) that can be placed on a grid, as if you were building a level with an unlimited amount of Lego blocks.
Kolizje i nawigacja mogą być również dodawane do siatki, tak jak w przypadku tile z tilemap.
Example project
To learn how GridMaps work, start by downloading the sample project: gridmap_starter.zip.
Rozpakuj ten projekt i dodaj go do Menedżera Projektu za pomocą przycisku "Importuj".
Tworzenie MeshLibrary
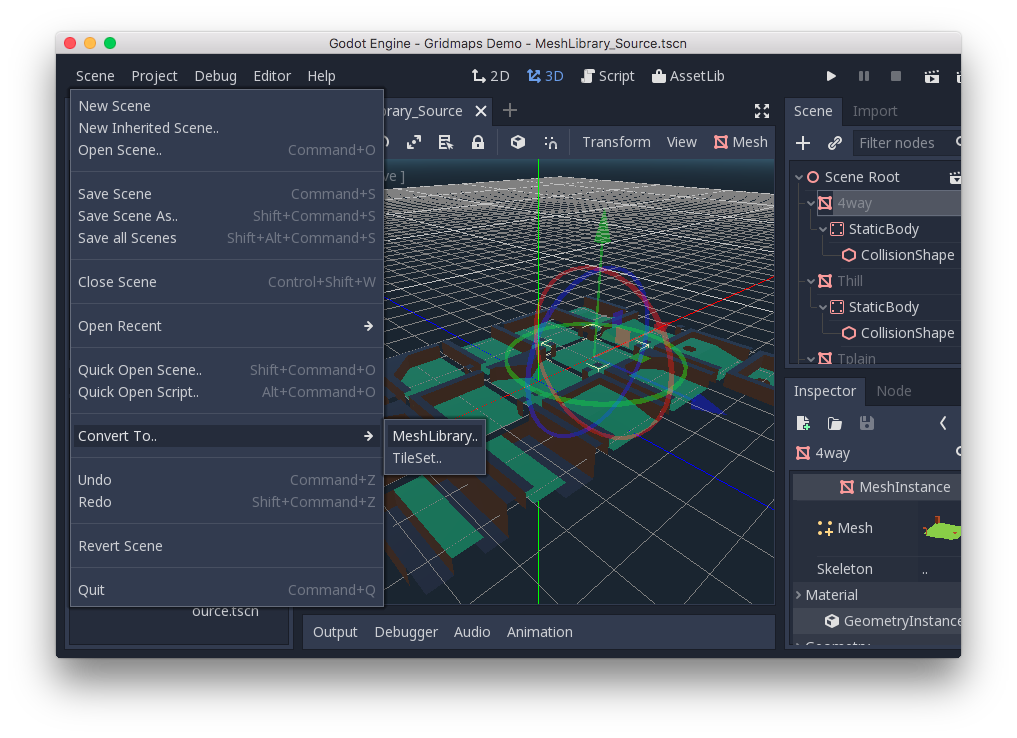
To begin, you need a MeshLibrary, which is a collection of individual meshes that can be used in the gridmap. Open the "mesh_library_source.tscn" scene to see an example of how to set up the mesh library.
As you can see, this scene has a Node3D node as its root, and a number of MeshInstance3D node children.
Jeśli nie potrzebujesz żadnej fizyki w swojej scenie, to już jesteś gotowy. Jednak w większości przypadków będziesz chciał przypisać kolizyjne obiekty do siatek.
Kolizje
You can manually assign a StaticBody3D and CollisionShape3D to each mesh. Alternatively, you can use the "Mesh" menu to automatically create the collision body based on the mesh data.
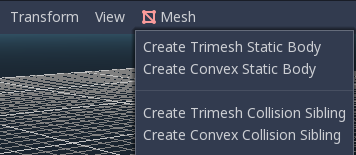
Zwróć uwagę, że kolizja "Convex" będzie działała lepiej w przypadku prostych siatek. W przypadku bardziej złożonych kształtów wybierz opcję "Utwórz statyczne ciało trójsiatki". Gdy każda siatka ma przypisany ciało fizyczne i kształt kolizji, twoja biblioteka siatek jest gotowa do użycia.

Materiały
Only the materials from within the meshes are used when generating the mesh library. Materials set on the node will be ignored.
Siatki nawigacji (NavigationMeshes)
Like all mesh instances, MeshLibrary items can be assigned a NavigationMesh resource, which can be created manually, or baked as described below.
To create the NavigationMesh from a MeshLibrary scene export, place a NavigationRegion3D child node below the main MeshInstance3D for the GridMap item. Add a valid NavigationMesh resource to the NavigationRegion3D and some source geometry nodes below and bake the NavigationMesh.
Informacja
With small grid cells it is often necessary to reduce the NavigationMesh properties for agent radius and region minimum size.
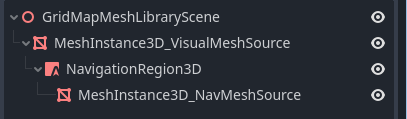
Nodes below the NavigationRegion3D are ignored for the MeshLibrary scene export, so additional nodes can be added as source geometry just for baking the navmesh.
Ostrzeżenie
The baked cell size of the NavigationMesh must match the NavigationServer map cell size to properly merge the navigation meshes of different grid cells.
Eksportowanie MeshLibrary
To export the library, click on Scene > Export As... > MeshLibrary..., and save it as a resource.
You can find an already exported MeshLibrary in the project named "MeshLibrary.tres".
Korzystanie z GridMap
Utwórz nową scenę i dodaj węzeł GridMap. Dodaj mesh library, przeciągając plik źródłowy z panelu - system plików i upuszczając go w właściwości "Temat" w inspektorze.
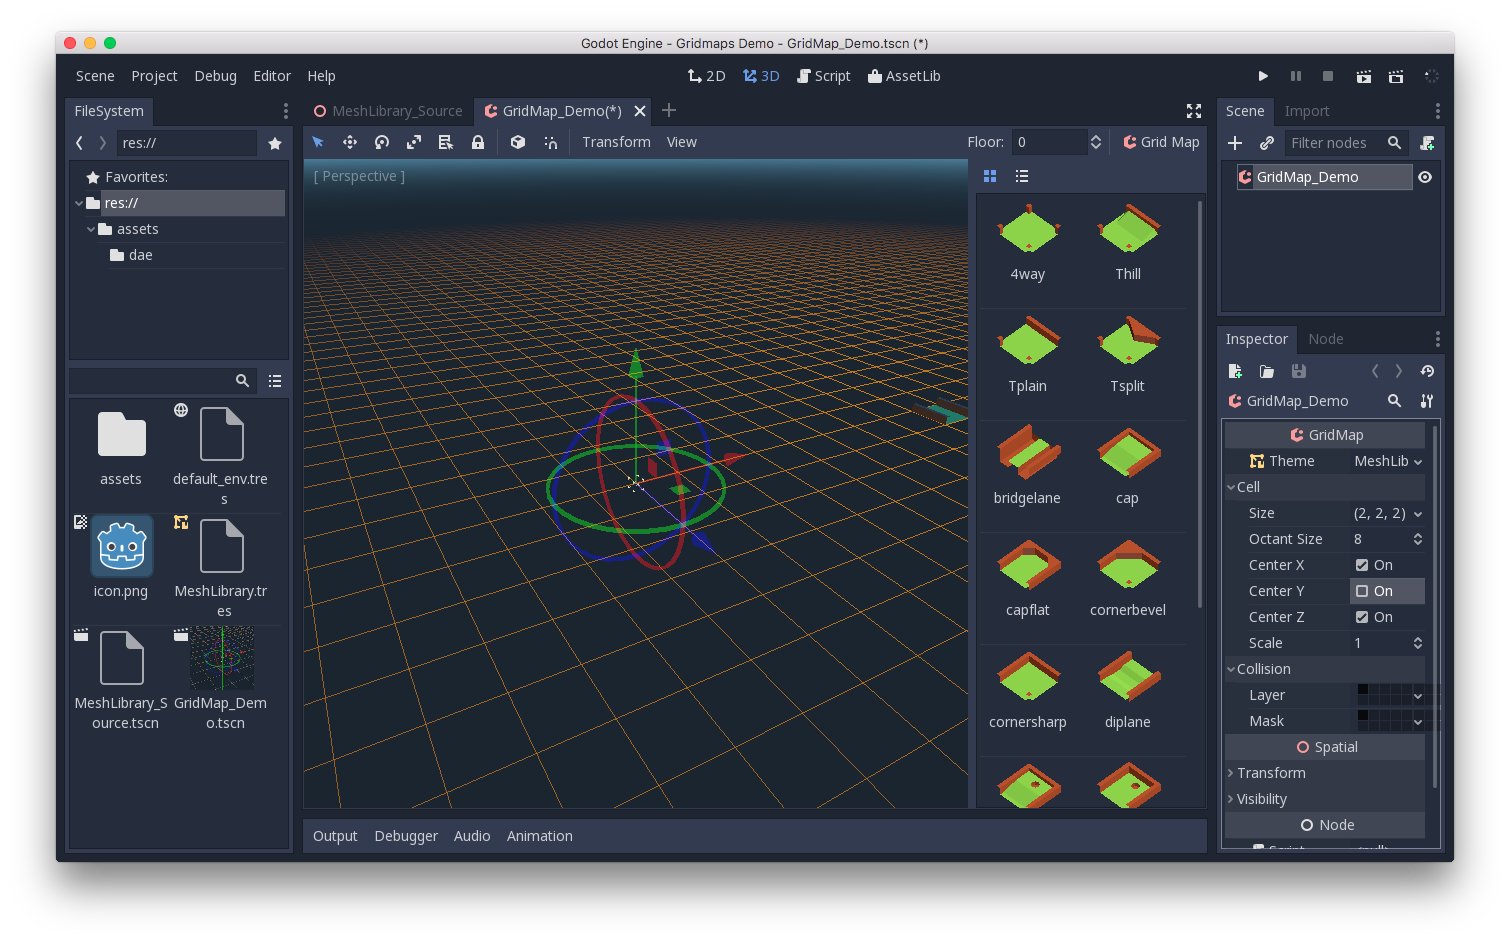
The "Cell/Size" property should be set to the size of your meshes. You can leave it at the default value for the demo. Set the "Center Y" property to "Off".
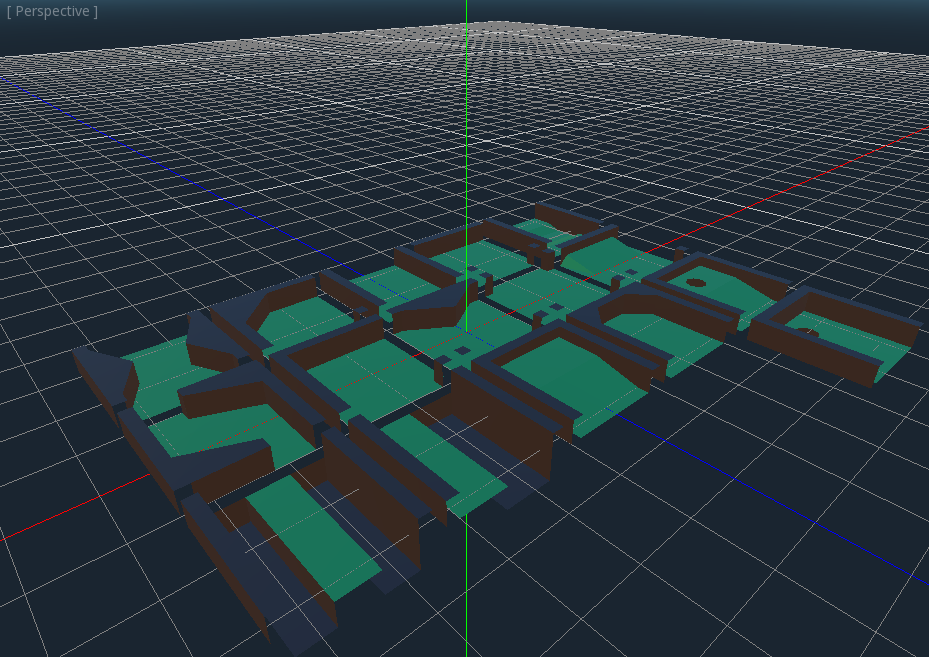
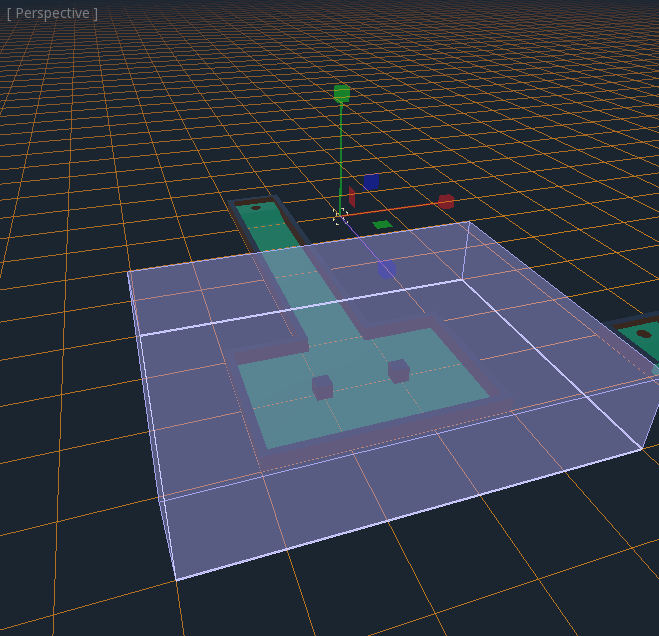
Now you can start designing the level by choosing a tile from the palette and placing it with Left-Click in the editor window. Use Right-click to remove a tile.
Use the arrows next to the "GridMap" menu to change the floor that you are working on.
Click on the "GridMap" menu to see options and shortcuts. For example, pressing S rotates a tile around the y-axis.
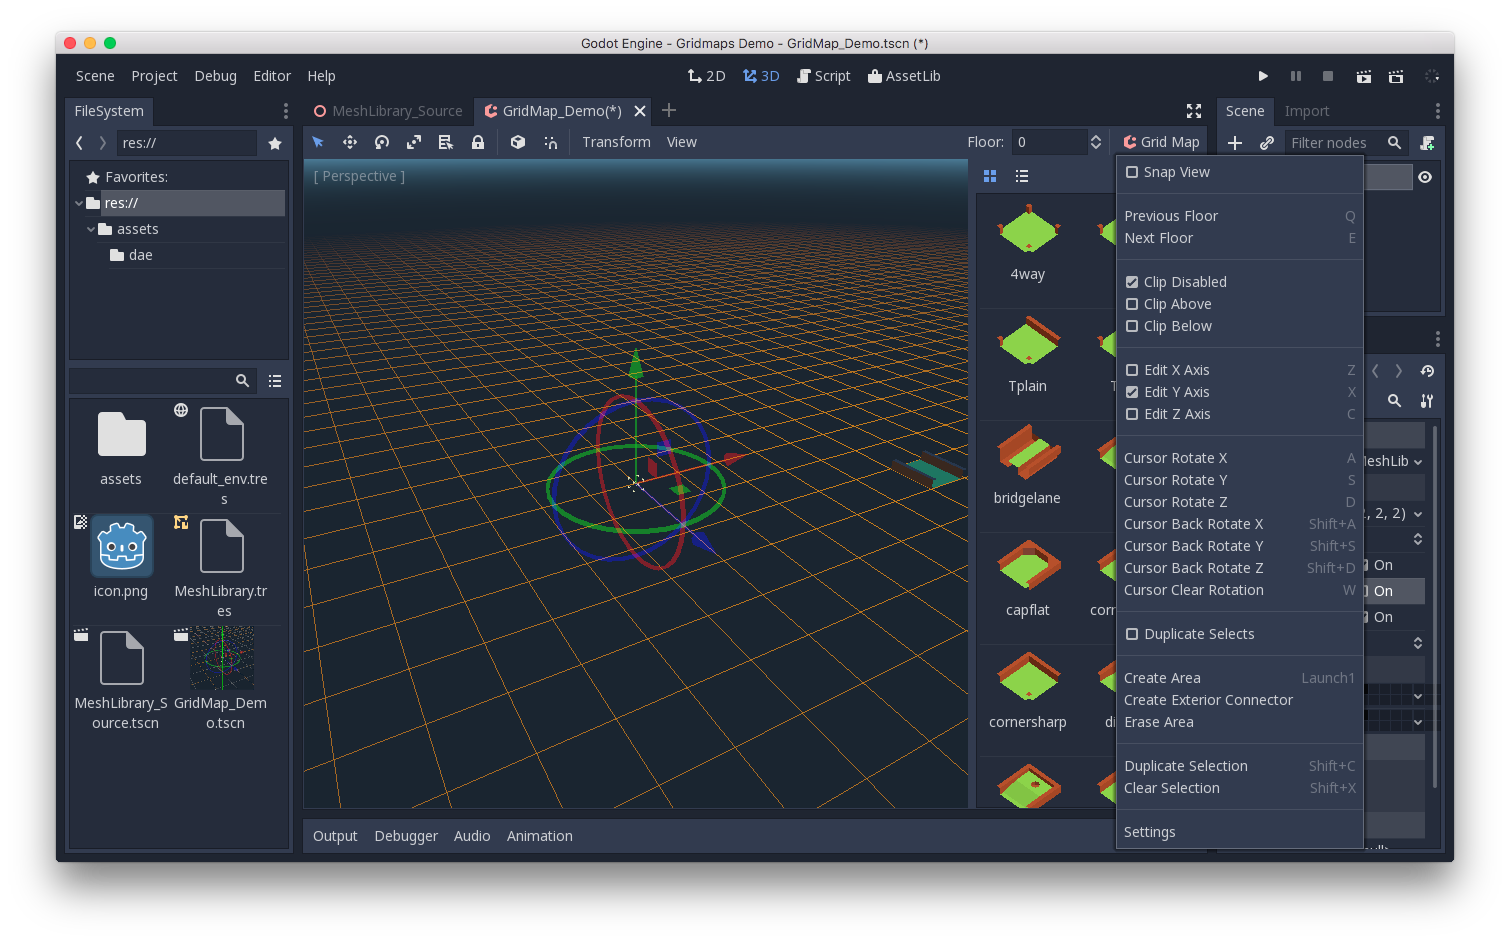
Holding Shift and dragging with the left mouse button will draw a selection box. You can duplicate or clear the selected area using the respective menu options.
In the menu, you can also change the axis you're drawing on, as well as shift the drawing plane higher or lower on its axis.

Using GridMap in code
See GridMap for details on the node's methods and member variables.