Up to date
This page is up to date for Godot 4.2.
If you still find outdated information, please open an issue.
Heads up display
The final piece our game needs is a User Interface (UI) to display things like score, a "game over" message, and a restart button.
Create a new scene, click the "Other Node" button and add a CanvasLayer node named
HUD. "HUD" stands for "heads-up display", an informational display that
appears as an overlay on top of the game view.
Il nodo :ref:'CanvasLayer <class_CanvasLayer>' ci consente di disegnare i nostri elementi dell'interfaccia utente su un livello sopra il resto del gioco, in modo che le informazioni visualizzate non vengano coperte da elementi di gioco come il giocatore o i mob.
L'HUD deve mostrare le seguenti informazioni:
Punteggio, modificato da ''ScoreTimer''.
Un messaggio, ad esempio "Game Over" o "Get Ready!"
Un pulsante "Start" per iniziare il gioco.
Il nodo di base per gli elementi dell'interfaccia utente è :ref:'Control <class_Control>'. Per creare l'interfaccia utente, useremo due tipi di nodi :ref:'Control <class_Control>': :ref:'Label <class_Label>' e :ref:'Button <class_Button>'.
Crea i seguenti come figli del nodo HUD:
Label denominato
ScoreLabel.Label denominato
Message.Button denominato
StartButton.Timer denominato
MessageTimer.
Fare clic su ScoreLabel e digitare un numero nel campo Testo nell'Inspector. Il tipo di font predefinito per i nodi Control è piccolo e non scala bene. C'è un file di font incluso nelle risorse di gioco chiamato "Xolonium-Regular.ttf". Per utilizzare questo font, eseguire le operazioni seguenti:
Under "Theme Overrides > Fonts", choose "Load" and select the "Xolonium-Regular.ttf" file.
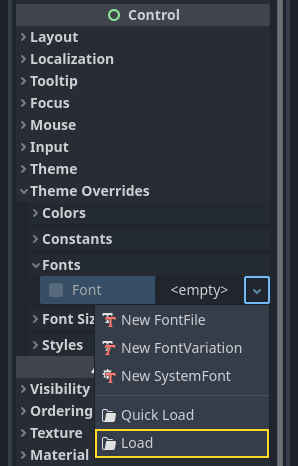
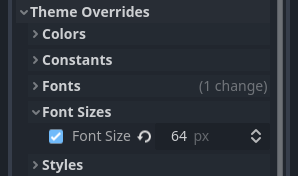
The font size is still too small, increase it to 64 under "Theme Overrides > Font Sizes".
Once you've done this with the ScoreLabel, repeat the changes for the Message and StartButton nodes.
Nota
Anchors: Control nodes have a position and size,
but they also have anchors. Anchors define the origin -
the reference point for the edges of the node.
Arrange the nodes as shown below. You can drag the nodes to place them manually, or for more precise placement, use "Anchor Presets".
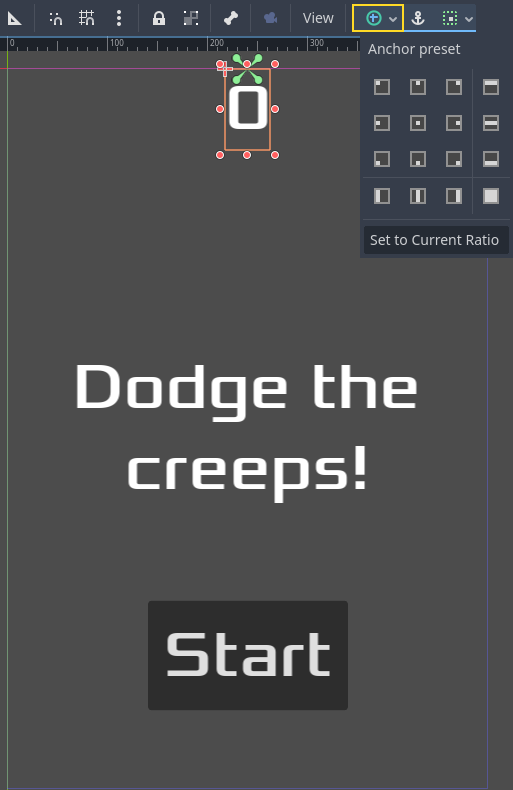
ScoreLabel
Add the text
0.Set the "Horizontal Alignment" and "Vertical Alignment" to
Center.Choose the "Anchor Preset"
Center Top.
Messaggio
Add the text
Dodge the Creeps!.Set the "Horizontal Alignment" and "Vertical Alignment" to
Center.Set the "Autowrap Mode" to
Word, otherwise the label will stay on one line.Under "Control - Layout/Transform" set "Size X" to
480to use the entire width of the screen.Choose the "Anchor Preset"
Center.
Collegamento di HUD a Main
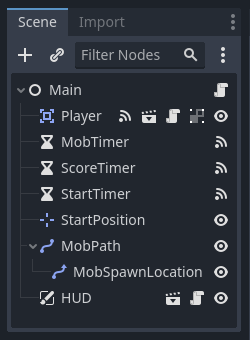
Ora che abbiamo finito di creare la scena HUD, tornare a Main. Istanza la scena HUD in Main come hai fatto per la scena Player. L'albero della scena completo dovrebbe essere simile a questo, quindi assicurati di non aver tralasciato nulla:
Ora dobbiamo collegare la funzionalità HUD al nostro script Main. Ciò richiede alcune aggiunte alla scena Main:
In the Node tab, connect the HUD's start_game signal to the new_game()
function of the Main node by clicking the "Pick" button in the "Connect a Signal"
window and selecting the new_game() method or type "new_game" below "Receiver Method"
in the window. Verify that the green connection icon now appears next to
func new_game() in the script.
In new_game(), aggiorna la visualizzazione del punteggio e mostra il messaggio "Get Ready":
$HUD.update_score(score)
$HUD.show_message("Get Ready")
var hud = GetNode<HUD>("HUD");
hud.UpdateScore(_score);
hud.ShowMessage("Get Ready!");
In game_over() dobbiamo chiamare la corrispondente funzione HUD:
$HUD.show_game_over()
GetNode<HUD>("HUD").ShowGameOver();
Finally, add this to _on_score_timer_timeout() to keep the display in sync
with the changing score:
$HUD.update_score(score)
GetNode<HUD>("HUD").UpdateScore(_score);
Avvertimento
Remember to remove the call to new_game() from
_ready() if you haven't already, otherwise
your game will start automatically.
Now you're ready to play! Click the "Play the Project" button. You will be asked
to select a main scene, so choose main.tscn.
Rimuovere i vecchi "creeps"
Se giochi fino al "Game Over" e inizi subito una nuova partita, i creeps del gioco precedente potrebbero essere ancora sullo schermo. Sarebbe meglio se scomparissero tutti all'inizio di una nuova partita. Abbiamo solo bisogno di un modo per dire a tutti i mob di sparire. Possiamo farlo con la funzione "gruppo".
Nella scena Mob, selezionare il nodo radice e cliccare sulla scheda "Nodo" accanto all'Inspector (lo stesso posto dove si trovano i segnali del nodo). Accanto a "Segnali", cliccare su "Gruppi" e si può digitare un nuovo nome per il gruppo e cliccare su "Aggiungi".

Now all mobs will be in the "mobs" group. We can then add the following line to
the new_game() function in Main:
get_tree().call_group("mobs", "queue_free")
// Note that for calling Godot-provided methods with strings,
// we have to use the original Godot snake_case name.
GetTree().CallGroup("mobs", Node.MethodName.QueueFree);
La funzione call_group() chiama la funzione cosi denominata su ogni nodo di un gruppo - cosi facendo diciamo ad ogni mob di cancellarsi.
The game's mostly done at this point. In the next and last part, we'll polish it a bit by adding a background, looping music, and some keyboard shortcuts.