Up to date
This page is up to date for Godot 4.2.
If you still find outdated information, please open an issue.
Processo d'importazione
Importing assets in Godot
To import assets in Godot, place your assets (image files, scenes, audio files, fonts, etc) directly in the project folder. There are 2 ways to achieve this:
For any file type: Copy files manually with your operating system's file manager.
For file types that can be imported by Godot: Drag-and-drop files from the operating system's file manager to the editor's FileSystem dock. This only works with resource file types (i.e. file types that Godot can import).
Godot will automatically import these files internally and keep the imported
resources hidden in a res://.godot/imported/ folder.
This means that when trying to access imported assets through code, you need to use the Resource Loader as it will automatically take into account where the internal files are saved. If you try and access an imported asset using the FileAccess class, it will work in the editor, but it will break in the exported project.
However, the Resource Loader cannot access non-imported files. Only the FileAccess class can.
Cambiare i parametri di importazione
Nota
Import parameters are only present in non-native Godot resource types.
This means Godot's own scene and resource file formats (.tscn, .scn,
.tres, .res) don't have import options you can select in the Import
dock.
To change the import parameters of an asset in Godot, select the relevant resource in the FileSystem dock:
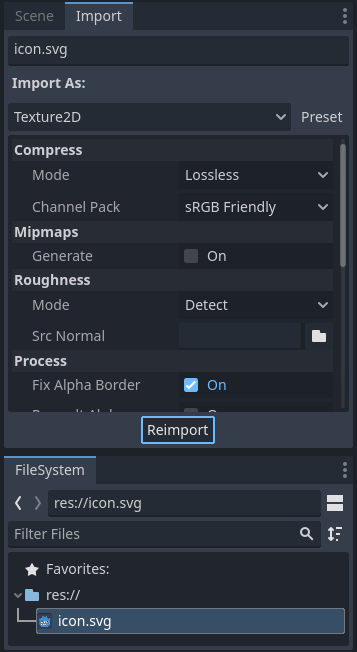
After adjusting the parameters, click Reimport. Be careful: if you select another file in the FileSystem dock before clicking Reimport, changes will be discarded. After clicking Reimport, the chosen parameters will only be used for this asset and on future reimports.
Anche cambiare i parametri di import di vari asset allo stesso tempo è possibile. Semplicemente selezionali assieme nel pannello delle risorse e i parametri configurati verranno impostati a tutti i selezionati durante la reimportazione.
Reimporting multiple assets
While working on a project you may find that several assets need to have the same parameters changed, such as enabling mipmaps, but you only want those specific parameters changed. To do this, select every asset you want to reimport in the file system. In the import tab there will now be a checkbox to the left of every import parameter.
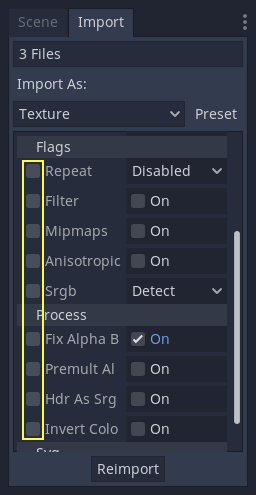
Select the checkbox of the parameters you want to change on your imported assets, then change the parameters normally. Finally, click the reimport button and every selected asset will be reimported with only those parameters changed.
Reimportazione automatica
Quando il checksum MD5 dell'asset originale cambia, Godot lo reimporta automaticamente, applicando le configurazioni della preconfigurazione (o preset) per quell'asset specifico.
File generati
Importing will add an extra <asset>.import file next to the source file,
containing the import configuration.
Make sure to commit these files to your version control system, as these files contain important metadata.
$ ls
example.png
example.png.import
project.godot
Additionally, extra assets will be present in the hidden
res://.godot/imported/ folder:
$ ls .godot/imported
example.png-218a8f2b3041327d8a5756f3a245f83b.ctex
example.png-218a8f2b3041327d8a5756f3a245f83b.md5
If any of the files present in this folder is erased (or the whole folder), the
asset or assets will be reimported automatically. As such, committing the
.godot/ folder to the version control system is not recommended. While
committing this folder can shorten reimporting time when checking out on another
computer, it requires considerably more space and bandwidth.
The default version control metadata that can be generated on project creation
will automatically ignore the .godot/ folder.
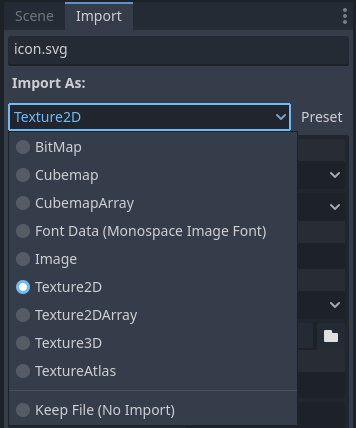
Cambiare il tipo della risorsa da importare
Some source assets can be imported as different types of resources. For this, select the relevant type of resource desired then click Reimport:
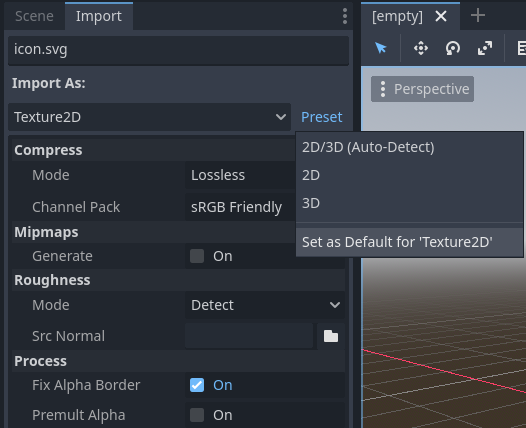
Cambiare i parametri di importazione standard
Different types of projects might require different defaults. Changing the import options to a predefined set of options can be achieved by using the Preset... Menu. Besides some resource types offering presets, the default settings can be saved and cleared too:
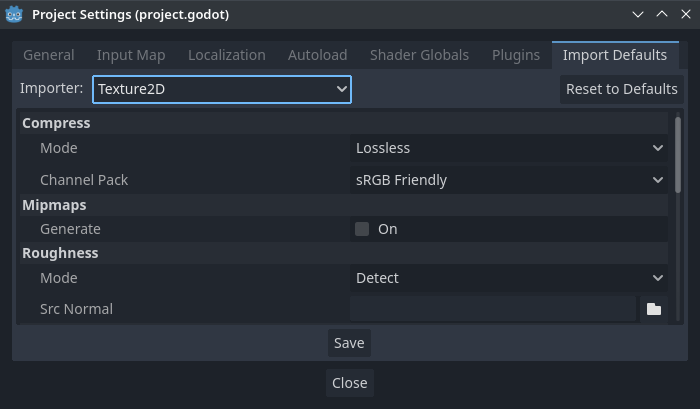
The default import parameters for a given resource type can be changed project-wide using the Import Defaults tab of the Project Settings dialog:
Further reading
This workflow takes a little time to get used to, but it enforces a more correct way to deal with resources.
There are many types of assets available for import. Continue reading to understand how to work with all of them: