Work in progress
The content of this page was not yet updated for Godot
4.5
and may be outdated. If you know how to improve this page or you can confirm
that it's up to date, feel free to open a pull request.
2D パーティクル・システム
導入
パーティクル・システムは、火花、火、魔法の粒子、煙、霧などの複雑な物理的効果をシミュレートするために使用されます。
その考えは、 "particle" が一定の間隔でそして一定の寿命で放出されるということです。 その寿命の間、すべての粒子は同じ基本的なふるまいを持ちます。 各パーティクルを他のパーティクルとは異なるものにし、より有機的に見えるのは、各パラメータに関連付けられた "randomness" です。基本的に、パーティクルシステムを作成することは、基本物理パラメーターを設定してから、それらにランダム性を追加することを意味します。
パーティクルノード
Godotは、2Dパーティクル用に2つの異なるノード、GPUParticles2D および CPUParticles2D を提供します。 GPUParticles2Dはより高度で、GPUを使用してパーティクルエフェクトを処理します。CPUParticles2Dは、GPUParticles2Dとほぼ同等の機能を備えたCPU駆動のオプションですが、大量のパーティクルを使用するときはパフォーマンスが低下します。 一方で、CPUParticles2DはローエンドシステムやGPUがボトルネックになる状況でよい動作をするでしょう。
GPUParticles2D が ParticleProcessMaterial (またはオプションとしてカスタムシェーダーも)を通して設定されているのに対して、同様のオプション設定は CPUParticles2Dの node プロパティを通して設定されます(trail(軌跡)の設定を除く)。
Going forward there are no plans to add new features to CPUParticles2D, though pull requests to add features already in GPUParticles2D will be accepted. For that reason we recommend using GPUParticles2D unless you have an explicit reason not to.
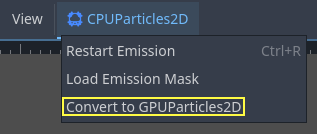
You can convert a CPUParticles2D node into a GPUParticles2D node by clicking on the node in the scene tree, selecting the 2D workspace, and selecting CPUParticles2D > Convert to GPUParticles2D in the toolbar.
It is also possible to convert a GPUParticles2D node to a CPUParticles2D node, however there may be issues if you use GPU-only features.
このチュートリアルの残りの部分では、GPUParticles2Dノードを使用します。最初に、GPUParticles2Dノードをシーンに追加します。そのノードを作成すると、白い点のみが作成され、インスペクタのParticles2Dノードの横に警告アイコンがあることに気付くでしょう。これは、ノードが機能するためにParticlesMaterialが必要だからです。
ParticleProcessMaterial
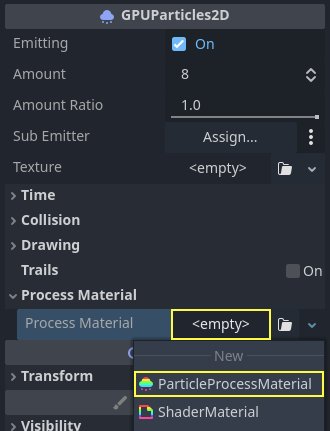
パーティクル・ノードにプロセス・マテリアルを追加するには、インスペクタパネルの Process Material に移動します。 Material の横のボックスをクリックし、ドロップダウン・メニューから New ParticleProcessMaterial を選択します。
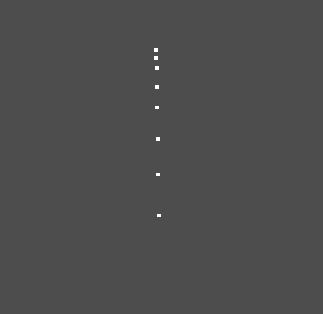
これで、GPUParticles2Dノードが下方に白いポイントを放出するようになるはずです。
テクスチャ
A particle system can use a single texture or an animation flipbook. A flipbook is a texture that contains several frames of animation that can be played back, or chosen at random during emission. This is equivalent to a spritesheet for particles.
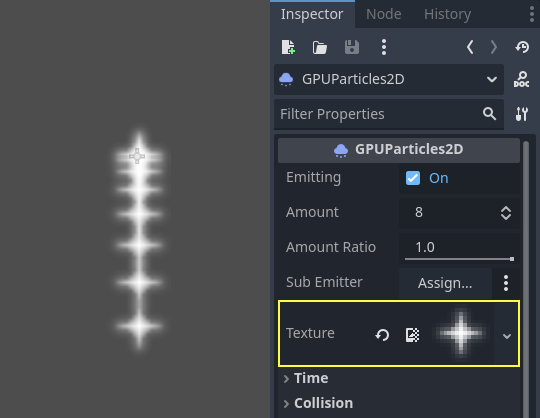
The texture is set via the Texture property:
Using an animation flipbook
Particle flipbooks are suited to reproduce complex effects such as smoke, fire, explosions. They can also be used to introduce random texture variation, by making every particle use a different texture. You can find existing particle flipbook images online, or pre-render them using external tools such as Blender or EmberGen.
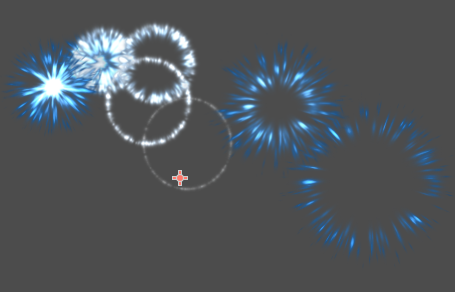
Example of a particle system that uses a flipbook texture
Using an animation flipbook requires additional configuration compared to a single texture. For demonstration purposes, we'll use this texture with 5 columns and 7 rows (right-click and choose Save as…):
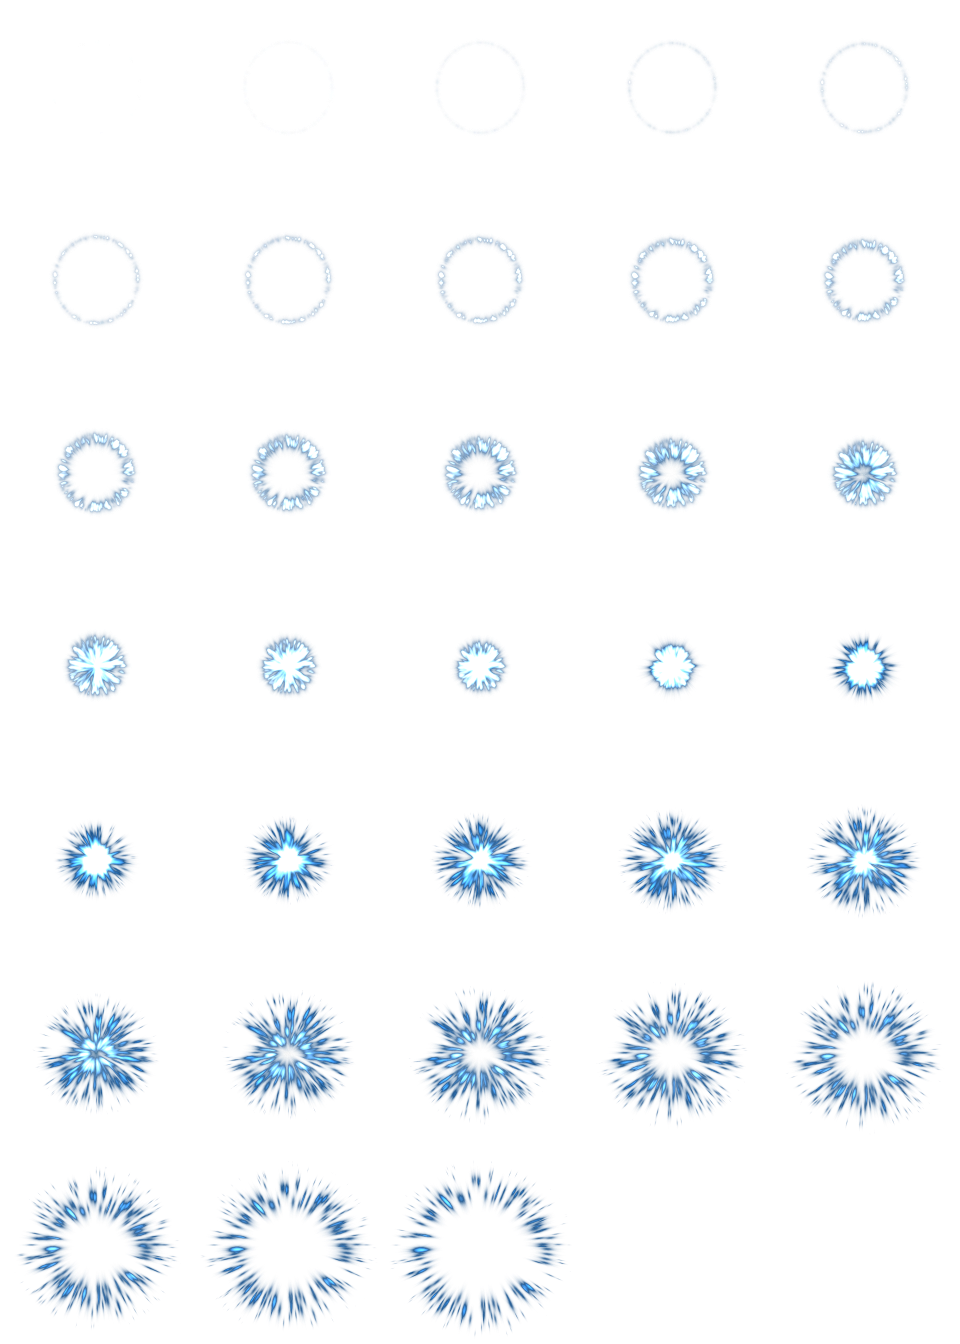
Credit: JoesAlotofthings (CC BY 4.0)
To use an animation flipbook, you must create a new CanvasItemMaterial in the Material section of the GPUParticles2D (or CPUParticles2D) node:
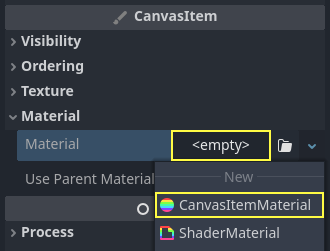
Creating a CanvasItemMaterial at the bottom of the particles node inspector
In this CanvasItemMaterial, enable Particle Animation and set H Frames and V Frames to the number of columns and rows present in your flipbook texture:
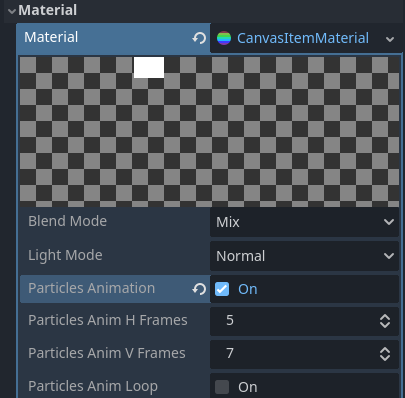
Configuring the CanvasItemMaterial for the example flipbook texture
Once this is done, the Animation section in ParticleProcessMaterial (for GPUParticles2D) or in the CPUParticles2D inspector will be effective.
Tip
If your flipbook texture has a black background instead of a transparent background, you will also need to set the blend mode to Add instead of Mix for correct display. Alternatively, you can modify the texture to have a transparent background in an image editor. In GIMP, this can be done using the Color > Color to Alpha menu.
時間パラメーター
生存時間
すべてのパーティクルが生き続ける秒単位の時間。ライフタイムが終了すると、新しいパーティクルが作成されて置き換えられます。
Lifetime: 0.5
Lifetime: 4.0
単発
When enabled, a GPUParticles2D node will emit all of its particles once and then never again.
前処理
パーティクルシステムは、パーティクルの放出がゼロから始まり、放出を開始します。これは、シーンを読み込むときに不便になる場合があり、トーチ、ミストなどのシステムは、入力した瞬間に放出を開始します。プリプロセスは、システムが実際に最初に描画される前に指定された秒数を処理するために使用されます。
スピードスケール
速度スケールのデフォルト値は 1 で、パーティクルシステムの速度を調整するために使用されます。値を小さくすると粒子が遅くなり、値を大きくすると粒子が非常に速くなります。
爆発性
ライフタイムが 1 で、パーティクルが10個ある場合、0.1秒ごとにパーティクルが放出されることを意味します。explosiveness パラメーターはこれを変更し、パーティクルをすべて一緒に放出させます。範囲は次のとおりです。
0: 一定の間隔でパーティクルを放出します(既定値)。
1: すべてのパーティクルを同時に放出します。
中間の値も使用できます。この機能は、パーティクルの爆発や突然のバーストを作成する場合に便利です。
ランダム性
すべての物理パラメーターをランダム化できます。ランダム値の範囲は 0 から 1 です。パラメーターをランダム化する数式は次のとおりです:
initial_value = param_value + param_value * randomness
Fixed FPS
この設定を使用して、固定FPSでレンダリングするようにパーティクルシステムを設定できます。たとえば、値を 2 に変更すると、パーティクルは毎秒2フレームでレンダリングされます。これにより、パーティクルシステム自体の速度が低下することはありません。
注釈
Godot 4.3 does not currently support physics interpolation for 2D particles. As a workaround, disable physics interpolation for the particles node by setting Node > Physics Interpolation > Mode at the bottom of the inspector.
Fract Delta
Setting Fract Delta to true results in fractional delta calculation,
which has a smoother particles display effect.
This increased smoothness stems from higher accuracy.
The difference is more noticeable in systems with high randomness or fast-moving particles.
It helps maintain the visual consistency of the particle system,
making sure that each particle's motion aligns with its actual lifespan.
Without it, particles might appear to jump or move more than they should in a single frame
if they are emitted at a point within the frame.
The greater accuracy has a performance tradeoff,
particularly in systems with a higher amount of particles.
描画パラメーター
可視領域矩形(Visibility Rect)
可視領域を設定する四角形は、画面上のパーティクルの可視性を制御します。この四角形がビューポートの外側にある場合、エンジンはパーティクルを画面にレンダリングしません。
長方形の W および H プロパティは、それぞれ幅と高さを制御します。X および Y プロパティは、パーティクルエミッタを基準とした長方形の左上隅の位置を制御します。
You can have Godot generate a Visibility Rect automatically using the toolbar above the 2d view. To do so, select the GPUParticles2D node and Click Particles > Generate Visibility Rect. Godot will simulate the Particles2D node emitting particles for a few seconds and set the rectangle to fit the surface the particles take.
Generation Time (sec) オプションを使用して、放出時間を制御できます。最大値は25秒です。パーティクルが移動する時間が長くなる場合は、Particles2Dノードの preprocess の継続時間を一時的に変更できます。
Local Coords
デフォルトでは、このオプションはオンになっており、パーティクルが放出される空間がノードに対して相対的であることを意味します。ノードを移動すると、すべてのパーティクルも一緒に移動します:
無効にすると、パーティクルはグローバルな空間に放出され、ノードを移動しても、既に放出されたパーティクルは影響を受けません。
Draw Order
これにより、個々のパーティクルが描画される順序がコントロールされます。Index は、パーティクルが放出順序に従って描画される事を意味します(デフォルト)。Lifetime は、残っている寿命の順に描画されることを意味します。
Particle Process Material Settings
For information on the settings in the ParticleProcessMaterial see this page.