Up to date
This page is up to date for Godot 4.2.
If you still find outdated information, please open an issue.
Introduction aux fonctions d'animation
Le nœud AnimationPlayer vous permet de créer des animations simples ou complexes.
Dans ce guide, vous apprendrez à :
Travailler avec le panneau d'animation
Animer n'importe quelle propriété de n'importe quel nœud
Créer une animation simple
In Godot, you can animate anything available in the Inspector, such as Node transforms, sprites, UI elements, particles, visibility and color of materials, and so on. You can also modify values of script variables and even call functions.
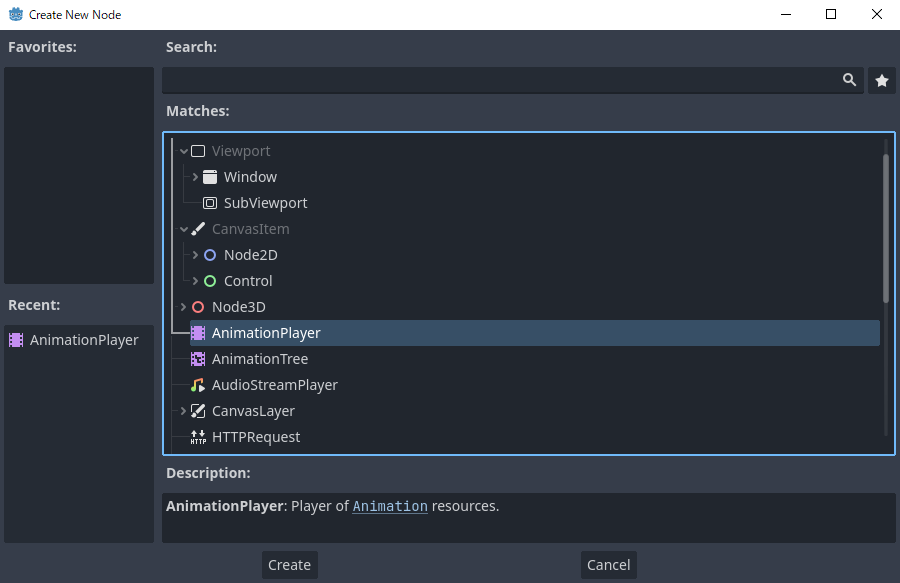
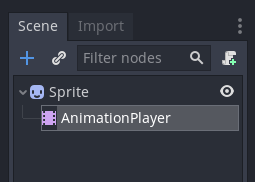
Créer un nœud AnimationPlayer
Pour utiliser les outils d'animation, nous devons d'abord créer un nœud AnimationPlayer.
The AnimationPlayer node type is the data container for your animations. One AnimationPlayer node can hold multiple animations, which can automatically transition to one another.
Le nœud AnimationPlayer
After you create an AnimationPlayer node, click on it to open the Animation Panel at the bottom of the viewport.

La position du panneau d'animation
The animation panel consists of four parts:
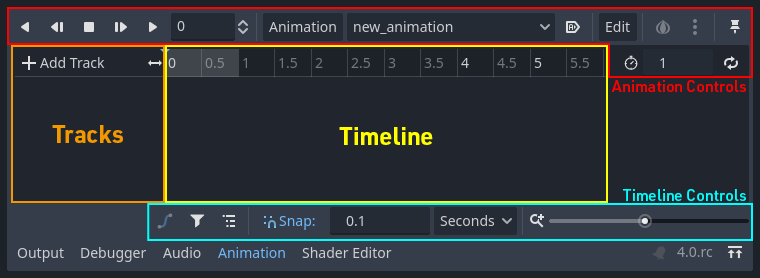
Le panneau d'animation
Contrôles d'animation (c.-à-d. ajouter, charger, enregistrer et supprimer des animations)
La liste des pistes
La timeline avec les clés d'animation
The timeline and track controls, where you can zoom the timeline and edit tracks, for example.
L'animation par ordinateur repose sur des clés d'animation
A keyframe defines the value of a property at a point in time.
Diamond shapes represent keyframes in the timeline. A line between two keyframes indicates that the value doesn't change between them.
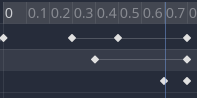
clés d'animation dans Godot
You set values of a node's properties and create animation keyframes for them. When the animation runs, the engine will interpolate the values between the keyframes, resulting in them gradually changing over time.
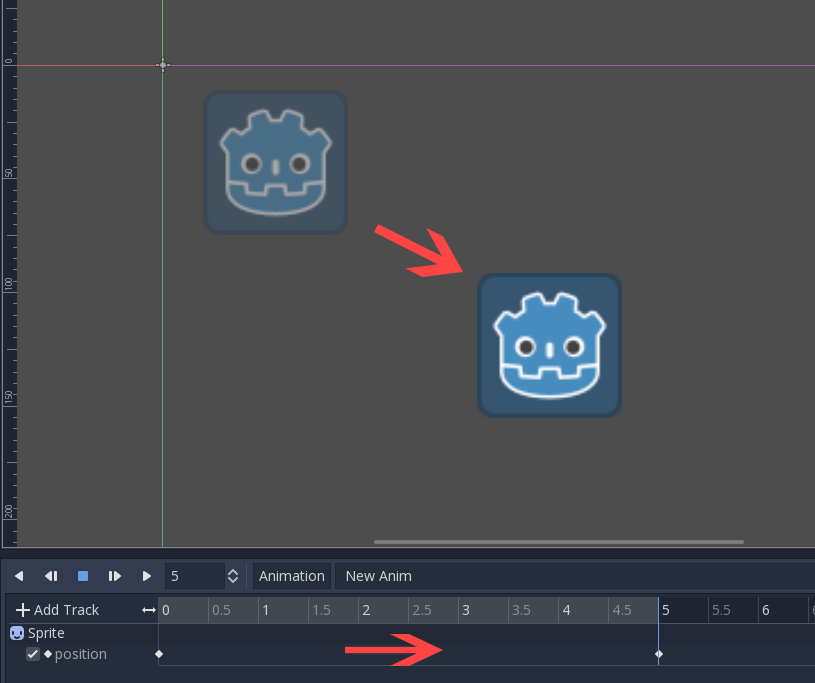
Deux clés d'animation sont tout ce qu'il faut pour obtenir un mouvement fluide
The timeline defines how long the animation will take. You can insert keyframes at various points, and change their timing.

La timeline dans le panneau d'animation
Each line in the Animation Panel is an animation track that references a
Normal or Transform property of a node. Each track stores a path to
a node and its affected property. For example, the position track
in the illustration refers to the position property of the Sprite2D
node.

Exemple de piste d'animation de type Normal
Astuce
If you animate the wrong property, you can edit a track's path at any time
by double-clicking on it and typing the new path. Play the animation using the
"Play from beginning" button  (or pressing
Shift + D on keyboard) to see the changes instantly.
(or pressing
Shift + D on keyboard) to see the changes instantly.
Tutoriel : Création d'une animation simple
Configuration de la scène
Pour ce didacticiel, nous allons créer un nœud Sprite avec un AnimationPlayer comme enfant. Nous allons animer le sprite pour qu'il se déplacer entre deux points sur l'écran.
Notre configuration de scène
Avertissement
AnimationPlayer inherits from Node instead of Node2D or Node3D, which means that the child nodes will not inherit the transform from the parent nodes due to a bare Node being present in the hierarchy.
Par conséquent, il n'est pas recommandé d'ajouter des nœuds qui ont une transformation 2D/3D comme enfant d'un nœud AnimationPlayer.
The sprite holds an image texture. For this tutorial, select the Sprite2D node, click Texture in the Inspector, and then click Load. Select the default Godot icon for the sprite's texture.
Adding an animation
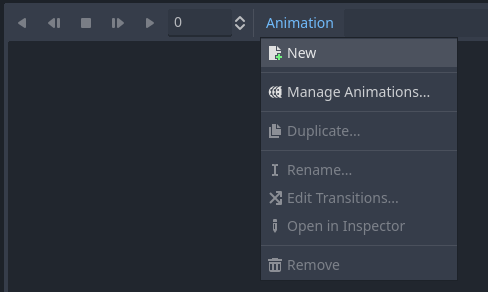
Select the AnimationPlayer node and click the "Animation" button in the
animation editor. From the list, select "New" ( ) to add a new
animation. Enter a name for the animation in the dialog box.
) to add a new
animation. Enter a name for the animation in the dialog box.
Ajouter une nouvelle animation
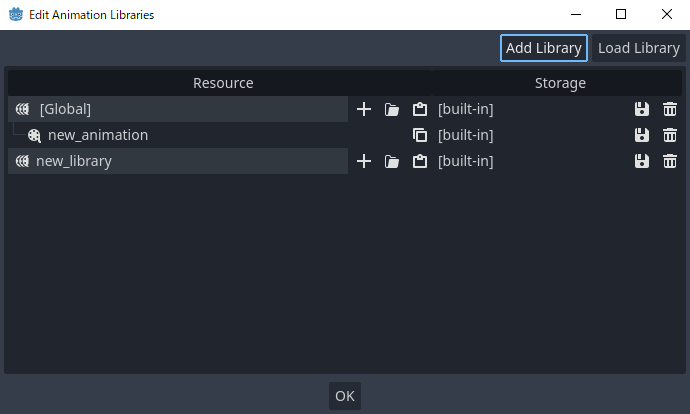
Manage an animation libraries
For reusability, the animation is registered in a list in the animation library resource. If you add an animation to AnimationPlayer without specifying any particular settings, the animation will be registered in the [Global] animation library that AnimationPlayer has by default.
Manage animations
If there are multiple animation libraries and you try to add an animation, a dialog box will appear with options.
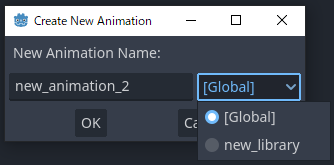
Add a new animation with library option
Ajout d'une piste
To add a new track for our sprite, select it and take a look at the toolbar:

Les boutons convénients
These switches and buttons allow you to add keyframes for the selected node's location, rotation, and scale. Since we are only animating the sprite's position, make sure that only the location switch is selected. The selected switches are blue.
Click on the key button to create the first keyframe. Since we don't have a track set up for the Position property yet, Godot will offer to create it for us. Click Create.
Godot will create a new track and insert our first keyframe at the beginning of the timeline:

La piste de sprite
La deuxième clé d'animation
We need to set our sprite's end location and how long it will take for it to get there.
Let's say we want it to take two seconds to move between the points. By default, the animation is set to last only one second, so change the animation length to 2 in the controls on the right side of the animation panel's timeline header.

Durée de l'animation
Now, move the sprite right, to its final position. You can use the Move tool in the toolbar or set the Position's X value in the Inspector.
Click on the timeline header near the two-second mark in the animation panel and then click the key button in the toolbar to create the second keyframe.
Lancer l'animation
Cliquez sur le bouton "Jouer depuis le début" ().
Yeah ! Notre animation fonctionne :
L'animation
Allers et retours
Godot has an interesting feature that we can use in animations. When Animation Looping is set but there's no keyframe specified at the end of the animation, the first keyframe is also the last.
This means we can extend the animation length to four seconds now, and Godot will also calculate the frames from the last keyframe to the first, moving our sprite back and forth.

Boucle d'animation
You can change this behavior by changing the track's loop mode. This is covered in the next chapter.
Paramètres de la piste
Each track has a settings panel at the end, where you can set its update mode, track interpolation, and loop mode.

Paramètres de la piste
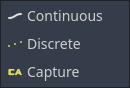
Le mode de mise à jour d'une piste indique à Godot quand mettre à jour les valeurs des propriétés. Cela peut l'être :
Continuous: Update the property on each frame
Discrete: Only update the property on keyframes
Capture: if the first keyframe's time is greater than
0.0, the current value of the property will be remembered and will be blended with the first animation key. For example, you could use the Capture mode to move a node that's located anywhere to a specific location.
Mode piste
You will usually use "Continuous" mode. The other types are used to script complex animations.
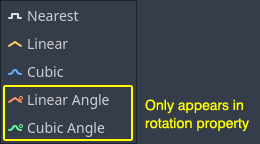
Track interpolation tells Godot how to calculate the frame values between keyframes. These interpolation modes are supported:
Le plus proche : définit la plus valeur de la clé d'animation la plus proche
Linéaire : Change la valeur en se basant sur un calcul linéaire entre deux clés d'animation
Cubique : change la valeur en se basant sur un calcul par fonction cubique entre deux clés d'animation
Linear Angle (Only appears in rotation property): Linear mode with shortest path rotation
Cubic Angle (Only appears in rotation property): Cubic mode with shortest path rotation
Interpolation de piste
With Cubic interpolation, animation is slower at keyframes and faster between them, which leads to more natural movement. Cubic interpolation is commonly used for character animation. Linear interpolation animates changes at a fixed pace, resulting in a more robotic effect.
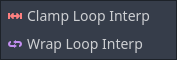
Godot supports two loop modes, which affect the animation when it's set to loop:
Modes de boucle
Clamp loop interpolation : Lorsque cette option est sélectionnée, l'animation s'arrête après la dernière clé d'animation pour cette piste. Lorsque la première clé d'animation est atteinte à nouveau, l'animation se réinitialise à ses valeurs.
Wrap loop interpolation : Lorsque cette option est sélectionnée, Godot calcule l'animation après la dernière clé d'animation pour atteindre à nouveau les valeurs de la première clé d'animation.
Clés d'animation pour d'autres propriétés
Godot's animation system isn't restricted to position, rotation, and scale. You can animate any property.
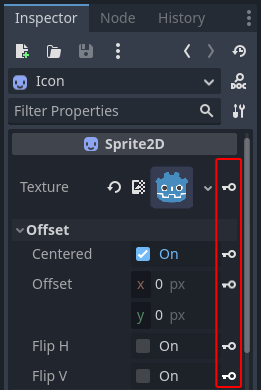
If you select your sprite while the animation panel is visible, Godot will display a small keyframe button in the Inspector for each of the sprite's properties. Click on one of these buttons to add a track and keyframe to the current animation.
Clés d'animation pour d'autres propriétés
Modifier les clés d'animation
You can click on a keyframe in the animation timeline to display and edit its value in the Inspector.
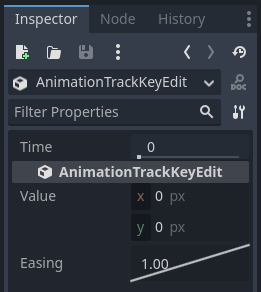
Éditeur clé d'animation éditant une clé d'animation
You can also edit the easing value for a keyframe here by clicking and dragging its easing curve. This tells Godot how to interpolate the animated property when it reaches this keyframe.
You can tweak your animations this way until the movement "looks right."
Utiliser les pistes RESET
Vous pouvez configurer une animation spéciale RESET pour contenir la "pose par défaut". Ceci est utilisé pour s'assurer que la pose par défaut est restaurée lorsque vous sauvegardez la scène et que vous l'ouvrez à nouveau dans l'éditeur.
Pour les pistes existantes, vous pouvez ajouter une animation appelée "RESET" (sensible à la casse), puis ajouter des pistes pour chaque propriété que vous souhaitez réinitialiser. La seule image clé doit être au temps 0, et donnez-lui la valeur par défaut souhaitée pour chaque piste.
Si la propriété Reset On Save de l'AnimationPlayer est mise à true, la scène sera sauvegardée avec les effets de l'animation reset appliqués (comme si elle avait été recherchée au temps 0.0). Cela n'affecte que le fichier sauvegardé - les pistes de propriétés dans l'éditeur restent là où elles étaient.
If you want to reset the tracks in the editor, select the AnimationPlayer node, open the Animation bottom panel then choose Apply Reset in the animation editor's Edit dropdown menu.
Lors de l'ajout de pistes sur de nouvelles animations, l'éditeur vous demandera de créer automatiquement une piste de réinitialisation lorsque vous utilisez l'icône d'image clé à côté d'une propriété dans l'inspecteur. Cela ne s'applique pas aux pistes créées avec des versions de Godot antérieures à 3.4, car la fonction de piste de réinitialisation de l'animation a été ajoutée dans la version 3.4.
Note
RESET tracks is also used as a reference value for blending. See also For better blending.