Work in progress
The content of this page was not yet updated for Godot
4.2
and may be outdated. If you know how to improve this page or you can confirm
that it's up to date, feel free to open a pull request.
Prototyping levels with CSG
CSG stands for Constructive Solid Geometry, and is a tool to combine basic shapes or custom meshes to create more complex shapes. In 3D modeling software, CSG is mostly known as "Boolean Operators".
Level prototyping is one of the main uses of CSG in Godot. This technique allows users to create the most common shapes by combining primitives. Interior environments can be created by using inverted primitives.
注釈
The CSG nodes in Godot are mainly intended for prototyping. There is no built-in support for UV mapping or editing 3D polygons (though extruded 2D polygons can be used with the CSGPolygon3D node).
If you're looking for an easy to use level design tool for a project, you may want to use Qodot instead. It lets you design levels using TrenchBroom and import them in Godot.
参考
You can check how to use CSG nodes to build various shapes (such as stairs or roads) using the Constructive Solid Geometry demo project.
CSGノードの入門
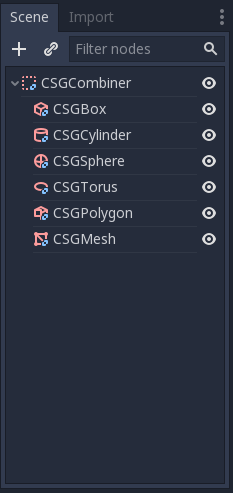
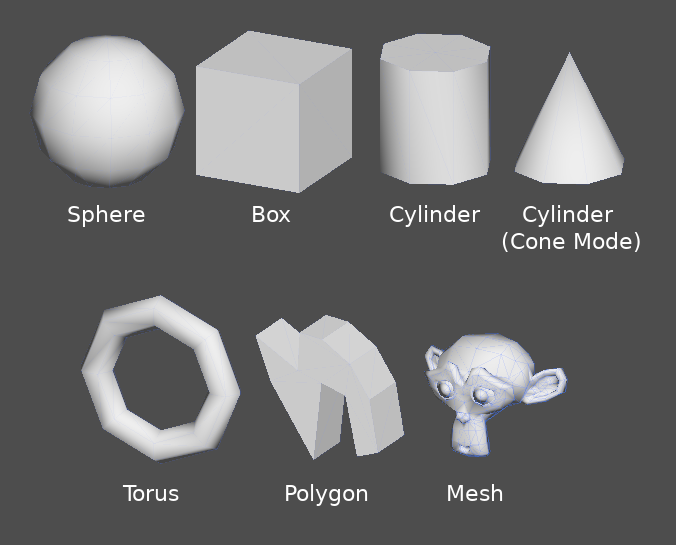
Godotの他の機能と同様に、CSGもノードとしてサポートされています。これらがCSGノードです:
CSGCylinder3D (also supports cone)
CSGツール機能
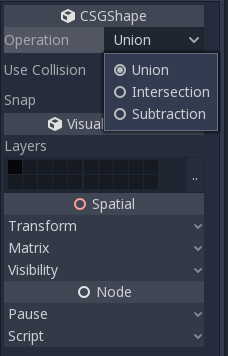
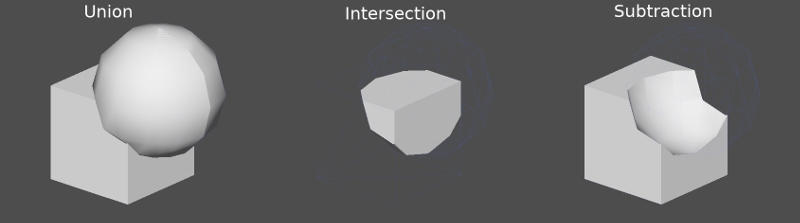
すべてのCSGノードは3種類のブーリアン演算に対応しています:
Union (和集合): プリミティブのジオメトリを結合させて、共通部分のジオメトリは除去されます。
Intersection (共通部分): ジオメトリの共通部分のみを残し、他は除去されます。
Subtraction (差集合): 第一の形状を、第二の形状で差し引いて、形状に穴を開けます。
CSGPolygon
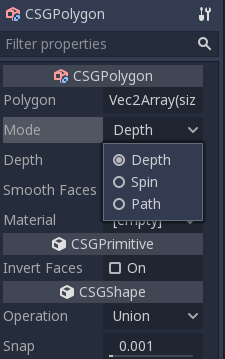
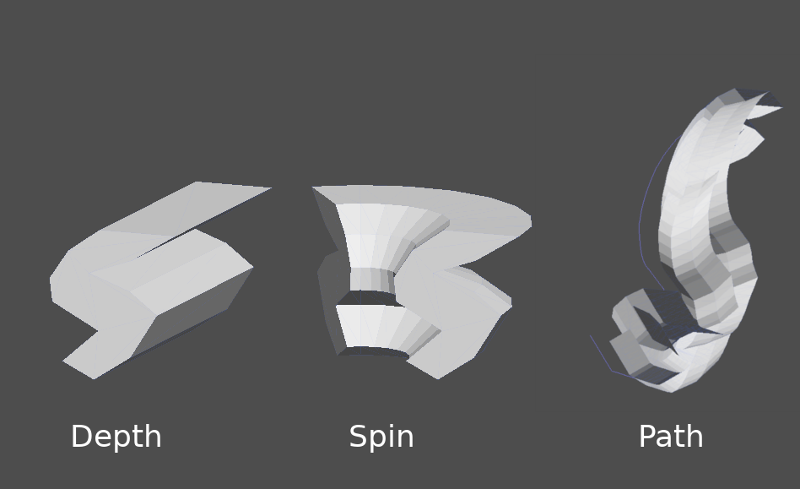
The CSGPolygon3D node extrude along a Polygon drawn in 2D (in X, Y coordinates) in the following ways:
Depth (深さ): 指定された量で後ろに押し出します。
Spin (回転): 原点を中心に、回転しながら押し出します。
Path (パス): Pathノードに沿って押し出します。ロフティングともよく呼ばれる操作です。
注釈
The Path mode must be provided with a Path3D node to work. In the Path node, draw the path and the polygon in CSGPolygon3D will extrude along the given path.
カスタム メッシュ
Any mesh can be used for CSGMesh3D; the mesh can be modeled in other software and imported into Godot. Multiple materials are supported. There are some restrictions for geometry:
閉じていること、
自己交差していないこと、
内部に面がないこと、
すべてのエッジは2つの面のみに接していること。
CSGCombiner3D
The CSGCombiner3D node is an empty shape used for organization. It will only combine children nodes.
処理の順番
Every CSG node will first process its children nodes and their operations: union, intersection, or subtraction, in tree order, and apply them to itself one after the other.
注釈
複雑なメッシュは処理に時間がかかるので、性能を上げるためには、CSGジオメトリを比較的シンプルなままに保ってください。(テーブルや部屋の物体など) 複数の物体を一緒にする場合は、それぞれ別のCSGツリーに分けましょう。ひとつのツリーに多くのオブジェクトを入れすぎると、やがて性能に影響が出始めます。バイナリ演算は本当に必要な時にだけ使用するようにしてください。
レベルのプロトタイプ作成
CSGツールの練習に、部屋のプロトタイプを作ってみましょう。
ちなみに
CSGシェイプを組み合わせるときは、平行投影のほうが見えやすくなります。
これから作るレベルには次のような物体があります:
部屋、
ベッド、
ランプ、
机、
本棚。
Create a scene with a Node3D node as root node.
ちなみに
環境のデフォルトの照明設定では、角度によってはシェーディングがきれいに表示されません。3Dビューポート メニューにて表示モードをオーバードロー表示にするか、あるいは DirectionalLight をひとつ追加すれば、はっきりと見えるようになります。
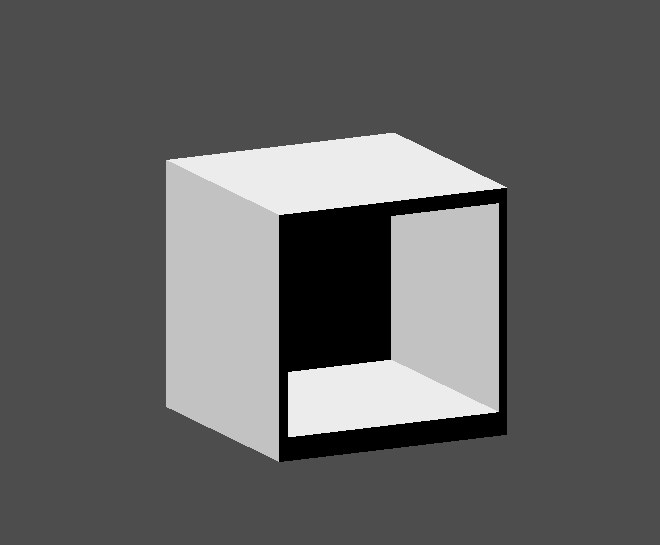
Create a CSGBox3D and name it room, enable Invert Faces and change the
dimensions of your room.

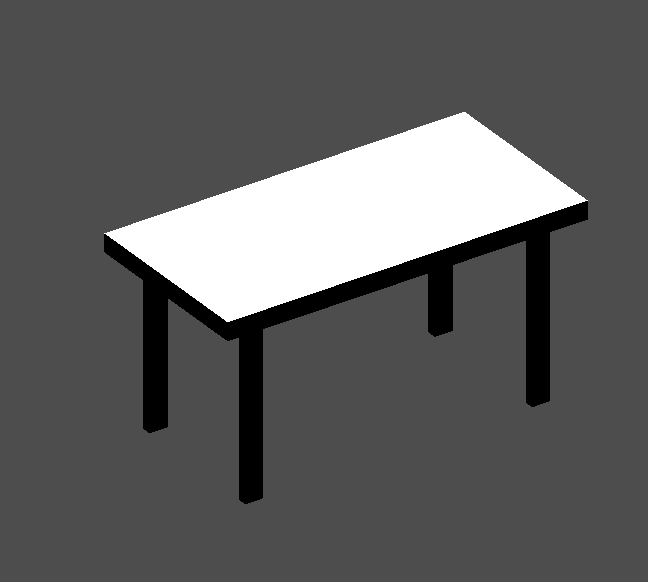
Next, create a CSGCombiner3D and name it desk.
デスクにはひとつの平面と4本の脚があります:
Create 1 CSGBox3D children node in Union mode for the surface and adjust the dimensions.
Create 4 CSGBox3D children nodes in Union mode for the legs and adjust the dimensions.
それらの位置を調節してデスクの形にしましょう。
注釈
CSG nodes inside a CSGCombiner3D will only process their operation within the combiner. Therefore, CSGCombiner3Ds are used to organize CSG nodes.
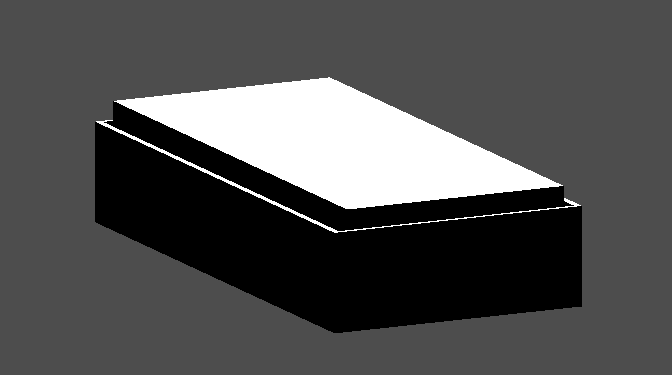
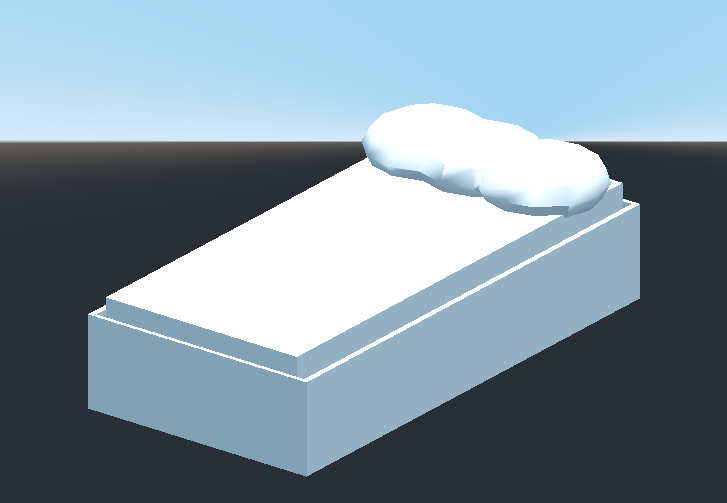
Create a CSGCombiner3D and name it bed.
Our bed consists of 3 parts: the bed, the mattress and a pillow. Create a CSGBox3D and adjust its dimension for the bed. Create another CSGBox3D and adjust its dimension for the mattress.
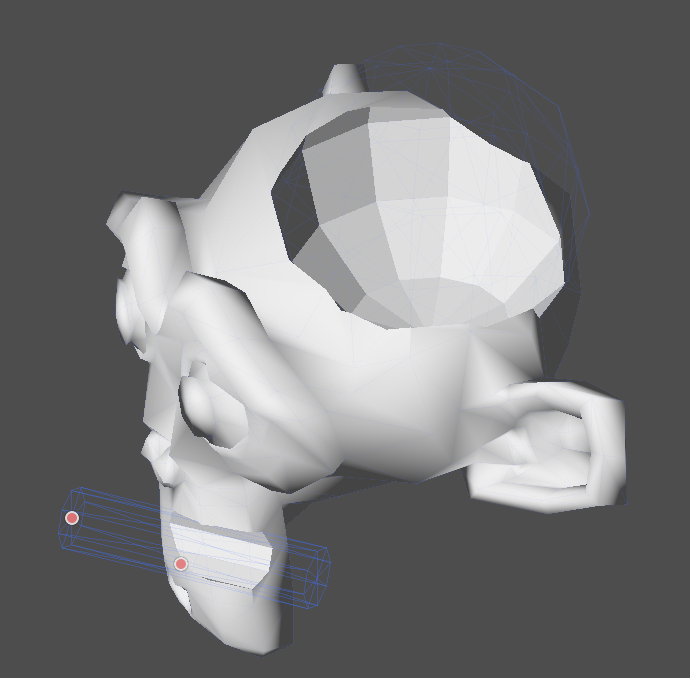
We will create another CSGCombiner3D named pillow as the child of bed.
The scene tree should look like this:
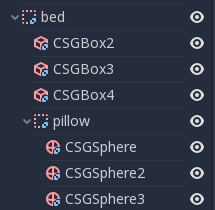
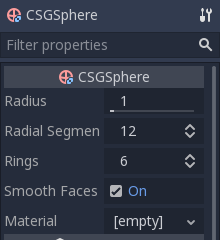
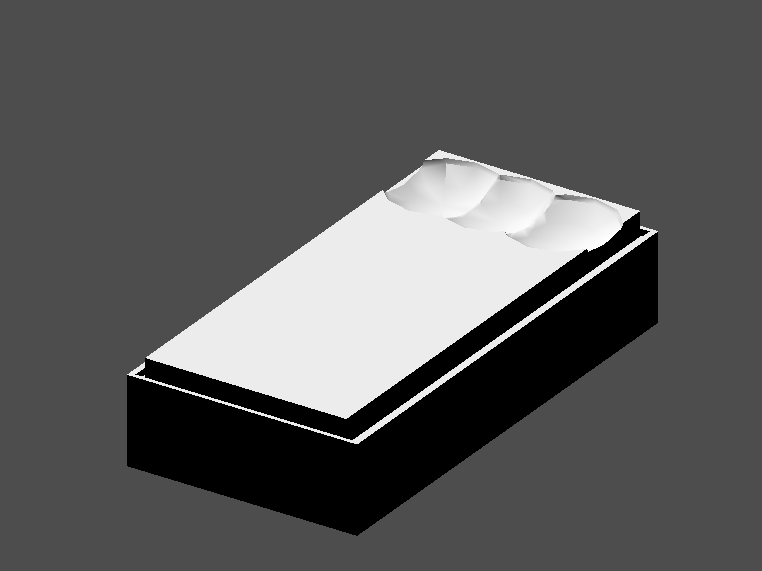
We will combine 3 CSGSphere3D nodes in Union mode to form a pillow. Scale the Y axis of the spheres and enable Smooth Faces.
pillowノードを選択して、モードをSubtraction (差)に切り替えます。すると組み合わせた球体により、マットレスに穴が開きます。
Try to re-parent the pillow node to the root Node3D node; the hole will
disappear.
注釈
This is to illustrate the effect of CSG processing order. Since the root node is not a CSG node, the CSGCombiner3D nodes are the end of the operations; this shows the use of CSGCombiner3D to organize the CSG scene.
結果を確かめてから、親の変更とモード変更を取り消すと、ベッドはこのようになっているはずです:
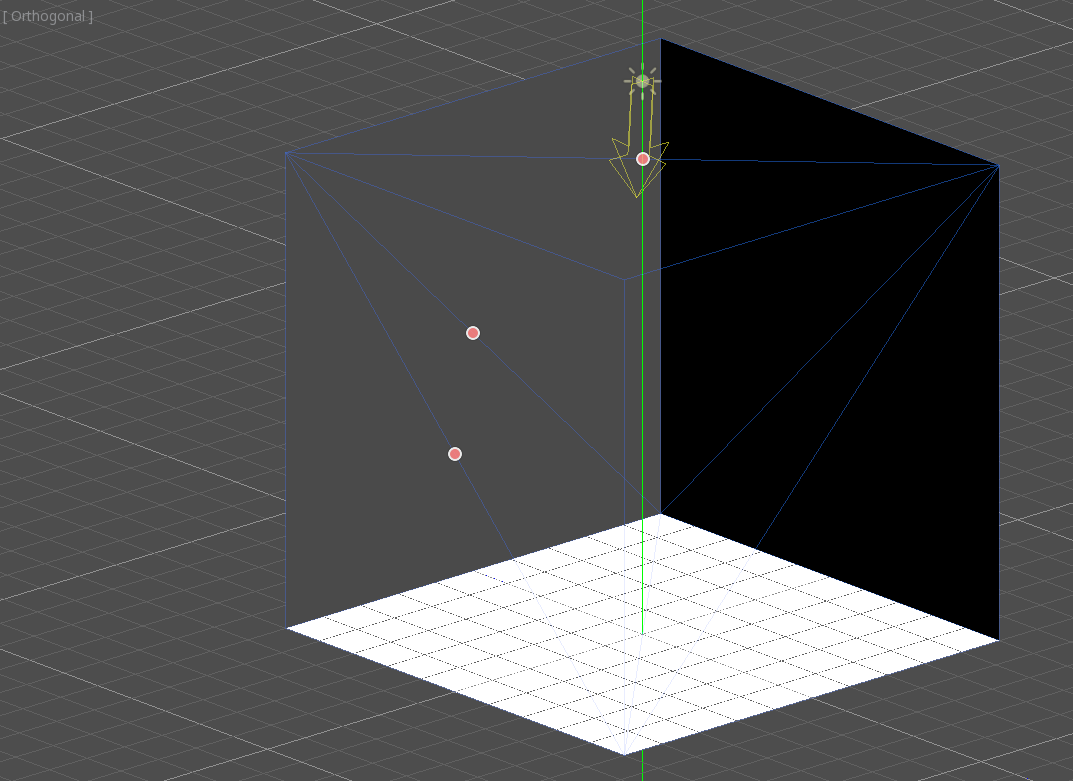
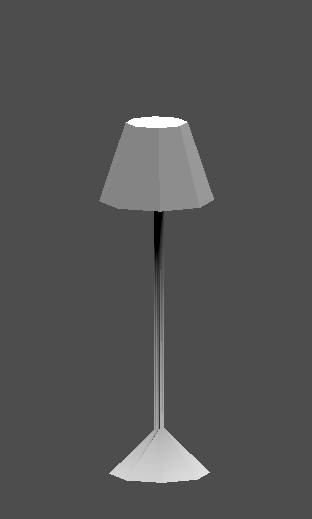
Create a CSGCombiner3D and name it lamp.
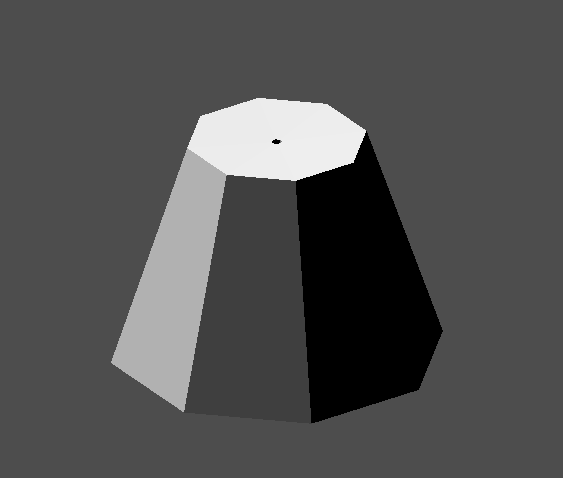
A lamp consists of 3 parts: the stand, the pole and the lampshade. Create a CSGCylinder3D, enable the Cone option and make it the stand. Create another CSGCylinder3D and adjust the dimensions to use it as a pole.
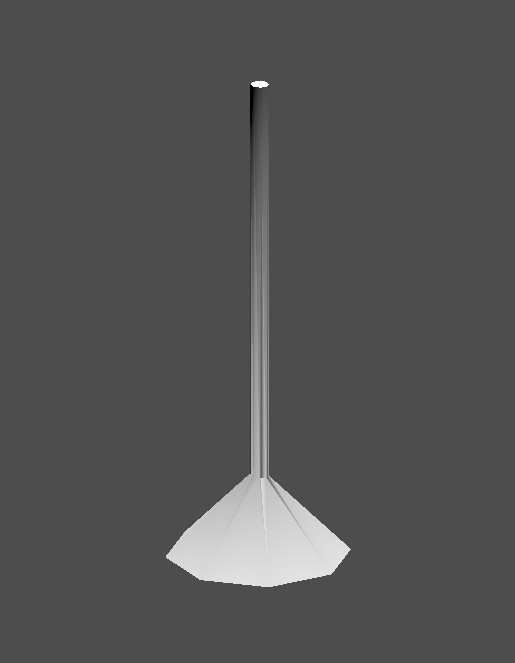
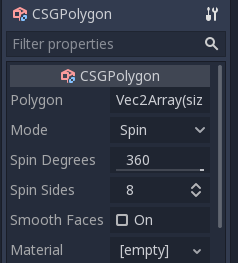
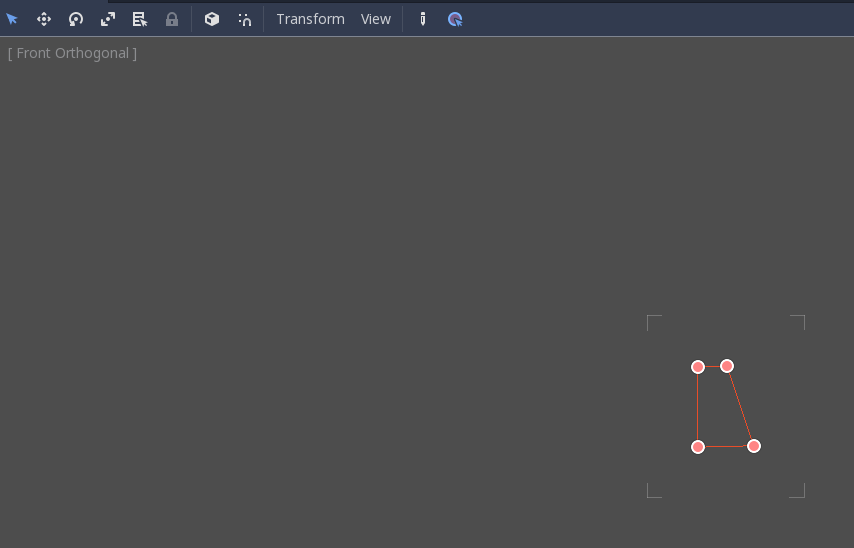
We will use a CSGPolygon3D for the lampshade. Use the Spin mode for the CSGPolygon3D and draw a trapezoid while in Front View (numeric keypad 1); this shape will extrude around the origin and form the lampshade.
3つのパーツの位置を調整して、ランプに見えるようにします。
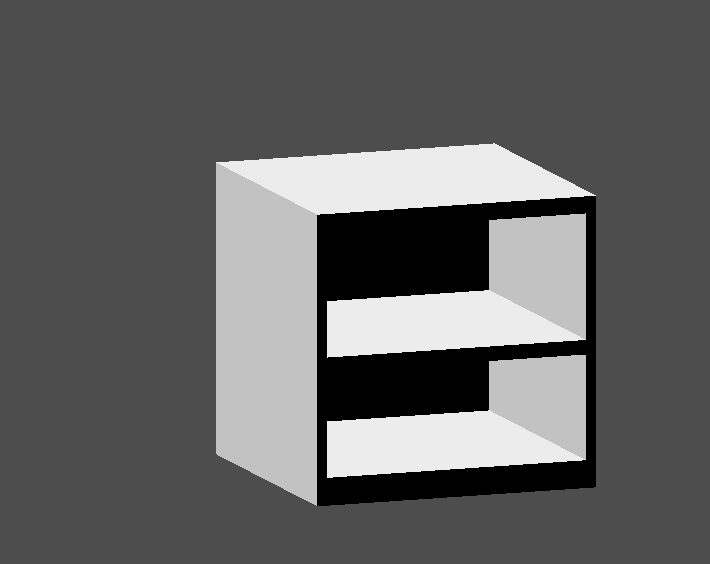
Create a CSGCombiner3D and name it bookshelf.
We will use 3 CSGBox3D nodes for the bookshelf. Create a CSGBox3D and adjust its dimensions; this will be the size of the bookshelf.
Duplicate the CSGBox3D and shorten the dimensions of each axis and change the mode to Subtraction.

You've almost built a shelf. Create one more CSGBox3D for dividing the shelf into two levels.
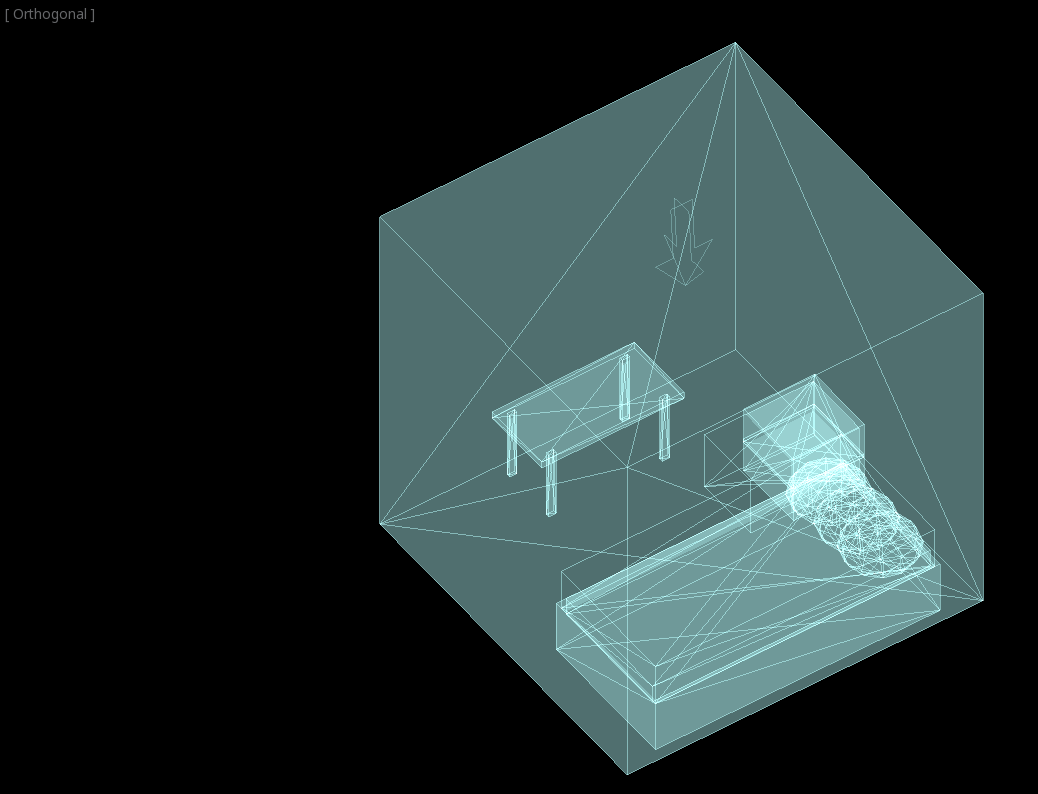
部屋の中に家具を自由に配置すれば、シーンはこういう風になるはずです。
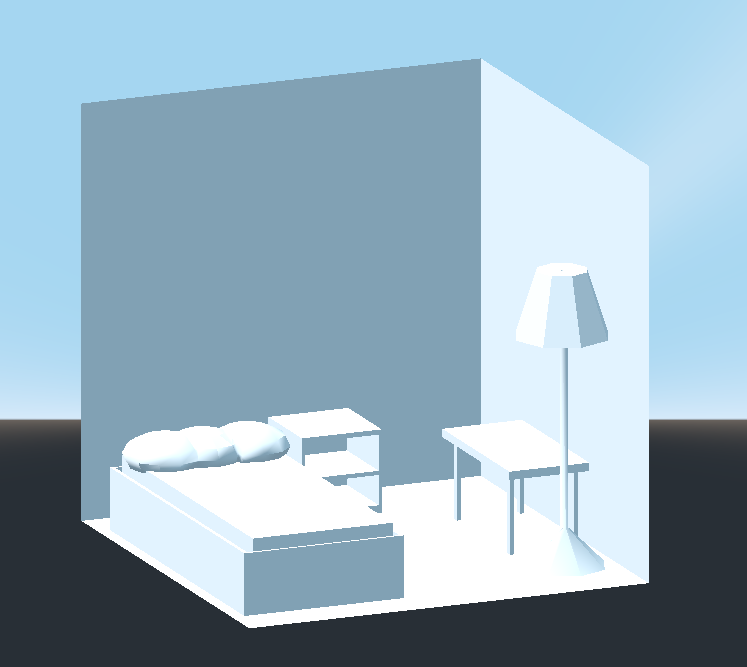
これで部屋のレベルのプロトタイプを、Godot の CSG ツールを使って作ることができました。迷路や街など、あらゆる種類のレベルをデザインするのに CSG ツールは使えます。ゲームをデザインするときは、その限界まで探ってみてください。
Using prototype textures
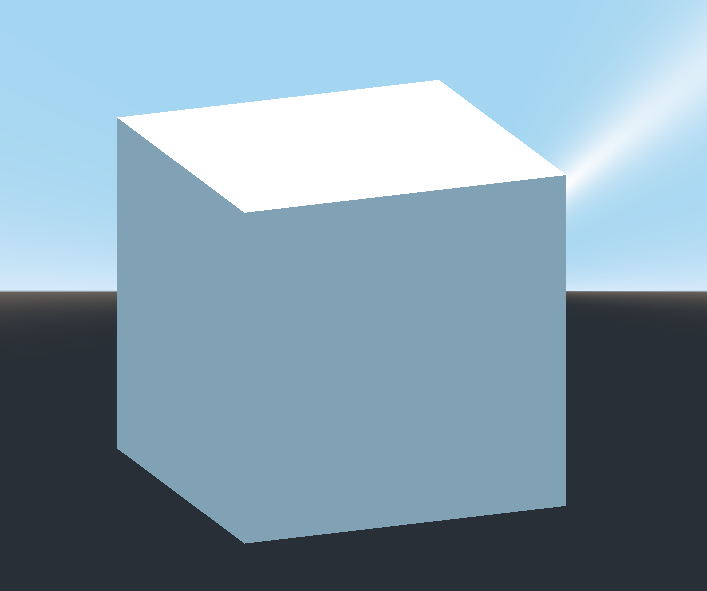
Godot's Standard Material 3D and ORM Material 3D supports triplanar mapping, which can be used to automatically apply a texture to arbitrary objects without distortion. This is handy when using CSG as Godot doesn't support editing UV maps on CSG nodes yet. Triplanar mapping is relatively slow, which usually restricts its usage to organic surfaces like terrain. Still, when prototyping, it can be used to quickly apply textures to CSG-based levels.
注釈
If you need some textures for prototyping, Kenney made a set of CC0-licensed prototype textures.
There are two ways to apply a material to a CSG node:
Applying it to a CSGCombiner3D node as a material override (Geometry > Material Override in the Inspector). This will affect its children automatically, but will make it impossible to change the material in individual children.
Applying a material to individual nodes (Material in the Inspector). This way, each CSG node can have its own appearance. Subtractive CSG nodes will apply their material to the nodes they're "digging" into.
To apply triplanar mapping to a CSG node, select it, go to the Inspector, click the [empty] text next to Material Override (or Material for individual CSG nodes). Choose New StandardMaterial3D. Click the newly created material's icon to edit it. Unfold the Albedo section and load a texture into the Texture property. Now, unfold the Uv1 section and check Triplanar. You can change the texture offset and scale on each axis by playing with the Scale and Offset properties just above. Higher values in the Scale property will cause the texture to repeat more often.
ちなみに
You can copy a StandardMaterial3D to reuse it across CSG nodes. To do so, click the dropdown arrow next to a material property in the Inspector and choose Copy. To paste it, select the node you'd like to apply the material onto, click the dropdown arrow next to its material property then choose Paste.
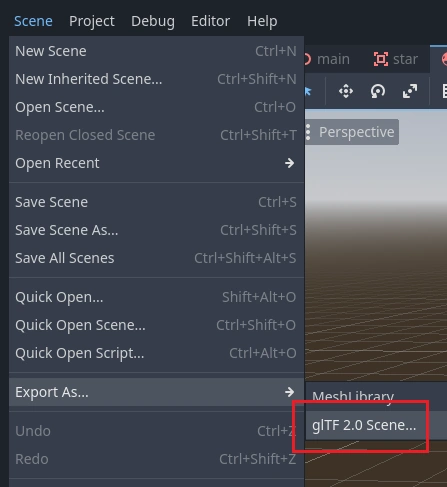
Exporting as glTF
It can be useful to block out a level using CSG, then export it as a 3d model, to import into 3D modeling software. You can do this by selecting Scene > Export As... > glTF 2.0 Scene.