Up to date
This page is up to date for Godot 4.2.
If you still find outdated information, please open an issue.
3Dの概要
Creating a 3D game can be challenging. That extra Z coordinate makes many of the common techniques that helped to make 2D games simpler no longer work. To aid in this transition, it is worth mentioning that Godot uses similar APIs for 2D and 3D. Most nodes are the same and are present in both 2D and 3D versions. In fact, it is worth checking the 3D platformer tutorial, or the 3D kinematic character tutorials, which are almost identical to their 2D counterparts.
3Dでは、数学は2Dよりもやや複雑です。したがって、wikiの ベクトル演算 エントリ(数学者やエンジニアではなく、ゲーム開発者向けに特別に作成されたもの)をチェックすることで、3Dゲームを効率的に開発する道を開くのに役立ちます。
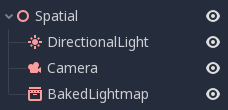
Node3D node
Node2D is the base node for 2D. Control is the base node for everything GUI. Following this reasoning, the 3D engine uses the Node3D node for everything 3D.
注釈
Be aware that "Spatial" Nodes are now called "Node3D" starting with Godot 4. Any Godot 3.x references to "Spatial" Nodes refer to "Node3D" in Godot 4.
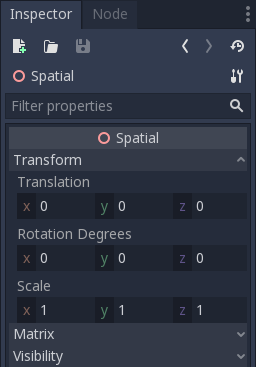
Node3Ds have a local transform, which is relative to the parent node (as long as the parent node is also of or inherits from the type Node3D). This transform can be accessed as a 4×3 Transform3D, or as 3 Vector3 members representing location, Euler rotation (X, Y and Z angles) and scale.
3Dコンテンツ
Unlike 2D, where loading image content and drawing is straightforward, 3D is a little more difficult. The content needs to be created with special 3D tools (also called Digital Content Creation tools, or DCCs) and exported to an exchange file format to be imported in Godot. This is required since 3D formats are not as standardized as images.
生成されたジオメトリ
ArrayMesh リソースを直接使用して、カスタムジオメトリを作成することができます。単純に配列を作成し、ArrayMesh.add_surface_from_arrays() 関数を使用します。SurfaceTool というヘルパークラスも利用できます。これは、インデックス作成、法線、接線などの生成のためのより単純なAPIとヘルパーを提供します。
いずれの場合でも、頂点配列を作成して3D APIに送信するとパフォーマンスが大幅に低下するため、このメソッドは静的なジオメトリ(頻繁に更新されないモデル)を生成するためのものです。
即時ジオメトリ
If, instead, you need to generate simple geometry that will be updated often, Godot provides a special ImmediateMesh resource that can be used in a MeshInstance3D node. This provides an OpenGL 1.x-style immediate-mode API to create points, lines, triangles, etc.
3Dでの2D
Godotは強力な2Dエンジンを搭載していますが、多くのタイプのゲームは3D環境で2Dを使用しています。回転しない固定カメラ(直交または遠近法)を使用することで、Sprite3D や AnimatedSprite3D などのノードを使用して、3D 背景、よりリアルな視差、照明/影の効果などのミキシングを利用した2Dゲームを作成できます。
欠点は、もちろん、プレーンな2Dと比較して複雑さが増し、パフォーマンスが低下することと、ピクセル単位で作業ができないことです。
環境
シーンの編集に加えて、環境を編集することもよくあります。 Godotは WorldEnvironment ノードを提供します。これにより、背景色、モード(スカイボックスを置くなど)を変更し、いくつかのタイプの組み込みのポストプロセッシングエフェクトを適用できます。環境はカメラでも上書きできます。
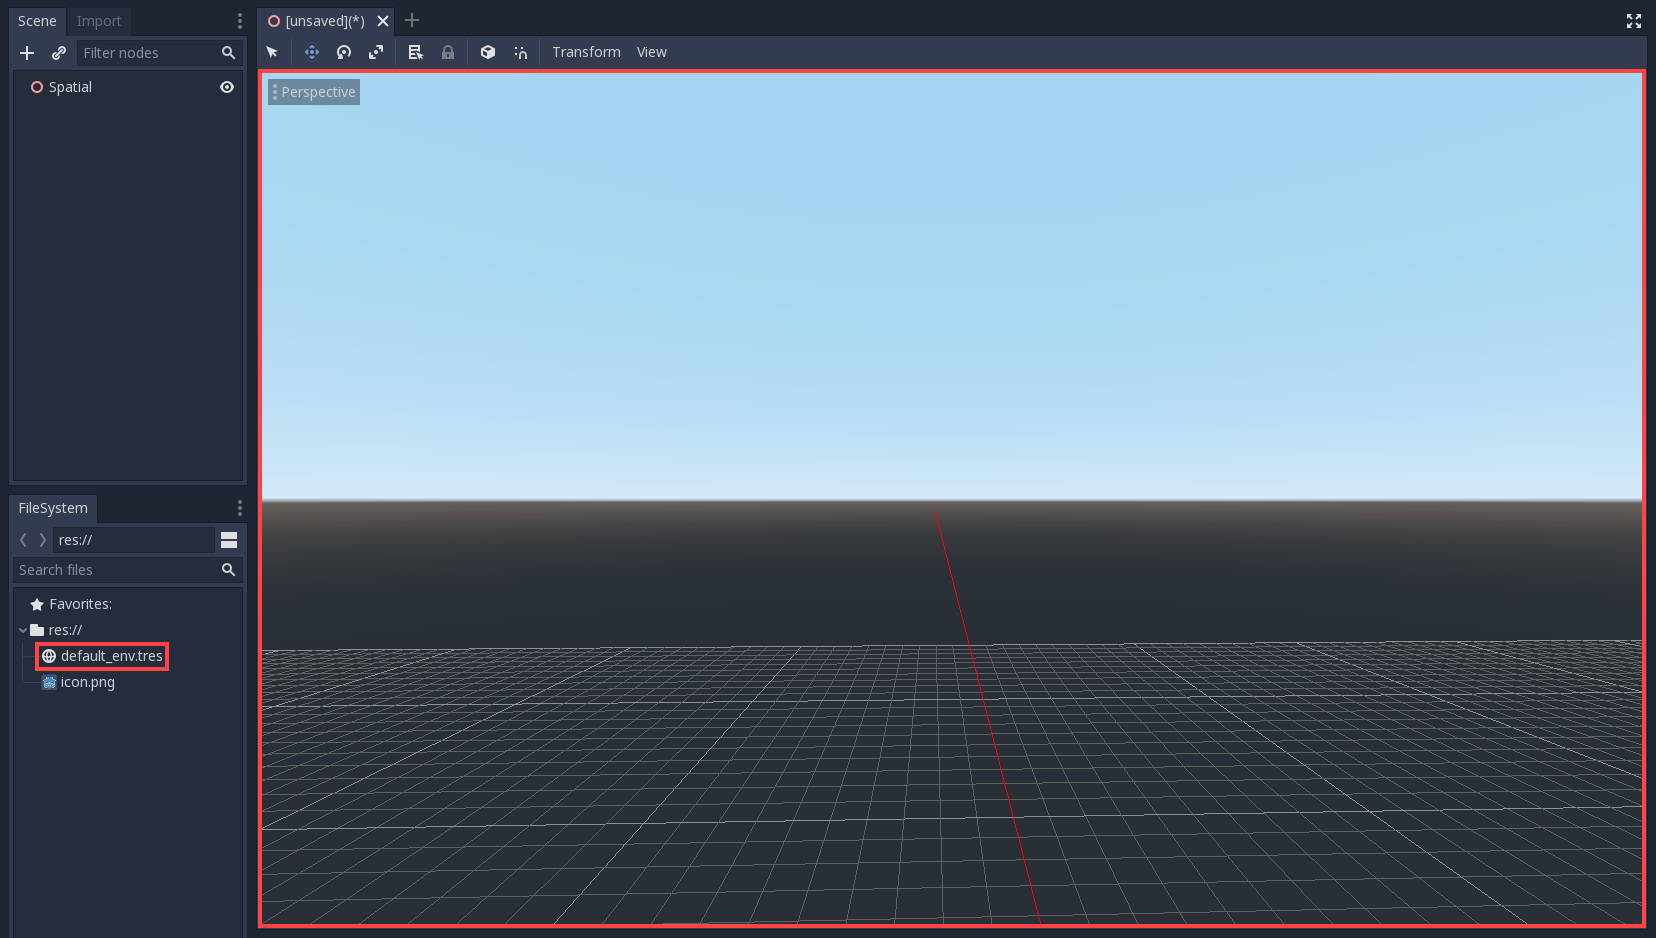
3Dビューポート
Editing 3D scenes is done in the 3D tab. This tab can be selected manually, but it will be automatically enabled when a Node3D node is selected.
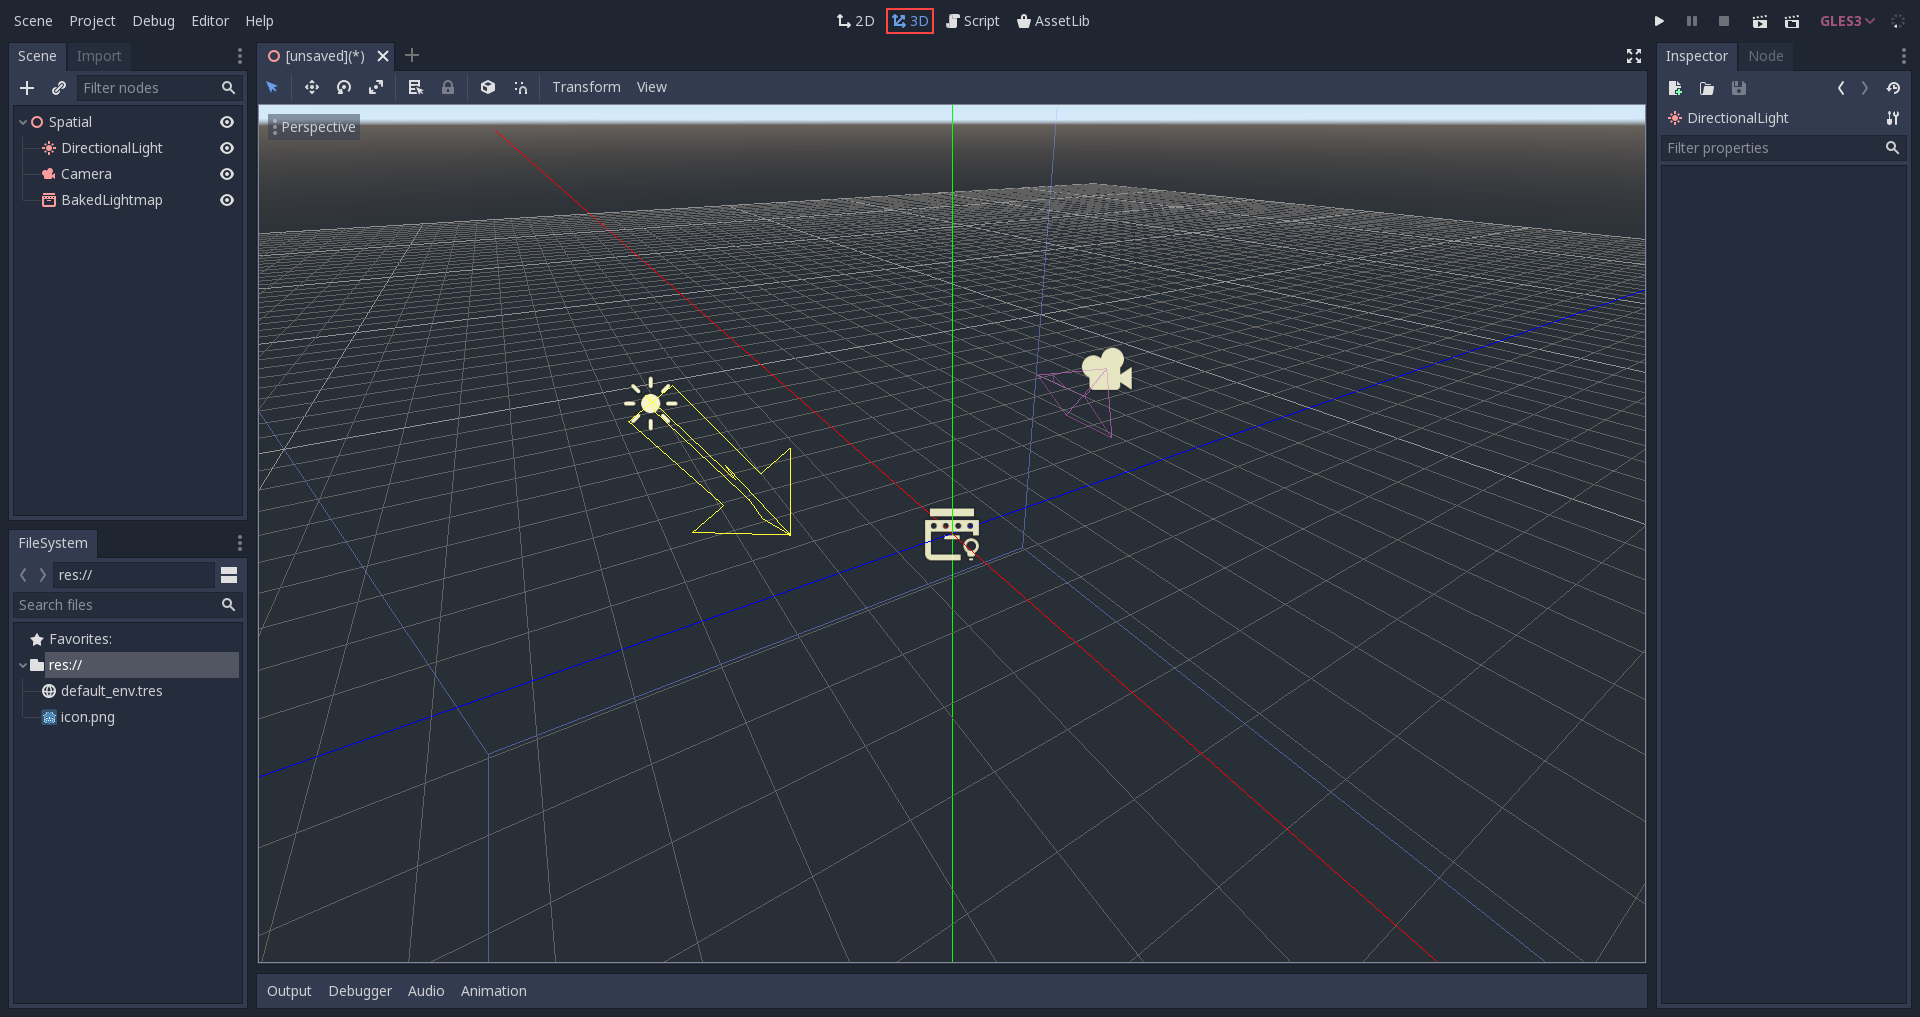
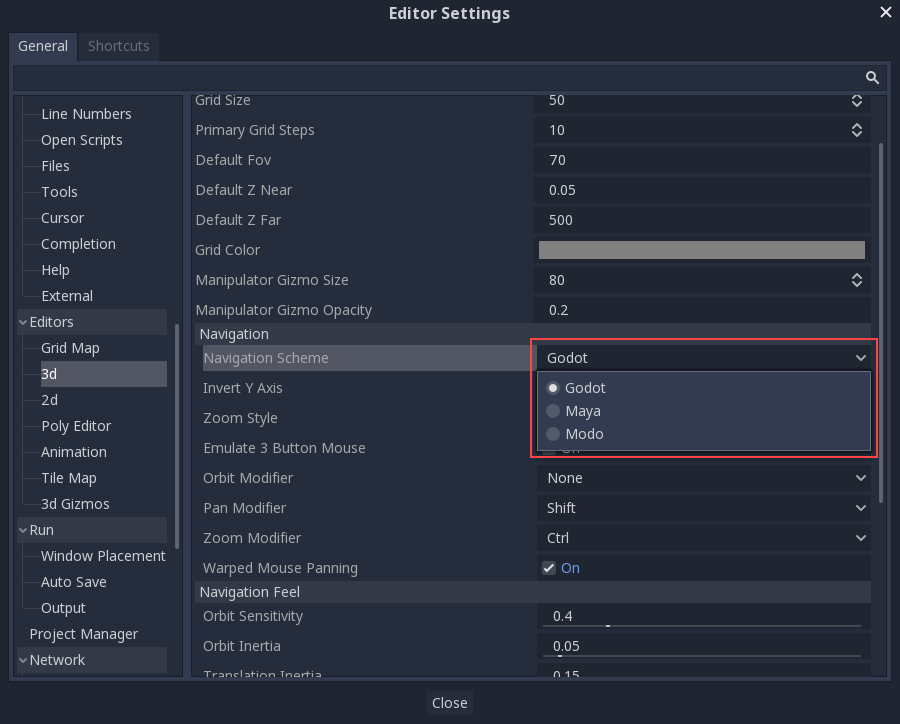
デフォルトの3Dシーン ナビゲーション コントロールは Blender(フリーソフトウェアのパイプラインに何らかの一貫性を持たせることを目指しています)に似ていますが、マウス ボタンと動作を [エディタ設定] の他のツールと同様にカスタマイズするためのオプションが含まれています。
座標系
Godot uses the metric system for everything in 3D, with 1 unit being equal to 1 meter. Physics and other areas are tuned for this scale. Therefore, attempting to use a different scale is usually a bad idea (unless you know what you are doing).
When working with 3D assets, it's always best to work in the correct scale (set the unit to metric in your 3D modeling software). Godot allows scaling post-import and, while this works in most cases, in rare situations it may introduce floating-point precision issues (and thus, glitches or artifacts) in delicate areas such as rendering or physics. Make sure your artists always work in the right scale!
The Y coordinate is used for "up". As for the horizontal X/Z axes, Godot uses a right-handed coordinate system. This means that for most objects that need alignment (such as lights or cameras), the Z axis is used as a "pointing towards" direction. This convention roughly means that:
X軸は左右
Y軸は上下
Z軸は前後
See this chart for comparison with other 3D software:
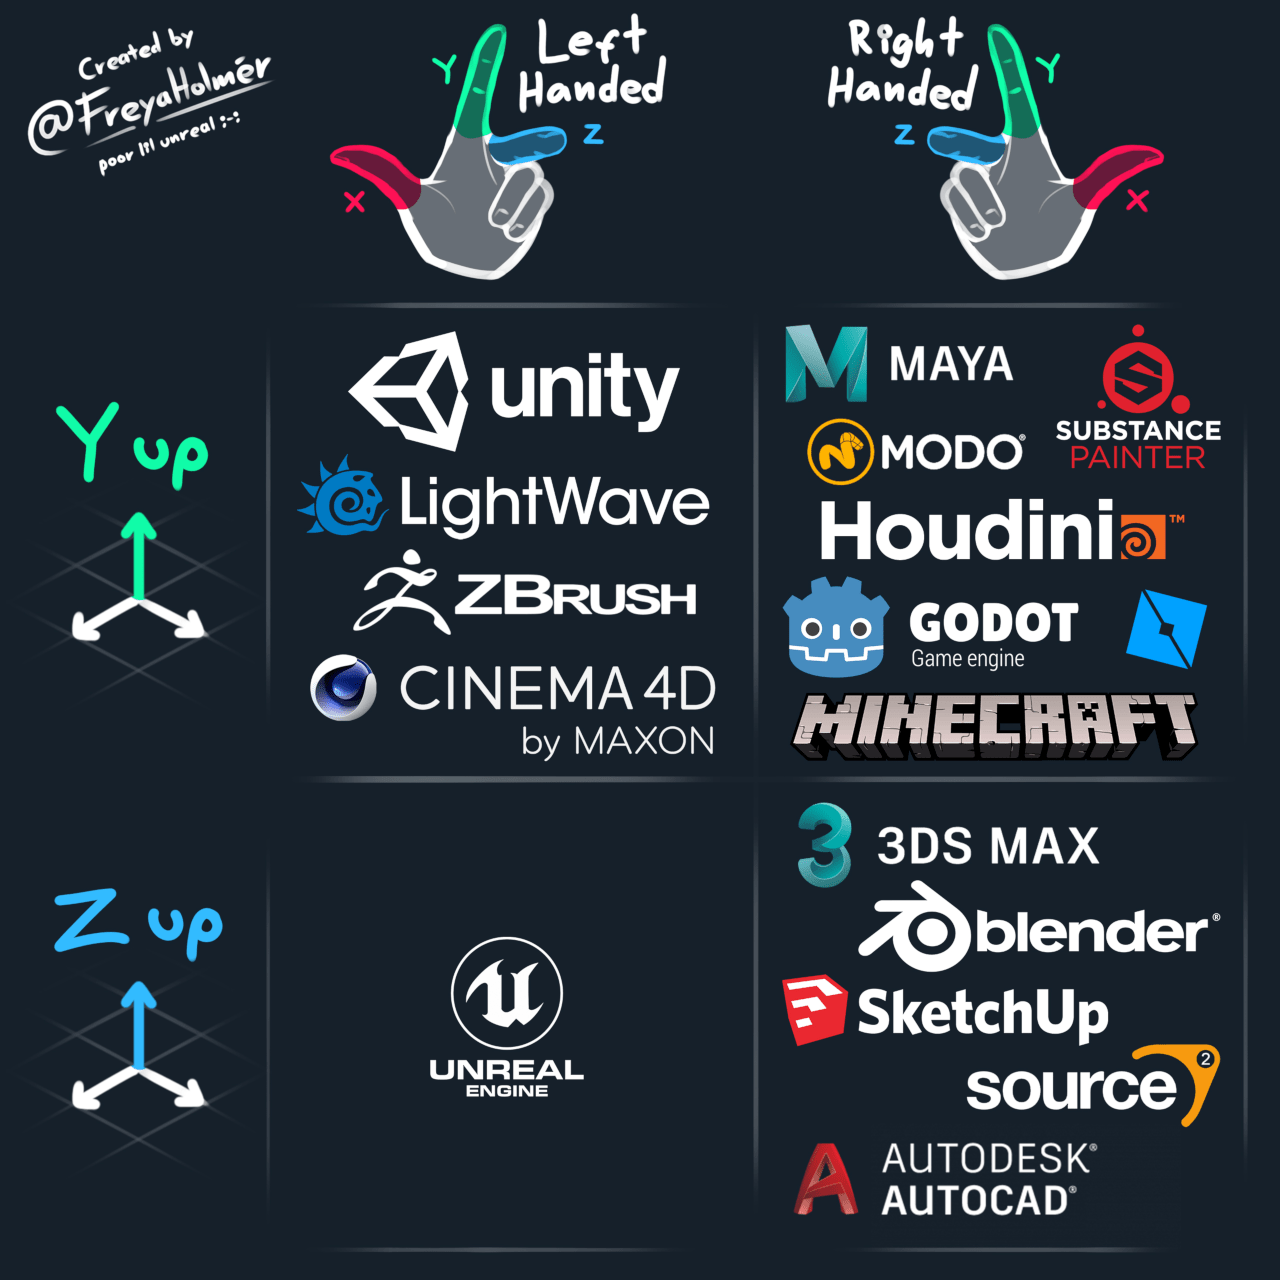
Image by Freya Holmér
空間と操作のギズモ
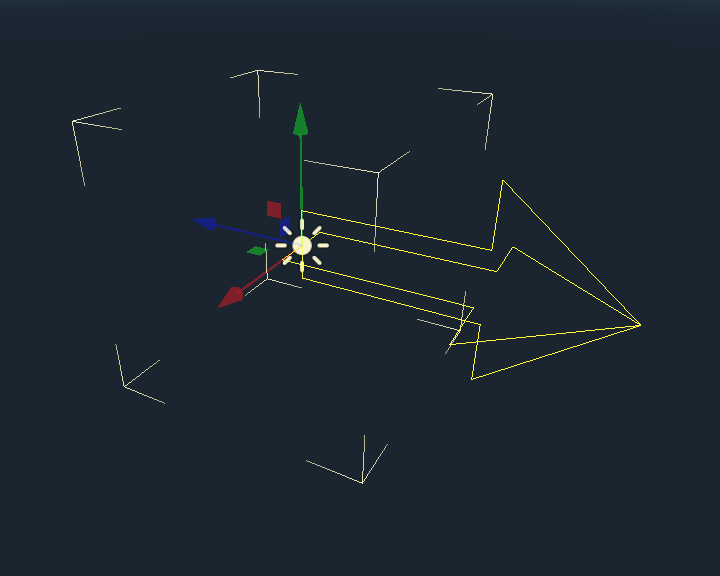
Moving objects in the 3D view is done through the manipulator gizmos. Each axis is represented by a color: Red, Green, Blue represent X, Y, Z respectively. This convention applies to the grid and other gizmos too (and also to the shader language, ordering of components for Vector3, Color, etc.).
いくつかの便利なキーバインド:
配置または回転をスナップするには、移動、スケーリング、または回転中に Ctrl を押します。
ビューを選択したオブジェクトの中央に配置するには、F を押します。
Using Blender-style transform shortcuts
Since Godot 4.2, you can enable Blender-style shortcuts for translating, rotating and scaling nodes. In Blender, these shortcuts are:
G for translating
R for rotating
S for scaling
After pressing a shortcut key while focusing on the 3D editor viewport, move the mouse or enter a number to move the selected node(s) by the specified amount in 3D units. You can constrain movement to a specific axis by specifying the axis as a letter, then the distance (if entering a value with the keyboard).
For instance, to move the selection upwards by 2.5 units, enter the following sequence in order (Y+ is upwards in Godot):
G-Y-2-.-5-Enter
To use Blender-style transform shortcuts in Godot, go to the Editor Settings' Shortcuts tab, then in the Spatial Editor section:
Bind Begin Translate Transformation to G.
Bind Begin Rotate Transformation to R.
Bind Begin Scale Transformation to S.
Finally, unbind Scale Mode so that its shortcut won't conflict with Begin Rotate Transformation.
ビューメニュー
表示オプションは、ビューポートのツールバーの[ビュー]メニューで制御されます。
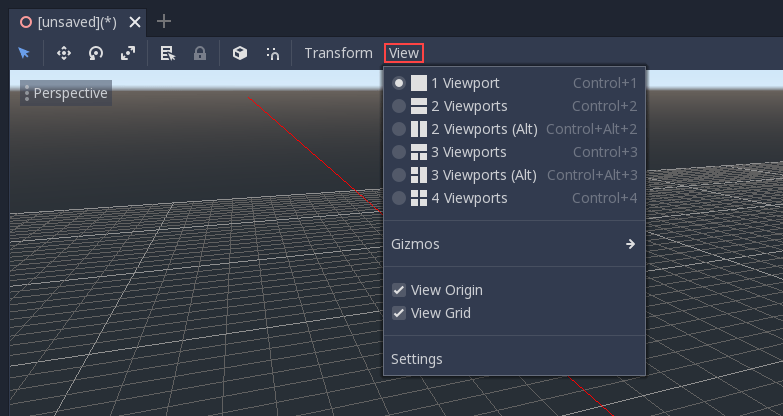
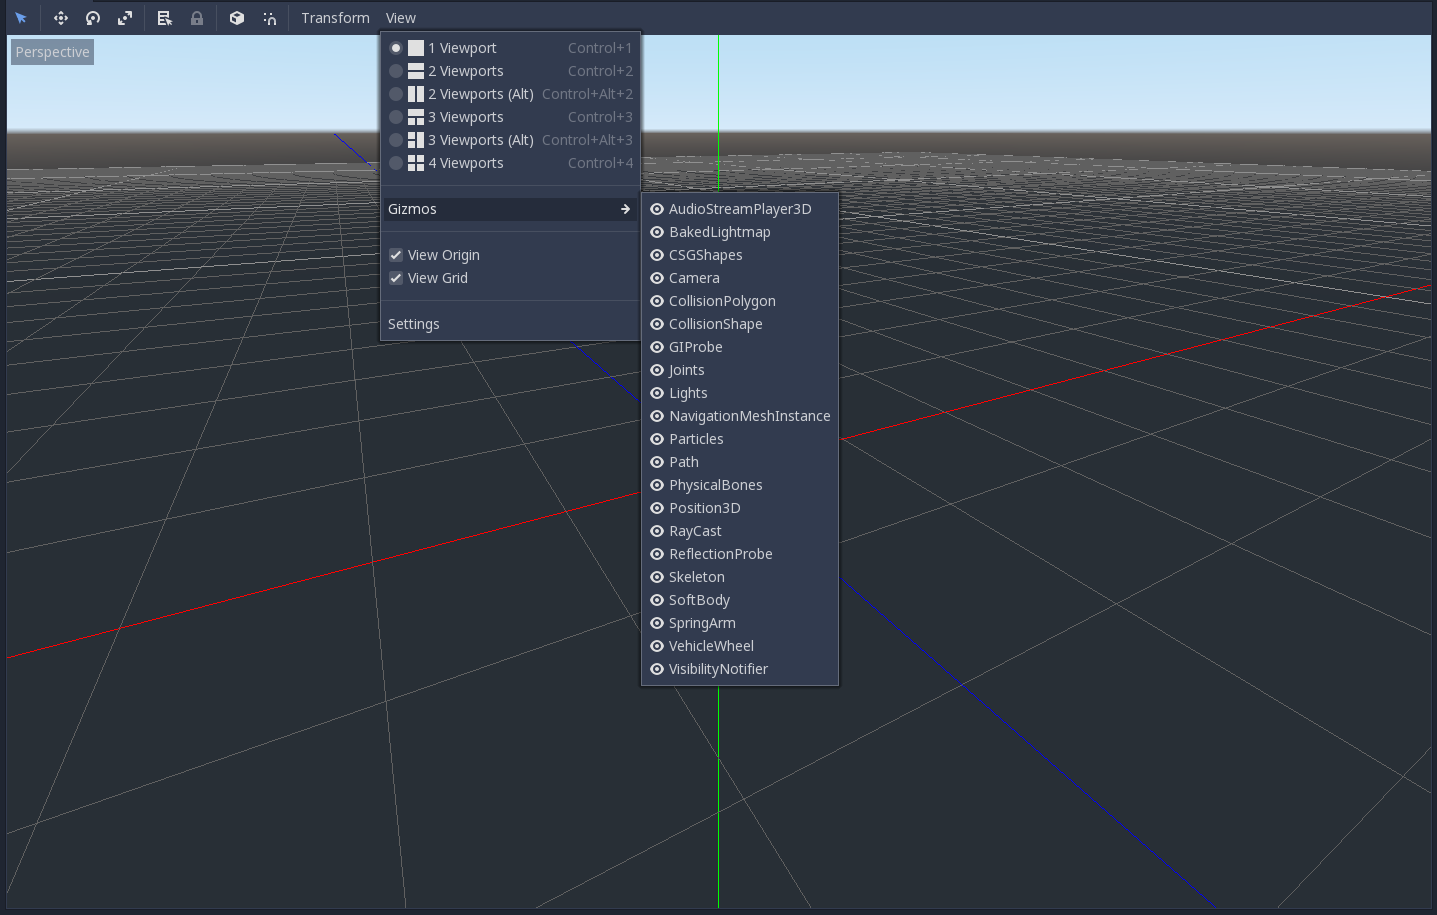
このメニューを使用して、エディタの3Dビューでギズモを非表示にできます:
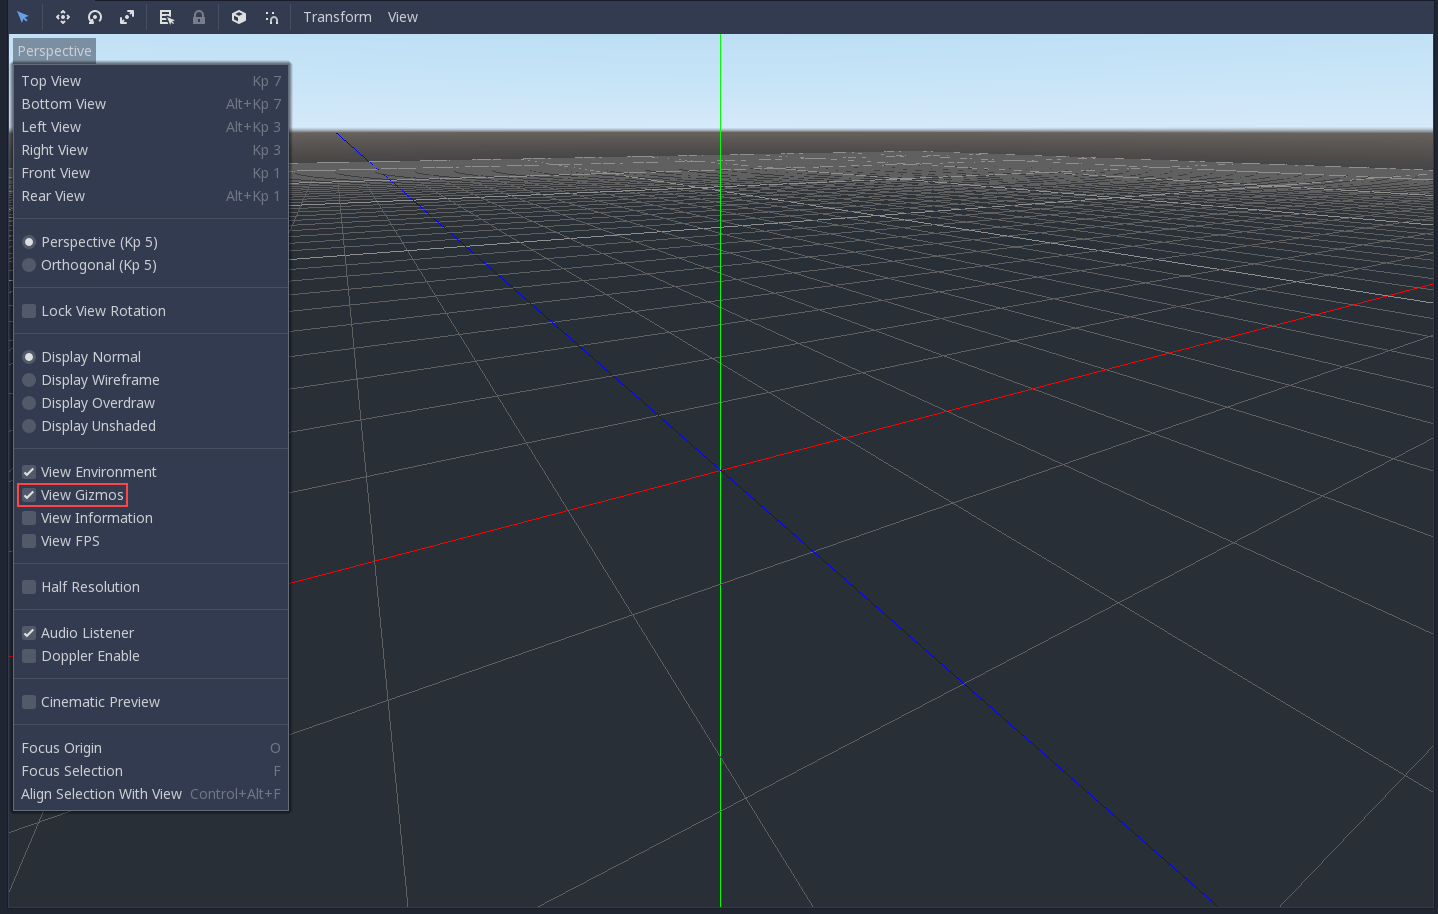
特定の種類のギズモを非表示にするには、[ビュー]メニューでオフに切り替えます。
デフォルトの環境
プロジェクトマネージャーから作成した場合、3D環境にはデフォルトの空があります。
Given how physically-based rendering works, it is advised to always try to work with a default environment in order to provide indirect and reflected light to your objects.
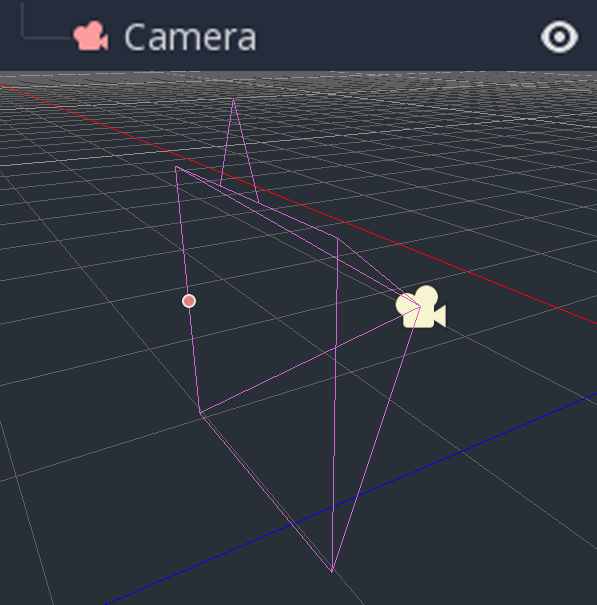
カメラ
No matter how many objects are placed in the 3D space, nothing will be displayed unless a Camera3D is also added to the scene. Cameras can work in either orthogonal or perspective projections:
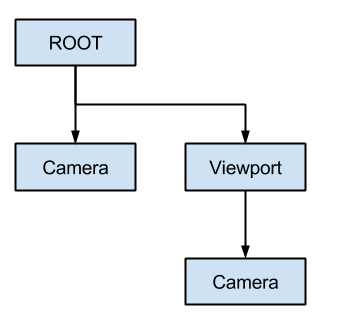
カメラは、親または祖父母のビューポートに関連付けられています(表示のみ)。シーンツリーのルートはビューポートであるため、カメラはデフォルトでその上に表示されますが、サブビューポート(レンダーターゲットまたはピクチャーインピクチャーとして)が必要な場合は、その表示用に子カメラが必要です。
複数のカメラを扱う場合、各ビューポートに次のルールが適用されます:
シーン ツリーにカメラが存在しない場合、最初に入力したカメラがアクティブなカメラになります。その後でシーンに入ってくるカメラは無視されます(current に設定されていないかぎり)。
カメラに"current"プロパティが設定されている場合、シーン内の他のカメラに関係なくそれが使用されます。このプロパティが設定されている場合は、それまでのカメラを置き換えて、アクティブになります。
アクティブなカメラがシーンツリーを離れると、ツリー順の最初のカメラが代わりになります。
ライト
The background environment emits some ambient light which appears on surfaces. Still, without any light sources placed in the scene, the scene will appear quite dark unless the background environment is very bright.
Most outdoor scenes have a directional light (the sun or moon), while indoor scenes typically have several positional lights (lamps, torches, …). See 3D lights and shadows for more information on setting up lights in Godot.