Up to date
This page is up to date for Godot 4.2.
If you still find outdated information, please open an issue.
가져오기 과정
Importing assets in Godot
To import assets in Godot, place your assets (image files, scenes, audio files, fonts, etc) directly in the project folder. There are 2 ways to achieve this:
For any file type: Copy files manually with your operating system's file manager.
For file types that can be imported by Godot: Drag-and-drop files from the operating system's file manager to the editor's FileSystem dock. This only works with resource file types (i.e. file types that Godot can import).
Godot will automatically import these files internally and keep the imported
resources hidden in a res://.godot/imported/ folder.
This means that when trying to access imported assets through code, you need to use the Resource Loader as it will automatically take into account where the internal files are saved. If you try and access an imported asset using the FileAccess class, it will work in the editor, but it will break in the exported project.
However, the Resource Loader cannot access non-imported files. Only the FileAccess class can.
가져오기의 매개변수 변경하기
참고
Import parameters are only present in non-native Godot resource types.
This means Godot's own scene and resource file formats (.tscn, .scn,
.tres, .res) don't have import options you can select in the Import
dock.
To change the import parameters of an asset in Godot, select the relevant resource in the FileSystem dock:
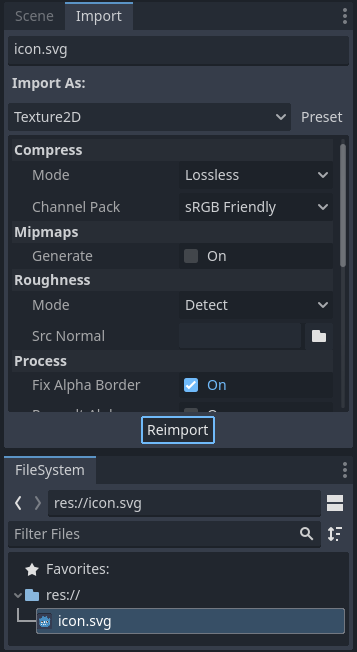
After adjusting the parameters, click Reimport. Be careful: if you select another file in the FileSystem dock before clicking Reimport, changes will be discarded. After clicking Reimport, the chosen parameters will only be used for this asset and on future reimports.
여러 애셋 가져오기 매개변수를 동시에 바꾸는 것도 가능합니다. 간단히 리소스 독에서 모두를 선택하고 다시 가져올 때 가져온 매개변수를 적용합니다.
여러 애셋들을 다시 가져오기
프로젝트에서 작업할 때 밉맵을 활성화 하는 등 여러 애셋이 같은 매개변수를 변경해야 하는 경우를 볼 수 있을 겁니다. 하지만 특정 매개변수만을 변경하고 싶은 경우, 파일시스템에서 다시 가져오고 싶은 파일을 모두 선택하십시오. 그러면 가져오기 탭의 모든 가져온 매개변수 좌측에 체크박스가 보일겁니다.
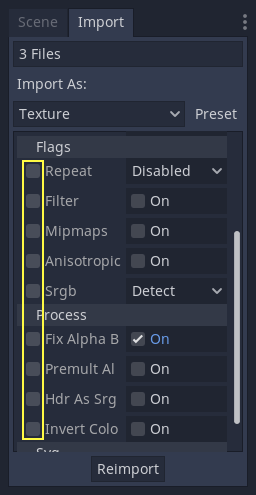
가져온 애셋에서 바꾸고 싶은 매개변수의 체크박스에 체크한 후 평상시처럼 매개변수를 변경하십시오. 이후 다시 가져오기 버튼을 누르면 선택된 애셋들이 체크된 매개변수의 값만 변경된 채 다시 가져와집니다.
자동으로 다시 가져오기
원본 애셋의 MD5 체크섬이 바꿀 때, Godot는 튿정 애셋을 위해 구성된 프리셋을 적용하면서, 그것에 자동 다시 내보내기를 실행할 것입니다.
생성된 파일
가져오기는 추가로 <asset>.import 파일을 생성하는데, 가져오기 구성이 거기에 들어있습니다. 이것을 버전 제어 시스템에 커밋하도록 하세요.
Make sure to commit these files to your version control system, as these files contain important metadata.
$ ls
example.png
example.png.import
project.godot
Additionally, extra assets will be present in the hidden
res://.godot/imported/ folder:
$ ls .godot/imported
example.png-218a8f2b3041327d8a5756f3a245f83b.ctex
example.png-218a8f2b3041327d8a5756f3a245f83b.md5
이 폴더에 있는 파일이 (혹은 폴더 전체가) 지워진다면, 애셋은 자동으로 다시 가져올 것입니다. 따라서, 이 폴더를 버전 제어 시스템에 커밋하는 것은 선택적입니다. 다른 컴퓨터에서 확인할 때 다시 가져오는 시간이 짧을 수 있지만, 상당히 많은 시간과 공간을 잡아먹습니다. 오십보백보입니다.
The default version control metadata that can be generated on project creation
will automatically ignore the .godot/ folder.
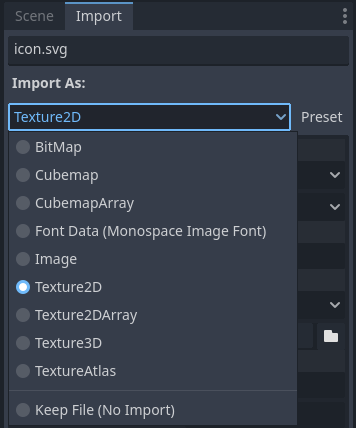
가져오기 리소스 타입 변경하기
Some source assets can be imported as different types of resources. For this, select the relevant type of resource desired then click Reimport:
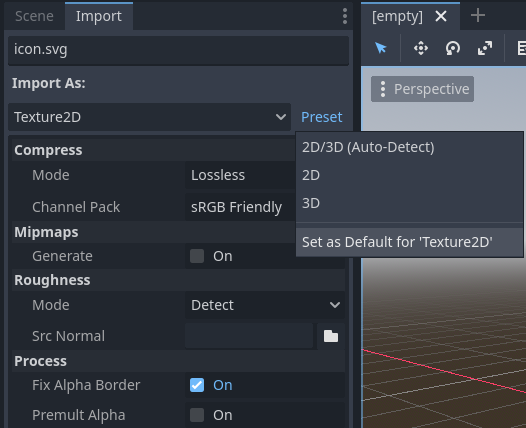
디폴트 가져오기 매개변수 변경하기
Different types of projects might require different defaults. Changing the import options to a predefined set of options can be achieved by using the Preset... Menu. Besides some resource types offering presets, the default settings can be saved and cleared too:
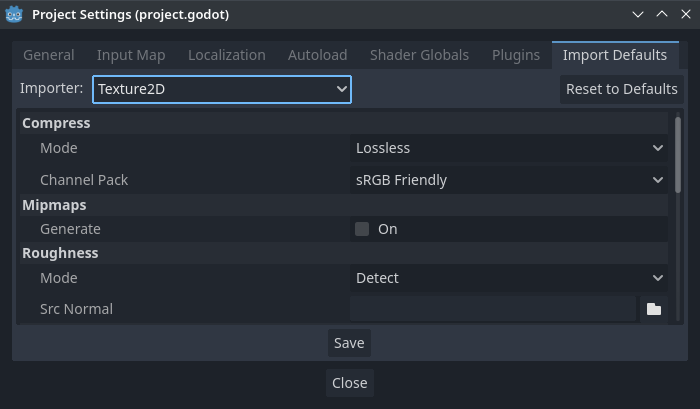
The default import parameters for a given resource type can be changed project-wide using the Import Defaults tab of the Project Settings dialog:
Further reading
This workflow takes a little time to get used to, but it enforces a more correct way to deal with resources.
많은 타입의 애셋을 가져오기로 이용할 수 있습니다, 따라서 이 모든 것들을 가지고 작업하는 방법을 이해하기 위해 계속 읽어주세요: