Processo de importação
Importing assets in Godot
To import assets in Godot, place your assets (image files, scenes, audio files, fonts, etc) directly in the project folder. There are 2 ways to achieve this:
For any file type: Copy files manually with your operating system's file manager.
For file types that can be imported by Godot: Drag-and-drop files from the operating system's file manager to the editor's FileSystem dock. This only works with resource file types (i.e. file types that Godot can import).
Godot will automatically import these files internally and keep the imported
resources hidden in a res://.godot/imported/ folder.
This means that when trying to access imported assets through code, you need to use the Resource Loader as it will automatically take into account where the internal files are saved. If you try and access an imported asset using the FileAccess class, it will work in the editor, but it will break in the exported project.
However, the Resource Loader cannot access non-imported files. Only the FileAccess class can.
Alterando Parâmetros de Importação
Nota
Import parameters are only present in non-native Godot resource types.
This means Godot's own scene and resource file formats (.tscn, .scn,
.tres, .res) don't have import options you can select in the Import
dock.
To change the import parameters of an asset in Godot, select the relevant resource in the FileSystem dock:
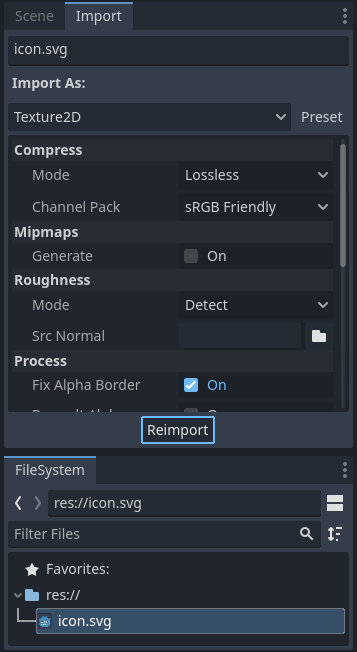
After adjusting the parameters, click Reimport. Be careful: if you select another file in the FileSystem dock before clicking Reimport, changes will be discarded. After clicking Reimport, the chosen parameters will only be used for this asset and on future reimports.
Changing the import parameters of several assets at the same time is also possible. Select all of them together in the FileSystem dock and the exposed parameters will apply to all of them when reimporting.
Reimportando múltiplos assets
Ao trabalhar em um projeto, você pode descobrir que vários assets precisam ter os mesmos parâmetros alterados, como a ativação de mipmaps, mas você só quer que esses parâmetros específicos sejam alterados. Para fazer isto, selecione todos os assets que você quer reimportar no sistema de arquivos. Na aba de importação agora haverá uma caixa de seleção à esquerda de cada parâmetro de importação.
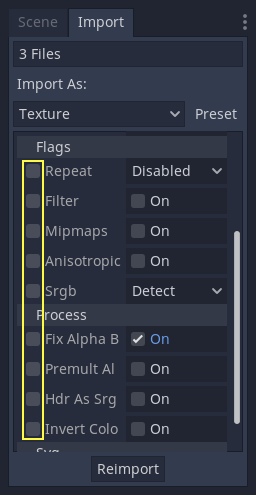
Marque a caixa de seleção dos parâmetros que você deseja alterar nos seus assets importados e, em seguida, altere os parâmetros normalmente. Finalmente, clique no botão de reimportação e todos os assets selecionados serão reimportados apenas com esses parâmetros alterados.
Reimportação Automática
Quando a soma de verificação MD5 do ativo de origem for alterada, Godot executará uma reimportação automática, aplicando a predefinição configurada para esse asset específico.
Arquivos gerados
A importação adicionará um arquivo extra <asset>.import próximo ao arquivo fonte, contendo a configuração de importação.
Make sure to commit these files to your version control system, as these files contain important metadata.
ls
example.png
example.png.import
project.godot
Additionally, extra assets will be present in the hidden
res://.godot/imported/ folder:
ls .godot/imported
example.png-218a8f2b3041327d8a5756f3a245f83b.ctex
example.png-218a8f2b3041327d8a5756f3a245f83b.md5
Se algum dos arquivos presentes nesta pasta for apagado (ou a pasta inteira), o asset ou assets serão reimportados automaticamente. Dessa forma, fazendo o commit da .godot/ pasta no sistema de controle de versão não é recomendado. Enquanto realizar o commit desta pasta pode poupar tempo na reimportação ao fazer o check-out em outro computador, irá requerir consideravelmente mais espaço e tempo de transferência.
The default version control metadata that can be generated on project creation
will automatically ignore the .godot/ folder.
Alterando o tipo de recurso de importação
Some source assets can be imported as different types of resources. For this, select the relevant type of resource desired then click Reimport:

Select Keep File (exported as is) as resource type to skip file import, files
with this resource type will be preserved as is during project export.
Select Skip File (not exported) as resource type to skip file import and ignore
file during project export.
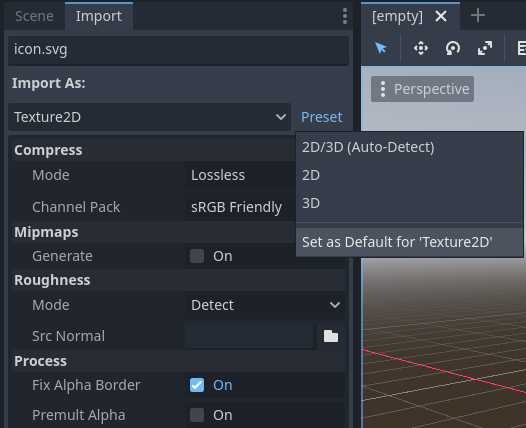
Alterando parâmetros de importação padrão
Different types of projects might require different defaults. Changing the import options to a predefined set of options can be achieved by using the Preset... Menu. Besides some resource types offering presets, the default settings can be saved and cleared too:
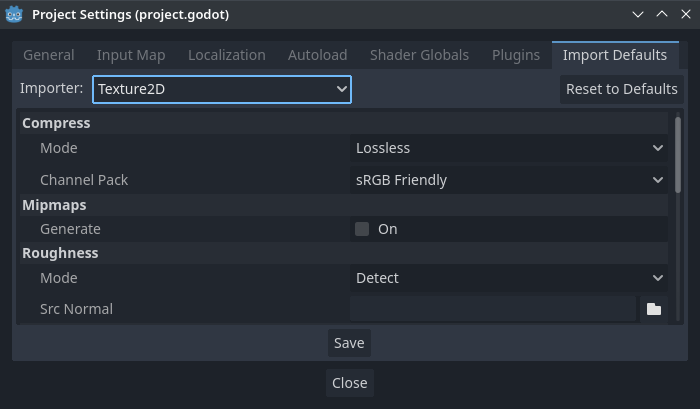
The default import parameters for a given resource type can be changed project-wide using the Import Defaults tab of the Project Settings dialog:
Further reading
This workflow takes a little time to get used to, but it enforces a more correct way to deal with resources.
Existem muitos tipos de assets disponíveis para importação. Continue lendo para entender como trabalhar com todos eles: