Work in progress
The content of this page was not yet updated for Godot
4.5
and may be outdated. If you know how to improve this page or you can confirm
that it's up to date, feel free to open a pull request.
Using SoftBody3D
Corpos moles (ou dinâmica de corpo mole) simulam movimento, alterando a forma e outras propriedades físicas de objetos deformáveis. Isso pode, por exemplo, ser usado para simular tecido ou para criar personagens mais realistas.
Configuração básica
A SoftBody3D node is used for soft body simulations.
Vamos criar um cubo saltitante para demonstrar a configuração de um corpo mole.
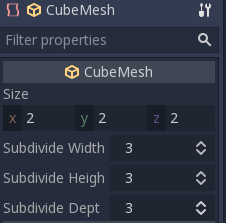
Create a new scene with a Node3D node as root. Then, create a SoftBody3D node. Add a CubeMesh in the mesh property of the node in the inspector and increase the subdivision of the mesh for simulation.
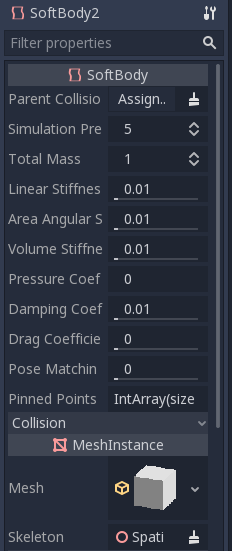
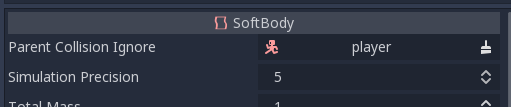
Defina os parâmetros para obter o tipo de corpo macio que você deseja. Tente manter a Simulation Precision acima de 5, caso contrário, o corpo mole pode entrar em colapso.
Nota
Manuseie alguns parâmetros com cuidado, pois alguns valores podem levar a resultados estranhos. Por exemplo, se a forma não estiver completamente fechada e você definir a pressão para mais de 0, o softbody voará como um saco plástico sob vento forte.
Execute a cena para ver a simulação.
Dica
To improve the simulation's result, increase the Simulation Precision, this will give significant improvement at the cost of performance.
Simulação de capa
Let's make a cloak in the Platformer3D demo.
Nota
You can download the Platformer3D demo on GitHub or the Asset Library.
Open the Player scene, add a SoftBody3D node and assign a PlaneMesh to it.
Open the PlaneMesh properties and set the size(x: 0.5 y: 1) then set Subdivide Width and Subdivide Depth to 5. Adjust the SoftBody3D's position. You should end up with something like this:
Dica
Subdivision generates a more tessellated mesh for better simulations.
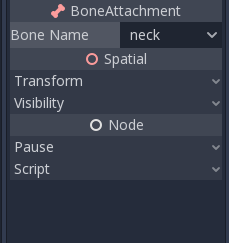
Add a BoneAttachment3D node under the skeleton node and select the Neck bone to attach the cloak to the character skeleton.
Nota
BoneAttachment3D node is to attach objects to a bone of an armature. The attached object will follow the bone's movement, weapon of a character can be attached this way.
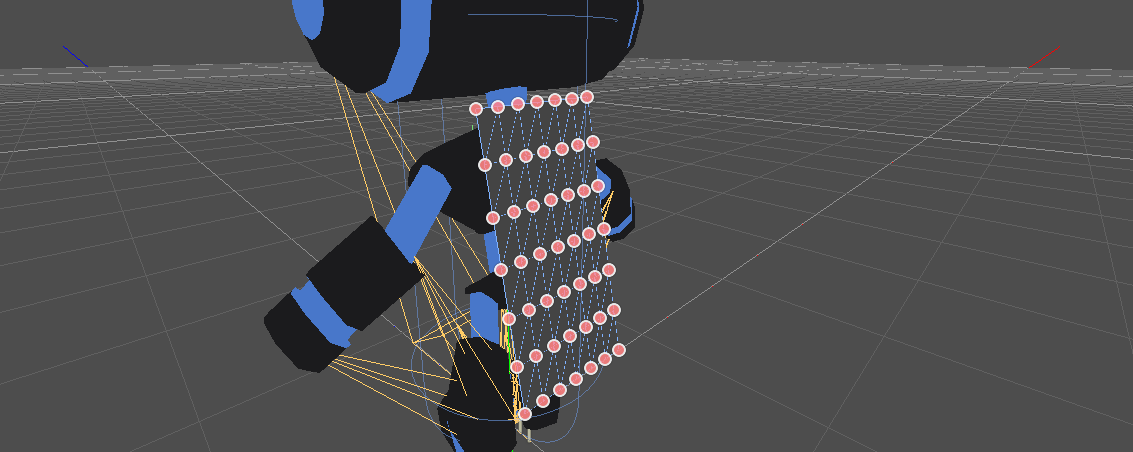
To create pinned joints, select the upper vertices in the SoftBody3D node:
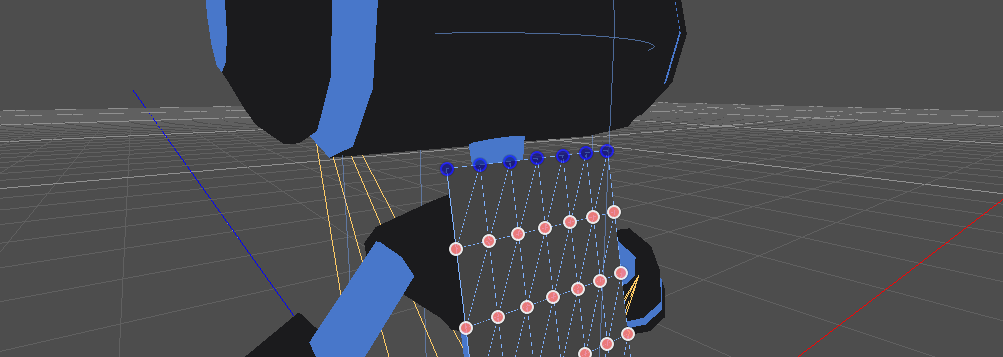
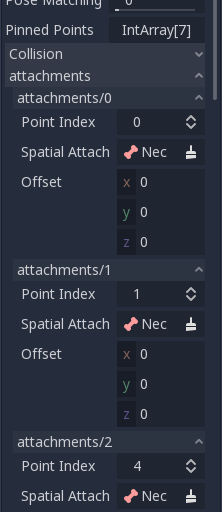
The pinned joints can be found in SoftBody3D's Attachments property, choose the BoneAttachment as the SpatialAttachment for each pinned joints, the pinned joints are now attached to the neck.
Last step is to avoid clipping by adding the Kinematic Body Player to Parent Collision Ignore of the SoftBody3D.
Play the scene and the cloak should simulate correctly.
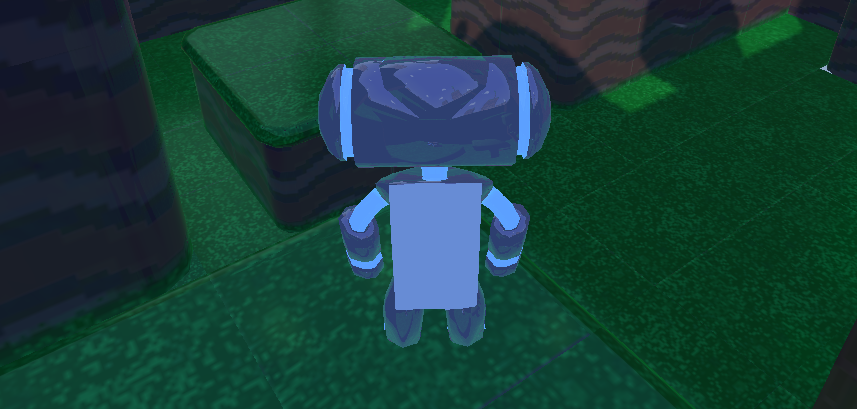
This covers the basic settings of softbody, experiment with the parameters to achieve the effect you are aiming for when making your game.
Using Imported Meshes
The Save to File option in the Advanced Import Settings dialog allows you
to save a mesh to a standalone resource file that you can then attach to
SoftBody3D nodes.
You may also want to disable LOD generation or change the LOD generation options
when importing a mesh for use with SoftBody3D. The default import settings
will produce an LOD that merges adjacent faces that are nearly flat with
respect to each other, even at very close render distances. This works well for
static meshes, but is often undesirable for use with SoftBody3D if you want
these faces to be able to bend and move with respect to each other, instead of
being rendered as a single plane.
See Import configuration and Mesh level of detail (LOD) for more details.