Work in progress
The content of this page was not yet updated for Godot
4.2
and may be outdated. If you know how to improve this page or you can confirm
that it's up to date, feel free to open a pull request.
Использование SoftBody
Мягкие тела (или soft-body dynamics) моделируют движение, изменение формы и другие физические свойства деформируемых объектов. Это может использоваться, например, для имитации ткани или для создания более реалистичных персонажей.
Базовая настройка
A SoftBody3D node is used for soft body simulations.
We will create a bouncy cube to demonstrate the setup of a soft body.
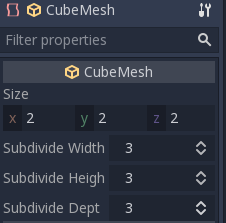
Create a new scene with a Node3D node as root. Then, create a Softbody node. Add a CubeMesh in the mesh property of the node in the inspector and increase the subdivision of the mesh for simulation.
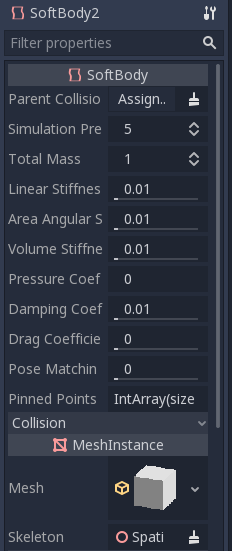
Set the parameters to obtain the type of soft body you aim for. Try to keep the Simulation Precision above 5, otherwise, the soft body may collapse.
Примечание
Handle some parameters with care, as some value can lead to strange results. For example, if the shape is not completely closed and you set pressure to more than 0, the softbody will fly around like a plastic bag under strong wind.
Play the scene to view the simulation.
Совет
To improve the simulation's result, increase the Simulation Precision, this will give significant improvement at the cost of performance.
Cloak simulation
Let's make a cloak in the Platformer3D demo.
Примечание
You can download the Platformer3D demo on GitHub or the Asset Library.
Open the Player scene, add a SoftBody node and assign a PlaneMesh to it.
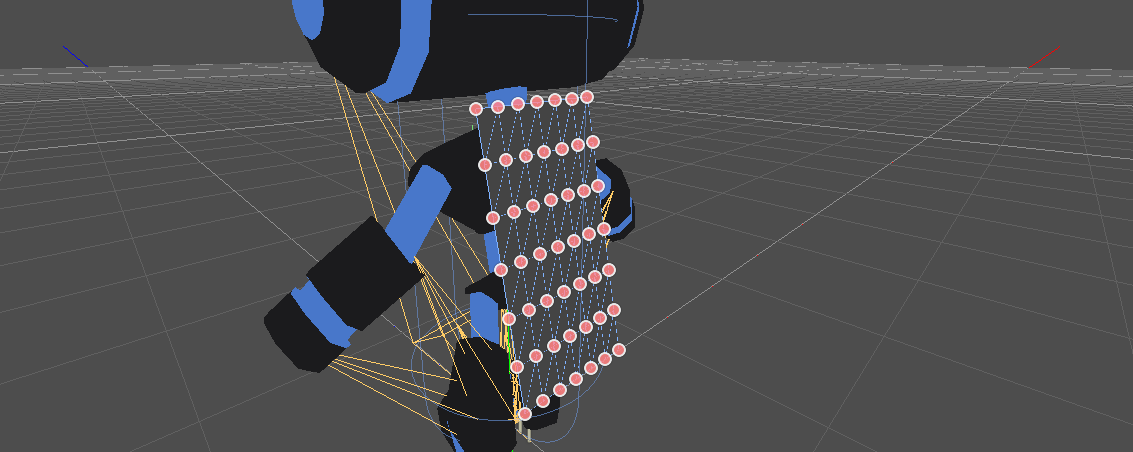
Open the PlaneMesh properties and set the size(x: 0.5 y: 1) then set Subdivide Width and Subdivide Depth to 5. Adjust the SoftBody's position. You should end up with something like this:
Совет
Subdivision generates a more tessellated mesh for better simulations.
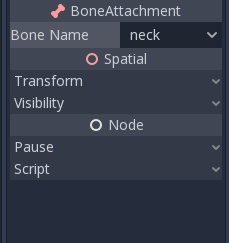
Add a BoneAttachment3D node under the skeleton node and select the Neck bone to attach the cloak to the character skeleton.
Примечание
BoneAttachment3D node is to attach objects to a bone of a armature. The attached object will follow the bone's movement, weapon of a character can be attached this way.
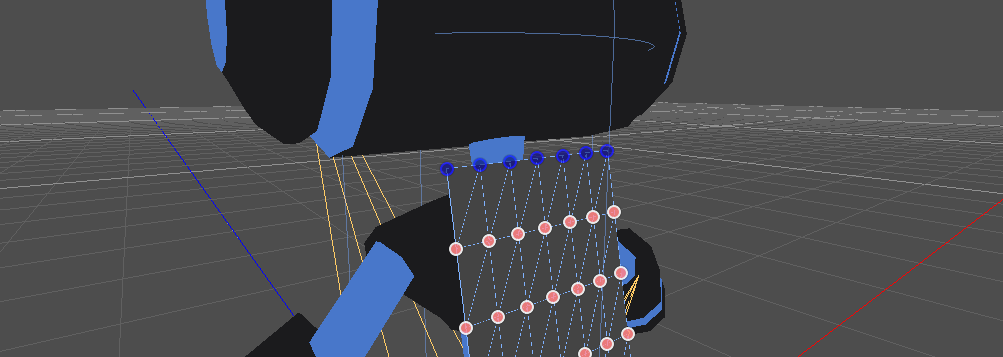
To create pinned joints, select the upper vertices in the SoftBody node:
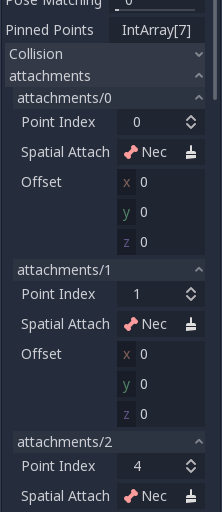
The pinned joints can be found in SoftBody's Attachments property, choose the BoneAttachment as the SpatialAttachment for each pinned joints, the pinned joints are now attached to the neck.
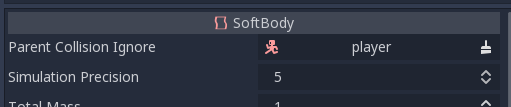
Last step is to avoid clipping by adding the Kinematic Body Player to Parent Collision Ignore of the SoftBody.
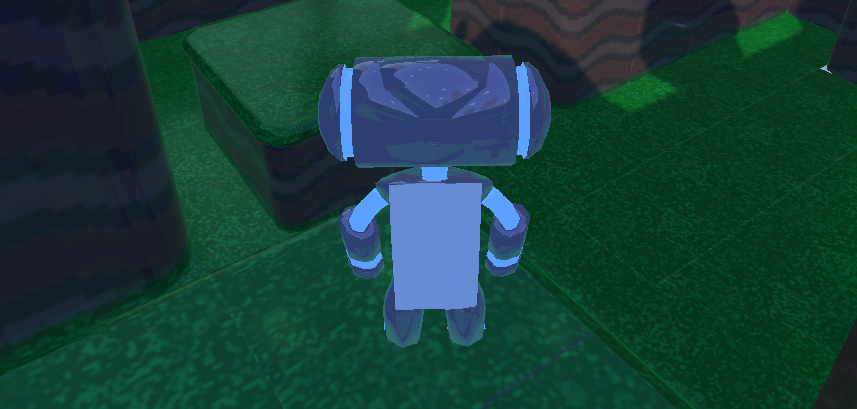
Play the scene and the cloak should simulate correctly.
This covers the basic settings of softbody, experiment with the parameters to achieve the effect you are aiming for when making your game.