Up to date
This page is up to date for Godot 4.3.
If you still find outdated information, please open an issue.
Interpolation
L'interpolation est une opération très basique en programmation graphique. Il est bon de s'y familiariser afin d'élargir ses horizons en tant que développeur graphique.
L'idée de base est que vous voulez passer de A à B. Une valeur t, représente les états intermédiaires.
For example, if t is 0, then the state is A. If t is 1, then the state is B. Anything in-between is an interpolation.
Between two real (floating-point) numbers, an interpolation can be described as:
interpolation = A * (1 - t) + B * t
Et souvent simplifié à :
interpolation = A + (B - A) * t
The name of this type of interpolation, which transforms a value into another at constant speed is "linear". So, when you hear about Linear Interpolation, you know they are referring to this formula.
Il existe d'autres types d'interpolations, qui ne seront pas traités ici. Il est recommandé de lire ensuite la page Bezier.
Interpolation vectorielle
Vector types (Vector2 and Vector3) can also be interpolated, they come with handy functions to do it Vector2.lerp() and Vector3.lerp().
Pour l'interpolation cubique, il existe aussi Vector2.cubic_interpolate() et Vector3.cubic_interpolate(), qui font une interpolation de style Bezier.
Here is example pseudo-code for going from point A to B using interpolation:
var t = 0.0

func _physics_process(delta):
    t += delta * 0.4

    $Sprite2D.position = $A.position.lerp($B.position, t)
private float _t = 0.0f;

public override void _PhysicsProcess(double delta)
{
    _t += (float)delta * 0.4f;

    Marker2D a = GetNode<Marker2D>("A");
    Marker2D b = GetNode<Marker2D>("B");
    Sprite2D sprite = GetNode<Sprite2D>("Sprite2D");

    sprite.Position = a.Position.Lerp(b.Position, _t);
}
Il produira le mouvement suivant :

Interpolation par transformation
Il est également possible d'interpoler des transformations entières (s'assurer qu'elles ont soit une échelle uniforme, soit, au moins, la même échelle non uniforme). Pour cela, la fonction Transform3D.interpolate_with() peut être utilisée.
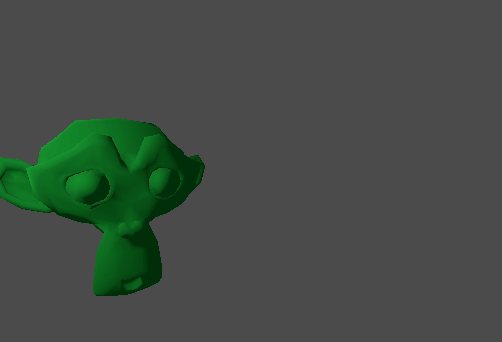
Voici un exemple de transformation d'un singe de Position1 à Position2 :
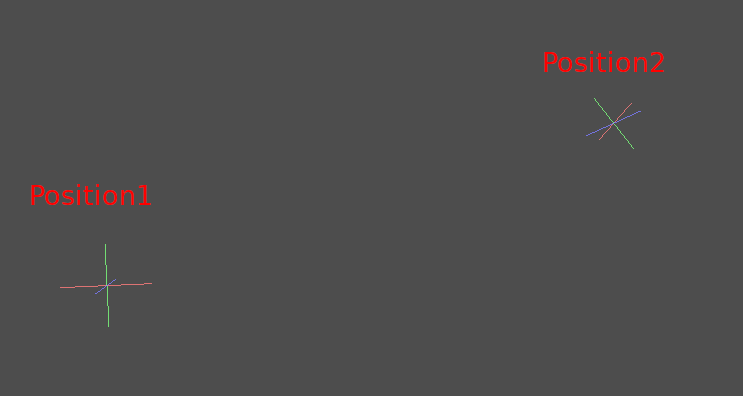
En utilisant le pseudo-code suivant :
var t = 0.0

func _physics_process(delta):
    t += delta

    $Monkey.transform = $Position1.transform.interpolate_with($Position2.transform, t)
private float _t = 0.0f;

public override void _PhysicsProcess(double delta)
{
    _t += (float)delta;

    Marker3D p1 = GetNode<Marker3D>("Position1");
    Marker3D p2 = GetNode<Marker3D>("Position2");
    CSGMesh3D monkey = GetNode<CSGMesh3D>("Monkey");

    monkey.Transform = p1.Transform.InterpolateWith(p2.Transform, _t);
}
Et encore une fois, il produira le mouvement suivant :
Mouvement lisser
L'interpolation peut être utilisée pour faciliter les mouvements, la rotation, etc. Voici un exemple d'un cercle suivant la souris avec un mouvement lissé :
const FOLLOW_SPEED = 4.0

func _physics_process(delta):
    var mouse_pos = get_local_mouse_position()

    $Sprite2D.position = $Sprite2D.position.lerp(mouse_pos, delta * FOLLOW_SPEED)
private const float FollowSpeed = 4.0f;

public override void _PhysicsProcess(double delta)
{
    Vector2 mousePos = GetLocalMousePosition();

    Sprite2D sprite = GetNode<Sprite2D>("Sprite2D");

    sprite.Position = sprite.Position.Lerp(mousePos, (float)delta * FollowSpeed);
}
Voici à quoi cela ressemble :

This is useful for smoothing camera movement, allies following you (ensuring they stay within a certain range), and many other common game patterns.