マウスカーソルのカスタマイズ
全体的なデザインに合うように、ゲームのマウスカーソルの外観を変更することができます。マウスカーソルをカスタマイズするには2つの方法があります:
Using project settings. This is simpler, but more limited.
Using a script. This is more customizable, but involves scripting.
注釈
You could display a "software" mouse cursor by hiding the mouse cursor and
moving a Sprite2D to the cursor position in a _process() method, but
this will add at least one frame of latency compared to a "hardware" mouse
cursor. Therefore, it's recommended to use the approach described here
whenever possible.
"ソフトウェア"的なアプローチを使用する必要がある場合は、実際のマウス入力をより適切に表示するために外挿ステップを追加することを検討してください。
プロジェクト設定を使用する
Open the Project Settings and go to Display > Mouse Cursor. You will see the settings Custom Image, Custom Image Hotspot, and Tooltip Position Offset.
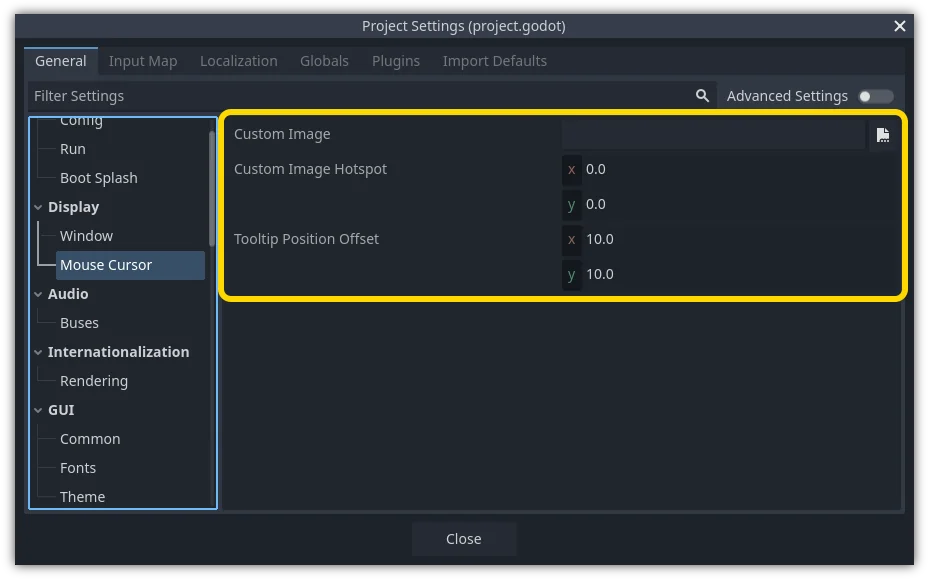
Custom Image is the desired image that you would like to set as the mouse cursor. Custom Hotspot is the point in the image that you would like to use as the cursor's detection point.
警告
The custom image must be 256×256 pixels at most. To avoid rendering issues, sizes of 128×128 or smaller are recommended.
Webプラットフォームでは、許可される最大カーソル画像サイズは 128×128 です。
スクリプトを使用する
ノードを作成し、次のスクリプトをアタッチします。
extends Node


# Load the custom images for the mouse cursor.
var arrow = load("res://arrow.png")
var beam = load("res://beam.png")


func _ready():
    # Changes only the arrow shape of the cursor.
    # This is similar to changing it in the project settings.
    Input.set_custom_mouse_cursor(arrow)

    # Changes a specific shape of the cursor (here, the I-beam shape).
    Input.set_custom_mouse_cursor(beam, Input.CURSOR_IBEAM)
using Godot;

public partial class MyNode : Node
{
    public override void _Ready()
    {
        // Load the custom images for the mouse cursor.
        var arrow = ResourceLoader.Load("res://arrow.png");
        var beam = ResourceLoader.Load("res://beam.png");

        // Changes only the arrow shape of the cursor.
        // This is similar to changing it in the project settings.
        Input.SetCustomMouseCursor(arrow);

        // Changes a specific shape of the cursor (here, the I-beam shape).
        Input.SetCustomMouseCursor(beam, Input.CursorShape.Ibeam);
    }
}
参考
使用法とプラットフォーム固有の注意事項の詳細については、Input.set_custom_mouse_cursor() のドキュメントを確認してください。
カーソルリスト
There are multiple mouse cursors you can define, documented in the Input.CursorShape enum. Which ones you want to use depends on your use case.