Materials
Introduction
Materials can be applied to most visible 3D objects. Basically they describe how light interacts with that object. There are many types of materials, but the main ones are the FixedMaterial and the ShaderMaterial. Tutorials for each of them exist Fixed materials and Shader materials.
This tutorial is about the basic properties shared between them.
Flags
Materials, no matter which type they are, have an associated set of flags. Their use will be explained in the following.
Visible
Toggles whether the material is visible. If unchecked, the object will not be shown.
Double sided & inverted faces
Godot by default only shows geometry faces (triangles) when their front-side faces the camera. If looking at the front-side of a face, its vertices have to be oriented clockwise by definition. For closed objects, the back-side of faces is never visible because they are hidden by other faces. SO not drawing invisible triangles (whose vertices are oriented counter-clockwise on the view plane) saves a lot of GPU power.
However, for flat or open objects, the back-side of faces might be visible and needs to be drawn as well. The “double sided” flag makes sure that no matter the facing, the triangle will always be drawn. It is also possible to invert this check and draw only counter-clockwise looking faces, though it’s not very useful except for a few cases (like drawing outlines).
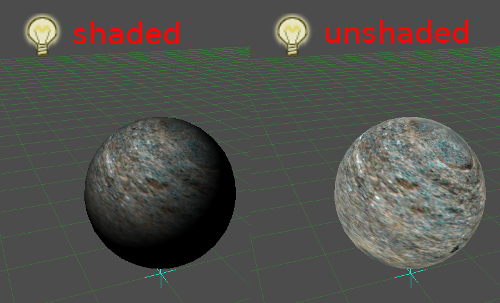
Unshaded
Objects are always black unless light affects them, and their shading changes according to the type and direction of lights. When this flag is turned on, the diffuse color is displayed right the same as it appears in the texture or parameter:
On top
When this flag is turned on, the object will be drawn after everything else has been drawn and without a depth test. This is generally useful for objects which shall never be hidden by other objects such as HUD effects or gizmos.
Ligthmap on UV2
When using lightmapping (see the doc_light_baking tutorial), this option determines that the lightmap should be accessed on the UV2 array instead of regular UV.
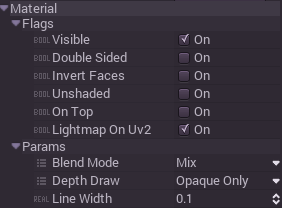
Parameters
Some parameters also exist for controlling drawing and blending:
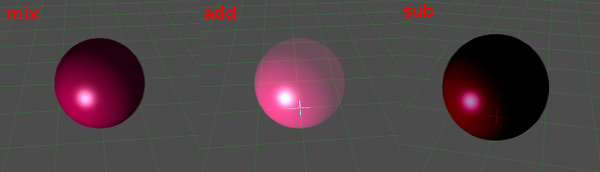
Blend mode
Objects are usually blended in Mix mode. Other blend modes (Add and Sub) exist for special cases (usually particle effects, light rays, etc.) but materials can be set to them:
Line width
When drawing lines, the size of them can be adjusted here per material.
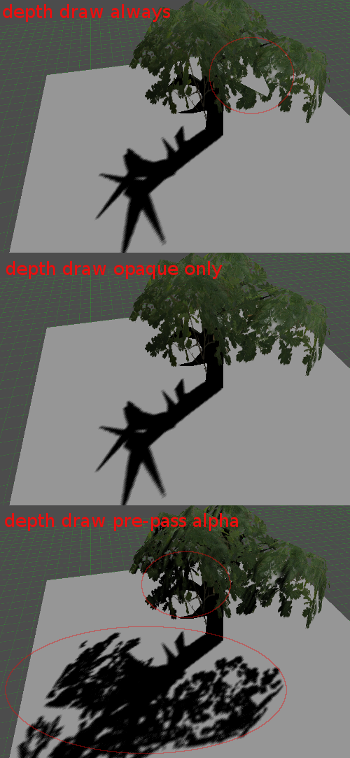
Depth draw mode
This is a tricky but very useful setting. By default, opaque objects are drawn using the depth buffer and translucent objects are not (but are sorted by depth). This behavior can be changed here. The options are:
- Always: Draw objects with depth always, even those with alpha. This often results in glitches like the one in the first image (which is why it’s not the default).
- Opaque Only: Draw objects with depth only when they are opaque, and do not set depth for alpha. This is the default because it’s fast, but it’s not the most correct setting. Objects with transparency that self-intersect will always look wrong, especially those that mix opaque and transparent areas, like grass, tree leaves, etc. Objects with transparency also can’t cast shadows, this is evident in the second image.
- Alpha Pre-Pass: The same as above, but a depth pass is performed for the opaque areas of objects with transparency. This makes objects with transparency look much more correct. In the third image it is evident how the leaves cast shadows between them and into the floor. This setting is turned off by default because, while on PC this is not very costly, mobile devices suffer a lot when this setting is turned on, so use it with care.
- Never: Never use the depth buffer for this material. This is mostly useful in combination with the “On Top” flag explained above.