Screen-reading shaders
Introduction
Very often it is desired to make a shader that reads from the same screen it’s writing to. 3D APIs such as OpenGL or DirectX make this very difficult because of internal hardware limitations. GPUs are extremely parallel, so reading and writing causes all sort of cache and coherency problems. As a result, not even the most modern hardware supports this properly.
The workaround is to make a copy of the screen, or a part of the screen, to a back-buffer and then read from it while drawing. Godot provides a few tools that makes this process easy!
TexScreen shader instruction
Godot Shading language has a special instruction, “texscreen”, it takes as parameter the UV of the screen and returns a vec3 RGB with the color. A special built-in varying: SCREEN_UV can be used to obtain the UV for the current fragment. As a result, this simple 2D fragment shader:
COLOR=vec4( texscreen(SCREEN_UV), 1.0 );
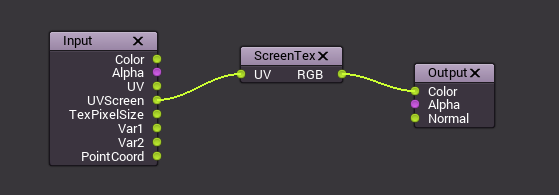
results in an invisible object, because it just shows what lies behind. The same shader using the visual editor looks like this:
TexScreen example
Texscreen instruction can be used for a lot of things. There is a special demo for Screen Space Shaders, that you can download to see and learn. One example is a simple shader to adjust brightness, contrast and saturation:
uniform float brightness = 1.0;
uniform float contrast = 1.0;
uniform float saturation = 1.0;

vec3 c = texscreen(SCREEN_UV);

c.rgb = mix(vec3(0.0), c.rgb, brightness);
c.rgb = mix(vec3(0.5), c.rgb, contrast);
c.rgb = mix(vec3(dot(vec3(1.0), c.rgb)*0.33333), c.rgb, saturation);

COLOR.rgb = c;
Behind the scenes
While this seems magical, it’s not. The Texscreen instruction, when first found in a node that is about to be drawn, does a full-screen copy to a back-buffer. Subsequent nodes that use texscreen() in shaders will not have the screen copied for them, because this ends up being very inefficient.
As a result, if shaders that use texscreen() overlap, the second one will not use the result of the first one, resulting in unexpected visuals:
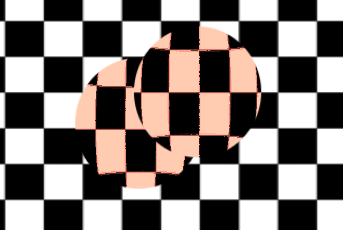
In the above image, the second sphere (top right) is using the same source for texscreen() as the first one below, so the first one “disappears”, or is not visible.
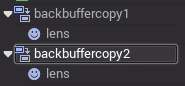
To correct this, a BackBufferCopy node can be instanced between both spheres. BackBufferCopy can work by either specifying a screen region or the whole screen:
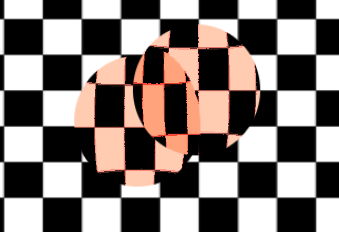
With correct back-buffer copying, the two spheres blend correctly:
Back-buffer logic
So, to make it clearer, here’s how the backbuffer copying logic works in Godot:
- If a node uses the texscreen(), the entire screen is copied to the back buffer before drawing that node. This only happens the first time, subsequent nodes do not trigger this.
- If a BackBufferCopy node was processed before the situation in the point above (even if texscreen() was not used), this behavior described in the point above does not happen. In other words, automatic copying of the entire screen only happens if texscreen() is used in a node for the first time and no BackBufferCopy node (not disabled) was found before in tree-order.
- BackBufferCopy can copy either the entire screen or a region. If set to only a region (not the whole screen) and your shader uses pixels not in the region copied, the result of that read is undefined (most likely garbage from previous frames). In other words, it’s possible to use BackBufferCopy to copy back a region of the screen and then use texscreen() on a different region. Avoid this behavior!