Scripting
Introduction
Much has been said about tools that allow users to create video games without programming. It’s been a dream for many independent developers to create games without learning how to code. This need has been around for a long time, even inside companies, where game designers wish to have more control of the game flow.
Many products have been shipped promising a no-programming environment, but the result is often incomplete, too complex or inefficient compared to traditional code. As a result, programming is here to stay for a long time. In fact, the general direction in game engines has been to add tools that try to reduce the amount of code that needs to be written for specific tasks, to speed up development.
In that sense, Godot has taken some useful design decisions towards that goal. The first and most important is the scene system. The aim of it is not obvious at first, but works well later on. That is, to relieve programmers from the responsibility of architecting code.
When designing games using the scene system, the whole project is fragmented into complementary scenes (not individual ones). Scenes complement each other, instead of being separate. There will be plenty of examples about this later on, but it’s very important to remember it.
For those with a good amount of programming expertise, this means a different design pattern to MVC. Godot promises efficiency at the expense of dropping the MVC habits, which are replaced by the scenes as a complement pattern.
Godot also uses the extend pattern for scripting, meaning that scripts extend from all the available engine classes.
GDScript
GDScript is a dynamically typed scripting language to fit inside Godot. It was designed with the following goals:
- First and most importantly, making it simple, familiar and as easy to learn as possible.
- Making the code readable and error safe. The syntax is mostly borrowed from Python.
Programmers generally take a few days to learn it, and within two weeks feel comfortable with it.
As with most dynamically typed languages, the higher productivity (code is easier to learn, faster to write, no compilation, etc) is balanced with a performance penalty. But most critical code is written in C++ already in the engine (vector ops, physics, math, indexing, etc), resulting in a more than sufficient performance for most types of games.
In any case, if more performance is required, critical sections can be rewritten in C++ and exposed transparently to the script. This allows the replacement of a GDScript class with a C++ class without altering the rest of the game.
Scripting a scene
Before continuing, please make sure to read the GDScript reference. It’s a simple language and the reference is short, it will not take more than a few minutes to get an overview of the concepts.
Scene setup
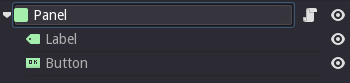
This tutorial will begin by scripting a simple GUI scene. Use the add node dialog to create the following hierarchy, with the following nodes:
- Panel
- Label
- Button
It should look like this in the scene tree:
Use the 2D editor to position and resize the button and label so that they look like the image below. You can set the text in the Inspector pane.
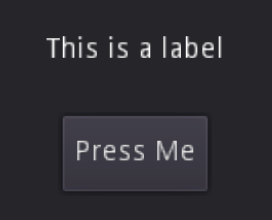
Finally, save the scene, a fitting name could be “sayhello.scn”
Adding a script
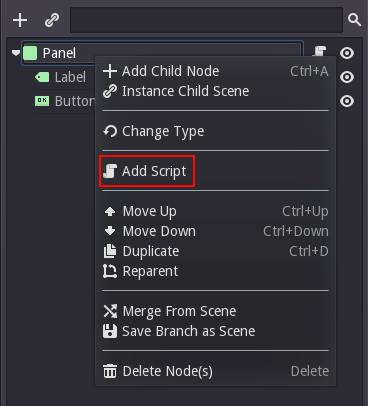
Right click on the panel node, then select “Add Script” in the context menu:
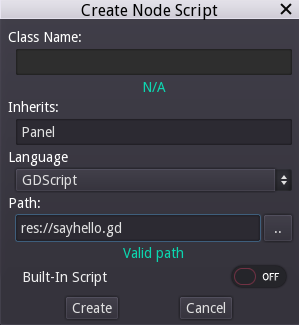
The script creation dialog will pop up. This dialog allows to select the language, class name, etc. GDScript does not use class names in script files, so that field is not editable. The script should inherit from “Panel” (as it is meant to extend the node, which is of Panel type, this is automatically filled).
Enter a path name for the script and then select “Create”:
Once this is done, the script will be created and added to the node. You can see this both as an extra icon in the node, as well as in the script property:

To edit the script, select either of the highlighted buttons. This will bring you to the script editor where an existing template will be included by default:
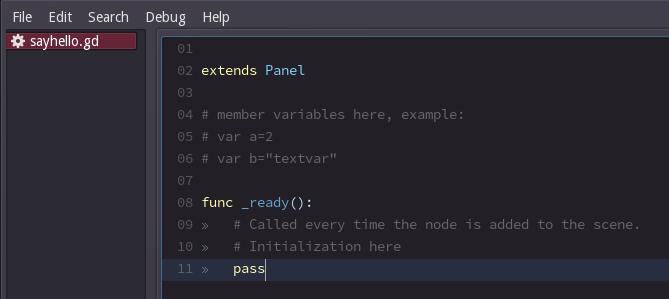
There is not much in there. The “_ready()” function is called when the node (and all its children) entered the active scene. (Remember, it’s not a constructor, the constructor is “_init()” ).
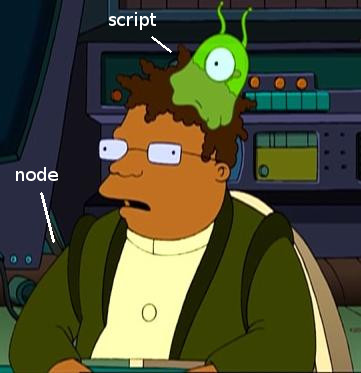
The role of the script
A script adds behavior to a node. It is used to control the node functions as well as other nodes (children, parent, siblings, etc). The local scope of the script is the node (just like in regular inheritance) and the virtual functions of the node are captured by the script.
Handling a signal
Signals are used mostly in GUI nodes (although other nodes have them too). Signals are “emitted” when some specific kind of action happens, and can be connected to any function of any script instance. In this step, the “pressed” signal from the button will be connected to a custom function.
An interface for connecting signals to your scripts exists in the editor. You can access this by selecting the node in the scene tree and then selecting the “Node” tab. Make sure that you have “Signals” selected.

In any case, at this point it is clear that we are interested in the “pressed” signal. Instead of using the visual interface, we will opt to code the connection.
For this, a function exists that is probably the one most used by Godot programmers, namely Node.get_node(). This function uses paths to fetch nodes in the current tree or anywhere in the scene, relative to the node holding the script.
To fetch the button, the following must be used:
get_node("Button")
Next, a callback will be added that will change the label’s text when the button is pressed:
func _on_button_pressed():
    get_node("Label").set_text("HELLO!")
Finally, the button “pressed” signal will be connected to that callback in _ready(), by using Object.connect().
func _ready():
    get_node("Button").connect("pressed",self,"_on_button_pressed")
The final script should look like this:
extends Panel

# member variables here, example:

# var a=2
# var b="textvar"

func _on_button_pressed():
    get_node("Label").set_text("HELLO!")

func _ready():
    get_node("Button").connect("pressed",self,"_on_button_pressed")
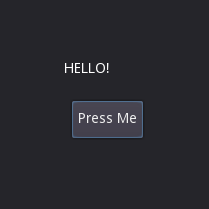
Running the scene should have the expected result when pressing the button:
Note: As it is a common misunderstanding in this tutorial, let’s clarify again that get_node(path) works by returning the immediate children of the node controlled by the script (in this case, Panel), so Button must be a child of Panel for the above code to work. To give this clarification more context, if Button were a child of Label, the code to obtain it would be:
# not for this case
# but just in case
get_node("Label/Button")
Also, remember that nodes are referenced by name, not by type.