Kinematic Character (2D)
Introduction
Yes, the name sounds strange. “Kinematic Character”. What is that? The reason is that when physics engines came out, they were called “Dynamics” engines (because they dealt mainly with collision responses). Many attempts were made to create a character controller using the dynamics engines but it wasn’t as easy as it seems. Godot has one of the best implementations of dynamic character controller you can find (as it can be seen in the 2d/platformer demo), but using it requires a considerable level of skill and understanding of physics engines (or a lot of patience with trial and error).
Some physics engines such as Havok seem to swear by dynamic character controllers as the best alternative, while others (PhysX) would rather promote the Kinematic one.
So, what is really the difference?:
- A dynamic character controller uses a rigid body with infinite inertial tensor. Basically, it’s a rigid body that can’t rotate. Physics engines always let objects collide, then solve their collisions all together. This makes dynamic character controllers able to interact with other physics objects seamlessly (as seen in the platformer demo), however these interactions are not always predictable. Collisions also can take more than one frame to be solved, so a few collisions may seem to displace a tiny bit. Those problems can be fixed, but require a certain amount of skill.
- A kinematic character controller is assumed to always begin in a non-colliding state, and will always move to a non colliding state. If it starts in a colliding state, it will try to free itself (like rigid bodies do) but this is the exception, not the rule. This makes their control and motion a lot more predictable and easier to program. However, as a downside, they can’t directly interact with other physics objects (unless done by hand in code).
This short tutorial will focus on the kinematic character controller. Basically, the oldschool way of handling collisions (which is not necessarily simpler under the hood, but well hidden and presented as a nice and simple API).
Fixed process
To manage the logic of a kinematic body or character, it is always advised to use fixed process, which is called the same amount of times per second, always. This makes physics and motion calculation work in a more predictable way than using regular process, which might have spikes or lose precision if the frame rate is too high or too low.
extends KinematicBody2D

func _fixed_process(delta):
    pass

func _ready():
    set_fixed_process(true)
Scene setup
To have something to test, here’s the scene (from the tilemap tutorial):
kbscene.zip. We’ll be creating a new scene
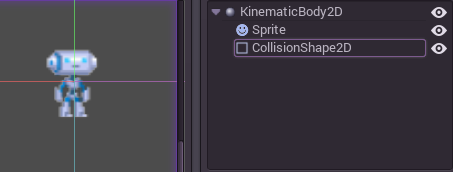
for the character. Use the robot sprite and create a scene like this:
Let’s add a circular collision shape to the collision body, create a new CircleShape2D in the shape property of CollisionShape2D. Set the radius to 30:
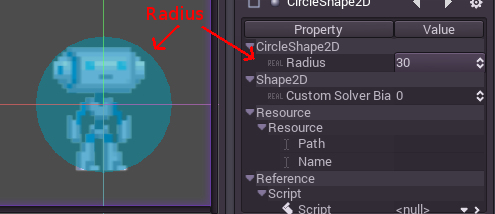
Note: As mentioned before in the physics tutorial, the physics engine can’t handle scale on most types of shapes (only collision polygons, planes and segments work), so always change the parameters (such as radius) of the shape instead of scaling it. The same is also true for the kinematic/rigid/static bodies themselves, as their scale affect the shape scale.
Now create a script for the character, the one used as an example above should work as a base.
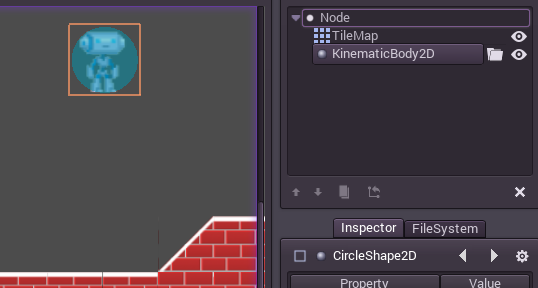
Finally, instance that character scene in the tilemap, and make the map scene the main one, so it runs when pressing play.
Moving the Kinematic character
Go back to the character scene, and open the script, the magic begins now! Kinematic body will do nothing by default, but it has a really useful function called KinematicBody2D.move(). This function takes a Vector2 as an argument, and tries to apply that motion to the kinematic body. If a collision happens, it stops right at the moment of the collision.
So, let’s move our sprite downwards until it hits the floor:
extends KinematicBody2D

func _fixed_process(delta):
    move( Vector2(0,1) ) #move down 1 pixel per physics frame

func _ready():
    set_fixed_process(true)
The result is that the character will move, but stop right when hitting the floor. Pretty cool, huh?
The next step will be adding gravity to the mix, this way it behaves a little more like an actual game character:
extends KinematicBody2D

const GRAVITY = 200.0
var velocity = Vector2()

func _fixed_process(delta):

    velocity.y += delta * GRAVITY

    var motion = velocity * delta
    move( motion )

func _ready():
    set_fixed_process(true)
Now the character falls smoothly. Let’s make it walk to the sides, left and right when touching the directional keys. Remember that the values being used (for speed at least) is pixels/second.
This adds simple walking support by pressing left and right:
extends KinematicBody2D

const GRAVITY = 200.0
const WALK_SPEED = 200

var velocity = Vector2()

func _fixed_process(delta):

    velocity.y += delta * GRAVITY

    if (Input.is_action_pressed("ui_left")):
        velocity.x = -WALK_SPEED
    elif (Input.is_action_pressed("ui_right")):
        velocity.x =  WALK_SPEED
    else:
        velocity.x = 0

    var motion = velocity * delta
    move(motion)

func _ready():
    set_fixed_process(true)
And give it a try.
Problem?
And… it doesn’t work very well. If you go to the left against a wall, it gets stuck unless you release the arrow key. Once it is on the floor, it also gets stuck and it won’t walk. What is going on??
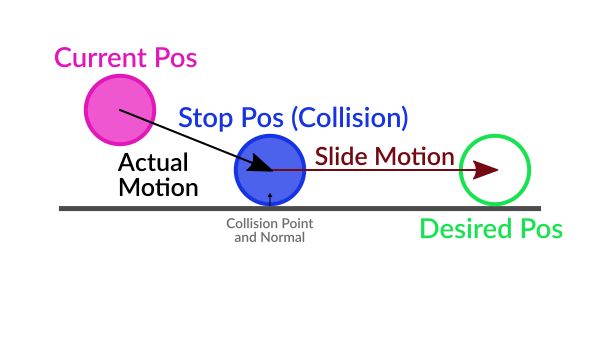
The answer is, what it seems like it should be simple, it isn’t that simple in reality. If the motion can’t be completed, the character will stop moving. It’s as simple as that. This diagram should illustrate better what is going on:
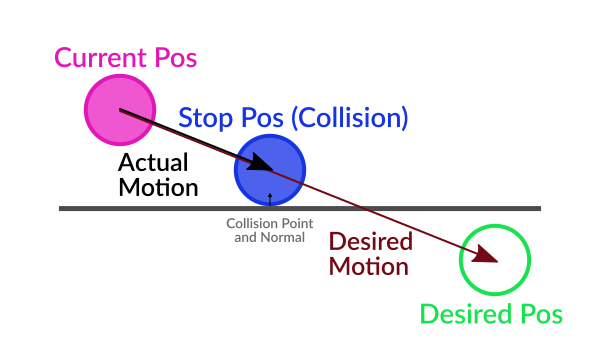
Basically, the desired motion vector will never complete because it hits the floor and the wall too early in the motion trajectory and that makes it stop there. Remember that even though the character is on the floor, the gravity is always turning the motion vector downwards.
Solution!
The solution? This situation is solved by “sliding” by the collision normal. KinematicBody2D provides two useful functions:
So what we want to do is this:
When colliding, the function move() returns the “remainder” of the
motion vector. That means, if the motion vector is 40 pixels, but
collision happened at 10 pixels, the same vector but 30 pixels long is
returned.
The correct way to solve the motion is, then, to slide by the normal this way:
func _fixed_process(delta):

    velocity.y += delta * GRAVITY
    if (Input.is_action_pressed("ui_left")):
        velocity.x = - WALK_SPEED
    elif (Input.is_action_pressed("ui_right")):
        velocity.x =   WALK_SPEED
    else:
        velocity.x = 0

    var motion = velocity * delta
    motion = move(motion)

    if (is_colliding()):
        var n = get_collision_normal()
        motion = n.slide(motion)
        velocity = n.slide(velocity)
        move(motion)


func _ready():
    set_fixed_process(true)
Note that not only the motion has been modified but also the velocity. This makes sense as it helps keep the new direction too.
The normal can also be used to detect that the character is on floor, by checking the angle. If the normal points up (or at least, within a certain threshold), the character can be determined to be there.
A more complete demo can be found in the demo zip distributed with the engine, or in the https://github.com/godotengine/godot-demo-projects/tree/2.1/2d/kinematic_char.