Viewports
Introduction
Godot has a small but very useful feature called viewports. Viewports are, as they name implies, rectangles where the world is drawn. They have three main uses, but can flexibly adapted to a lot more. All this is done via the Viewport node.
The main uses in question are:
- Scene Root: The root of the active scene is always a Viewport. This is what displays the scenes created by the user. (You should know this by having read previous tutorials!)
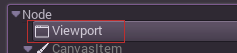
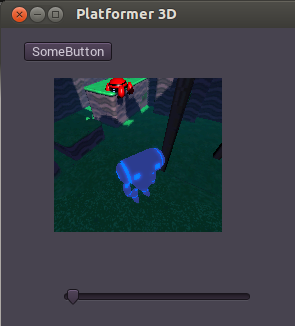
- Sub-Viewports: These can be created when a Viewport is a child of a Control.
- Render Targets: Viewports can be set to “RenderTarget” mode. This means that the viewport is not directly visible, but its contents can be accessed via a Texture.
Input
Viewports are also responsible of delivering properly adjusted and scaled input events to all its children nodes. Both the root viewport and sub-viewports do this automatically, but render targets do not. Because of this, the user must do it manually via the Viewport.input() function if needed.
Listener
Godot supports 3D sound (in both 2D and 3D nodes), more on this can be found in another tutorial (one day..). For this type of sound to be audible, the viewport needs to be enabled as a listener (for 2D or 3D). If you are using a custom viewport to display your world, don’t forget to enable this!
Cameras (2D & 3D)
When using a 2D or 3D Camera / Camera2D, cameras will always display on the closest parent viewport (going towards the root). For example, in the following hierarchy:
- Viewport
- Camera
Camera will display on the parent viewport, but in the following one:
- Camera
- Viewport
It will not (or may display in the root viewport if this is a subscene).
There can be only one active camera per viewport, so if there is more than one, make sure that the desired one has the “current” property set, or make it the current camera by calling:
camera.make_current()
Scale & stretching
Viewports have a “rect” property. X and Y are often not used (only the root viewport really uses them), while WIDTH AND HEIGHT represent the size of the viewport in pixels. For Sub-Viewports, these values are overridden by the ones from the parent control, but for render targets this sets their resolution.
It is also possible to scale the 2D content and make it believe the viewport resolution is other than the one specified in the rect, by calling:
viewport.set_size_override(w,h) #custom size for 2D
viewport.set_size_override_stretch(true/false) #enable stretch for custom size
The root viewport uses this for the stretch options in the project settings.
Worlds
For 3D, a Viewport will contain a World. This is basically the universe that links physics and rendering together. Spatial-base nodes will register using the World of the closest viewport. By default, newly created viewports do not contain a World but use the same as a parent viewport (root viewport does contain one though, which is the one objects are rendered to by default). A world can be set in a viewport using the “world” property, and that will separate all children nodes of that viewport from interacting with the parent viewport world. This is specially useful in scenarios where, for example, you might want to show a separate character in 3D imposed over the game (like in Starcraft).
As a helper for situations where you want to create viewports that display single objects and don’t want to create a world, viewport has the option to use its own World. This is very useful when you want to instance 3D characters or objects in the 2D world.
For 2D, each Viewport always contains its own World2D. This suffices in most cases, but in case sharing them may be desired, it is possible to do so by calling the viewport API manually.
Capture
It is possible to query a capture of the viewport contents. For the root viewport this is effectively a screen capture. This is done with the following API:
# queues a screen capture, will not happen immediately
viewport.queue_screen_capture()
After a frame or two (check _process()), the capture will be ready, get it back by using:
var capture = viewport.get_screen_capture()
If the returned image is empty, capture still didn’t happen, wait a little more, as this API is asyncronous.
Sub-viewport
If the viewport is a child of a control, it will become active and display anything it has inside. The layout is something like this:
- Control
- Viewport
The viewport will cover the area of its parent control completely.
Render target
To set as a render target, just toggle the “render target” property of the viewport to enabled. Note that whatever is inside will not be visible in the scene editor. To display the contents, the render target texture must be used. This can be requested via code using (for example):
var rtt = viewport.get_render_target_texture()
sprite.set_texture(rtt)
By default, re-rendering of the render target happens when the render target texture has been drawn in a frame. If visible, it will be rendered, otherwise it will not. This behavior can be changed to manual rendering (once), or always render, no matter if visible or not.
A few classes are created to make this easier in most common cases inside the editor:
- ViewportSprite (for 2D).
- ViewportQuad (for 3D).
- ViewportFrame (for GUI).
TODO: Review the doc, ViewportQuad and ViewportFrame don’t exist in 2.0.
Make sure to check the viewport demos! Viewport folder in the demos archive available to download, or https://github.com/godotengine/godot-demo-projects/tree/master/viewport