Up to date
This page is up to date for Godot 4.3.
If you still find outdated information, please open an issue.
為 Android 進行編譯
也參考
這個頁面描述的是如何從源碼編譯 Android 匯出範本二進位。如果你想要找的是匯出專案到 Android,請閱讀 為 Android 匯出。
請注意
在大多數情況下,使用內建的部署工具與匯出樣板就勾勒。手動編譯 Android APK 通常適用於自定建置或為部署工具自定套件的情況。
另外,在建置自定匯出樣板前,依然必須依照 為 Android 匯出 中所提到的步驟進行。
系統需求
要在 Windows, Linux 或 macOS 下進行編譯,則必須滿足下列條件:
SCons 3.1.2+ build system.
Android SDK (命令行工具即可)。
所需的 SDK 元件會由 Gradle 自動安裝 (除了 NDK)。
On Linux, do not use an Android SDK provided by your distribution's repositories as it will often be outdated.
On macOS, do not use an Android SDK provided by Homebrew as it will not be installed in a unified location.
Gradle (若尚未安裝,會自動下載並安裝)。
JDK 17 (either OpenJDK or Oracle JDK).
You can download a build from Adoptium.
設定建置系統
Set the environment variable
ANDROID_HOMEto point to the Android SDK. If you downloaded the Android command-line tools, this would be the folder where you extracted the contents of the ZIP archive.Windows: Press Windows + R, type "control system", then click on Advanced system settings in the left pane, then click on Environment variables on the window that appears.
Linux or macOS: Add the text
export ANDROID_HOME="/path/to/android-sdk"to your.bashrcor.zshrcwhere/path/to/android-sdkpoints to the root of the SDK directories.
在此資料夾中安裝必要的SDK元件:
通過運作以下命令接受SDK元件許可證, 其中
android_sdk_path是android SDK的路徑, 然後用y回答所有提示:
cmdline-tools/latest/bin/sdkmanager --sdk_root=<android_sdk_path> --licenses
運作以下命令完成安裝, 其中
android_sdk_path是Android SDK的路徑.
cmdline-tools/latest/bin/sdkmanager --sdk_root=<android_sdk_path> "platform-tools" "build-tools;34.0.0" "platforms;android-34" "cmdline-tools;latest" "cmake;3.10.2.4988404" "ndk;23.2.8568313"
After setting up the SDK and environment variables, be sure to restart your terminal to apply the changes. If you are using an IDE with an integrated terminal, you need to restart the IDE.
Run
scons platform=android. If this fails, go back and check the steps. If you completed the setup correctly, the NDK will begin downloading. If you are trying to compile GDExtension, you need to first compile the engine to download the NDK, then you can compile GDExtension.
建置匯出樣板
Godot needs three export templates for Android: the optimized "release"
template (android_release.apk), the debug template (android_debug.apk),
and the Gradle build template (android_source.zip).
As Google requires all APKs to include ARMv8 (64-bit) libraries since August 2019,
the commands below build templates containing both ARMv7 and ARMv8 libraries.
可以通過在 Godot 根目錄以下列參數來呼叫 SCons 來編譯標準匯出樣板:
釋出樣板 (用於匯出時有勾選 Debugging Enabled 時)
scons platform=android target=template_release arch=arm32
scons platform=android target=template_release arch=arm64 generate_apk=yes
除錯樣板 (用於匯出時有勾選 Debugging Enabled 時)
scons platform=android target=template_debug arch=arm32
scons platform=android target=template_debug arch=arm64 generate_apk=yes
(Optional) Dev template (used when troubleshooting)
scons platform=android target=template_debug arch=arm32 dev_build=yes
scons platform=android target=template_debug arch=arm64 dev_build=yes generate_apk=yes
The resulting templates will be located under the bin directory:
bin/android_release.apkfor the release templatebin/android_debug.apkfor the debug templatebin/android_dev.apkfor the dev templatebin/android_source.zipfor the Gradle build template
備註
If you are changing the list of architectures you're building, remember to add
generate_apk=yesto the last architecture you're building, so that the template files are generated after the build.To include debug symbols in the generated templates, add the
debug_symbols=yesparameter to the SCons command.
也參考
如果您想要啟用 Vulkan 驗證層,請參閱 Android 上的 Vulkan 驗證層 <doc_vulkan_validation_layers_android>`。
加上對 x86 裝置的支援
If you also want to include support for x86 and x86_64 devices, run the SCons
command a third and fourth time with the arch=x86_32, and
arch=x86_64 arguments before building the APK with Gradle. For
example, for the release template:
scons platform=android target=template_release arch=arm32
scons platform=android target=template_release arch=arm64
scons platform=android target=template_release arch=x86_32
scons platform=android target=template_release arch=x86_64 generate_apk=yes
This will create template binaries that works on all platforms. The final binary size of exported projects will depend on the platforms you choose to support when exporting; in other words, unused platforms will be removed from the binary.
清理產生的匯出樣板
可以使用下列指令來移除產生的匯出樣板:
cd platform/android/java
# On Windows
.\gradlew clean
# On Linux and macOS
./gradlew clean
使用匯出樣板
Godot needs release and debug binaries that were compiled against the same version/commit as the editor. If you are using official binaries for the editor, make sure to install the matching export templates, or build your own from the same version.
When exporting your game, Godot uses the templates as a base, and updates their content as needed.
安裝樣板
The newly-compiled templates (android_debug.apk
, android_release.apk, and android_source.zip) must be copied to Godot's templates folder
with their respective names. The templates folder can be located in:
Windows:
%APPDATA%\Godot\templates\<版本>\Linux:
$HOME/.local/share/godot/templates/<版本>/macOS:
$HOME/Library/Application Support/Godot/templates/<版本>/
<version> is of the form major.minor[.patch].status using values from
version.py in your Godot source repository (e.g. 4.1.3.stable or 4.2.dev).
You also need to write this same version string to a version.txt file located
next to your export templates.
However, if you are writing your custom modules or custom C++ code, you might instead want to configure your template binaries as custom export templates here:
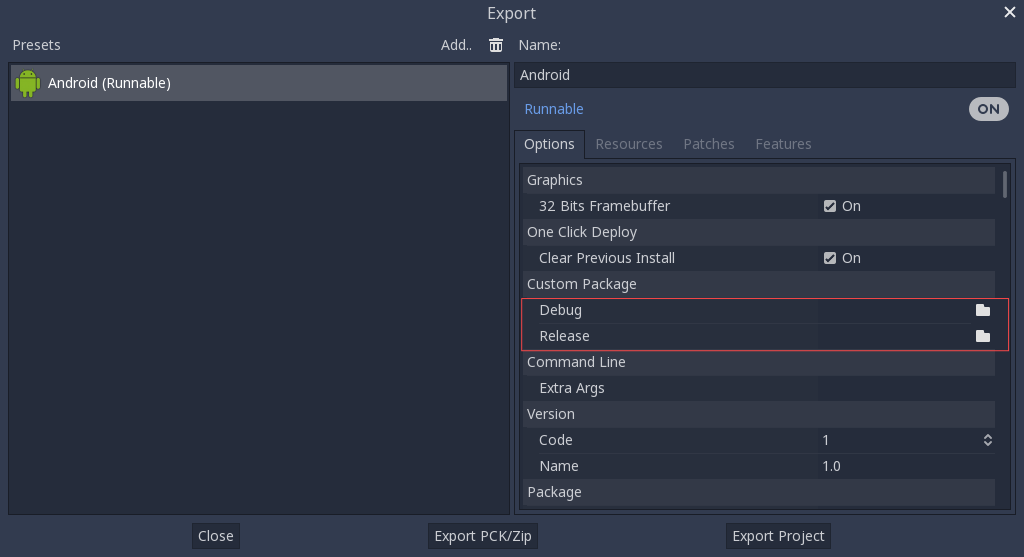
這種情況下甚至不需要複製這些檔案,只需要將這些檔案參照至 Godot 原始碼目錄中的 bin\ 資料夾即可。這樣一來下次建置時就會自動參照到自定樣板。
內建主題編輯器。
可以通過在 Godot 根目錄以下列參數來呼叫 SCons 來編譯標準匯出樣板:
scons platform=android arch=arm32 production=yes target=editor
scons platform=android arch=arm64 production=yes target=editor
scons platform=android arch=x86_32 production=yes target=editor
scons platform=android arch=x86_64 production=yes target=editor generate_apk=yes
You can add the
dev_build=yesparameter to generate a dev build of the Godot editor.You can add the
debug_symbols=yesparameter to include the debug symbols in the generated build.You can skip certain architectures depending on your target device to speed up compilation.
Remember to add generate_apk=yes to the last architecture you're building, so that binaries are generated after the build.
The resulting binaries will be located under bin/android_editor_builds/.
Removing the Editor binaries
You can use the following commands to remove the generated editor binaries:
 cd platform/android/java
 # On Windows
.\gradlew clean
# On Linux and macOS
./gradlew clean
Installing the Godot editor APK
在啟用了開發者選項的 Android 裝置上,透過 USB/USB-C 連接埠的充電線將 Android 裝置連接到您的電腦。開啟終端機/命令提示字元並使用以下參數從根目錄執行以下命令:
adb install ./bin/android_editor_builds/android_editor-release.apk
疑難排解
SCons 中未顯示平台
Double-check that you've set the ANDROID_HOME
environment variable. This is required for the platform to appear in SCons'
list of detected platforms.
See Setting up the buildsystem
for more information.
應用程式無法安裝
Android 可能會提示應用程式未正確安裝。這時:
請檢查除錯 (Debug) 金鑰儲存區是否有正確產生。
請檢查 jarsigner 執行檔是否為 JDK 8 中的。
若依然失敗,請開啟命令行並執行 logcat :
adb logcat
接著在應用程式安裝時檢查輸出。錯誤訊息應該會顯示在此處。若無法解決,請尋找支援。
應用程式馬上退出
若應用程式可執行,但會馬上退出的話,可能是由於下列原因導致:
請確保匯出樣板的版本符合編輯器版本。若使用較新的 Godot 版本,則 必須 一併更新樣板的版本。
libs/<android_arch>/中沒有libgodot_android.so。其中,<android_arch>是裝置的架構。專案的架構與匯出樣板的架構不同。請確定有使用裝置的架構來建置樣板,並確認匯出設定有包含對該架構的支援。
不論哪種情況,adb logcat 應該也會顯示錯誤的原因。