Up to date
This page is up to date for Godot 4.3.
If you still find outdated information, please open an issue.
Using a SubViewport as a texture
前言
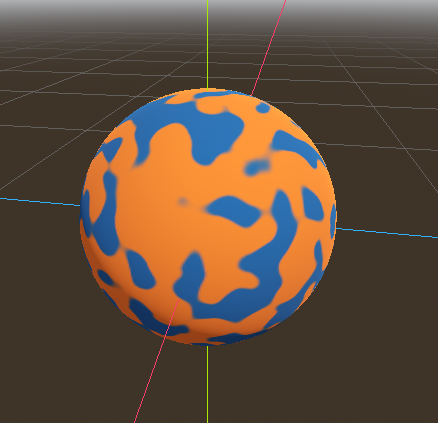
This tutorial will introduce you to using the SubViewport as a texture that can be applied to 3D objects. In order to do so, it will walk you through the process of making a procedural planet like the one below:
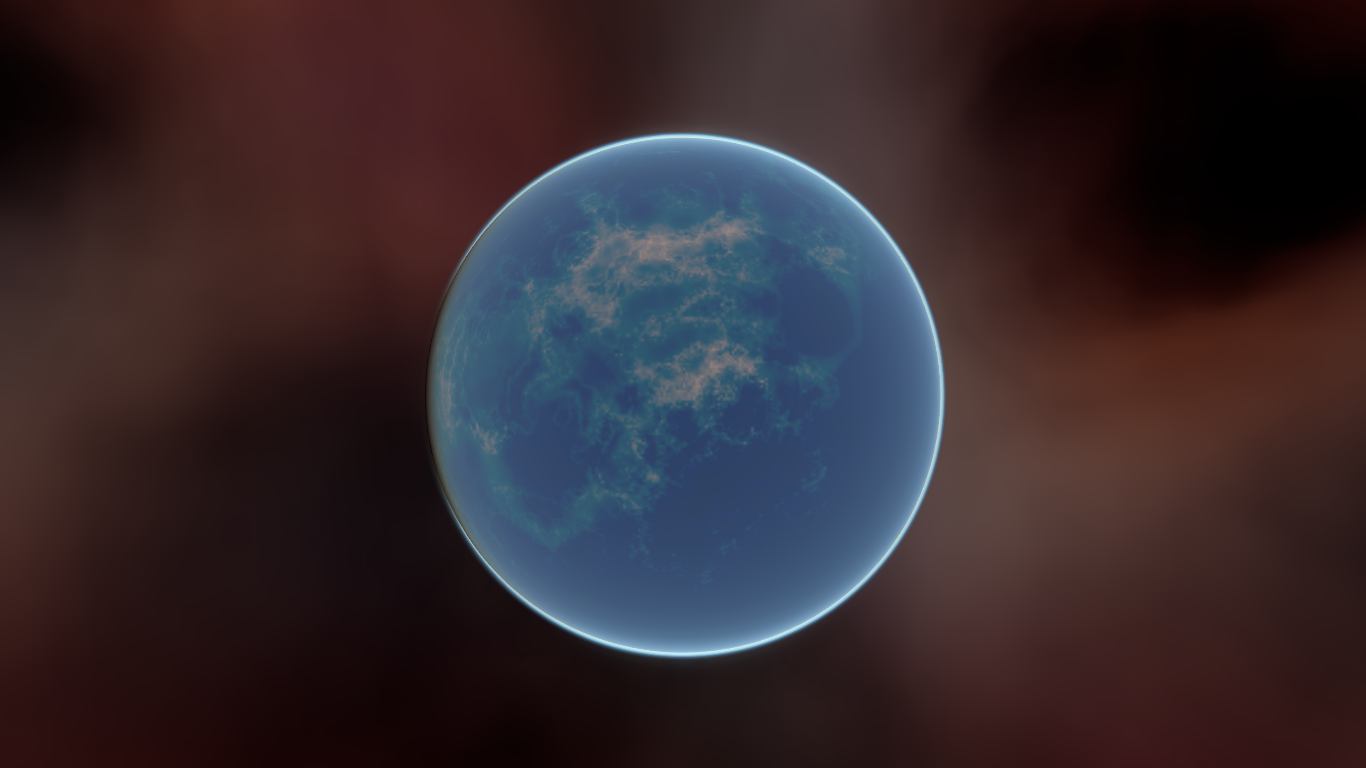
備註
本教學沒有介紹如何編寫像這個星球那樣的動態氛圍.
This tutorial assumes you are familiar with how to set up a basic scene including: a Camera3D, a light source, a MeshInstance3D with a Primitive Mesh, and applying a StandardMaterial3D to the mesh. The focus will be on using the SubViewport to dynamically create textures that can be applied to the mesh.
在本教學中, 我們將介紹以下主題:
How to use a SubViewport as a render texture
使用 equirectangular 對應將紋理對應到球體
程式式行星的片段著色器技術
從:ref:`視口紋理 <class_ViewportTexture>`設定粗糙度貼圖
設定場景
Create a new scene and add the following nodes exactly as shown below.
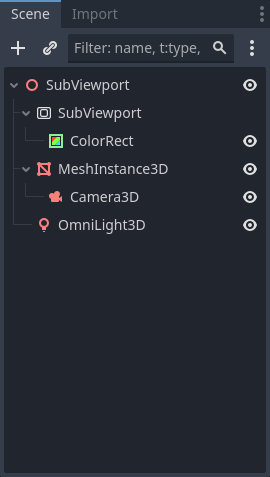
Go into the the MeshInstance3D and make the mesh a SphereMesh
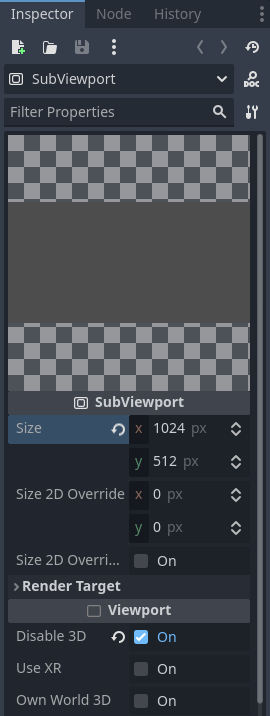
Setting up the SubViewport
Click on the SubViewport node and set its size to (1024, 512). The
SubViewport can actually be any size so long as the width is double the
height. The width needs to be double the height so that the image will accurately map onto the
sphere, as we will be using equirectangular projection, but more on that later.
Next disable 3D. We will be using a ColorRect to render the surface, so we don't need 3D either.
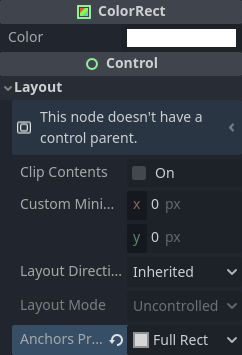
Select the ColorRect and in the inspector set the anchors preset to Full Rect.
This will ensure that the ColorRect takes up the entire SubViewport.
接下來, 我們為 Shader Material 新增一個 ColorRect (ColorRect > CanvasItem > Material > Material > New ShaderMaterial).
備註
建議本教學基本瞭解陰影. 但是, 即使您不熟悉著色器, 也將提供所有程式碼, 因此後續操作應該沒有問題.
Click the dropdown menu button for the shader material and click / Edit. From here go to Shader > New Shader.
give it a name and click "Create". click the shader in the inspector to open the shader editor. Delete the default code
and add the following:
shader_type canvas_item;

void fragment() {
    COLOR = vec4(UV.x, UV.y, 0.5, 1.0);
}
save the shader code, you'll see in the inspector that the above code renders a gradient like the one below.
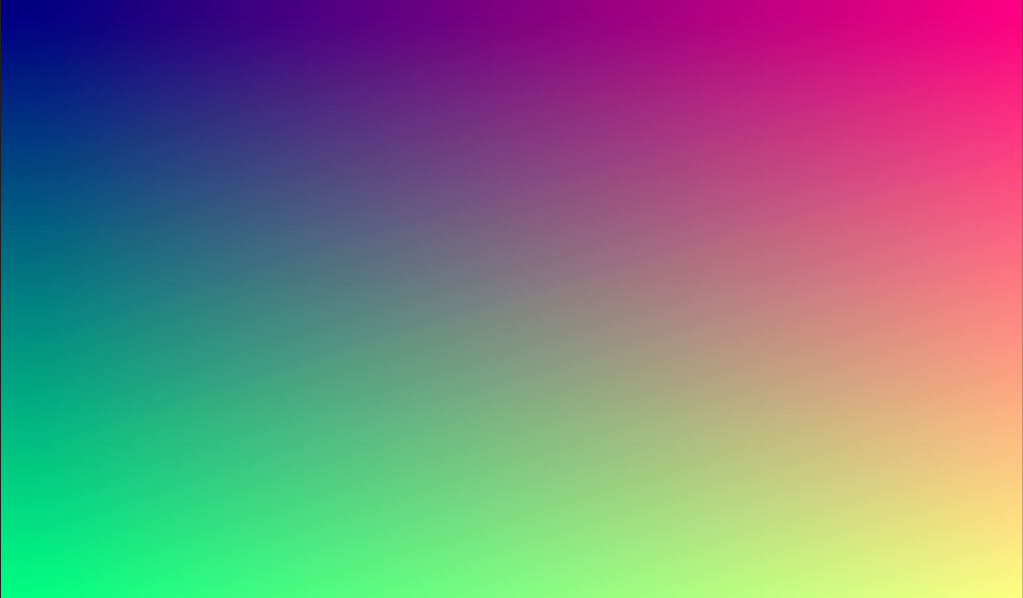
Now we have the basics of a SubViewport that we render to and we have a unique image that we can apply to the sphere.
應用紋理
Now go into the MeshInstance3D and add a StandardMaterial3D to it. No need for a special Shader Material (although that would be a good idea for more advanced effects, like the atmosphere in the example above).
MeshInstance3D > GeometryInstance > Geometry > Material Override > New StandardMaterial3D
Then click the dropdown for the StandardMaterial3D and click "Edit"
Go to the "Resource" section and check the Local to scene box. Then, go to the "Albedo" section
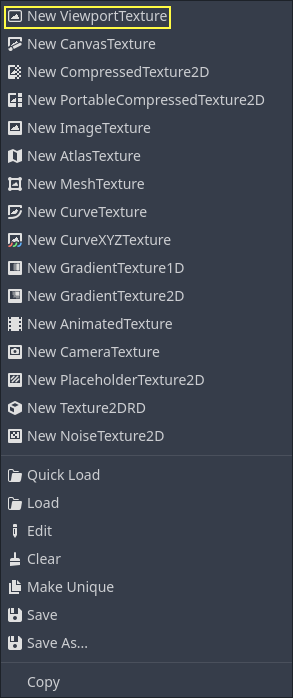
and click beside the "Texture" property to add an Albedo Texture. Here we will apply the texture we made.
Choose "New ViewportTexture"
Click on the ViewportTexture you just created in the inspector, then click "Assign". Then, from the menu that pops up, select the Viewport that we rendered to earlier.
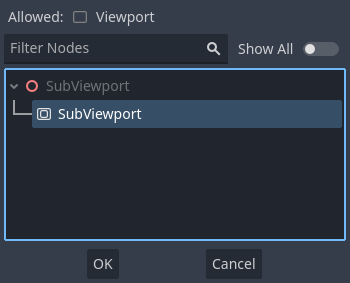
現在, 您的球體應使用我們算繪到視口的顏色進行著色.
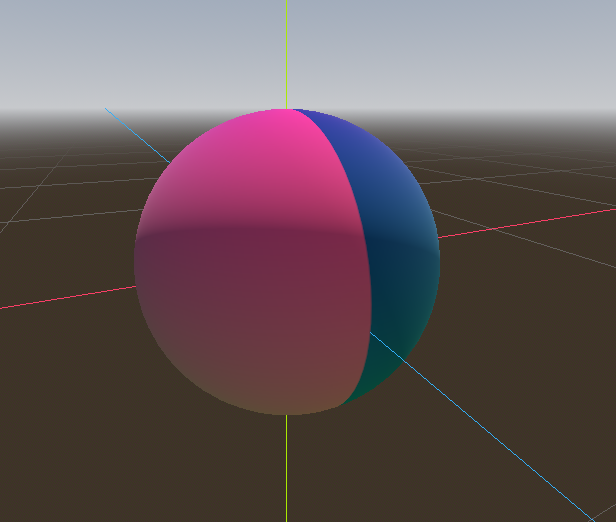
注意到在紋理環繞的地方形成的醜陋縫隙嗎?這是因為我們是根據UV座標來選取顏色的, 而UV座標並不會環繞紋理. 這是二維地圖投影中的一個典型問題. 遊戲開發人員通常有一個二維貼圖, 他們想投射到一個球體上, 但是當它環繞時, 將有接縫. 這個問題有一個優雅的解決方法, 我們將在下一節中說明.
製作行星紋理
So now, when we render to our SubViewport, it appears magically on the sphere. But there is an ugly
seam created by our texture coordinates. So how do we get a range of coordinates that wrap around
the sphere in a nice way? One solution is to use a function that repeats on the domain of our texture.
sin and cos are two such functions. Let's apply them to the texture and see what happens. Replace the
existing color code in the shader with the following:
COLOR.xyz = vec3(sin(UV.x * 3.14159 * 4.0) * cos(UV.y * 3.14159 * 4.0) * 0.5 + 0.5);
不算太壞. 如果你環顧四周, 可以看到接縫現在已經消失了, 但在它所處位置, 會有兩極的擠壓. 這種擠壓是由於Godot在其 SpatialMaterial 中把紋理對應到球體的方式造成的. 它使用了一種叫做 "等角投影" 的投影技術, 將球面圖形轉化為一個二維平面.
備註
如果你對技術方面的一些額外資訊感興趣,我們將從球面座標轉換為直角坐標。球面座標對應的是球體的經度和緯度,而直角坐標則是從球體中心到點的一個向量。
對於每個像素, 我們將計算它在球體上的三維位置. 由此, 我們將使用3D噪波來確定一個顏色值. 通過計算3D噪波, 我們解決了兩極的擠壓問題. 要理解為什麼, 想像一下在球體表面而不是在二維平面上計算雜訊. 當你跨越球體表面進行計算時, 你永遠不會碰到邊緣, 因此你永遠不會在極點上產生接縫或夾點。下面的程式碼會將“UV”轉換為笛卡爾座標。
float theta = UV.y * 3.14159;
float phi = UV.x * 3.14159 * 2.0;
vec3 unit = vec3(0.0, 0.0, 0.0);

unit.x = sin(phi) * sin(theta);
unit.y = cos(theta) * -1.0;
unit.z = cos(phi) * sin(theta);
unit = normalize(unit);
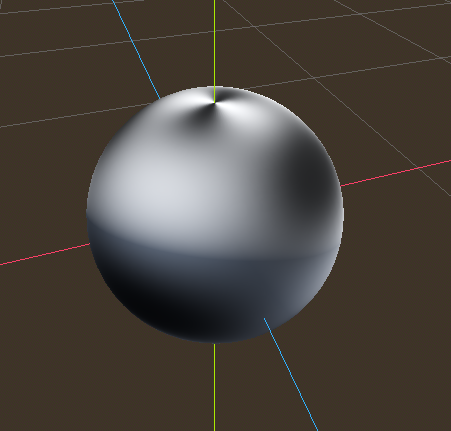
如果我們使用 unit 作為輸出 COLOR 值, 我們可以得到:
現在我們可以計算出球體表面的3D位置, 可以使用3D雜訊來製作球體. 直接從 Shadertoy 中使用這個雜訊函式:
vec3 hash(vec3 p) {
    p = vec3(dot(p, vec3(127.1, 311.7, 74.7)),
             dot(p, vec3(269.5, 183.3, 246.1)),
             dot(p, vec3(113.5, 271.9, 124.6)));

    return -1.0 + 2.0 * fract(sin(p) * 43758.5453123);
}

float noise(vec3 p) {
  vec3 i = floor(p);
  vec3 f = fract(p);
  vec3 u = f * f * (3.0 - 2.0 * f);

  return mix(mix(mix(dot(hash(i + vec3(0.0, 0.0, 0.0)), f - vec3(0.0, 0.0, 0.0)),
                     dot(hash(i + vec3(1.0, 0.0, 0.0)), f - vec3(1.0, 0.0, 0.0)), u.x),
                 mix(dot(hash(i + vec3(0.0, 1.0, 0.0)), f - vec3(0.0, 1.0, 0.0)),
                     dot(hash(i + vec3(1.0, 1.0, 0.0)), f - vec3(1.0, 1.0, 0.0)), u.x), u.y),
             mix(mix(dot(hash(i + vec3(0.0, 0.0, 1.0)), f - vec3(0.0, 0.0, 1.0)),
                     dot(hash(i + vec3(1.0, 0.0, 1.0)), f - vec3(1.0, 0.0, 1.0)), u.x),
                 mix(dot(hash(i + vec3(0.0, 1.0, 1.0)), f - vec3(0.0, 1.0, 1.0)),
                     dot(hash(i + vec3(1.0, 1.0, 1.0)), f - vec3(1.0, 1.0, 1.0)), u.x), u.y), u.z );
}
備註
所有功勞歸作者Inigo Quilez所有. 它是在 MIT 許可下發行的.
現在使用 noised , 將以下內容新增到 fragment 函式中:
float n = noise(unit * 5.0);
COLOR.xyz = vec3(n * 0.5 + 0.5);
備註
為了突出顯示紋理, 我們將材質設定為無陰影.
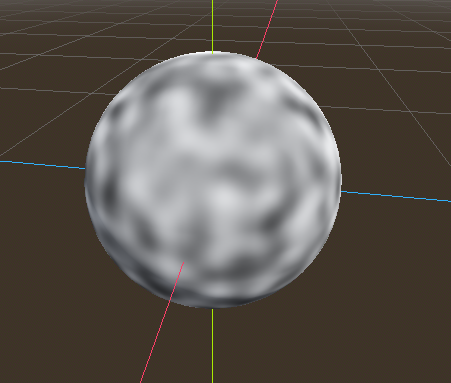
你現在可以看到, 儘管這看起來完全不像所承諾的球體, 但噪音確實無縫地包裹著球體. 對此, 讓我們進入一些更豐富多彩的東西.
著色這個星球
現在來製作行星的顏色. 雖然有很多方法可以做到這一點, 但目前, 我們將使用水和陸地之間的梯度.
要在 GLSL 中建立漸變, 我們使用 mix 函式. mix 需要兩個值來插值和第三個參數來選擇在它們之間插入多少, 實質上它將兩個值 混合 在一起. 在其他API中, 此函式通常稱為 lerp . 雖然 lerp 通常用於將兩個浮點數混合在一起, 但 mix 可以取任何值, 無論它是浮點數還是向量型別.
COLOR.xyz = mix(vec3(0.05, 0.3, 0.5), vec3(0.9, 0.4, 0.1), n * 0.5 + 0.5);
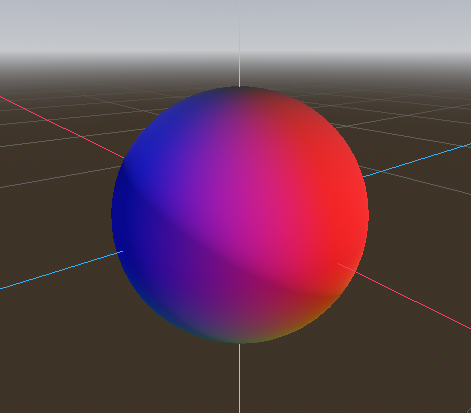
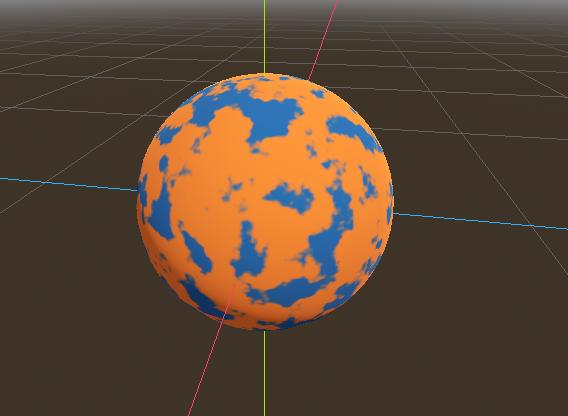
第一種顏色是藍色, 代表海洋. 第二種顏色是一種偏紅的顏色, 因為所有外星球都需要紅色的地形. 最後, 它們 n * 0.5 + 0.5 混合在一起. n 在 -1 和 1 之間平滑變化. 所以我們把它對應到 mix 預期的 0-1 範圍內. 現在你可以看到, 顏色在藍色和紅色之間變化.
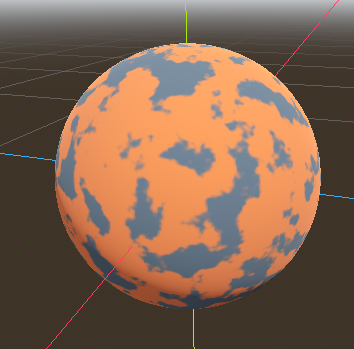
這比我們想要的還要模糊一些. 行星通常在陸地和海洋之間有一個相對清晰的分隔. 為了做到這一點, 我們將把最後一項改為 smoothstep(-0.1, 0.0, n) . 整條線就變成了這樣:
COLOR.xyz = mix(vec3(0.05, 0.3, 0.5), vec3(0.9, 0.4, 0.1), smoothstep(-0.1, 0.0, n));
smoothstep 所做的是, 如果第三個參數低於第一個參數, 則返回 0 , 如果第三個參數大於第二個參數, 則返回 1 , 如果第三個數字在第一個和第二個之間, 則在 0 和 1 之間平滑地混合. 所以在這一行中, 當 n 小於 -0.1 時, smoothstep 返回 0 , 當 n 高於 0 時, 它返回 1 .
還有一件事, 使其更像一個行星. 這片土地不應該是圓球狀的;讓我們把邊緣變得更粗糙一些. 在著色器中經常使用的一個技巧是在不同的頻率下將不同層次的雜訊疊加在一起, 使地形看起來粗糙. 我們使用一個層來製作大陸的整體球狀結構. 然後, 另一層將邊緣打碎, 然後是另一層, 以此類推. 我們要做的是用四行著色器程式碼來計算 n , 而不是只有一行. n 變成了:
float n = noise(unit * 5.0) * 0.5;
n += noise(unit * 10.0) * 0.25;
n += noise(unit * 20.0) * 0.125;
n += noise(unit * 40.0) * 0.0625;
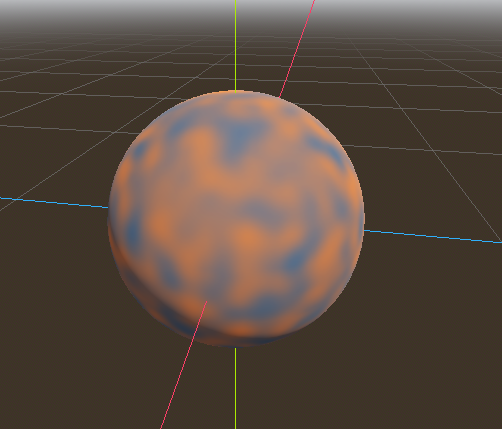
現在這個星球看起來像:
製作海洋
讓這個看起來更像是一顆行星的最後一件事. 海洋和陸地以不同的方式反射光線. 因此, 我們希望海洋比陸地更加閃耀. 我們可以通過將第四個值傳遞到輸出 COLOR 的 alpha 通道並將其用作粗糙度圖來實作.
COLOR.a = 0.3 + 0.7 * smoothstep(-0.1, 0.0, n);
該行對於水返回 0.3 , 對於土地返回 1.0 . 這意味著土地將變得很粗糙, 而水將變得非常光滑.
然後,在材質中,在“Metallic”(金屬性)部分,請確保 Metallic 為 0、Specular 為 1。這樣做的原因是水對光線的反射非常好,但它不是金屬的。這些值在物理上並不準確,但對於這個演示來說已經足夠好了。
Next, under the "Roughness" section set the roughness texture to a
Viewport Texture pointing to our planet texture SubViewport.
Finally, set the Texture Channel to Alpha. This instructs the renderer to use the alpha
channel of our output COLOR as the Roughness value.
You'll notice that very little changes except that the planet is no longer reflecting the sky.
This is happening because, by default, when something is rendered with an
alpha value, it gets drawn as a transparent object over the background. And since the default background
of the SubViewport is opaque, the alpha channel of the
Viewport Texture is 1, resulting in the planet texture being
drawn with slightly fainter colors and a Roughness value of 1 everywhere. To correct this, we
go into the SubViewport and enable the "Transparent Bg" property. Since we are now
rendering one transparent object on top of another, we want to enable blend_premul_alpha:
render_mode blend_premul_alpha;
這是將顏色預先乘以 alpha 值, 然後將它們正確地混合在一起. 通常情況下, 當在一個透明的顏色上混合另一個顏色時, 即使背景的 alpha 為 0 (如本例), 也會出現奇怪的顏色滲漏問題. 設定 blend_premul_alpha 可以解決這個問題.
Now the planet should look like it is reflecting light on the ocean but not the land. move around the OmniLight3D in the scene so you can see the effect of the reflections on the ocean.
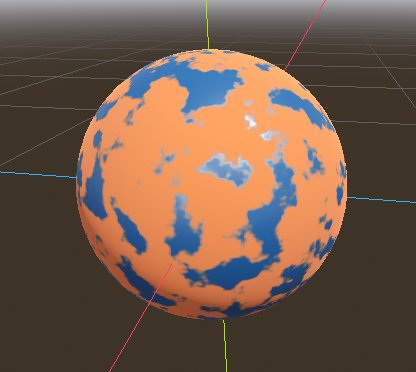
And there you have it. A procedural planet generated using a SubViewport.