Up to date
This page is up to date for Godot 4.3.
If you still find outdated information, please open an issue.
使用圖塊地圖
也參考
本頁面假設你已經建立或下載了一個圖塊集。如果沒有,請先閱讀 使用圖塊地圖,因為建立圖塊地圖需要一個圖塊集。
前言
A tilemap is a grid of tiles used to create a game's layout. There are several benefits to using TileMapLayer nodes to design your levels. First, they make it possible to draw the layout by "painting" the tiles onto a grid, which is much faster than placing individual Sprite2D nodes one by one. Second, they allow for much larger levels because they are optimized for drawing large numbers of tiles. Finally, you can add collision, occlusion, and navigation shapes to tiles, adding greater functionality to the TileMap.
Specifying the TileSet in the TileMapLayer
If you've followed the previous page on 使用圖塊地圖, you should have a TileSet resource that is built-in to the TileMapLayer node. This is good for prototyping, but in a real world project, you will generally have multiple levels reusing the same tileset.
The recommended way to reuse the same TileSet in several TileMapLayer nodes is to save the TileSet to an external resource. To do so, click the dropdown next to the TileSet resource and choose Save:
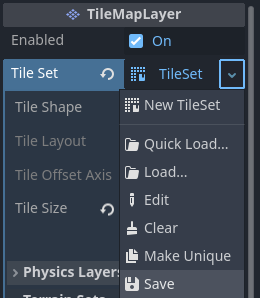
將內建 TileSet 資源保存為外部資源檔
Multiple TileMapLayers and settings
When working with tilemaps it's generally advised that you use multiple TileMapLayer nodes when appropriate. Using multiple layers can be advantageous, for example, this allows you to distinguish foreground tiles from background tiles for better organization. You can place one tile per layer at a given location, which allows you to overlap several tiles together if you have more than one layer.
Each TileMapLayer node has several properties you can adjust:
Enabled: 如果為
true, 目前圖層在編輯器中和運作專案時可見。TileSet The tileset used by the TileMapLayer node.
算繪
Y Sort Origin: The vertical offset to use for Y-sorting on each tile (in pixels). Only effective if Y Sort Enabled under CanvasItem settings is
true.X Draw Order Reversed Reverses the order tiles are drawn on the X axis. Requires that Y Sort Enabled under CanvasItem settings is
true.Rendering Quadrant Size A quadrant is a group of tiles drawn together on a single CanvasItem for optimization purposes. This setting defines the length of a square's side in the map's coordinate system. The quadrant size does not apply to a Y sorted TileMapLayer since tiles are grouped by Y position in that case.
物理
Collision Enabled Enables or disables collision.
Use Kinematic Bodies When true TileMapLayer collision shapes will be instantiated as kinematic bodies.
Collision Visibility Mode Whether or not the TileMapLayer's collision shapes are visible. If set to default, then it depends on the show collision debug settings.
Reordering layers
You can reorder layers by drag-and-dropping their node in the Scene tab. You can also switch between which TileMapLayer node you're working on by using the buttons in the top right corner of the TileMap editor.
備註
建立,重命名或對圖層進行排序時不會影響現有圖塊。但是請小心,在“移除”時將會同時移除該圖層上所有的圖塊。
執行編輯器
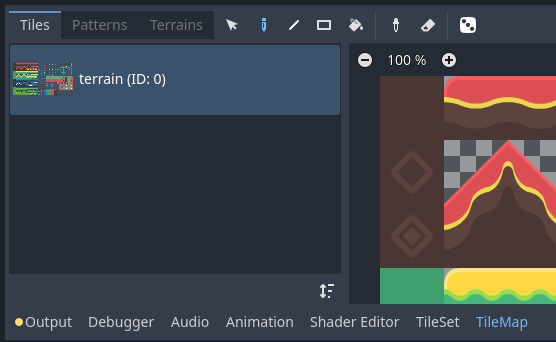
Select the TileMapLayer node, then open the TileMap panel at the bottom of the editor:
Opening the TileMap panel at the bottom of the editor. The TileMapLayer node must be selected first.
選擇用於繪製的圖塊
首先,如果你在上面建立了其他圖層,確保你已經選擇了要繪製的靶心圖表層:
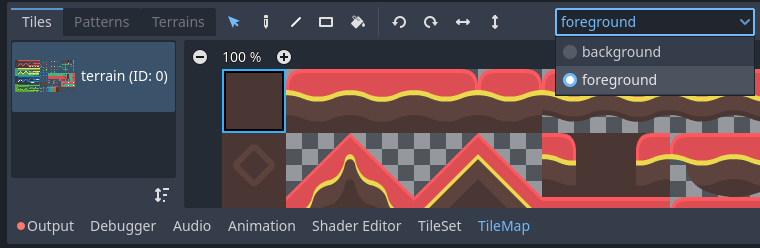
在 TileMap 編輯器中選擇要繪製的圖層
小訣竅
In the 2D editor, the layers you aren't currently editing from the same TileMapLayer node will appear grayed out while in the TileMap editor. You can disable this behavior by clicking the icon next to the layer selection menu (Highlight Selected TileMap Layer tooltip).
如果沒有建立其他圖層,可以跳過上述步驟,因為進入 TileMap 編輯器時會自動選擇第一個圖層。
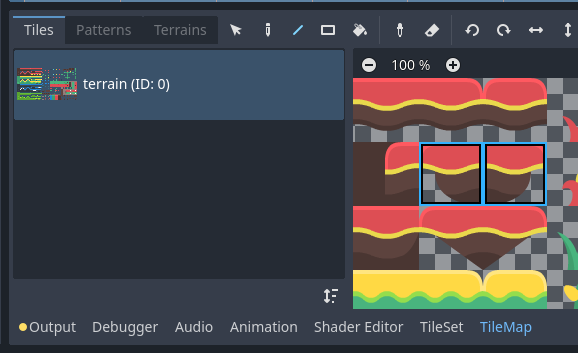
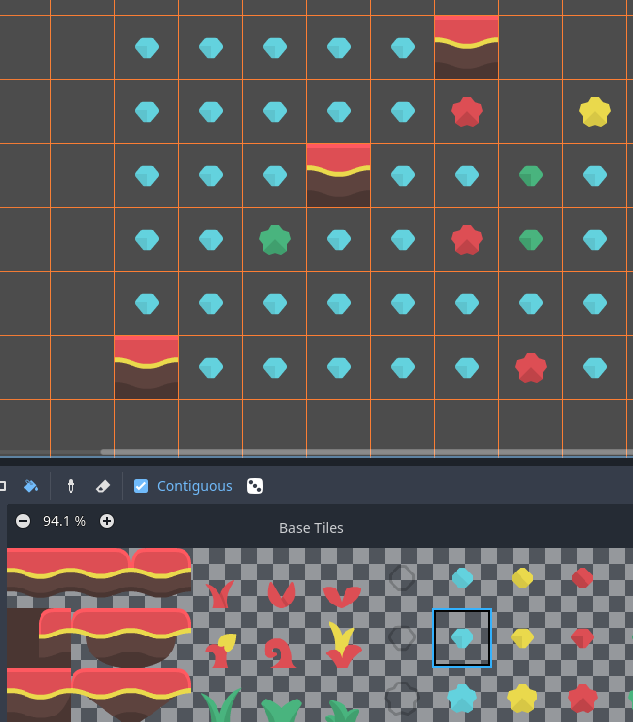
在 2D 編輯器中放置圖塊之前,必須在編輯器底部的 TileMap 面板中選擇一個或多個圖塊。為此,請按一下 TileMap 面板中的圖塊,也可以按住滑鼠選擇多個圖塊:
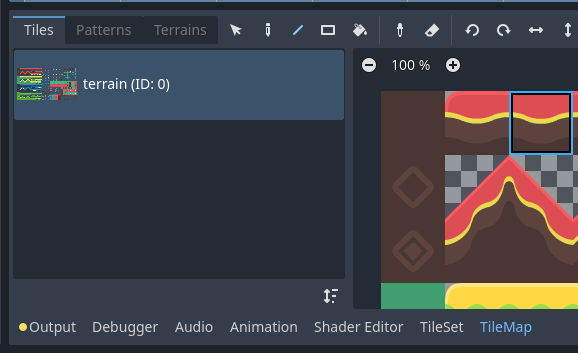
點擊以選中TileMap編輯器中的圖塊
小訣竅
與2D編輯器和TileSet編輯器中一樣,您可以使用滑鼠中鍵或右鍵在TileMap面板上平移,使用滑鼠滾輪或左上角的按鈕進行縮放。
您也可以按住 Shift 來追加到目前選擇。當選擇多個圖塊時,每次執行繪畫操作時都會放置多個圖塊。這可用於透過點擊繪製由多個圖塊組成的結構(例如大型平台或樹木)。
最終選擇不必是連續的:如果所選圖塊之間有空白空間,則在 2D 編輯器中繪製的圖案中它將留空。
在TileMap編輯器中按住滑鼠左鍵可以選擇多個圖塊
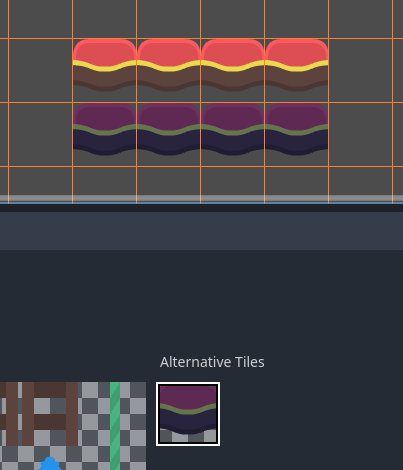
如果您在 TileSet 中建立了替代圖塊,則可以選擇它們在基礎圖塊的右側進行繪製:
使用程式碼來連接訊號
最後,如果您在 TileSet 中建立了 場景集合,則可以將場景圖塊放置在 TileMap 中:
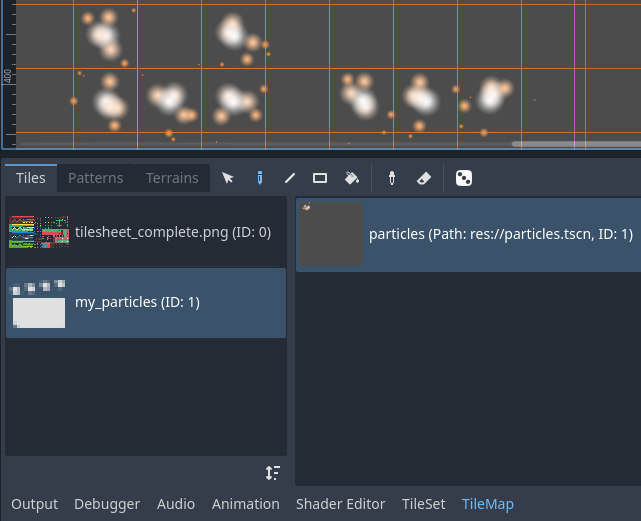
使用 TileMap 編輯器放置包含粒子的場景圖塊
本地坐標
使用 TileMap 編輯器頂部的工具列,您可以在多種繪畫模式和工具之間進行選擇。這些模式會影響在 2D 編輯器中點擊時的操作,而不是 TileMap 面板本身。
在工具列中從左到右:
剪下所選
透過點選單一圖塊來選擇圖塊,或按住滑鼠左鍵在 2D 編輯器中使用矩形選擇多個圖塊。請注意,無法選擇空白區域:如果建立矩形選擇,則只會選擇非空圖塊。
若要追加至目前選擇,請按住 Shift 然後選擇一個圖塊。若要從目前選取中刪除,請按住 Ctrl 然後選擇一個圖塊。
然後可以在任何其他繪畫模式中使用該選擇來快速建立已放置圖案的副本。
You can remove the selected tiles from the TileMap by pressing Del.
在繪畫模式下,您可以按住 Ctrl 然後執行選擇來暫時切換此模式。
小訣竅
您可以透過執行選取來複製並貼上已放置的圖塊,按 Ctrl + C,然後按 Ctrl + V。點擊左鍵後將貼上所選內容。您可以再次按 Ctrl + V 以這種方式執行更多副本。右鍵或按 Escape 取消貼上。
繪製圖塊
標準繪畫模式可讓您透過點擊或按住滑鼠左鍵來放置圖塊。
如果右鍵單擊,目前選定的圖塊將從圖塊地圖中刪除。換句話說,它將被空白空間所取代。
如果您在 TileMap 中或使用選擇工具選擇了多個圖塊,則每次您在按住滑鼠左鍵的同時點擊或拖曳滑鼠時都會放置它們。
小訣竅
在「繪畫」模式下,您可以在按住滑鼠左鍵之前按住 Shift 來繪製一條線,然後將滑鼠拖曳到線的終點。這與使用下面描述的直線工具相同。
您也可以按住 Ctrl 和 Shift *之前*按住滑鼠左鍵,然後將滑鼠拖曳到矩形的端點來繪製矩形。這與使用下面描述的矩形工具相同。
最後,您可以透過按住 Ctrl 然後點擊圖塊(或按住並拖曳滑鼠)來選擇 2D 編輯器中的現有圖塊。這會將目前繪製的圖塊切換為您剛剛點擊的圖塊。這與使用下面描述的選擇器工具相同。
線段
選擇「線條繪製」模式後,您可以繪製始終為 1 格粗的線條(無論其方向為何)。
如果您在「線條繪製」模式下按一下滑鼠右鍵,則會清除一條線條。
如果您在 TileMap 中或使用選取工具選擇了多個圖塊,則可以將它們放置在一條線上的重複圖案中。
在「繪畫」或「橡皮擦」模式下,您可以按住 Shift 鍵然後繪圖來暫時切換此模式。
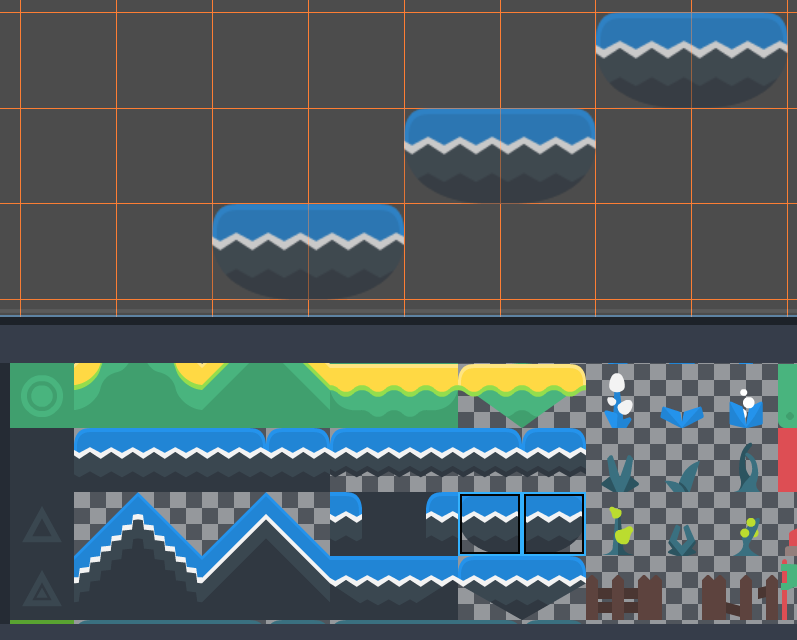
選擇兩個圖塊後使用線條工具對角繪製平台
反正切
選擇矩形繪製模式後,您可以繪製軸對齊的矩形。
如果在「矩形繪製」模式下按滑鼠右鍵,則會清除軸對齊的矩形。
如果您在 TileMap 中或使用選取工具選擇了多個圖塊,則可以將它們放置在矩形內的重複圖案中。
您可以在「繪畫」或「橡皮擦」模式下暫時切換此模式,方法是按住 Ctrl 和 Shift 然後繪圖。
油漆桶填滿
選擇「桶填滿」模式後,您可以透過切換工具列右側顯示的「連續」複選框來選擇是否僅將繪畫限制在連續區域。
如果啟用**連續**(預設設定),則僅取代接觸目前選擇的符合圖塊。這種連續檢查是水平和垂直執行的,但*不是*對角執行。
如果停用**連續**,則整個 TileMap 中具有相同 ID 的所有圖塊都會被目前選定的圖塊取代。如果選擇未選取「連續」的空白圖塊,則包含 TileMap 有效區域的矩形中的所有圖塊都會被取代。
如果您在「桶填滿」模式下按一下滑鼠右鍵,則會將相符的圖塊替換為空圖塊。
如果您在 TileMap 中或使用選取工具選擇了多個圖塊,則可以將它們放置在填滿區域內的重複圖案中。
建立內容
顏色
選擇選取器模式後,您可以按住 Ctrl 然後按一下圖塊來在 2D 編輯器中選取現有圖塊。這會將目前繪製的圖塊切換為您剛剛點擊的圖塊。您也可以按住滑鼠左鍵並形成一個矩形選取範圍來一次選取多個圖塊。只能挑選非空的磁磚。
在繪畫模式下,您可以按住 Ctrl 然後點擊或拖曳滑鼠來暫時切換此模式。
橡皮擦
此模式可與任何其他繪畫模式(繪畫、線條、矩形、桶填充)結合使用。啟用橡皮擦模式後,左鍵點擊時圖塊將被空圖塊替換,而不是繪製新線。
在任何其他模式下,您可以透過右鍵單擊(而不是左鍵單擊)暫時切換此模式。
建立內容
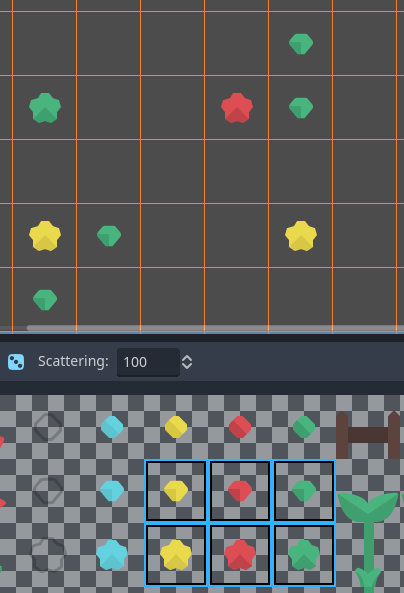
繪畫時,您可以選擇啟用*隨機化*。啟用後,繪畫時將在所有目前選定的圖塊中隨機選擇一個圖塊。繪畫、線條、矩形和桶填充工具支援此功能。為了實作有效的繪圖隨機化,您必須在 TileMap 編輯器中選擇多個圖塊或使用散射(可以組合使用兩種方法)。
如果**Scattering**設定為大於0的值,則繪製時有可能不會放置圖塊。這可用於為大區域新增偶爾的、非重複的細節(例如在大型自上而下的 TileMap 上新增草或麵包屑)。
使用 4 核心的例子:
多次選擇隨機選擇,然後按住滑鼠左鍵繪畫
使用“桶填充”模式時的範例:

使用帶有單一圖塊的“桶填充”工具,但啟用了隨機化和散射
備註
橡皮擦模式不考慮隨機化和散射。選擇範圍內的所有圖塊總是會被刪除。
使用圖案保存和加載預製圖塊放置
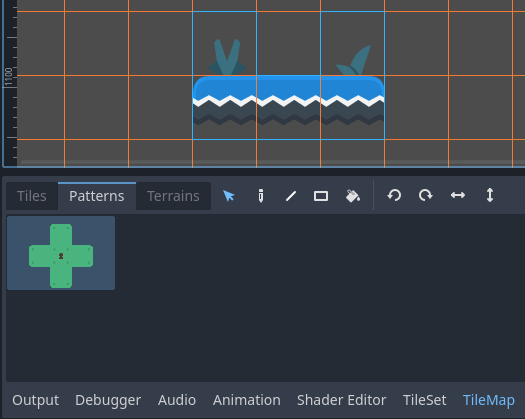
雖然您可以在選擇模式下複製和貼上圖塊,但您可能想要保存預製的圖塊「圖案」以便立即放置在一起。這可以透過選擇 TileMap 編輯器的 Patterns 分頁在每個 TileMap 的基礎上完成。
若要建立新圖案,請切換到選擇模式,執行選擇並按 Ctrl + C。按一下「圖案」標籤中的空白區域(空白區域周圍應出現藍色焦點矩形),然後按 Ctrl + V:
從 TileMap 編輯器中的選擇建立新圖案
若要使用現有圖案,請在 Patterns 標籤中按一下其影像,切換至任何繪畫模式,然後左鍵按一下 2D 編輯器中的某處:
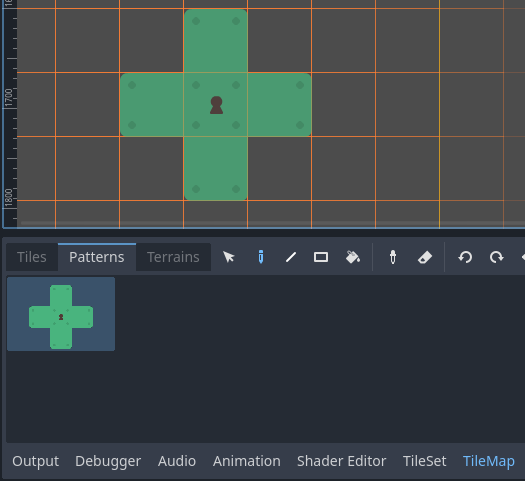
使用 TileMap 編輯器放置現有圖案
與多圖塊選擇一樣,如果與線條、矩形或桶填充繪畫模式一起使用,圖案將重複。
備註
Despite being edited in the TileMap editor, patterns are stored in the TileSet resource. This allows reusing patterns in different TileMapLayer nodes after loading a TileSet resource saved to an external file.
使用地形自動處理圖塊連接
To use terrains, the TileMapLayer node must feature at least one terrain set and a terrain within this terrain set. See 建立內容 if you haven't created a terrain set for the TileSet yet.
有四種可用於取得設定的巨集:
Connect, where tiles are connected to surrounding tiles on the same TileMapLayer.
路徑,圖塊連接到以同一筆劃繪製的圖塊(直到釋放滑鼠按鈕)。
特定於圖塊的覆蓋可解決衝突或處理地形系統未覆蓋的情況。
連接模式更容易使用,但路徑更靈活,因為它允許藝術家在繪畫過程中進行更多控制。例如,Path 可以允許道路直接相鄰而不相互連接,而 Connect 將強制連接兩條道路。
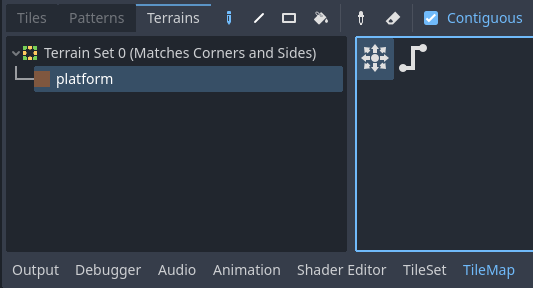
在 TileMap 編輯器的 Terrains 標籤中選擇 Connect 模式
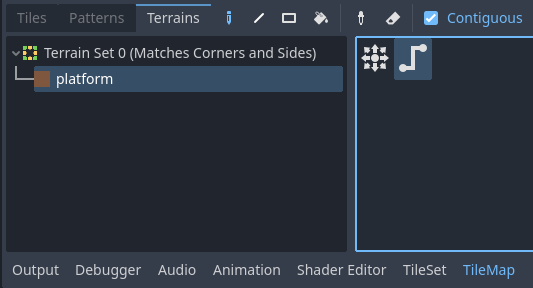
在 TileMap 編輯器的 Terrains 標籤中選擇 Path 模式
最後,您可以從地形中選擇特定的圖塊來解決某些情況下的衝突:
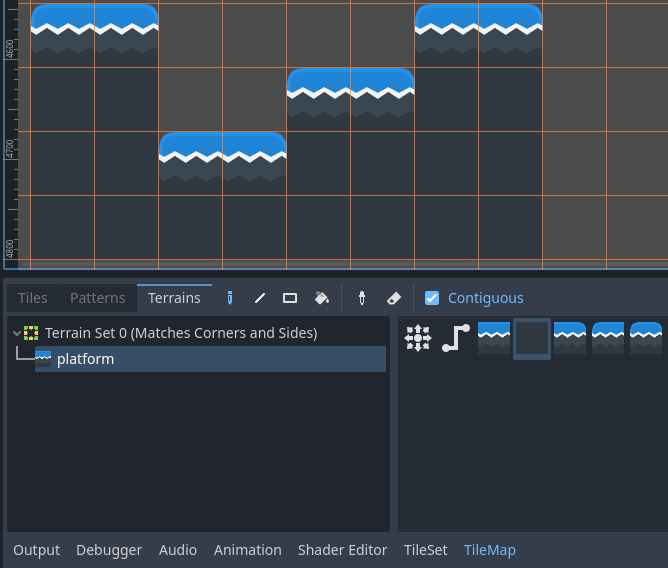
在 TileMap 編輯器的 Terrains 標籤中使用特定圖塊進行繪畫
任何至少有一個位元設定為對應地形 ID 的值的圖塊將出現在可供選擇的圖塊列表中。
翻譯現有頁面
如果您刪除 TileMap 中引用的 TileSet 中的圖塊,TileMap 將顯示一個佔位符以指示放置了無效的圖塊 ID:

由於 TileSet 引用被破壞,TileMap 編輯器中缺少圖塊
這些佔位符在正在運作的專案中**不**可見,但圖塊資料仍保留在磁碟上。這使您可以安全地關閉和重新開啟此類場景。一旦您重新新增具有配對 ID 的圖塊,圖塊就會以新圖塊的外觀出現。
備註
Missing tile placeholders may not be visible until you select the TileMapLayer node and open the TileMap editor.