Up to date
This page is up to date for Godot 4.3.
If you still find outdated information, please open an issue.
3D 簡介
創造一個 3D 遊戲是具有挑戰性的。多了額外的 Z 軸使得許多有助於使製作 2D 遊戲變得簡單的常用技術不再起作用。為了幫助習慣這,值得一提的是,Godot 在 2D 和 3D 中使用了類似的API。大多數的節點都是相同的,並且存在於 2D 和 3D 版本中。事實上,可以看看 3D 平台遊戲教學或 3D 動力學角色教學,這些教學大部分與 2D 遊戲相同。
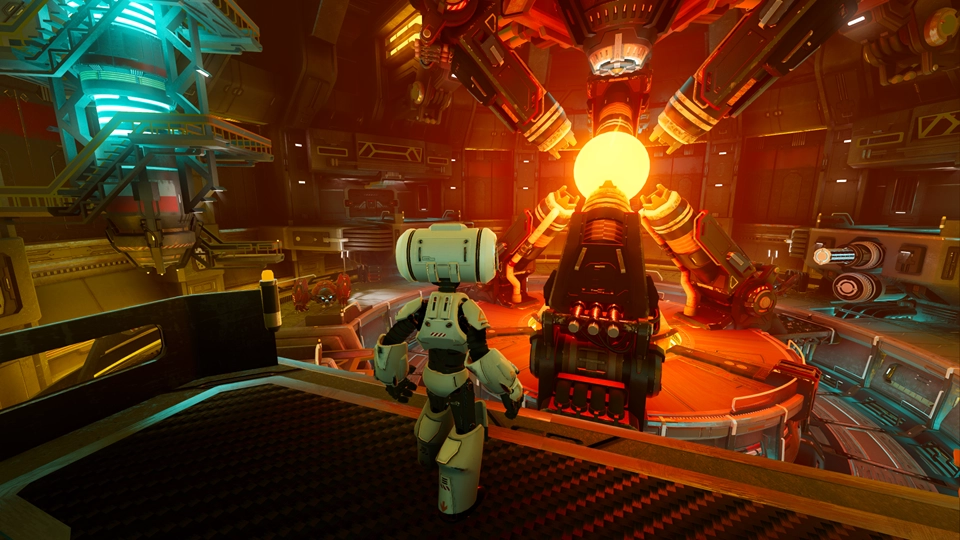
Godot Third Person Shooter (TPS) Demo, available on the Github repository or the Asset Library.
In 3D, math is a little more complex than in 2D. For an introduction to the relevant math written for game developers, not mathemeticians or engineers, check out 向量數學 and 使用 3D 變換.
3D workspace
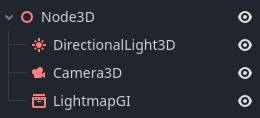
Editing 3D scenes is done in the 3D workspace. This workspace can be selected manually, but it will be automatically selected when a Node3D node is selected.
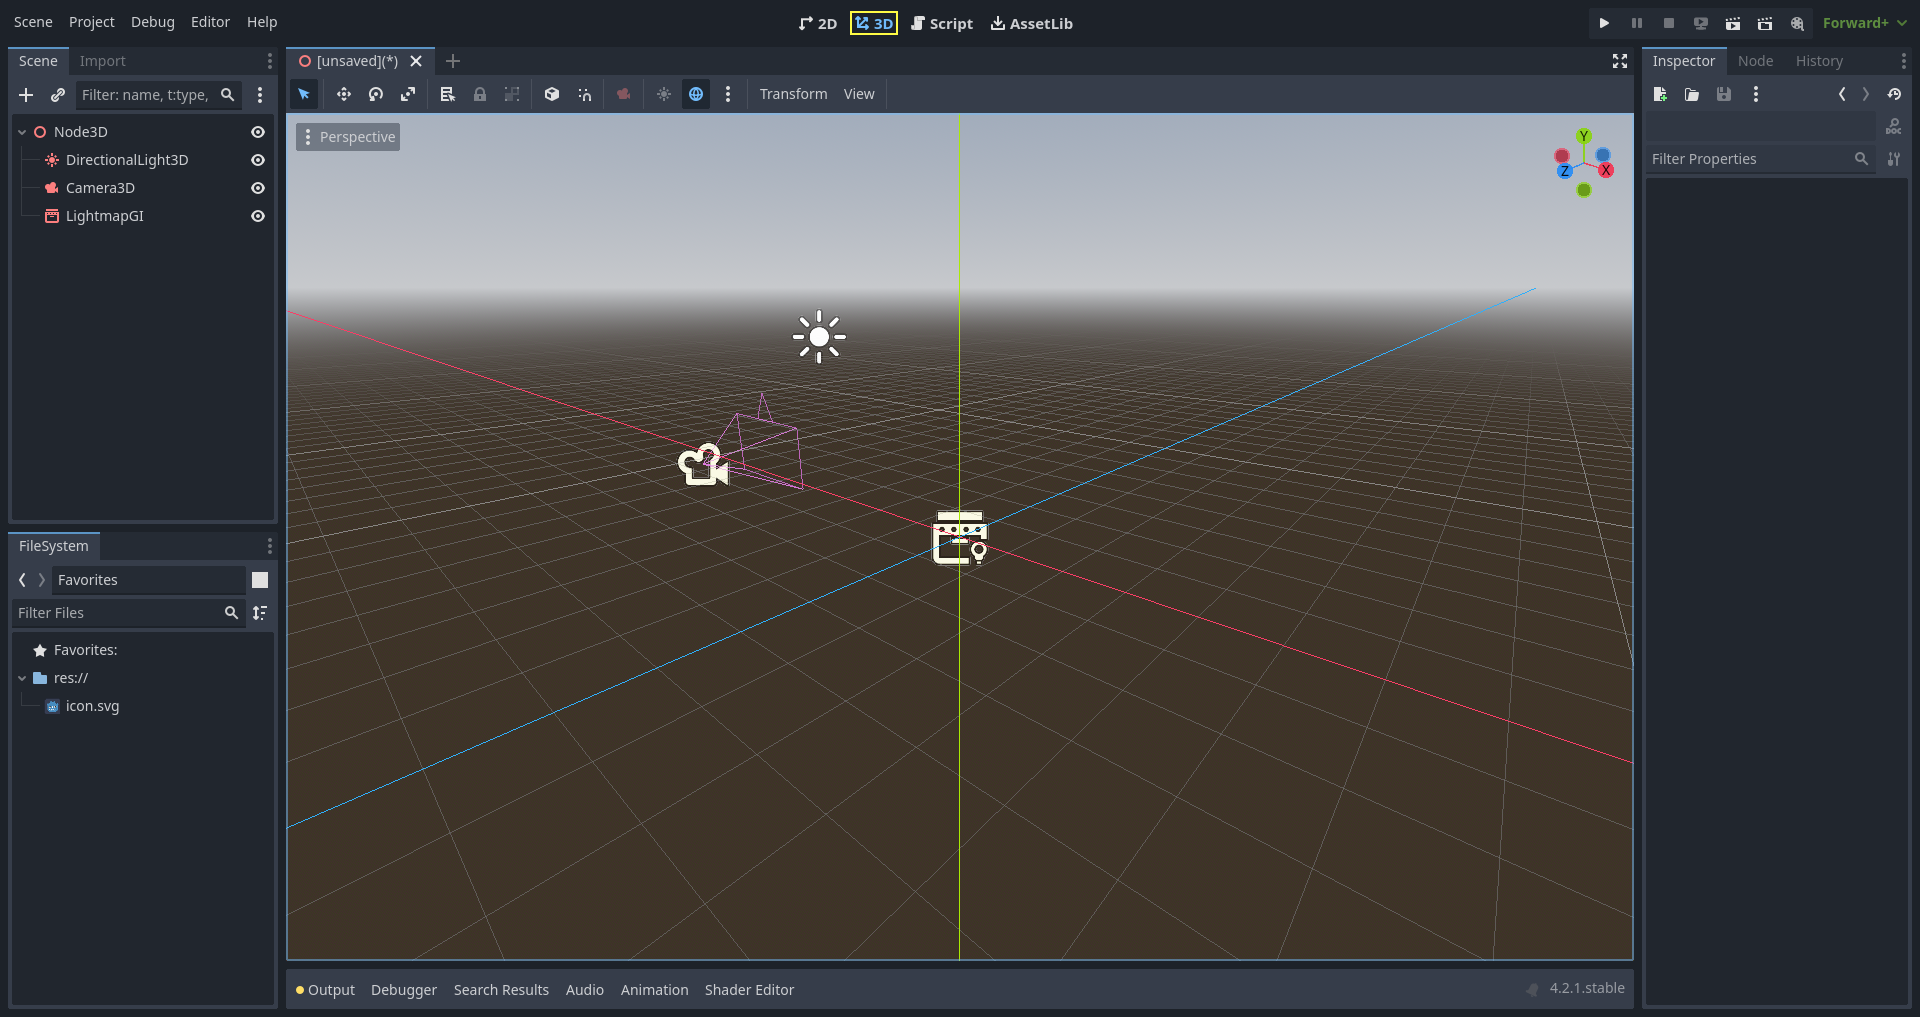
Similar to 2D, the tabs below the workspace selector are used to change between currently opened scenes or create a new one using the plus (+) button. The left and right docks should be familiar from editor introduction.
Below the scene selector, the main toolbar is visible, and beneath the main toolbar is the 3D viewport.
Main toolbar
Some buttons in the main toolbar are the same as those in the 2D workspace. A brief explanation is given with the shortcut if the mouse cursor is hovered over a button for one second. Some buttons may have additional functionality if another keypress is performed. A recap of main functionality of each button with its default shortcut is provided below from left to right:

Select Mode (Q): Allows selection of nodes in the viewport. Left clicking on a node to select one. Left clicking and dragging a rectangle selects all nodes within the rectangle's boundaries, once released. Holding Shift while selecting adds more nodes to the selection. Clicking on a selected node while holding Shift deselects the node. In this mode, you can use the gizmos to perform movement or rotation.
Move Mode (W): Enables move (or translate) mode for the selected nodes. See 空間與操縱小工具 for more details.
Rotate Mode (E): Enables rotation mode for the selected nodes. See 空間與操縱小工具 for more details.
Scale Mode (R): Enables scaling and displays scaling gizmos in different axes for the selected nodes. See 空間與操縱小工具 for more details.
Show the list of selectable nodes at the clicked position: As the description suggests, this provides a list of selectable nodes at the clicked position as a context menu, if there is more than one node in the clicked area.
Lock (Ctrl + L) the selected nodes, preventing selection and movement in the viewport. Clicking the button again (or using Ctrl + Shift + L) unlocks the selected nodes. Locked nodes can only be selected in the scene tree. They can easily be identified with a padlock next to their node names in the scene tree. Clicking on this padlock also unlocks the nodes.
Group selected nodes (Ctrl + G). This allows selection of the root node if any of the children are selected. Using Ctrl + G ungroups them. Additionally, clicking the ungroup button in the scene tree performs the same action.
Use Local Space (T): If enabled, gizmos of a node are drawn using the current node's rotation angle instead of the global viewport axes.
Use Snap (Y): If enabled, movement, and rotation snap to grid. Snapping can also temporarily be activated using Ctrl while performing the action. The settings for changing snap options are explained below.
Project Camera Override: This action temporarily replaces the active camera in the level (e.g., the camera following the player) with the camera in the editor's viewport, allowing you to move freely and inspect the level's different parts, while game is running.
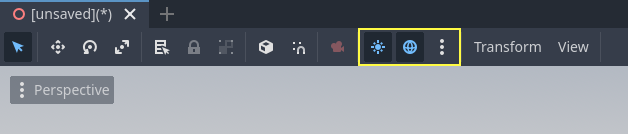
Toggle preview sunlight: If no DirectionalLight3D exist in the scene, a preview of sunlight can be used as a light source. See Preview environment and light for more details.
Toggle preview environment: If no WorldEnvironment exists in the scene, a preview of the environment can be used as a placeholder. See Preview environment and light for more details.
Edit Sun and Environment Settings (three dots): Opens the menu to configure preview sunlight and environment settings. See Preview environment and light for more details.
Transform menu: It has three options:
Snap Object to Floor: Snaps an object to a solid floor.
Transform Dialog: Opens a dialog to adjust transform parameters (translate, rotate, scale, and transform) manually.
Snap Settings: Allows you to change transform, rotate snap (in degrees), and scale snap (in percent) settings.
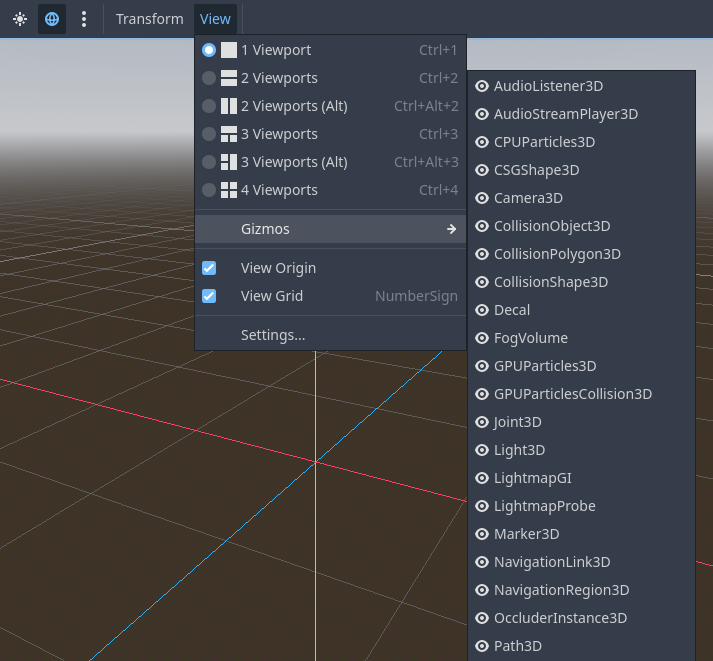
View menu: Controls the view options and enables additional viewports:
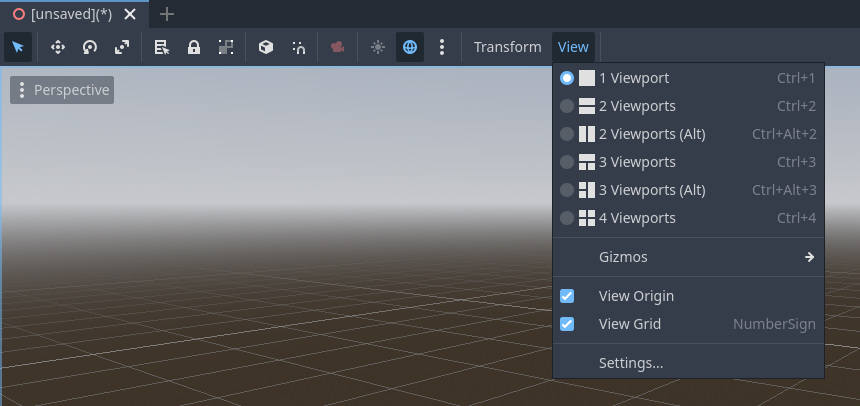
In this menu, you can also show/hide grids, which are set to 1x1 meter by default, and the origin, where the blue, green, and red axis lines intersect. Moreover, specific types of gizmos can be toggled in this menu.
An open eye means that the gizmo is visible, a closed eye means it is hidden. A half-open eye means that it is also visible through opaque surfaces.
Clicking on Settings in this view menu opens a window to change the Vertical Field of View (VFOV) parameter (in degrees), Z-Near, and Z-Far values.
Next to the View menu, additional buttons may be visible. In the toolbar image at the beginning of this chapter, an additional Mesh button appears because a MeshInstance3D is selected. This menu provides some quick actions or tools to work on a specific node or selection.
View menu of viewport
Below the Select tool, in the 3D viewport, clicking on the three dots opens the View menu for the viewport. Hiding all shown gizmos in the editor's 3D view can also be performed through this menu:
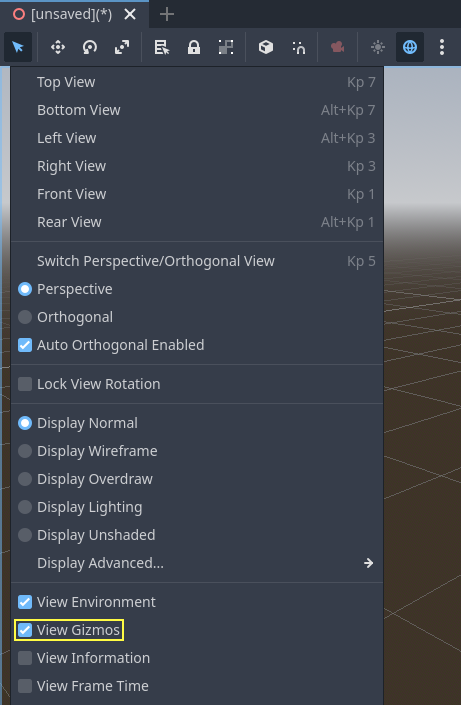
This menu also displays the current view type and enables quick adjustment of the viewport's viewing angle. Additionally, it offers options to modify the appearance of nodes within the viewport.
座標系
Godot 在 3D 中使用的都是 `公制(metric)<https://zh.wikipedia.org/wiki/%E5%85%AC%E5%88%B6>`__ ,1 個單位等於 1 公尺。物理和其他區域都針對這個進行了調整。因此,嘗試使用不同的比例通常是個壞主意(除非您知道自己在做什麼)。
使用 3D 素材時,最好使用正確的比例(將 DCC 設定為公制)。 Godot 允許在匯入後縮放,雖然這在大多數情況下都有效,但在極少數情況下,它可能會在算繪或物理等精細領域引入浮點精度問題(會出現毛刺或失真)。所以請確保藝術家始終以正確的比例工作!
Y座標用於 "向上 ", 但對於大多數需要對齊的物體(如燈光, 相機, 膠囊碰撞體, 載具等),Z軸用作" 指向"方向. 這個約定大致意味著:
X 是兩邊
Y 是上/下
Z 是前/後
請參閱此圖表與其他 3D 軟體進行比較:
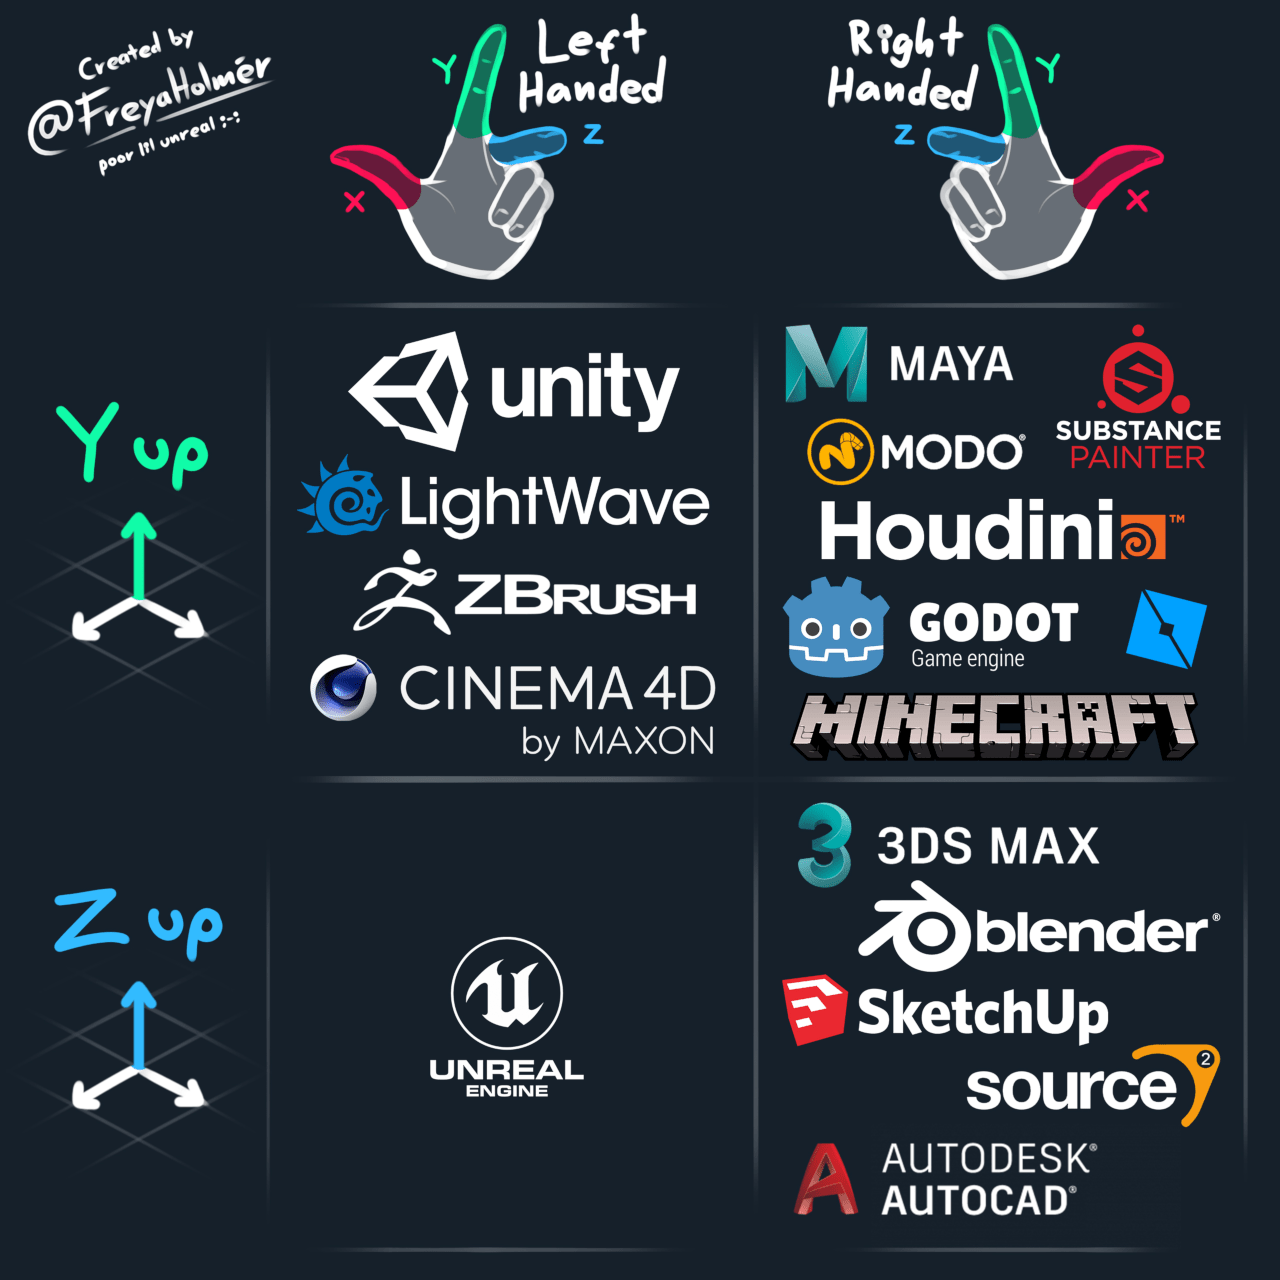
圖片來源:「Freya Holmér <https://twitter.com/FreyaHolmer>」__
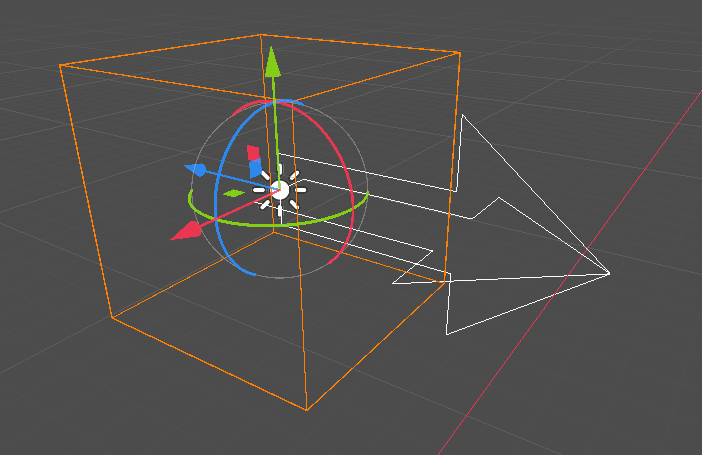
空間與操縱小工具
Moving, rotating, and scaling objects in the 3D view is done through the manipulator gizmos. Each axis is represented by a color: Red, Green, Blue represent X, Y, Z respectively. This convention applies to the grid and other gizmos too (and also to the shader language, ordering of components for Vector3, Color, etc.).
一些有用的鍵盤綁定:
To snap placement or rotation, press Ctrl while moving, scaling, or rotating.
要將視合集中在所選物件上, 按 F.
In the viewport, the arrows can be clicked and held to move the object on an axis. The arcs can be clicked and held to rotate the object. To lock one axis and move the object freely in the other two axes, the colored rectangles can be clicked, held, and dragged.
If the transform mode is changed from Select Mode to Scale Mode, the arrows will be replaced by cubes, which can be dragged to scale an object as if the object is being moved.
Navigating the 3D environment
In 3D environments, it is often important to adjust the viewpoint or angle from which you are viewing the scene. In Godot, navigating the 3D environment in the viewport (or spatial editor) can be done in multiple ways.
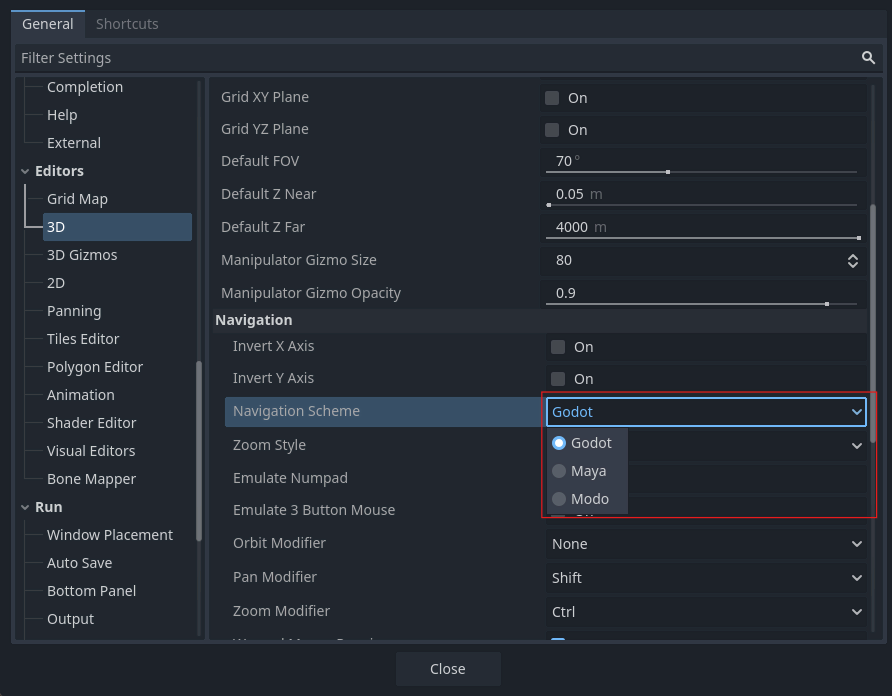
The default 3D scene navigation controls are similar to Blender (aiming to have some sort of consistency in the free software pipeline), but options are included to customize mouse buttons and behavior to be similar to other tools in the Editor Settings. To change the controls to Maya or Modo controls, you can navigate to Editor Settings > Editors > 3D. Then, under Navigation, search for Navigation Scheme.
Using the default settings, the following shortcuts control how one can navigate in the viewport:
Pressing the middle mouse button and dragging the mouse allows you to orbit around the center of what is on the screen.
It is also possible to left-click and hold the manipulator gizmo located on the top right of the viewport to orbit around the center:

Left-clicking on one of the colored circles will set the view to the chosen orthogonal and the viewport's view menu will be updated accordingly.

If the Perspective view is enabled on the viewport (can be seen on the viewport's View menu, not the View menu on the main toolbar), holding down the right mouse button on the viewport or pressing Shift + F switches to "free-look" mode. In this mode you can move the mouse to look around, use the W A S D keys to fly around the view, E to go up, and Q to go down. To disable this mode, release the right mouse button or press Shift + F again.
In the free-look mode, you can temporarily increase the flying speed using Shift or decrease it using Alt. To change and keep the speed modifier use mouse wheel up or mouse wheel down, to increase or decrease it, respectively.
In orthogonal mode, holding the right mouse button will pan the view instead. Use Keypad 5 to toggle between perspective and orthogonal view.
Using Blender-style transform shortcuts
Since Godot 4.2, you can enable Blender-style shortcuts for translating, rotating and scaling nodes. In Blender, these shortcuts are:
G for translating
R for rotating
S for scaling
After pressing a shortcut key while focusing on the 3D editor viewport, move the mouse or enter a number to move the selected node(s) by the specified amount in 3D units. You can constrain movement to a specific axis by specifying the axis as a letter, then the distance (if entering a value with the keyboard).
For instance, to move the selection upwards by 2.5 units, enter the following sequence in order (Y+ is upwards in Godot):
G-Y-2-.-5-Enter
To use Blender-style transform shortcuts in Godot, go to the Editor Settings' Shortcuts tab, then in the Spatial Editor section:
Bind Begin Translate Transformation to G.
Bind Begin Rotate Transformation to R.
Bind Begin Scale Transformation to S.
Finally, unbind Scale Mode so that its shortcut won't conflict with Begin Rotate Transformation.
小訣竅
More shortcuts can be found on the 3D / Spatial editor page.
Node3D 節點
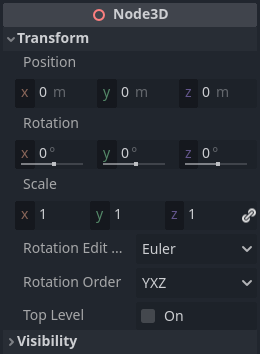
Node2D 是 2D 的基礎節點。 Control 是所有 GUI 的基礎節點。同理,3D 引擎使用 Spatial 節點來處理所有 3D 內容。
Node3Ds have a local transform, which is relative to the parent node (as long as the parent node is also of or inherits from the type Node3D). This transform can be accessed as a 3×4 Transform3D, or as 3 Vector3 members representing location, Euler rotation (X, Y and Z angles) and scale.
3D 內容
2D 中載入圖像內容和繪圖都非常直觀,3D 則有所不同,會稍微困難一些。3D內容需要使用特殊的 3D 工具(通常稱為數位內容建立工具或Digital Content Creation工具,簡稱DCC)來建立,並匯出成可被 Godot 匯入的交換文件格式。這是必需的,因為 3D 格式不像圖像那樣標準化。
生成的幾何體
通過直接使用 ArrayMesh 資源可以建立自定義幾何體。只需要建立陣列並使用 ArrayMesh.add_surface_from_arrays(),他提供了一個更直接的 API 和幫助工具,用於索引、生成法線和切線等。
在任何情況下,此方法都適用於生成靜態幾何體(不會經常更新的模型),因為建立頂點陣列並將它們提交給 3D API 會產生顯著的性能成本。
備註
To learn about prototyping inside Godot or using external tools, see 使用 CSG 設計關卡原型.
即時幾何體
If, instead, you need to generate simple geometry that will be updated often, Godot provides a special ImmediateMesh resource that can be used in a MeshInstance3D node. This provides an OpenGL 1.x-style immediate-mode API to create points, lines, triangles, etc.
3D環境中的2D
雖然 Godot 包含強大的 2D 引擎,但許多型別的遊戲在 3D 環境中使用 2D 效果。通過使用不旋轉的固定相機(正交或透視),可以使用諸如 Sprite3D 和 AnimatedSprite3D 等節點來建立混合了具有3D背景,更逼真的視差,光照/陰影效果等的 2D 遊戲。
當然,缺點是與普通2D相比增加了複雜性並降低了性能,並且缺乏以像素製作時的參考。
環境
除了編輯場景之外,編輯環境通常也很常見。 Godot 提供了一個 WorldEnvironment 節點,該節點允許更改背景顏色、模式(如放置一個天空盒時那樣),並應用多種型別的內建後處理效果。環境也可以在相機中被覆蓋。
Preview environment and light
By default, any 3D scene that doesn't have a WorldEnvironment node, or a DirectionalLight3D, will have a preview turned on for what it's missing to light the scene.
The preview light and environment will only be visible in the scene while in the editor. If you run the scene or export the project they will not affect the scene.
The preview light and environment can be turned on or off from the top menu by clicking on their respective icon.
The three dots dropdown menu next to those icons can be used to adjust the properties of the preview environment and light if they are enabled.
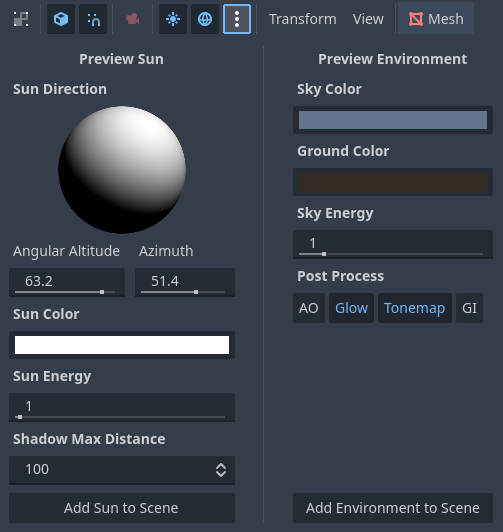
The same preview sun and environment is used for every scene in the same project, So only make adjustments that would apply to all of the scenes you will need a preview light and environment for.
攝影機
無論在 3D 空間中放置多少物體,除非在場景中新增了 Camera,否則不會顯示任何內容。相機可以在正交或透視投影中工作:
相機與父視口或其祖先視口相關聯, 且僅顯示到他們上面. 由於場景樹的根是一個視口, 預設情況下會在其上顯示相機, 但如果需要子視口(作為算繪目標或畫中畫), 則需要自己的子相機才能顯示.

處理多台相機時, 每個視口都遵循以下規則:
如果場景樹中沒有相機,則第一個進入的相機將成為活躍相機。進入場景的其他相機將被忽略(除非它們被設定為 current)。
如果相機設定了“current”屬性,則無論場景中是否有其他相機,都會使用它。如果該屬性已設定,它將變為活動狀態,取代之前的相機。
如果活動相機離開了場景樹,則按樹形順序排列的第一台相機將取代它。
燈光
背景環境發出一些出現在表面的環境光。儘管如此,如果場景中沒有放置任何光源,除非背景環境非常明亮,否則場景會顯得相當暗。
大多數室外場景都有定向光(太陽或月亮),而室內場景通常有多個位置光(燈、手電筒等)。有關在 Godot 中設定燈光的更多信息,請參閱 doc_lights_and_shadows`。