Up to date
This page is up to date for Godot 4.3.
If you still find outdated information, please open an issue.
分數與重玩
在這一部分中,我們會新增計分、播放音樂、重啟遊戲的能力。
我們要用一個變數來記錄目前的分數,使用最簡的介面在螢幕上顯示。我們會用文字標籤來實作。
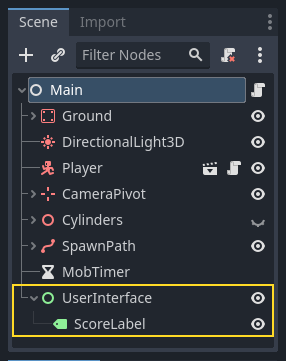
In the main scene, add a new child node Control to Main and name it
UserInterface. Ensure you are on the 2D screen, where you can edit your User Interface (UI).
Label ,命名為 ScoreLabel 。
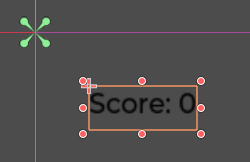
在*屬性面板*中將該 Label 的 Text 設為類似“Score: 0”的占位元內容。

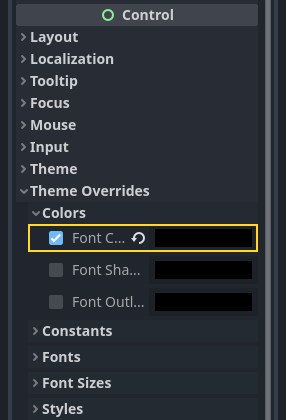
並且,文字預設是白色的,和我們的遊戲背景一樣。我們需要修改它的顏色,才能在運作時看到。
向下滾動到 *Theme Overrides*(主題覆蓋)然後展開 *Colors*(顏色)並點擊 *Font Color*(字形顏色)旁邊的黑框來為文字著色
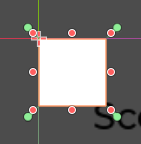
最後按一下視口中的文字,將其拖離左上角。
UserInterface 節點讓我們可以將 UI 組合到場景樹的一個分支上,並且也讓主題資源能夠傳播到它的所有子節點上。我們將會用它來設定遊戲的字形。
建立內容
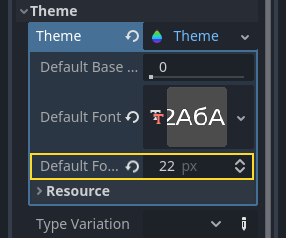
再次選中 UserInterface 節點。在*屬性面板*中為 Theme -> Theme 建立一個新的主題資源。

按一下這個資源就會在底部面板中打開主題編輯器。會展示使用你的主題資源時內建 UI 控制項的外觀。
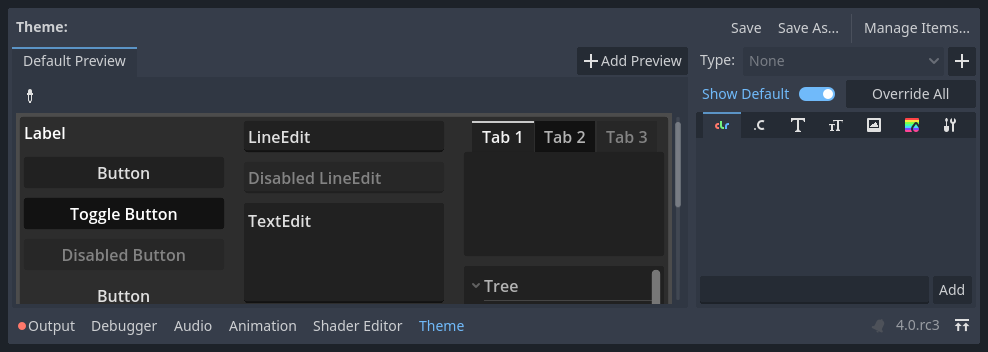
By default, a theme only has a few properties: Default Base Scale, Default Font and Default Font Size.
也參考
你可以為主題資源新增更多屬性,從而設計更複雜的使用者介面,不過這就超出本系列的範疇了。要學習主題的建立和編輯,請參閱 序言。
The Default Font expects a font file like the ones you have on your computer. Two common font file formats are TrueType Font (TTF) and OpenType Font (OTF).
在*檔案系統*面板中,展開 fonts 目錄,按一下我們包含在專案裡的 Montserrat-Medium.ttf 檔案並將其拖放到*Default Font*(預設字形)上。文字就又會出現在主題預覽中了。
文字有一點小。將*Default Font Size*(預設字形大小)設定為 22 像素即可增大文字的大小。
追蹤得分
我們下一步是進行計分。為 ScoreLabel 附加一個新的腳本,並在其中定義 ``score``(分數)變數。
extends Label

var score = 0
using Godot;

public partial class ScoreLabel : Label
{
    private int _score = 0;
}
每踩扁一隻怪物,這個分數就應該加 1。我們可以使用它們的 squashed 訊號來得知發生的時間。不過,因為我們是用程式碼產生實體的怪物,我們無法在編輯器中將怪物的訊號連接到 ScoreLabel。
不過,我們可以在每次生成一隻怪物時通過程式碼來進行連接。
打開 main.gd 腳本。如果它還開著,你可以在腳本編輯器左欄中點擊它的名字。
另一種方法是在*檔案系統*面板中按兩下 main.gd 檔案。
在 _on_mob_timer_timeout() 函式的最後新增下面這行程式碼:
func _on_mob_timer_timeout():
    #...
    # We connect the mob to the score label to update the score upon squashing one.
    mob.squashed.connect($UserInterface/ScoreLabel._on_mob_squashed.bind())
private void OnMobTimerTimeout()
{
    // ...
    // We connect the mob to the score label to update the score upon squashing one.
    mob.Squashed += GetNode<ScoreLabel>("UserInterface/ScoreLabel").OnMobSquashed;
}
這一行的意思是,當小怪發出 squashed 訊號時,ScoreLabel 節點就會接收到並呼叫 _on_mob_squashed() 函式。
Head back to the score_label.gd script to define the _on_mob_squashed()
callback function.
這裡我們將進行加分並更新顯示的文字。
func _on_mob_squashed():
    score += 1
    text = "Score: %s" % score
public void OnMobSquashed()
{
    _score += 1;
    Text = $"Score: {_score}";
}
第二行用 score 變數的值替換預留位置 %s。使用此功能時,Godot 會自動將值轉換為字串文字,這在向標籤中輸出文字或者使用 print() 函式時非常方便。
也參考
可以在 GDScript 格式字串 學習字串格式化相關的更多資訊。在 C# 中請考慮`使用“$”進行字串插值 <https://learn.microsoft.com/en-us/dotnet/csharp/language-reference/tokens/interpolated>`_。
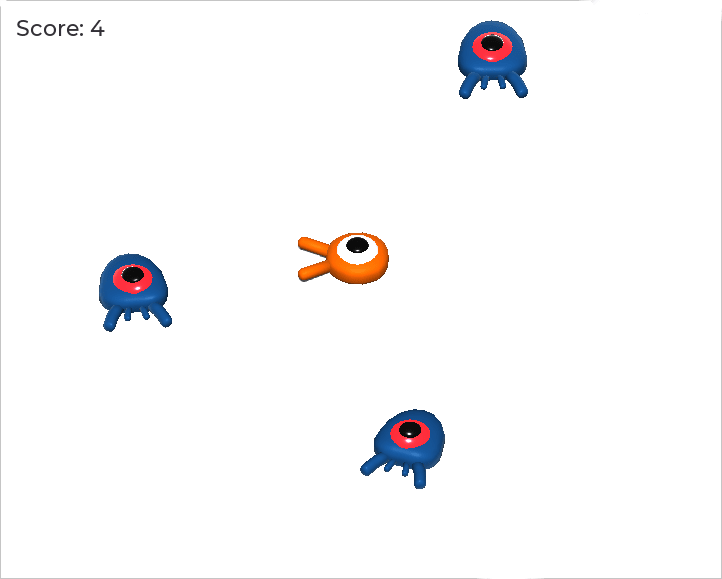
你現在可以玩遊戲,壓死幾個敵人,看看分數的增長。
備註
在一個複雜的遊戲中,你可能想把你的使用者介面與遊戲世界完全分開。在這種情況下,你就不會在標籤上記錄分數了。相反,你可能想把它儲存在一個單獨的、專門的物件中。但當原型設計或你的專案很簡單時,保持你的程式碼簡單就可以了。程式設計總是一種平衡的行為。
執行遊戲
我們現在就要新增死亡後重玩的能力。玩家死亡後,我們會在螢幕上現實一條消息並等待輸入。
回到 main.tscn 場景,選中 UserInterface 節點,新增 ColorRect 節點作為其子項並命名為 ``Retry``(重試)。該節點會使用單一色彩填充矩形,我們用它來覆蓋畫面,達到變暗的效果。
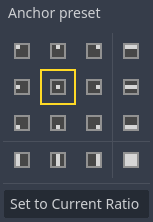
要使其覆蓋整個視口,可以使用工具列中 錨點預設 功能表。

點擊打開,並應用*整個矩形*命令。
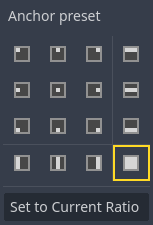
什麼都沒發生。好吧,是幾乎什麼都沒有;只有四個綠色的大頭針移動到了選擇框的四個角落。
這是因為 UI 節點(圖示都是綠色)使用的是錨點和邊距,它們都相對於它們父節點包圍框。這裡的 UserInterface 節點比較小,所以 Retry 會受限於它。
選中 UserInterface 然後也對其使用*錨點預設 -> 整個矩形*。Retry 節點就應該覆蓋整個視口了。
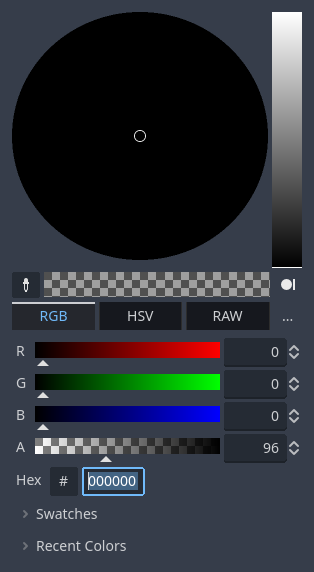
讓我們修改它的顏色,把遊戲區域變暗。選中 Retry,在*屬性面板*中將 Color*(顏色)設定為透明的暗色。要實作整個效果,可以在取色器中將 *A 滑動條拖到左邊。它控制的是顏色的 Alpha 通道,也就是不透明度。
接下來,新增一個 Label 的節點作為 Retry 的子節點並且設定他的 Text 為“Press Enter to retry”。將其移動至螢幕中央,並且選擇 *Anchor Preset -> Center*(錨點預設 > 居中)。
複寫建置選項
我們現在就可以去編寫程式碼,在玩家死亡時顯示 Retry 節點,重玩時隱藏。
打開 main.gd 腳本。首先,我們想要在遊戲開始時隱藏覆蓋層。將這一行加到 _ready() 函式中。
func _ready():
    $UserInterface/Retry.hide()
public override void _Ready()
{
    GetNode<Control>("UserInterface/Retry").Hide();
}
然後在玩家受到攻擊時,我們就顯示這個覆蓋層。
func _on_player_hit():
    #...
    $UserInterface/Retry.show()
private void OnPlayerHit()
{
    //...
    GetNode<Control>("UserInterface/Retry").Show();
}
最後,當 Retry 節點可見時,我們需要監聽玩家的輸入,按下確認鍵時讓遊戲重啟。可以使用內建的 _unhandled_input() 回呼函式來實作,任何輸入都會觸發這個回呼函式。
如果玩家按下了預設的 ui_accept 輸入動作並且 Retry 是可見狀態,我們就重新載入目前場景。
func _unhandled_input(event):
    if event.is_action_pressed("ui_accept") and $UserInterface/Retry.visible:
        # This restarts the current scene.
        get_tree().reload_current_scene()
public override void _UnhandledInput(InputEvent @event)
{
    if (@event.IsActionPressed("ui_accept") && GetNode<Control>("UserInterface/Retry").Visible)
    {
        // This restarts the current scene.
        GetTree().ReloadCurrentScene();
    }
}
我們可以通過 get_tree() 函式存取全域 SceneTree 物件,然後用它來重新載入並重啟目前場景。
新增腳本
要新增音樂,讓音樂在後臺連續播放,我們就要用到 Godot 的另一項功能:自動載入。
要播放音訊,只需往場景裡新增一個 AudioStreamPlayer 節點,然後為它附加一個音訊檔。啟動場景時,就會自動播放。然而,如果重新載入了場景,比如我們在重玩的時候就這麼幹了,這些音訊節點也會被重設,音樂也就會從頭開始播放。
你可以使用自動載入功能來讓 Godot 在遊戲開始時自動載入節點或場景,不依賴於目前場景。你還可以用它來建立能夠全域存取的物件。
在*場景*功能表中按一下*新建場景*,或者使用目前打開的場景旁邊的 + 圖示來建立一個新場景。
按一下*其他節點*按鈕,建立一個 AudioStreamPlayer 然後將其重命名為 ``MusicPlayer``(音樂播放機)。
我們在 art/ 目錄中包含了一條音樂音軌 House In a Forest Loop.ogg。按一下並把它拖放到*屬性面板*中的 Stream*(流)屬性上。同時要打開 *Autoplay,這樣音樂就會在遊戲開始時自動播放了。
Save the scene as music_player.tscn.
We have to register it as an autoload. Head to the Project -> Project Settings… menu and click on the Globals -> Autoload tab.
In the Path field, you want to enter the path to your scene. Click the folder
icon to open the file browser and double-click on music_player.tscn. Then,
click the Add button on the right to register the node.
music_player.tscn now loads into any scene you open or play.
So if you run the game now, the music will play automatically in any scene.
在這一節課結束之前,我們來看一下在底層發生了什麼。運作遊戲時,你的*場景*面板會多出來兩個分頁:遠端*和*本地。
你可以在*遠端*分頁中查看運作中的遊戲的節點樹。你會看到 Main 節點以及場景中所包含的所有東西,最底部是產生實體的小怪。
頂部的是自動載入的 MusicPlayer 以及一個 root 節點,這是你的遊戲的視口。
這一節課就是這樣。在下一部分,我們會新增動畫,讓遊戲更美觀。
這是完整的 main.gd 腳本,僅供參考。
extends Node

@export var mob_scene: PackedScene

func _ready():
    $UserInterface/Retry.hide()


func _on_mob_timer_timeout():
    # Create a new instance of the Mob scene.
    var mob = mob_scene.instantiate()

    # Choose a random location on the SpawnPath.
    # We store the reference to the SpawnLocation node.
    var mob_spawn_location = get_node("SpawnPath/SpawnLocation")
    # And give it a random offset.
    mob_spawn_location.progress_ratio = randf()

    var player_position = $Player.position
    mob.initialize(mob_spawn_location.position, player_position)

    # Spawn the mob by adding it to the Main scene.
    add_child(mob)

    # We connect the mob to the score label to update the score upon squashing one.
    mob.squashed.connect($UserInterface/ScoreLabel._on_mob_squashed.bind())

func _on_player_hit():
    $MobTimer.stop()
    $UserInterface/Retry.show()

func _unhandled_input(event):
    if event.is_action_pressed("ui_accept") and $UserInterface/Retry.visible:
        # This restarts the current scene.
        get_tree().reload_current_scene()
using Godot;

public partial class Main : Node
{
    [Export]
    public PackedScene MobScene { get; set; }

    public override void _Ready()
    {
        GetNode<Control>("UserInterface/Retry").Hide();
    }

    public override void _UnhandledInput(InputEvent @event)
    {
        if (@event.IsActionPressed("ui_accept") && GetNode<Control>("UserInterface/Retry").Visible)
        {
            // This restarts the current scene.
            GetTree().ReloadCurrentScene();
        }
    }

    private void OnMobTimerTimeout()
    {
        // Create a new instance of the Mob scene.
        Mob mob = MobScene.Instantiate<Mob>();

        // Choose a random location on the SpawnPath.
        // We store the reference to the SpawnLocation node.
        var mobSpawnLocation = GetNode<PathFollow3D>("SpawnPath/SpawnLocation");
        // And give it a random offset.
        mobSpawnLocation.ProgressRatio = GD.Randf();

        Vector3 playerPosition = GetNode<Player>("Player").position;
        mob.Initialize(mobSpawnLocation.Position, playerPosition);

        // Spawn the mob by adding it to the Main scene.
        AddChild(mob);

        // We connect the mob to the score label to update the score upon squashing one.
        mob.Squashed += GetNode<ScoreLabel>("UserInterface/ScoreLabel").OnMobSquashed;
    }

    private void OnPlayerHit()
    {
        GetNode<Timer>("MobTimer").Stop();
        GetNode<Control>("UserInterface/Retry").Show();
    }
}