Up to date
This page is up to date for Godot 4.2.
If you still find outdated information, please open an issue.
Vytvoření scény hráče
With the project settings in place, we can start working on the player-controlled character.
První scéna, kterou vytvoříme, definuje objekt Player. Jednou z výhod vytvoření samostatné hráčské scény je to, že ji můžeme testovat samostatně, dokonce ještě předtím, než vytvoříme další části hry.
Struktura uzlu
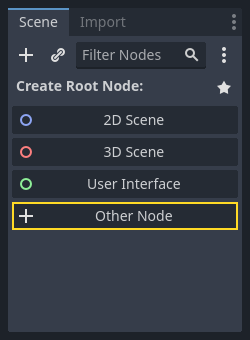
Nejprve musíme vybrat kořenový uzel pro objekt hráče. Obecně by kořen scény měl odrážet požadovanou funkčnost objektu - to čím objekt je. Klikněte na tlačítko "Jiný uzel" a do scény přidejte uzel Area2D.
Godot zobrazí varovnou ikonu vedle uzlu ve stromu scény. Prozatím to můžete ignorovat. Vyřešíme to později.
Pomocí Area2D můžeme detekovat objekty, které se překrývají nebo naráží do hráče. Změňte název uzlu na Player poklepáním na něj. Nyní, když jsme nastavili kořen scény hráče, můžeme do něho přidat další podřízené uzly, abychom mu rozšířili funkčnost a poskytli více vlastností.
Before we add any children to the Player node, we want to make sure we don't
accidentally move or resize them by clicking on them. Select the node and click
the icon to the right of the lock. Its tooltip says "Make selected node's
children not selectable."

Uložte scénu. Klikněte na Scéna -> Uložit nebo stiskněte Ctrl + S v systému Windows / Linux nebo Cmd + S v systému MacOS.
Poznámka
V tomto projektu budeme dodržovat Godot pravidla pro názvy identifikátorů.
GDScript: Třídy (uzly) používají PascalCase, proměnné a funkce používají snake_case a konstanty používají ALL_CAPS (viz Průvodce stylem GDScript).
C #: Třídy, exportované proměnné a metody používají PascalCase, soukromá pole používají _camelCase, lokální proměnné a parametry používají camelCase (viz C# style guide). Při připojování signálů buďte opatrní, abyste přesně zadali názvy metod.
Animace spritu
Click on the Player node and add (Ctrl + A on Windows/Linux or
Cmd + A on macOS) a child node AnimatedSprite2D. The AnimatedSprite2D will handle the
appearance and animations for our player. Notice that there is a warning symbol
next to the node. An AnimatedSprite2D requires a SpriteFrames resource, which is a list of the animations it can
display. To create one, find the Sprite Frames property under the Animation tab in the Inspector and click
"[empty]" -> "New SpriteFrames". Click again to open the "SpriteFrames" panel:
On the left is a list of animations. Click the "default" one and rename it to
"walk". Then click the "Add Animation" button to create a second animation named
"up". Find the player images in the "FileSystem" tab - they're in the art
folder you unzipped earlier. Drag the two images for each animation, named
playerGrey_up[1/2] and playerGrey_walk[1/2], into the "Animation Frames"
side of the panel for the corresponding animation:
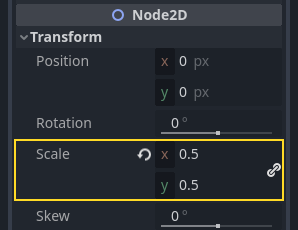
The player images are a bit too large for the game window, so we need to scale
them down. Click on the AnimatedSprite2D node and set the Scale property
to (0.5, 0.5). You can find it in the Inspector under the Node2D
heading.
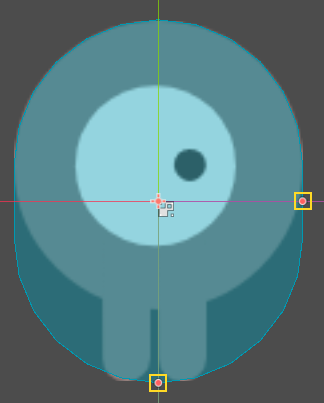
Finally, add a CollisionShape2D as a child of
Player. This will determine the player's "hitbox", or the bounds of its
collision area. For this character, a CapsuleShape2D node gives the best
fit, so next to "Shape" in the Inspector, click "[empty]" -> "New
CapsuleShape2D". Using the two size handles, resize the shape to cover the
sprite:
Až skončíte, měla by vaše Player scéna vypadat takto:
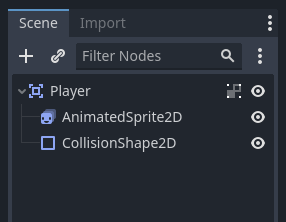
Po těchto změnách nezapomeňte scénu znovu uložit.
In the next part, we'll add a script to the player node to move and animate it. Then, we'll set up collision detection to know when the player got hit by something.