Up to date
This page is up to date for Godot 4.2.
If you still find outdated information, please open an issue.
Vytváření instancí
In the previous part, we saw that a scene is a collection of nodes organized in a tree structure, with a single node as its root. You can split your project into any number of scenes. This feature helps you break down and organize your game's different components.
You can create as many scenes as you'd like and save them as files with the
.tscn extension, which stands for "text scene". The label.tscn file from
the previous lesson was an example. We call those files "Packed Scenes" as they
pack information about your scene's content.
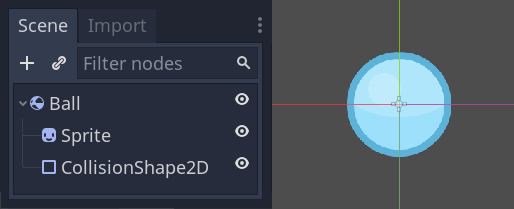
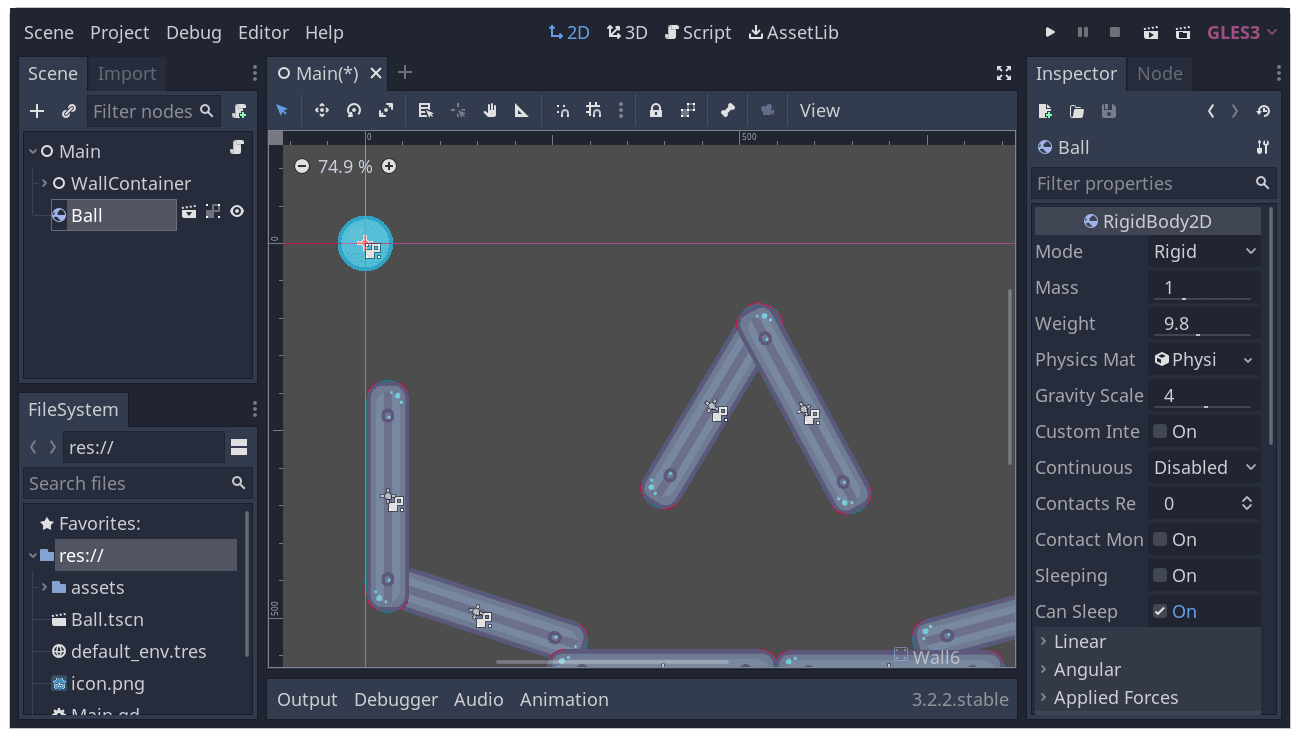
Here's an example of a ball. It's composed of a RigidBody2D node as its root named Ball, which allows the ball to fall and bounce on walls, a Sprite2D node, and a CollisionShape2D.
Once you saved a scene, it works as a blueprint: you can reproduce it in other scenes as many times as you'd like. Replicating an object from a template like this is called instancing.
As we mentioned in the previous part, instanced scenes behave like a node: the editor hides their content by default. When you instance the Ball, you only see the Ball node. Notice also how each duplicate has a unique name.
Every instance of the Ball scene starts with the same structure and properties
as ball.tscn. However, you can modify each independently, such as changing
how they bounce, how heavy they are, or any property exposed by the source
scene.
Osvědčené postupy
Let's use instancing in practice to see how it works in Godot. We invite you to download the ball's sample project we prepared for you: instancing_starter.zip.
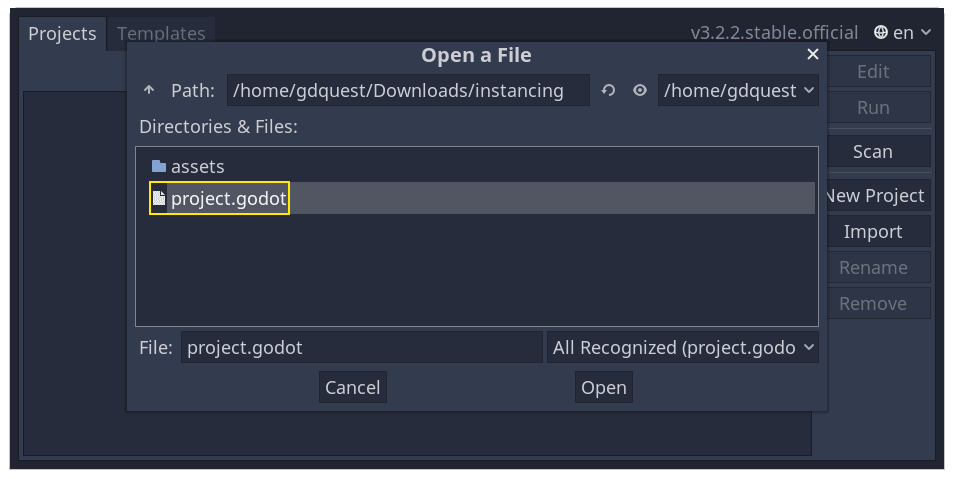
Extract the archive on your computer. To import it, you need the Project Manager. The Project Manager is accessed by opening Godot, or if you already have Godot opened, click on Project -> Quit to Project List (Ctrl + Shift + Q, Ctrl + Option + Cmd + Q on macOS)
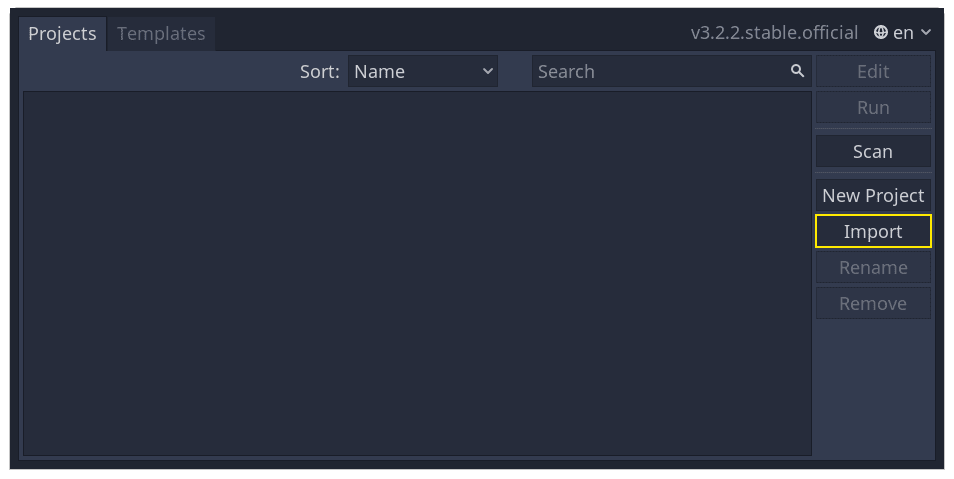
In the Project Manager, click the Import button to import the project.
In the pop-up that appears, click the browse button and navigate to the folder you extracted.
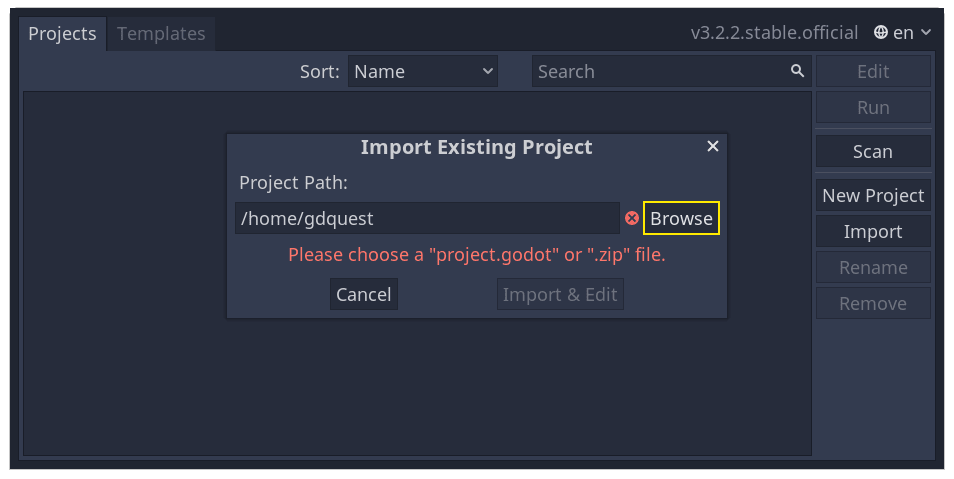
Double-click the project.godot file to open it.
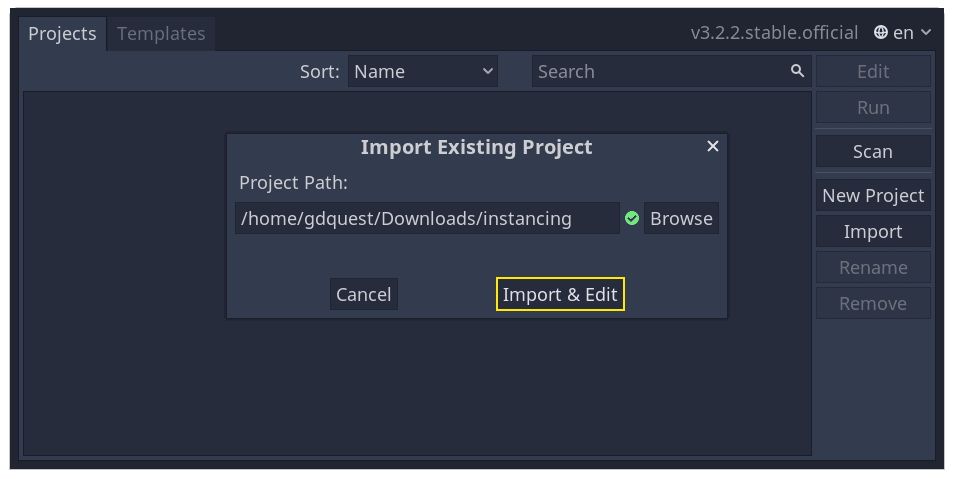
Finally, click the Import & Edit button.
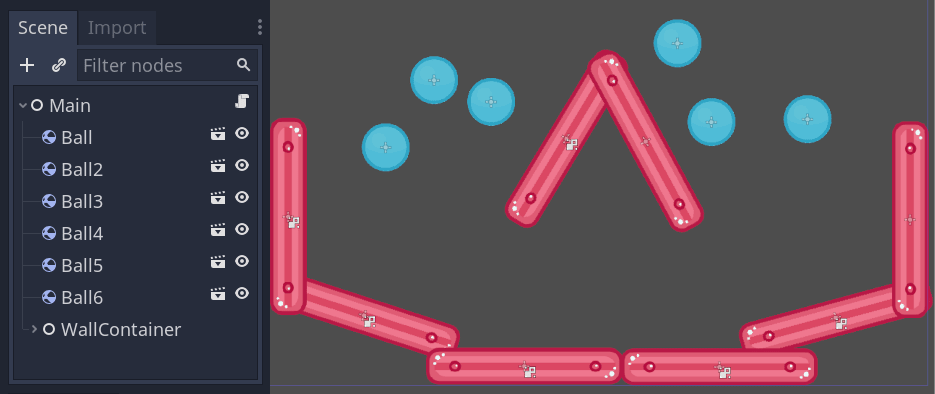
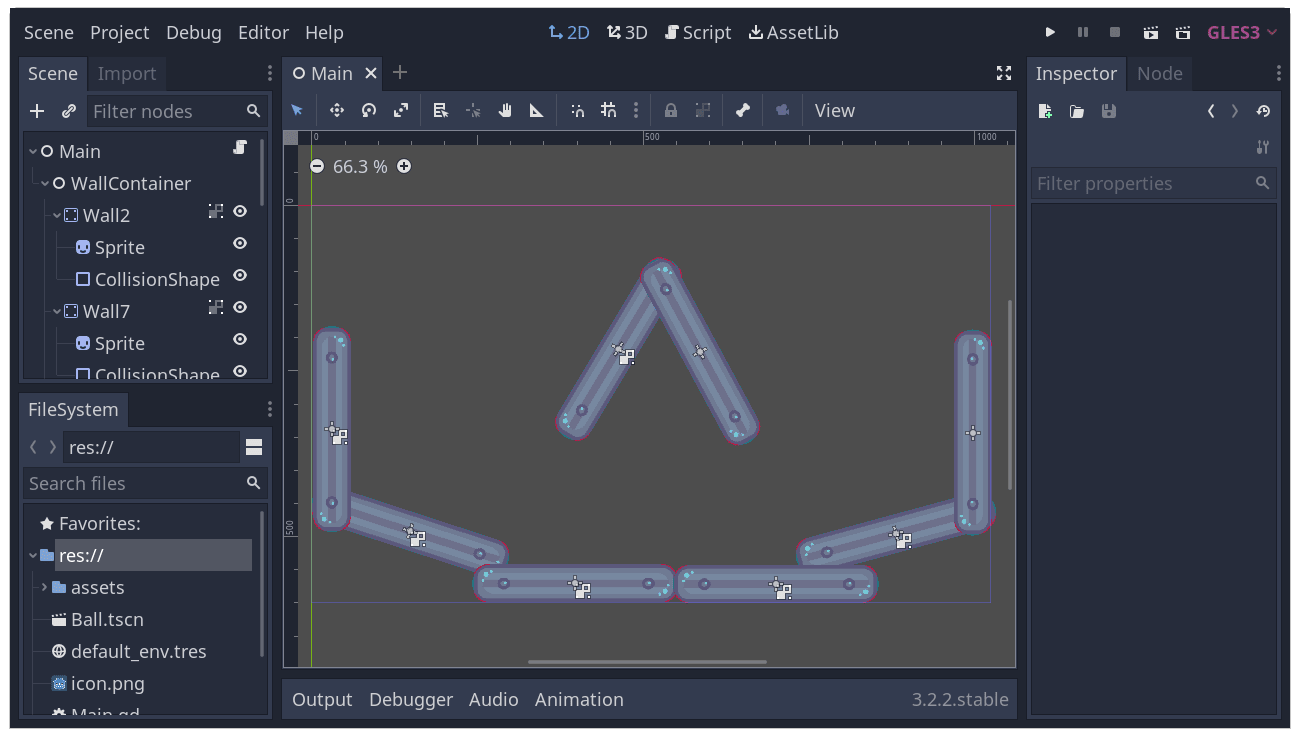
The project contains two packed scenes: main.tscn, containing walls against
which the ball collides, and ball.tscn. The Main scene should open
automatically. If you're seeing an empty 3D scene instead of the main scene, click the 2D button at the top of the screen.

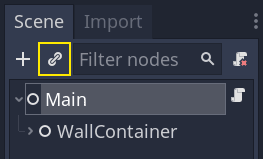
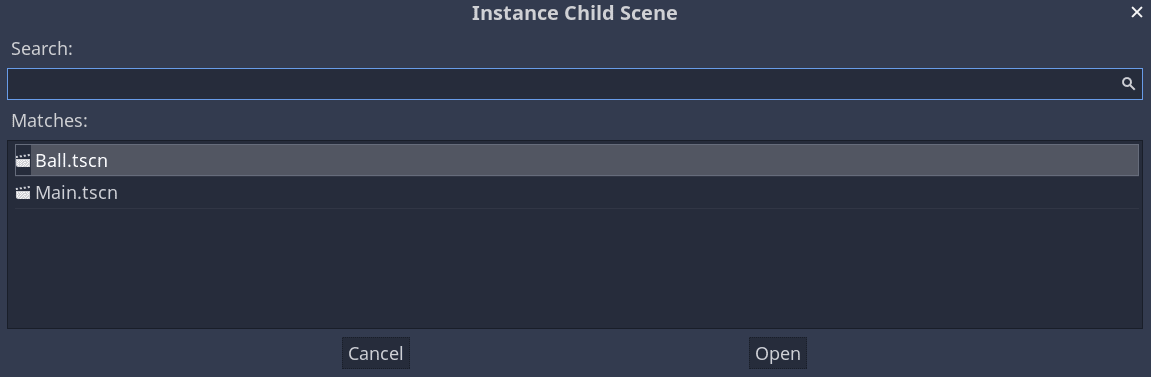
Let's add a ball as a child of the Main node. In the Scene dock, select the Main node. Then, click the link icon at the top of the scene dock. This button allows you to add an instance of a scene as a child of the currently selected node.
Double-click the ball scene to instance it.
Koule se zobrazí v levém horním rohu okna zobrazení.
Click on it and drag it towards the center of the view.
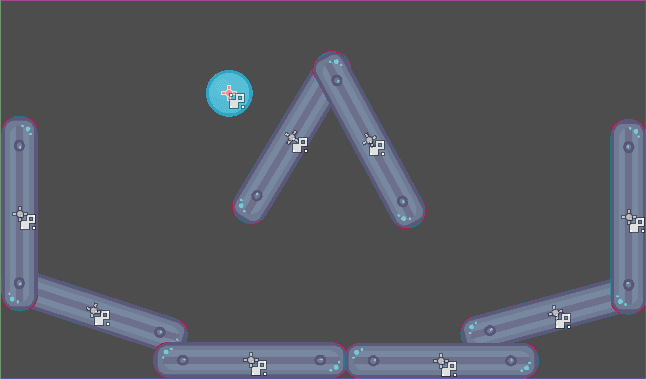
Play the game by pressing F5 (Cmd + B on macOS). You should see it fall.
Now, we want to create more instances of the Ball node. With the ball still selected, press Ctrl + D (Cmd + D on macOS) to call the duplicate command. Click and drag to move the new ball to a different location.
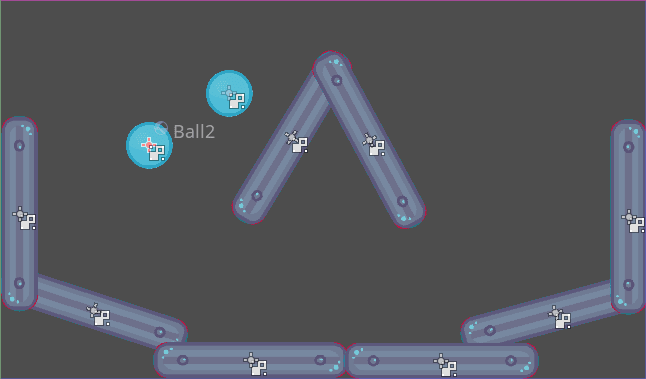
Tento postup můžete opakovat, dokud jich na scéně nebude několik.
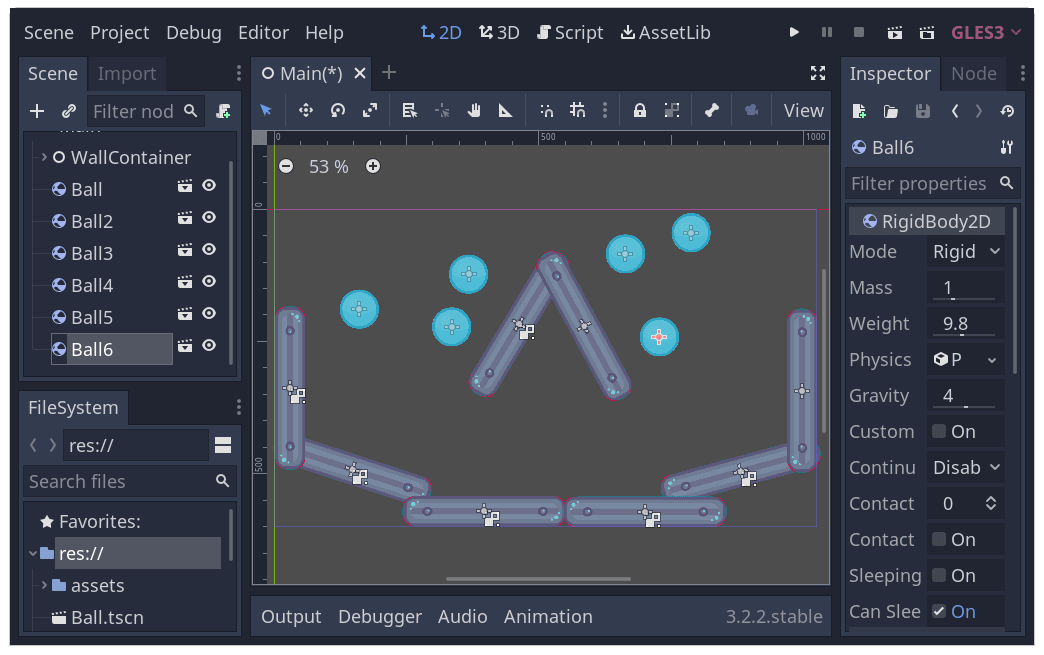
Play the game again. You should now see every ball fall independently from one another. This is what instances do. Each is an independent reproduction of a template scene.
Úpravy scén a instancí
There is more to instances. With this feature, you can:
Change the properties of one ball without affecting the others using the Inspector.
Change the default properties of every Ball by opening the
ball.tscnscene and making a change to the Ball node there. Upon saving, all instances of the Ball in the project will see their values update.
Poznámka
Changing a property on an instance always overrides values from the corresponding packed scene.
Let's try this. Open ball.tscn and select the Ball node. In the Inspector on
the right, click on the PhysicsMaterial property to expand it.
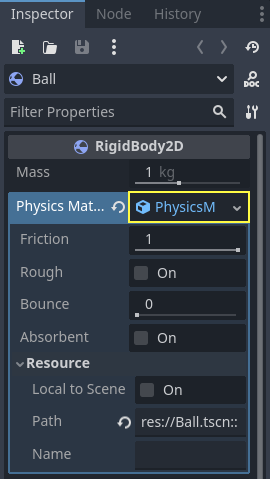
Set its Bounce property to 0.5 by clicking on the number field, typing 0.5,
and pressing Enter.

Play the game by pressing F5 and notice how all balls now bounce a lot more. As the Ball scene is a template for all instances, modifying it and saving causes all instances to update accordingly.
Let's now adjust an individual instance. Head back to the Main scene by clicking on the corresponding tab above the viewport.

Select one of the instanced Ball nodes and, in the Inspector, set its Gravity
Scale value to 10.

A grey "revert" button appears next to the adjusted property.
Všimněte si, že vedle upravené vlastnosti se zobrazí šedé tlačítko „obnovit“. Je-li toto tlačítko k dispozici, znamená to, že jste v instanci scény upravili vlastnost originální scény tj tak, aby přepsala svoji hodnotu v uložených vlastnostech upravené scény. I když je tato vlastnost modifikována ve scéně původni, zde v instanci zůstane hodnota upravená . Stisknutím tlačítka pro obnovení vrátíte vlastnost na hodnotu v uložené scéně.
Rerun the game and notice how this ball now falls much faster than the others.
Poznámka
If you change a value on the PhysicsMaterial of one instance, it
will affect all the others. This is because PhysicsMaterial is a
resource, and resources are shared between instances. To make a
resource unique for one instance, right-click on it in the Inspector
and click Make Unique in the contextual menu.
Resources are another essential building block of Godot games we will cover in a later lesson.
Scene instances as a design language
Instances and scenes in Godot offer an excellent design language, setting the engine apart from others out there. We designed Godot around this concept from the ground up.
We recommend dismissing architectural code patterns when making games with Godot, such as Model-View-Controller (MVC) or Entity-Relationship diagrams. Instead, you can start by imagining the elements players will see in your game and structure your code around them.
Například takhle by se dala představit jednoduchá střílečka:
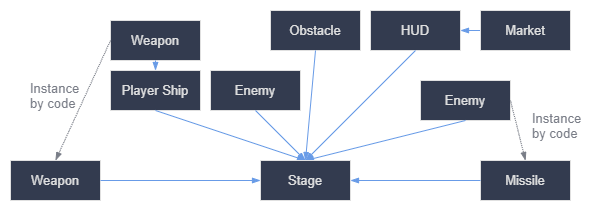
S takovým diagramem můžete přijít pro téměř jakoukoli hru. Zakreslete si ty části hry, které jsou viditelné z perspektivy hráče, a poté přidejte šipky znázorňující vlastnictví jednoho objektu druhým.
Once you have a diagram, we recommend creating a scene for each element listed in it to develop your game. You'll use instancing, either by code or directly in the editor, to build your tree of scenes.
Hodně času stráveného při programováním her (nebo softwaru obecně) je o navrhování architektury a přizpůsobení herních komponent této architektuře. Navrh založený na scénách nahrazuje tento přístup a dělá vývoj mnohem rychlejším a přímočarějším, což vám umožňuje soustředit se na samotnou herní logiku. Protože většina herních komponent je mapována přímo na scénu, použití designu založeného na instancích scén znamená, že žádné další rozšiřování architektury kódem není většinou potřeba.
Podívejme se na další příklad hry typu otevřený-svět se spoustou zdrojů a vnořených prvků:
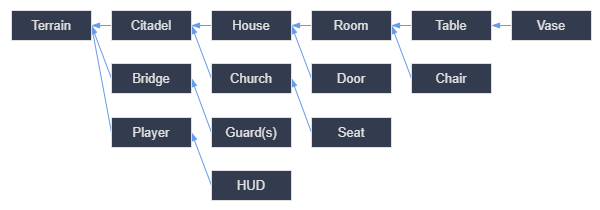
Imagine we started by creating the room. We could make a couple of different room scenes, with unique arrangements of furniture in them. Later, we could make a house scene that uses multiple room instances for the interior. We would create a citadel out of many instanced houses and a large terrain on which we would place the citadel. Each of these would be a scene instancing one or more sub-scenes.
Později bychom mohli vytvořit scény, které představují Stráže (a další NPC) a také je přidat do Citadely. V důsledku toho by byli nepřímo přidáni do celého herního světa.
S Godotem je snadné takto postupně budovat vaši hru, protože vše, co musíte udělat, je vytvořit další scény a následně jejich instance. Kromě toho je uživatelské rozhraní editoru navrženo tak, aby bylo uživatelsky přívětivé pro programátory i neprogramátory. Typický proces týmového vývoje může vyžadovat 2D nebo 3D umělce, návrháře úrovní, herní návrháře a animátory, všechny pracující s jedním editorem.
Shrnutí
Instancing, the process of producing an object from a blueprint, has many handy uses. With scenes, it gives you:
Možnost rozdělit hru na opakovaně použitelné komponenty.
A tool to structure and encapsulate complex systems.
A language to think about your game project's structure in a natural way.