Attention: Here be dragons
This is the latest
(unstable) version of this documentation, which may document features
not available in or compatible with released stable versions of Godot.
Checking the stable version of the documentation...
Animação de recorte(Cut-out)
O que é isso?
Tradicionalmente, animação de recorte é um tipo de animação stop motion em que as peças de papel (ou outro material fino) são cortados em formas especiais e dispostos em representações bidimensionais de personagens e objetos. Os corpos dos personagens geralmente são feitos de várias peças. As peças são arranjadas e fotografadas uma vez para cada quadro do filme. O animador move e gira as partes em pequenos incrementos entre cada tomada para criar a ilusão de movimento quando as imagens são reproduzidas rapidamente em sequência.
Simulações de animação de recorte agora podem ser criadas usando software como visto em South Park e Jake and the Never Land Pirates.
Nos videogames, essa técnica também se tornou popular. Exemplos disso são Paper Mario ou Rayman Origins .
Animação de recorte (Cutout) no Godot
Godot provides tools for working with cutout rigs, and is ideal for the workflow:
O sistema de animação é totalmente integrado ao engine: Isso significa que as animações podem controlar muito mais do que apenas o movimento de objetos. Texturas, tamanhos de sprites, pivôs, opacidade, modulação de cores e muito mais podem ser animados e mesclados.
Combine animation styles: AnimatedSprite2D allows traditional cel animation to be used alongside cutout animation. In cel animation different animation frames use entirely different drawings rather than the same pieces positioned differently. In an otherwise cutout-based animation, cel animation can be used selectively for complex parts such as hands, feet, changing facial expressions, etc.
Elementos de formato personalizado: Formas personalizadas podem ser criadas com Polygon2D permitindo animação UV, deformações, etc.
Sistemas de partículas: um equipamento de animação de recorte pode ser combinado com sistemas de partículas. Isso pode ser útil para efeitos mágicos, jetpacks, etc.
Custom Colliders: Defina colisores e áreas de influência em diferentes partes dos esqueletos, ótimo para chefes e jogos de luta.
Árvore de Animação: Permite combinações complexas e mistura entre várias animações, da mesma forma que funciona em 3D.
E muito mais!
Criação do GBot
Para este tutorial, usaremos como conteúdo de demonstração as peças do personagem GBot, criado por Andreas Esau.
Obtenha os recursos: cutout_animation_assets.zip.
Preparando a estrutura
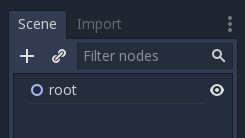
Crie um Node2D vazio como raiz da cena, trabalharemos dentro dele:
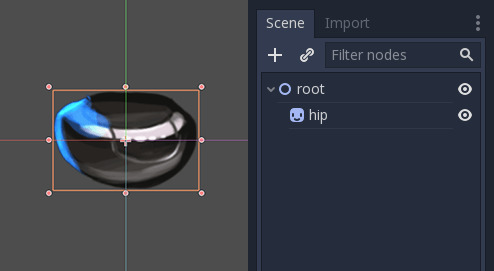
O primeiro nó do modelo é o quadril. Geralmente, tanto em 2D quanto em 3D, o quadril é a raiz do esqueleto. Isso facilita a animação:
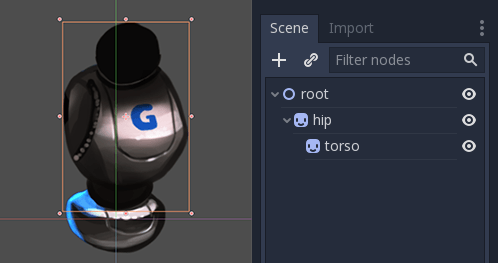
Em seguida, será a vez do torso. O torso precisa ser um filho do quadril, então crie um sprite filho e carregue a textura do torso, ajustando-a posteriormente da maneira correta:
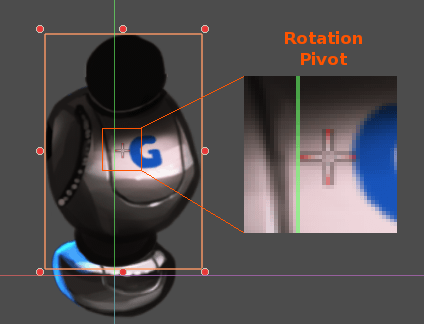
Isso parece bom. Vamos ver se nossa hierarquia funciona como um esqueleto rotacionando o torso. Podemos fazer isso pressionando E para entrar no modo de rotação e arrastando com o botão esquerdo do mouse. Para sair do modo de rotação, pressione ESC.

O pivô de rotação está incorreto e precisa ser ajustado.
Esta pequena cruz no meio do Sprite2D é o pivô de rotação:
Ajustando o pivô
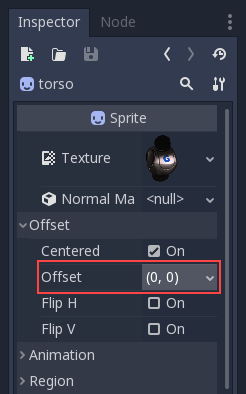
O pivô pode ser ajustado alterando a propriedade offset (deslocamento, desvio) no Sprite2D:
O pivô também pode ser ajustado visualmente. Ao posicionar o cursor sobre o ponto do pivô desejado, pressione V para mover o pivô para o Sprite2D selecionado. Há também uma ferramenta na barra de ferramentas com função semelhante.
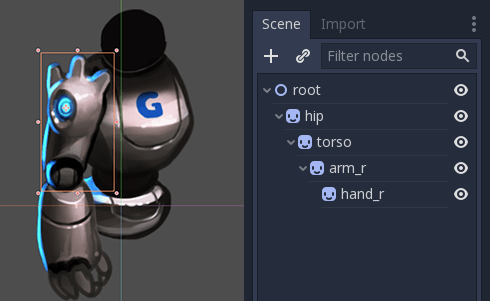
Continue adicionando as partes do corpo, começando pelo braço direito. Certifique-se de colocar cada sprite em seu lugar correto na hierarquia, para que suas rotações e translações sejam relativas ao seu pai:
Com o braço esquerdo há um problema. Em 2D, os nós filhos aparecem na frente de seus pais:
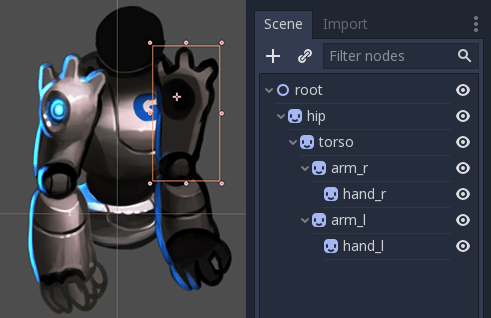
Queremos que o braço esquerdo apareça atrás do quadril e do torso. Poderíamos mover os nós do braço esquerdo para trás do quadril (acima do nó do quadril na hierarquia da cena), mas aí o braço esquerdo não estaria mais em sua posição correta na hierarquia. Isso significa que ele não seria afetado pelo movimento do torso. Vamos resolver esse problema com nós de transformações remotas RemoteTransform2D.
Nota
Você também pode corrigir problemas de ordem de profundidade ajustando a propriedade Z de qualquer nó que herda do Node2D.
Nó RemoteTransform2D
O nó RemoteTransform2D transforma nós em algum outro lugar na hierarquia. Este nó aplica sua própria transformação (incluindo qualquer transformação que herda de seus pais) ao nó remoto que ele visa.
Isso nos permite corrigir a ordem de visibilidade dos nossos elementos, independentemente da localização dessas partes na hierarquia do recorte.
Create a RemoteTransform2D node as a child of the torso. Call it remote_arm_l.
Create another RemoteTransform2D node inside the first and call it remote_hand_l.
Use the Remote Path property of the two new nodes to target the arm_l and
hand_l sprites respectively:
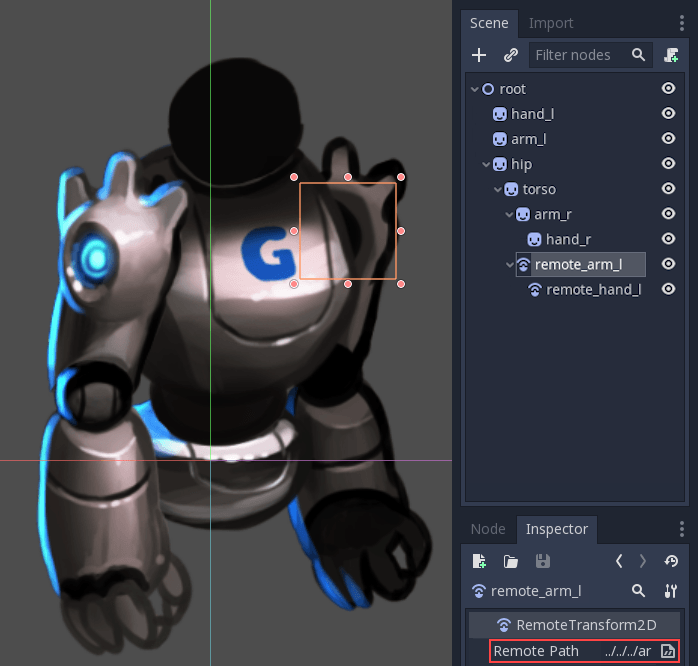
Moving the RemoteTransform2D nodes now moves the sprites. So we can create
animations by adjusting the RemoteTransform2D transforms:
Completando o esqueleto
Complete a estrutura seguindo os mesmos passos para as demais partes. A cena resultante deverá ser semelhante à esta:
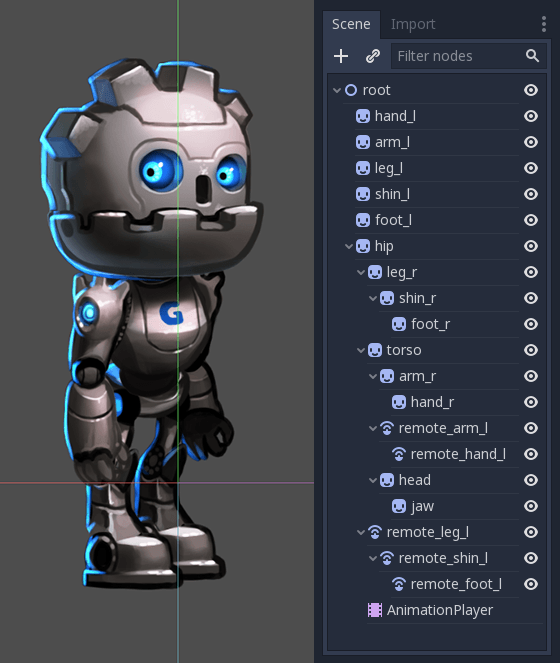
The resulting rig will be easy to animate. By selecting the nodes and rotating them you can animate forward kinematics (FK) efficiently.
Para objetos e estruturas simples, isso funciona bem, mas existem limitações:
Selecting sprites in the main viewport can become difficult in complex rigs. The scene tree ends up being used to select parts instead, which can be slower.
Inverse Kinematics (IK) is useful for animating extremities like hands and feet, and can't be used with our rig in its current state.
Para resolver esses problemas, usaremos os esqueletos da Godot.
Esqueletos
Na Godot, existe uma ferramenta auxiliar para criar "ossos" entre os nós. Os nós conectados por esses ossos são chamados de esqueletos.
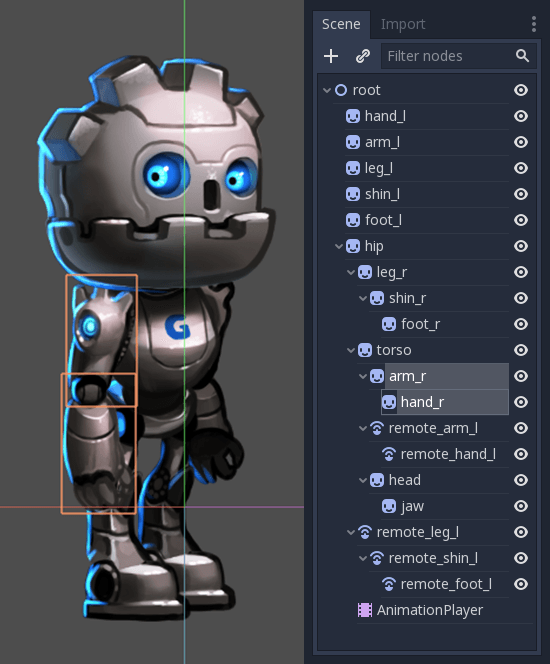
As an example, let's turn the right arm into a skeleton. To create a skeleton, a chain of nodes must be selected from top to bottom:
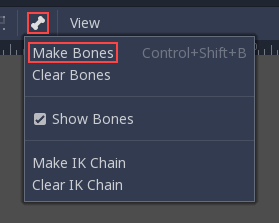
Then, click on the Skeleton menu and select Make Bones.
This will add bones covering the arm, but the result may be surprising.
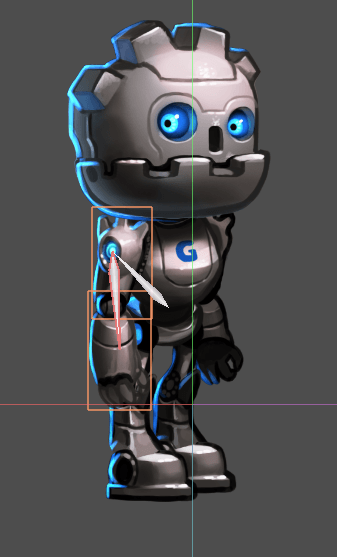
Why does the hand lack a bone? In Godot, a bone connects a node with its parent. And there's currently no child of the hand node. With this knowledge let's try again.
The first step is creating an endpoint node. Any kind of node will do, but Marker2D is preferred because it's visible in the editor. The endpoint node will ensure that the last bone has orientation.
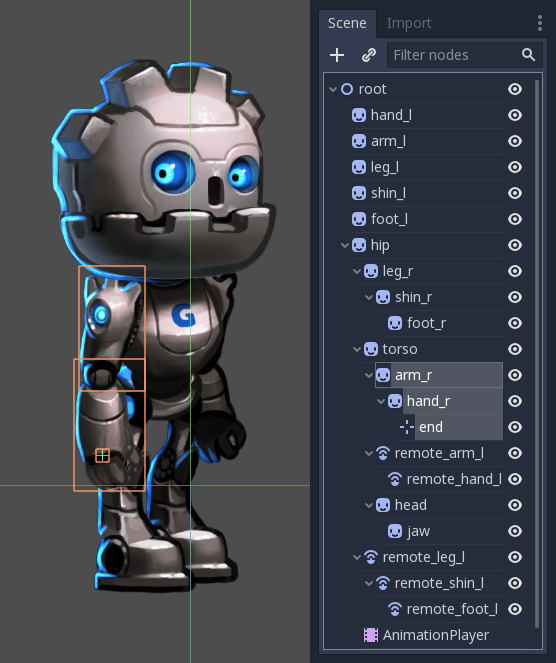
Now select the whole chain, from the endpoint to the arm and create bones:
The result resembles a skeleton a lot more, and now the arm and forearm can be selected and animated.
Create endpoints for all important extremities. Generate bones for all articulable parts of the cutout, with the hip as the ultimate connection between all of them.
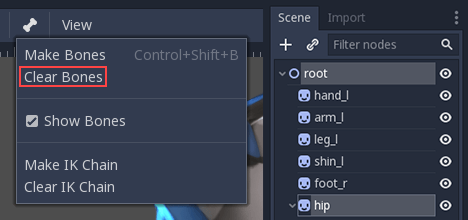
You may notice that an extra bone is created when connecting the hip and torso.
Godot has connected the hip node to the scene root with a bone, and we don't
want that. To fix this, select the root and hip node, open the Skeleton menu,
click clear bones.
Sua cena final deve ser algo como isto:
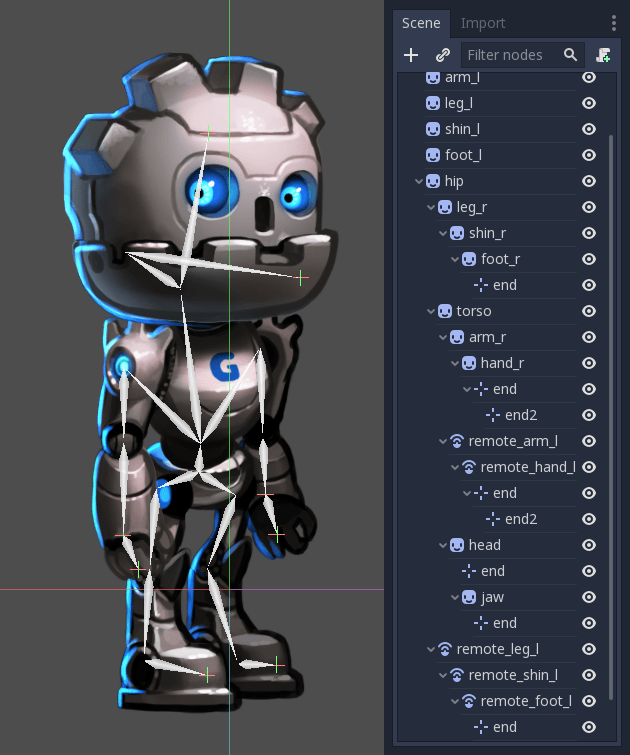
You might have noticed a second set of endpoints in the hands. This will make sense soon.
Now that the whole figure is rigged, the next step is setting up the IK chains. IK chains allow for more natural control of extremities.
cadeias IK
IK stands for inverse kinematics. It's a convenient technique for animating the position of hands, feet and other extremities of rigs like the one we've made. Imagine you want to pose a character's foot in a specific position on the ground. Without IK chains, each motion of the foot would require rotating and positioning several other bones (the shin and the thigh at least). This would be quite complex and lead to imprecise results. IK allows us to move the foot directly while the shin and thigh self-adjust.
Nota
IK chains in Godot currently work in the editor only, not at runtime. They are intended to ease the process of setting keyframes, and are not currently useful for techniques like procedural animation.
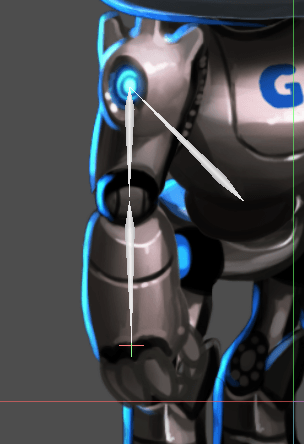
To create an IK chain, select a chain of bones from endpoint to the base for the chain. For example, to create an IK chain for the right leg, select the following:

Then enable this chain for IK. Go to Edit > Make IK Chain.
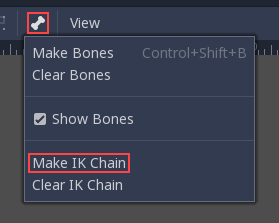
As a result, the base of the chain will turn Yellow.
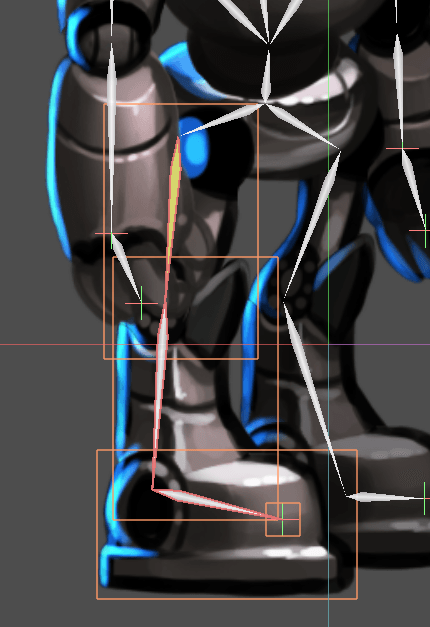
Once the IK chain is set up, grab any child or grand-child of the base of the chain (e.g. a foot), and move it. You'll see the rest of the chain adjust as you adjust its position.
Dicas de animação
The following section will be a collection of tips for creating animation for your cutout rigs. For more information on how the animation system in Godot works, see Introdução aos recursos de animação.
Definindo quadros-chave e excluindo propriedades
Special contextual elements appear in the top toolbar when the animation editor window is open:
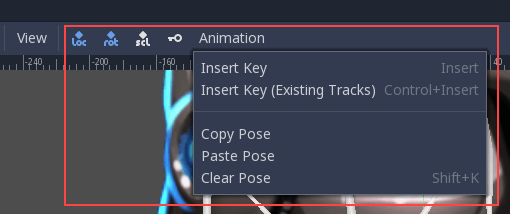
The key button inserts location, rotation, and scale keyframes for the selected objects or bones at the current playhead position.
The "loc", "rot", and "scl" toggle buttons to the left of the key button modify its function, allowing you to specify which of the three properties keyframes will be created for.
Here's an illustration of how this can be useful: Imagine you have a node which already has two keyframes animating its scale only. You want to add an overlapping rotation movement to the same node. The rotation movement should begin and end at different times from the scale change that's already set up. You can use the toggle buttons to have only rotation information added when you add a new keyframe. This way, you can avoid adding unwanted scale keyframes which would disrupt the existing scale animation.
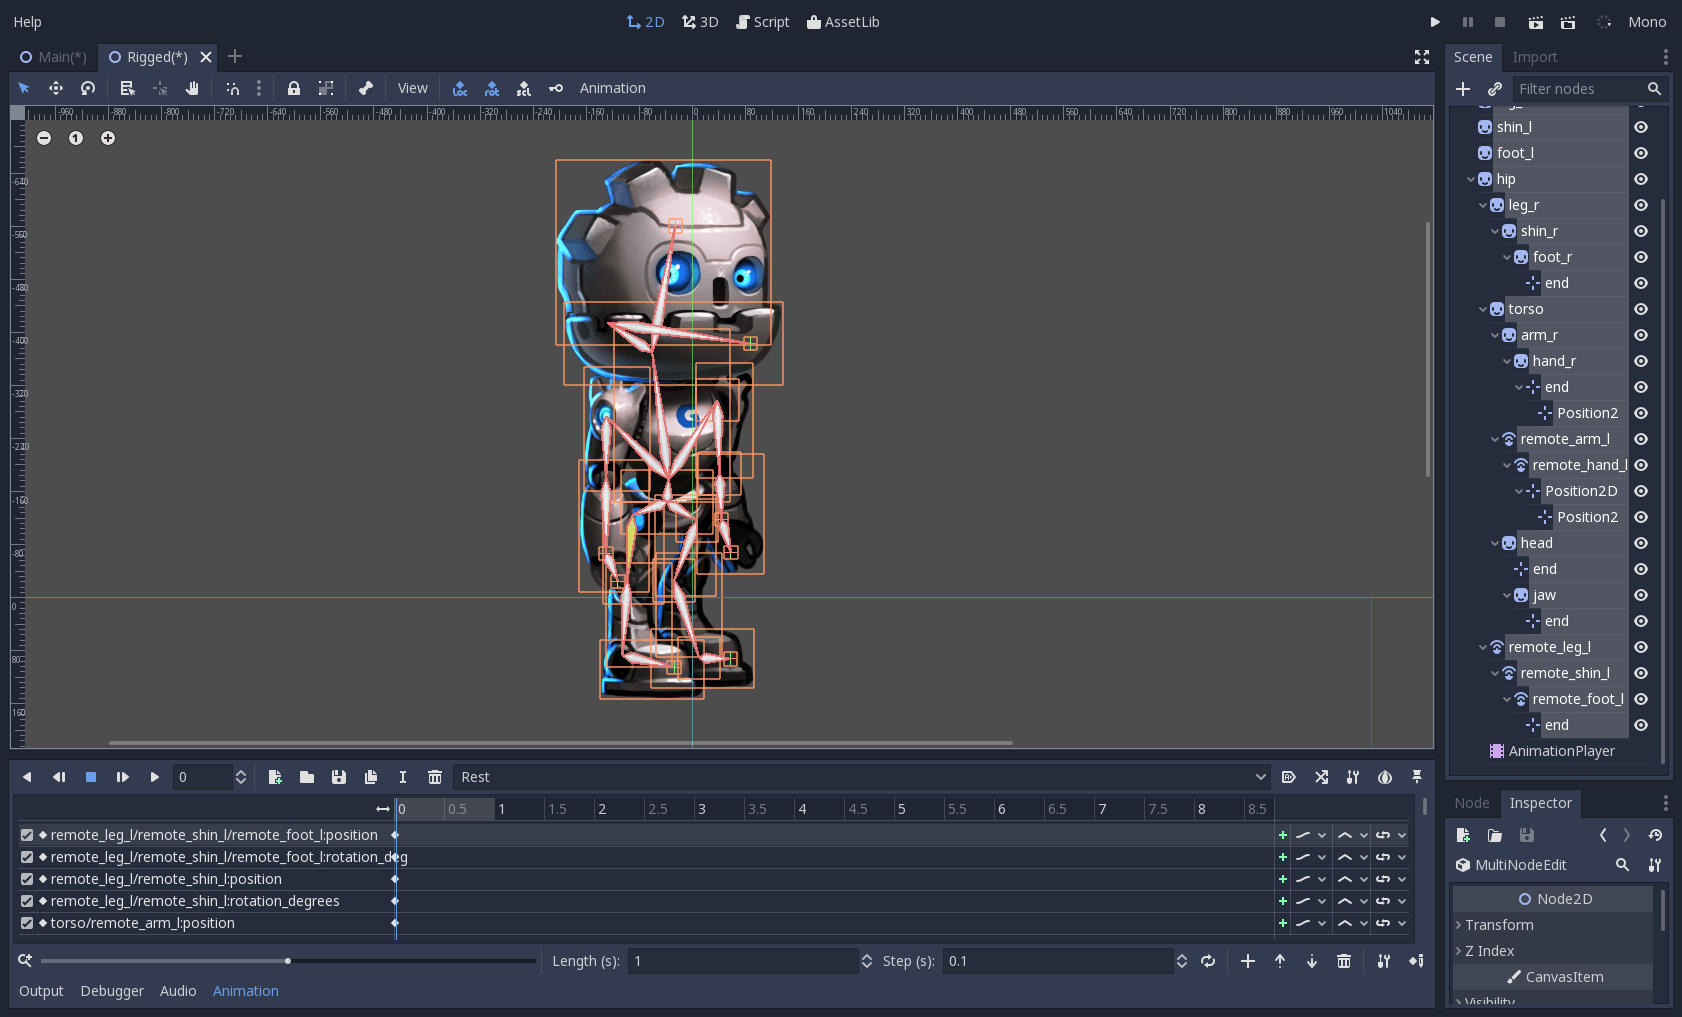
Criando uma pose de descanso
Think of a rest pose as a default pose that your cutout rig should be set to when no other pose is active in your game. Create a rest pose as follows:
1. Make sure the rig parts are positioned in what looks like a "resting" arrangement.
Crie uma nova animação e renomeie-a como "rest".
Select all nodes in your rig (box selection should work fine).
4. Make sure the "loc", "rot", and "scl" toggle buttons are all active in the toolbar.
5. Press the key button. Keys will be inserted for all selected parts storing their current arrangement. This pose can now be recalled when necessary in your game by playing the "rest" animation you've created.
Modifying rotation only
When animating a cutout rig, often it's only the rotation of the nodes that needs to change. Location and scale are rarely used.
So when inserting keys, you might find it convenient to have only the "rot" toggle active most of the time:

This will avoid the creation of unwanted animation tracks for position and scale.
Keyframing IK chains
When editing IK chains, it's not necessary to select the whole chain to add keyframes. Selecting the endpoint of the chain and inserting a keyframe will automatically insert keyframes for all other parts of the chain too.
Visually move a sprite behind its parent
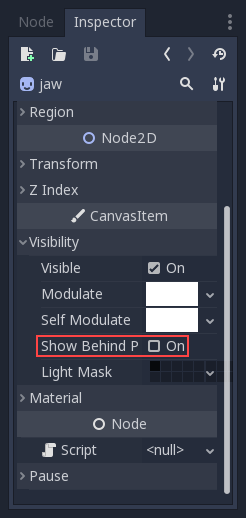
Sometimes it is necessary to have a node change its visual depth relative to its parent node during an animation. Think of a character facing the camera, who pulls something out from behind his back and holds it out in front of him. During this animation the whole arm and the object in his hand would need to change their visual depth relative to the body of the character.
To help with this there's a keyframable "Behind Parent" property on all Node2D-inheriting nodes. When planning your rig, think about the movements it will need to perform and give some thought to how you'll use "Behind Parent" and/or RemoteTransform2D nodes. They provide overlapping functionality.
Setting easing curves for multiple keys
To apply the same easing curve to multiple keyframes at once:
Select the relevant keys.
Click on the pencil icon in the bottom right of the animation panel. This will open the transition editor.
In the transition editor, click on the desired curve to apply it.

2D Skeletal deform
Skeletal deform can be used to augment a cutout rig, allowing single pieces to deform organically (e.g. antennae that wobble as an insect character walks).
This process is described in a separate tutorial.