Designing the mob scene
In this part, you're going to code the monsters, which we'll call mobs. In the next lesson, we'll spawn them randomly around the playable area.
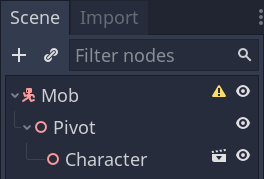
Let's design the monsters themselves in a new scene. The node structure is going to be similar to the Player scene.
Create a scene with, once again, a KinematicBody node as its root. Name it
Mob. Add a Spatial node as a child of it, name it Pivot. And drag and drop
the file mob.glb from the FileSystem dock onto the Pivot to add the
monster's 3D model to the scene. You can rename the newly created mob node
into Character.
We need a collision shape for our body to work. Right-click on the Mob node, the scene's root, and click Add Child Node.
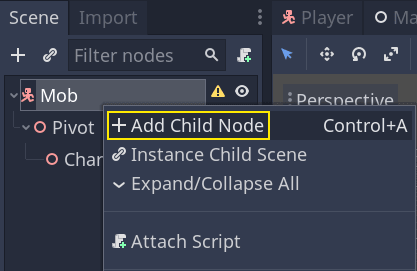
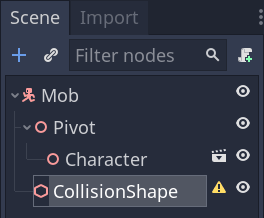
Add a CollisionShape.
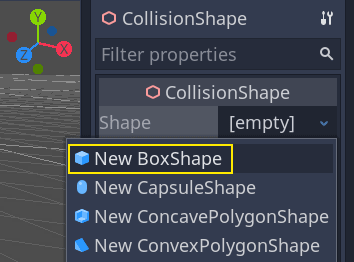
In the Inspector, assign a BoxShape to the Shape property.
We should change its size to fit the 3D model better. You can do so interactively by clicking and dragging on the orange dots.
The box should touch the floor and be a little thinner than the model. Physics engines work in such a way that if the player's sphere touches even the box's corner, a collision will occur. If the box is a little too big compared to the 3D model, you may die at a distance from the monster, and the game will feel unfair to the players.
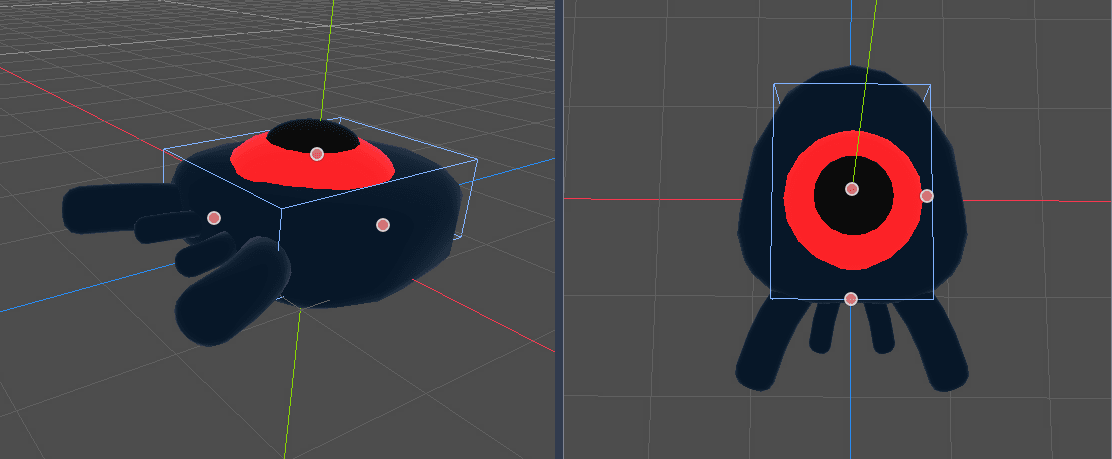
Notice that my box is taller than the monster. It is okay in this game because we're looking at the scene from above and using a fixed perspective. Collision shapes don't have to match the model exactly. It's the way the game feels when you test it that should dictate their form and size.
Removing monsters off-screen
We're going to spawn monsters at regular time intervals in the game level. If we're not careful, their count could increase to infinity, and we don't want that. Each mob instance has both a memory and a processing cost, and we don't want to pay for it when the mob's outside the screen.
Once a monster leaves the screen, we don't need it anymore, so we can delete it. Godot has a node that detects when objects leave the screen, VisibilityNotifier, and we're going to use it to destroy our mobs.
Note
When you keep instancing an object in games, there's a technique you can use to avoid the cost of creating and destroying instances all the time called pooling. It consists of pre-creating an array of objects and reusing them over and over.
When working with GDScript, you don't need to worry about this. The main reason to use pools is to avoid freezes with garbage-collected languages like C# or Lua. GDScript uses a different technique to manage memory, reference counting, which doesn't have that caveat. You can learn more about that here Memory management.
Select the Mob node and add a VisibilityNotifier as a child of it. Another box, pink this time, appears. When this box completely leaves the screen, the node will emit a signal.
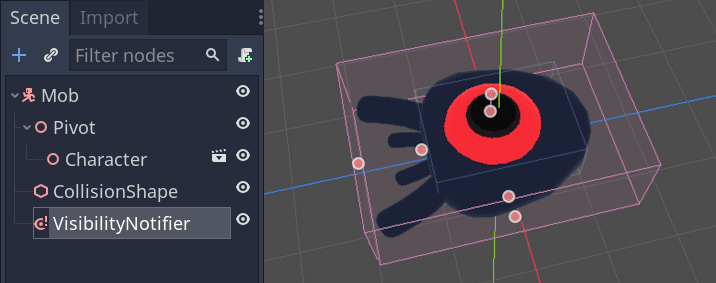
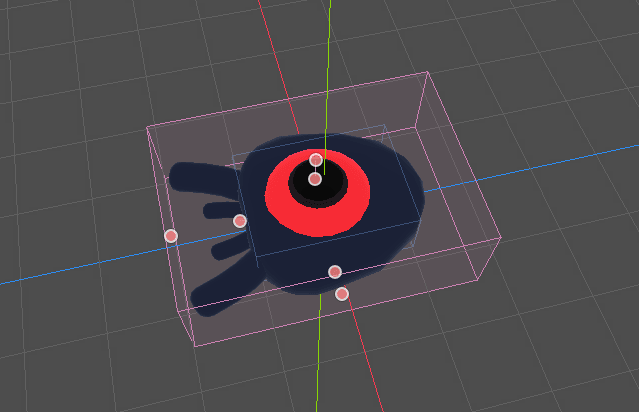
Resize it using the orange dots until it covers the entire 3D model.
Coding the mob's movement
Let's implement the monster's motion. We're going to do this in two steps. First, we'll write a script on the Mob that defines a function to initialize the monster. We'll then code the randomized spawn mechanism in the Main scene and call the function from there.
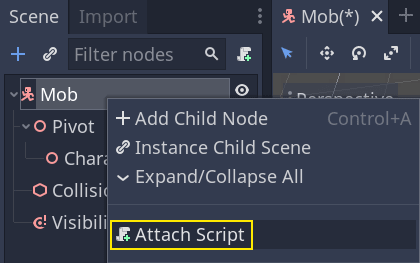
Attach a script to the Mob.
Here's the movement code to start with. We define two properties, min_speed
and max_speed, to define a random speed range. We then define and initialize
the velocity.
extends KinematicBody

# Minimum speed of the mob in meters per second.
export var min_speed = 10
# Maximum speed of the mob in meters per second.
export var max_speed = 18

var velocity = Vector3.ZERO


func _physics_process(_delta):
    move_and_slide(velocity)
public class Mob : KinematicBody
{
    // Don't forget to rebuild the project so the editor knows about the new export variable.

    // Minimum speed of the mob in meters per second
    [Export]
    public int MinSpeed = 10;
    // Maximum speed of the mob in meters per second
    [Export]
    public int MaxSpeed = 18;

    private Vector3 _velocity = Vector3.Zero;

    public override void _PhysicsProcess(float delta)
    {
        MoveAndSlide(_velocity);
    }
}
Similarly to the player, we move the mob every frame by calling
KinematicBody's move_and_slide() method. This time, we don't update
the velocity every frame: we want the monster to move at a constant speed
and leave the screen, even if it were to hit an obstacle.
You may see a warning in GDScript that the return value from
move_and_slide() is unused. This is expected. You can simply ignore the
warning or, if you want to hide it entirely, add the comment
# warning-ignore:return_value_discarded just above the
move_and_slide(velocity) line. To read more about the GDScript warning
system, see GDScript warning system.
We need to define another function to calculate the start velocity. This function will turn the monster towards the player and randomize both its angle of motion and its velocity.
The function will take a start_position, the mob's spawn position, and the
player_position as its arguments.
We position the mob at start_position and turn it towards the player using
the look_at_from_position() method, and randomize the angle by rotating a
random amount around the Y axis. Below, rand_range() outputs a random value
between -PI / 4 radians and PI / 4 radians.
# We will call this function from the Main scene.
func initialize(start_position, player_position):
    # We position the mob and turn it so that it looks at the player.
    look_at_from_position(start_position, player_position, Vector3.UP)
    # And rotate it randomly so it doesn't move exactly toward the player.
    rotate_y(rand_range(-PI / 4, PI / 4))
// We will call this function from the Main scene
public void Initialize(Vector3 startPosition, Vector3 playerPosition)
{
    // We position the mob and turn it so that it looks at the player.
    LookAtFromPosition(startPosition, playerPosition, Vector3.Up);
    // And rotate it randomly so it doesn't move exactly toward the player.
    RotateY((float)GD.RandRange(-Mathf.Pi / 4.0, Mathf.Pi / 4.0));
}
We then calculate a random speed using rand_range() once again and we use it
to calculate the velocity.
We start by creating a 3D vector pointing forward, multiply it by our
random_speed, and finally rotate it using the Vector3 class's
rotated() method.
func initialize(start_position, player_position):
    # ...

    # We calculate a random speed.
    var random_speed = rand_range(min_speed, max_speed)
    # We calculate a forward velocity that represents the speed.
    velocity = Vector3.FORWARD * random_speed
    # We then rotate the vector based on the mob's Y rotation to move in the direction it's looking.
    velocity = velocity.rotated(Vector3.UP, rotation.y)
public void Initialize(Vector3 startPosition, Vector3 playerPosition)
{
    // ...

    // We calculate a random speed.
    float randomSpeed = (float)GD.RandRange(MinSpeed, MaxSpeed);
    // We calculate a forward velocity that represents the speed.
    _velocity = Vector3.Forward * randomSpeed;
    // We then rotate the vector based on the mob's Y rotation to move in the direction it's looking
    _velocity = _velocity.Rotated(Vector3.Up, Rotation.y);
}
Leaving the screen
We still have to destroy the mobs when they leave the screen. To do so, we'll
connect our VisibilityNotifier node's screen_exited signal to the Mob.
Head back to the 3D viewport by clicking on the 3D label at the top of the editor. You can also press Ctrl + F2 (Alt + 2 on macOS).

Select the VisibilityNotifier node and on the right side of the interface, navigate to the Node dock. Double-click the screen_exited() signal.

Connect the signal to the Mob.
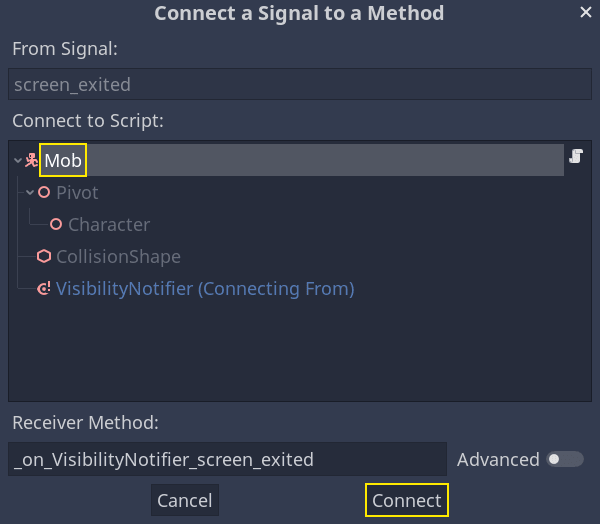
This will take you back to the script editor and add a new function for you,
_on_VisibilityNotifier_screen_exited(). From it, call the queue_free()
method. This will destroy the mob instance when the VisibilityNotifier 's box
leaves the screen.
func _on_VisibilityNotifier_screen_exited():
    queue_free()
// We also specified this function name in PascalCase in the editor's connection window
public void OnVisibilityNotifierScreenExited()
{
    QueueFree();
}
Our monster is ready to enter the game! In the next part, you will spawn monsters in the game level.
Here is the complete Mob.gd script for reference.
extends KinematicBody

# Minimum speed of the mob in meters per second.
export var min_speed = 10
# Maximum speed of the mob in meters per second.
export var max_speed = 18

var velocity = Vector3.ZERO


func _physics_process(_delta):
    move_and_slide(velocity)

func initialize(start_position, player_position):
    look_at_from_position(start_position, player_position, Vector3.UP)
    rotate_y(rand_range(-PI / 4, PI / 4))

    var random_speed = rand_range(min_speed, max_speed)
    velocity = Vector3.FORWARD * random_speed
    velocity = velocity.rotated(Vector3.UP, rotation.y)


func _on_VisibilityNotifier_screen_exited():
    queue_free()
public class Mob : KinematicBody
{
    // Minimum speed of the mob in meters per second
    [Export]
    public int MinSpeed = 10;
    // Maximum speed of the mob in meters per second
    [Export]
    public int MaxSpeed = 18;

    private Vector3 _velocity = Vector3.Zero;

    public override void _PhysicsProcess(float delta)
    {
        MoveAndSlide(_velocity);
    }

    // We will call this function from the Main scene
    public void Initialize(Vector3 startPosition, Vector3 playerPosition)
    {
        LookAtFromPosition(startPosition, playerPosition, Vector3.Up);
        RotateY((float)GD.RandRange(-Mathf.Pi / 4.0, Mathf.Pi / 4.0));

        var randomSpeed = (float)GD.RandRange(MinSpeed, MaxSpeed);
        _velocity = Vector3.Forward * randomSpeed;
        _velocity = _velocity.Rotated(Vector3.Up, Rotation.y);
    }

    // We also specified this function name in PascalCase in the editor's connection window
    public void OnVisibilityNotifierScreenExited()
    {
        QueueFree();
    }
}