Score and replay
In this part, we'll add the score, music playback, and the ability to restart the game.
We have to keep track of the current score in a variable and display it on screen using a minimal interface. We will use a text label to do that.
In the main scene, add a new Control node as a child of Main and name it UserInterface. You will automatically be taken to the 2D screen, where you can edit your User Interface (UI).
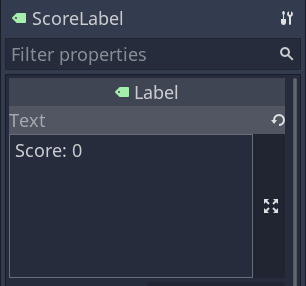
Add a Label node and rename it to ScoreLabel.

In the Inspector, set the Label's Text to a placeholder like "Score: 0".
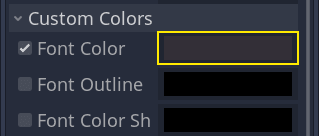
Also, the text is white by default, like our game's background. We need to change its color to see it at runtime.
Scroll down to Theme Overrides, and expand Colors and click the black box next to Font Color to tint the text.
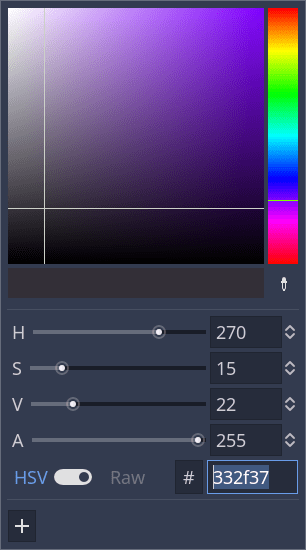
Pick a dark tone so it contrasts well with the 3D scene.
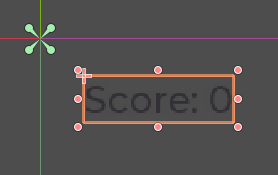
Finally, click and drag on the text in the viewport to move it away from the top-left corner.
The UserInterface node allows us to group our UI in a branch of the scene tree and use a theme resource that will propagate to all its children. We'll use it to set our game's font.
Creating a UI theme
Once again, select the UserInterface node. In the Inspector, create a new theme resource in Theme -> Theme.
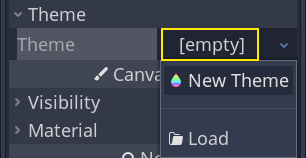
Click on it to open the theme editor In the bottom panel. It gives you a preview of how all the built-in UI widgets will look with your theme resource.
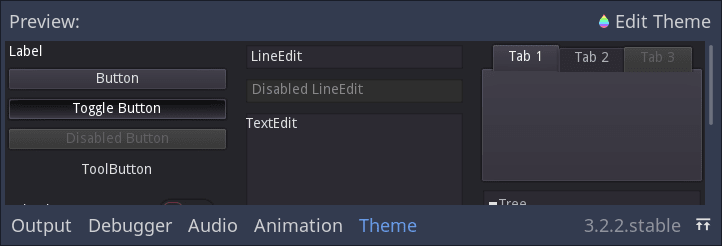
By default, a theme only has one property, the Default Font.
See also
You can add more properties to the theme resource to design complex user interfaces, but that is beyond the scope of this series. To learn more about creating and editing themes, see Introduction to GUI skinning.
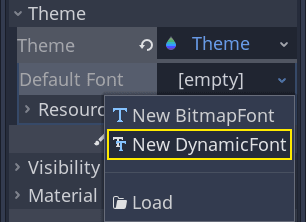
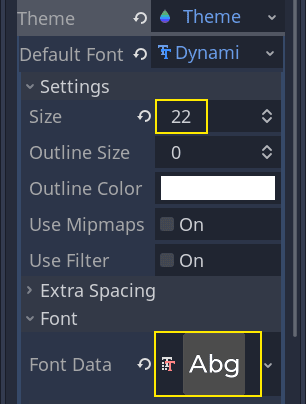
Click the Default Font property and create a new DynamicFont.
Expand the DynamicFont by clicking on it and expand its Font section. There, you will see an empty Font Data field.
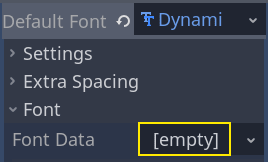
This one expects a font file like the ones you have on your computer. Two common font file formats are TrueType Font (TTF) and OpenType Font (OTF).
In the FileSystem dock, Expand the fonts directory and click and drag the
Montserrat-Medium.ttf file we included in the project onto the Font Data.
The text will reappear in the theme preview.
The text is a bit small. Set the Settings -> Size to 22 pixels to increase
the text's size.
Keeping track of the score
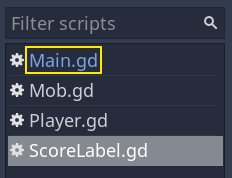
Let's work on the score next. Attach a new script to the ScoreLabel and define
the score variable.
extends Label

var score = 0
public class ScoreLabel : Label
{
    private int _score = 0;
}
The score should increase by 1 every time we squash a monster. We can use
their squashed signal to know when that happens. However, as we instantiate
monsters from the code, we cannot do the connection in the editor.
Instead, we have to make the connection from the code every time we spawn a monster.
Open the script Main.gd. If it's still open, you can click on its name in
the script editor's left column.
Alternatively, you can double-click the Main.gd file in the FileSystem
dock.
At the bottom of the _on_MobTimer_timeout() function, add the following
line.
func _on_MobTimer_timeout():
    #...
    # We connect the mob to the score label to update the score upon squashing one.
    mob.connect("squashed", $UserInterface/ScoreLabel, "_on_Mob_squashed")
public void OnMobTimerTimeout()
{
    // ...
    // We connect the mob to the score label to update the score upon squashing one.
    mob.Connect(nameof(Mob.Squashed), GetNode<ScoreLabel>("UserInterface/ScoreLabel"), nameof(ScoreLabel.OnMobSquashed));
}
This line means that when the mob emits the squashed signal, the
ScoreLabel node will receive it and call the function _on_Mob_squashed().
Head back to the ScoreLabel.gd script to define the _on_Mob_squashed()
callback function.
There, we increment the score and update the displayed text.
func _on_Mob_squashed():
    score += 1
    text = "Score: %s" % score
public void OnMobSquashed()
{
    _score += 1;
    Text = string.Format("Score: {0}", _score);
}
The second line uses the value of the score variable to replace the
placeholder %s. When using this feature, Godot automatically converts values
to text, which is convenient to output text in labels or using the print()
function.
See also
You can learn more about string formatting here: GDScript format strings.
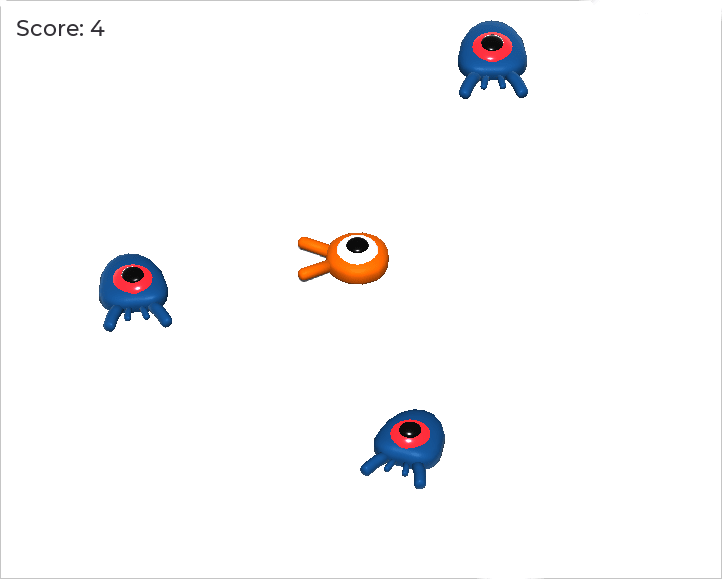
You can now play the game and squash a few enemies to see the score increase.
Note
In a complex game, you may want to completely separate your user interface from the game world. In that case, you would not keep track of the score on the label. Instead, you may want to store it in a separate, dedicated object. But when prototyping or when your project is simple, it is fine to keep your code simple. Programming is always a balancing act.
Retrying the game
We'll now add the ability to play again after dying. When the player dies, we'll display a message on the screen and wait for input.
Head back to the Main scene, select the UserInterface node, add a ColorRect node as a child of it and name it Retry. This node fills a rectangle with a uniform color and will serve as an overlay to darken the screen.
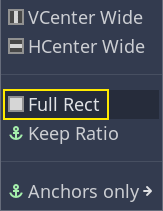
To make it span over the whole viewport, you can use the Layout menu in the toolbar.
![]()
Open it and apply the Full Rect command.
Nothing happens. Well, almost nothing: only the four green pins move to the corners of the selection box.
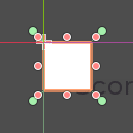
This is because UI nodes (all the ones with a green icon) work with anchors and margins relative to their parent's bounding box. Here, the UserInterface node has a small size and the Retry one is limited by it.
Select the UserInterface and apply Layout -> Full Rect to it as well. The Retry node should now span the whole viewport.
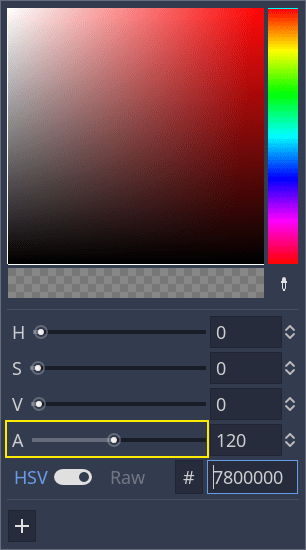
Let's change its color so it darkens the game area. Select Retry and in the Inspector, set its Color to something both dark and transparent. To do so, in the color picker, drag the A slider to the left. It controls the color's alpha channel, that is to say, its opacity.
Next, add a Label as a child of Retry and give it the Text "Press Enter to retry."
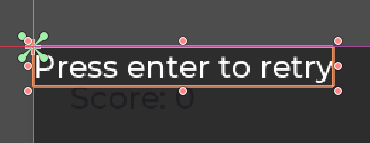
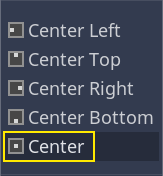
To move it and anchor it in the center of the screen, apply Layout -> Center to it.
Coding the retry option
We can now head to the code to show and hide the Retry node when the player dies and plays again.
Open the script Main.gd. First, we want to hide the overlay at the start of
the game. Add this line to the _ready() function.
func _ready():
    #...
    $UserInterface/Retry.hide()
public override void _Ready()
{
    // ...
    GetNode<Control>("UserInterface/Retry").Hide();
}
Then, when the player gets hit, we show the overlay.
func _on_Player_hit():
    #...
    $UserInterface/Retry.show()
public void OnPlayerHit()
{
    //...
    GetNode<Control>("UserInterface/Retry").Show();
}
Finally, when the Retry node is visible, we need to listen to the player's
input and restart the game if they press enter. To do this, we use the built-in
_unhandled_input() callback.
If the player pressed the predefined ui_accept input action and Retry is
visible, we reload the current scene.
func _unhandled_input(event):
    if event.is_action_pressed("ui_accept") and $UserInterface/Retry.visible:
        # This restarts the current scene.
        get_tree().reload_current_scene()
public override void _UnhandledInput(InputEvent @event)
{
    if (@event.IsActionPressed("ui_accept") && GetNode<Control>("UserInterface/Retry").Visible)
    {
        // This restarts the current scene.
        GetTree().ReloadCurrentScene();
    }
}
The function get_tree() gives us access to the global SceneTree object, which allows us to reload and restart the current
scene.
Adding music
To add music that plays continuously in the background, we're going to use another feature in Godot: autoloads.
To play audio, all you need to do is add an AudioStreamPlayer node to your scene and attach an audio file to it. When you start the scene, it can play automatically. However, when you reload the scene, like we do to play again, the audio nodes are also reset, and the music starts back from the beginning.
You can use the autoload feature to have Godot load a node or a scene automatically at the start of the game, outside the current scene. You can also use it to create globally accessible objects.
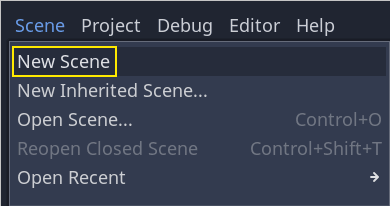
Create a new scene by going to the Scene menu and clicking New Scene.
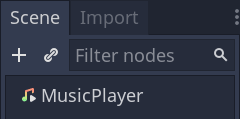
Click the Other Node button to create an AudioStreamPlayer and rename it to MusicPlayer.
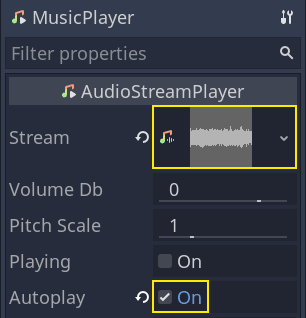
We included a music soundtrack in the art/ directory, House In a Forest
Loop.ogg. Click and drag it onto the Stream property in the Inspector.
Also, turn on Autoplay so the music plays automatically at the start of the
game.
Save the scene as MusicPlayer.tscn.
We have to register it as an autoload. Head to the Project -> Project Settings… menu and click on the Autoload tab.
In the Path field, you want to enter the path to your scene. Click the folder
icon to open the file browser and double-click on MusicPlayer.tscn. Then,
click the Add button on the right to register the node.

If you run the game now, the music will play automatically. And even when you lose and retry, it keeps going.
Before we wrap up this lesson, here's a quick look at how it works under the hood. When you run the game, your Scene dock changes to give you two tabs: Remote and Local.
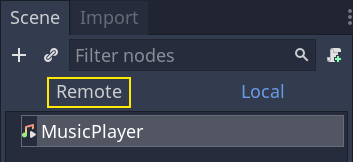
The Remote tab allows you to visualize the node tree of your running game. There, you will see the Main node and everything the scene contains and the instantiated mobs at the bottom.
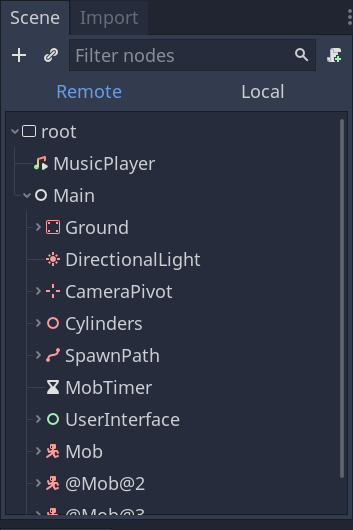
At the top are the autoloaded MusicPlayer and a root node, which is your game's viewport.
And that does it for this lesson. In the next part, we'll add an animation to make the game both look and feel much nicer.
Here is the complete Main.gd script for reference.
extends Node

export (PackedScene) var mob_scene


func _ready():
    randomize()
    $UserInterface/Retry.hide()


func _unhandled_input(event):
    if event.is_action_pressed("ui_accept") and $UserInterface/Retry.visible:
        get_tree().reload_current_scene()


func _on_MobTimer_timeout():
    var mob = mob_scene.instance()

    var mob_spawn_location = get_node("SpawnPath/SpawnLocation")
    mob_spawn_location.unit_offset = randf()

    var player_position = $Player.transform.origin
    mob.initialize(mob_spawn_location.translation, player_position)

    add_child(mob)
    mob.connect("squashed", $UserInterface/ScoreLabel, "_on_Mob_squashed")


func _on_Player_hit():
    $MobTimer.stop()
    $UserInterface/Retry.show()
public class Main : Node
{
#pragma warning disable 649
    [Export]
    public PackedScene MobScene;
#pragma warning restore 649

    public override void _Ready()
    {
        GD.Randomize();
        GetNode<Control>("UserInterface/Retry").Hide();
    }

    public override void _UnhandledInput(InputEvent @event)
    {
        if (@event.IsActionPressed("ui_accept") && GetNode<Control>("UserInterface/Retry").Visible)
        {
            GetTree().ReloadCurrentScene();
        }
    }

    public void OnMobTimerTimeout()
    {
        Mob mob = (Mob)MobScene.Instance();

        var mobSpawnLocation = GetNode<PathFollow>("SpawnPath/SpawnLocation");
        mobSpawnLocation.UnitOffset = GD.Randf();

        Vector3 playerPosition = GetNode<Player>("Player").Transform.origin;
        mob.Initialize(mobSpawnLocation.Translation, playerPosition);

        AddChild(mob);
        mob.Connect(nameof(Mob.Squashed), GetNode<ScoreLabel>("UserInterface/ScoreLabel"), nameof(ScoreLabel.OnMobSquashed));
    }

    public void OnPlayerHit()
    {
        GetNode<Timer>("MobTimer").Stop();
        GetNode<Control>("UserInterface/Retry").Show();
    }
}