Attention: Here be dragons
This is the latest
(unstable) version of this documentation, which may document features
not available in or compatible with released stable versions of Godot.
Checking the stable version of the documentation...
单例(自动加载)
介绍
Godot 的场景系统虽然强大而灵活,但有一个缺点:无法保存多个场景都需要的信息(例如玩家的分数或者背包)。
可以通过一些变通方法来解决此问题,但是它们有其自身的局限性:
你可以使用“主”场景来把其它场景当作自己的子节点来加载和卸载。然而,这就意味着这些场景无法再独立正常运行。
信息可以存储在磁盘的
user://下,然后由需要它的场景加载,但是经常保存和加载数据很麻烦并且可能很慢。
单例模式是解决需要在场景之间存储持久性信息的常见用例的实用工具。在我们的示例中,只要多个单例具有不同的名称,就可以复用相同的场景或类。
利用这个概念,你可以创建这样的对象:
无论当前运行哪个场景,始终加载。
可以存储全局变量,如玩家信息。
可以处理切换场景和场景间的过渡。
行为类似单例,因为 GDScript 在设计上就不支持全局变量。
自动加载的节点和脚本可以为我们提供这些特征。
备注
Godot 并不会让自动加载成为单例设计模式中的那种“真”单例。必要时,用户仍然可以进行多次实例化。
小技巧
如果你创建的自动加载是编辑器插件的一部分,请考虑在启用插件时将其自动注册到项目设置中。
自动加载
你可以创建自动加载(AutoLoad)来加载场景或者加载继承自 Node 的脚本。
备注
自动加载脚本时,会创建一个 Node 并把脚本附加上去。加载其它任何场景前,这个节点就会被加到根视图上。
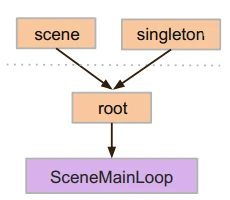
要自动加载场景或脚本,请从前往项目 > 项目设置 > 全局 > 自动加载。
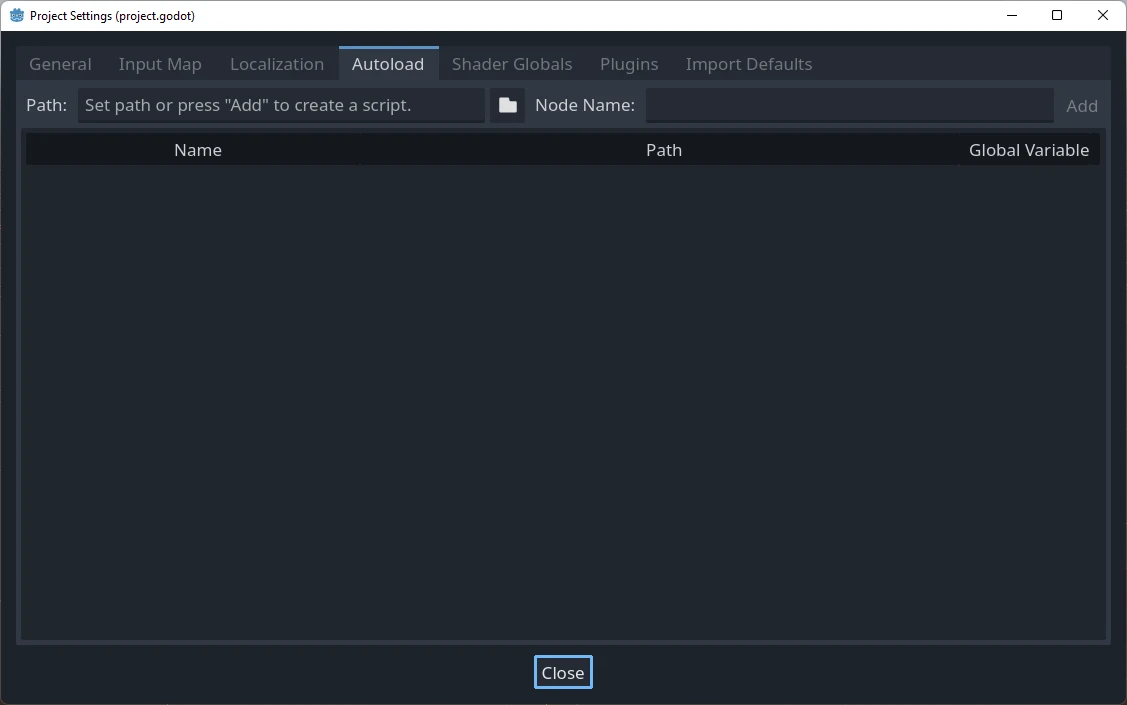
你可以在这里添加任意数量的场景或脚本。列表中的每个条目都需要一个名称,会被用来给该节点的 name 属性赋值。使用上下箭头键可以操纵将条目添加到全局场景树时的顺序。与普通场景一样,引擎读取这些节点的顺序是从上到下的。
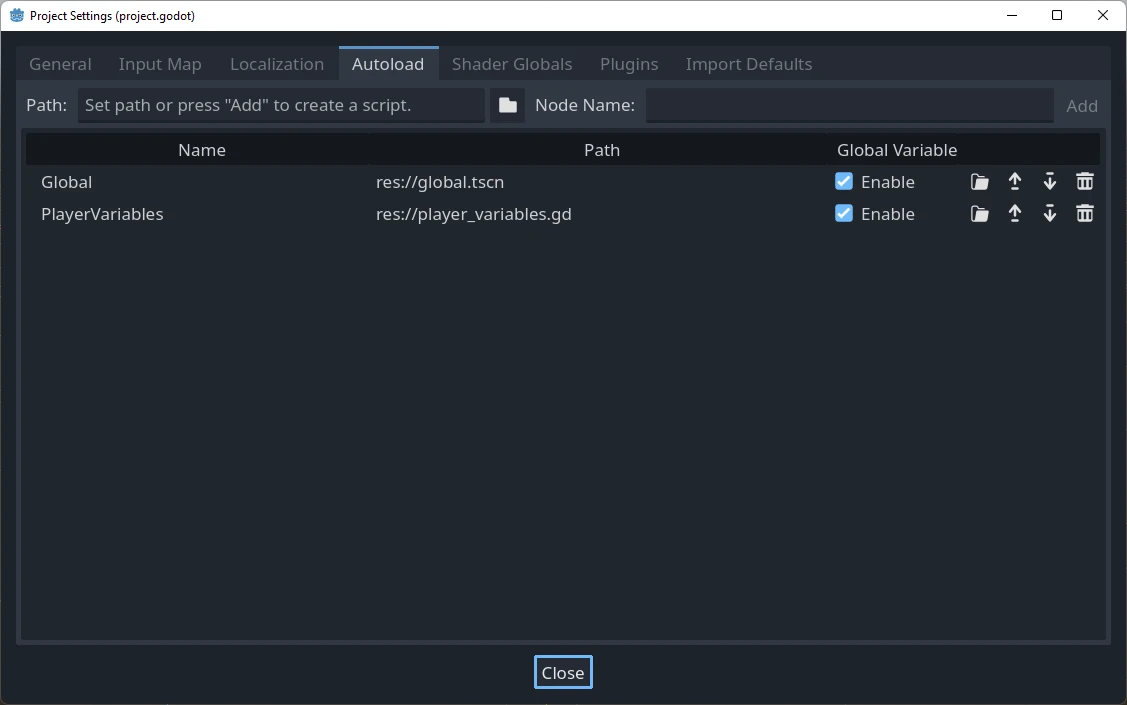
如果勾选了启用一栏(默认勾选),那么就可以在 GDScript 中直接访问该单例:
PlayerVariables.health -= 10
启用一栏在 C# 代码中无效。不过如果该单例是 C# 脚本,也可以实现类似的效果,请添加静态属性 Instance,然后在 _Ready() 中赋值:
public partial class PlayerVariables : Node
{
    public static PlayerVariables Instance { get; private set; }

    public int Health { get; set; }

    public override void _Ready()
    {
        Instance = this;
    }
}
这样就可以在 C# 代码中访问该单例了,无需使用 GetNode() 和类型转换:
PlayerVariables.Instance.Health -= 10;
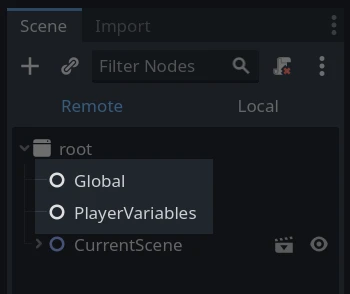
请注意,访问自动加载对象(脚本、场景)的方式和访问场景树中的任何其他节点是一样的。实际上,如果你查看正在运行的场景树,就会看到自动加载的节点出现:
警告
运行时绝对不能通过 free() 或 queue_free() 去移除自动加载,否则引擎会崩溃。
自定义场景切换器
本教程将演示如何使用‘自动加载(autoloads)’来构建一个场景切换器。如果你只需要进行基础的场景切换,直接使用 SceneTree.change_scene_to_file() 方法就足够了(详情请参考 使用 SceneTree 相关文档)。不过,如果你需要在切换场景时实现更复杂的逻辑和行为,那么本教程介绍的这种方法能提供更强大的功能。
首先,请下载模板 singleton_autoload_starter.zip 并在 Godot 中打开。
可能会出现一个窗口通知你该项目最后一次是在较旧版本的 Godot 中打开的,这没有问题。点击 确定 来打开项目。
该项目包含两个场景:scene_1.tscn 和 scene_2.tscn。每个场景都包含一个显示场景名称的标签和一个连接了 pressed() 信号的按钮。运行该项目时,它将从 scene_1.tscn 开始,但是按下按钮不会执行任何操作。
创建脚本
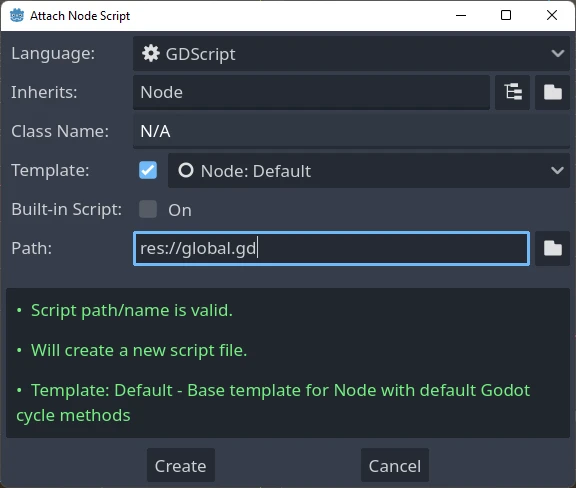
打开 Script 窗口,然后新建一个名为 global.gd 的脚本。确保它继承自 Node:
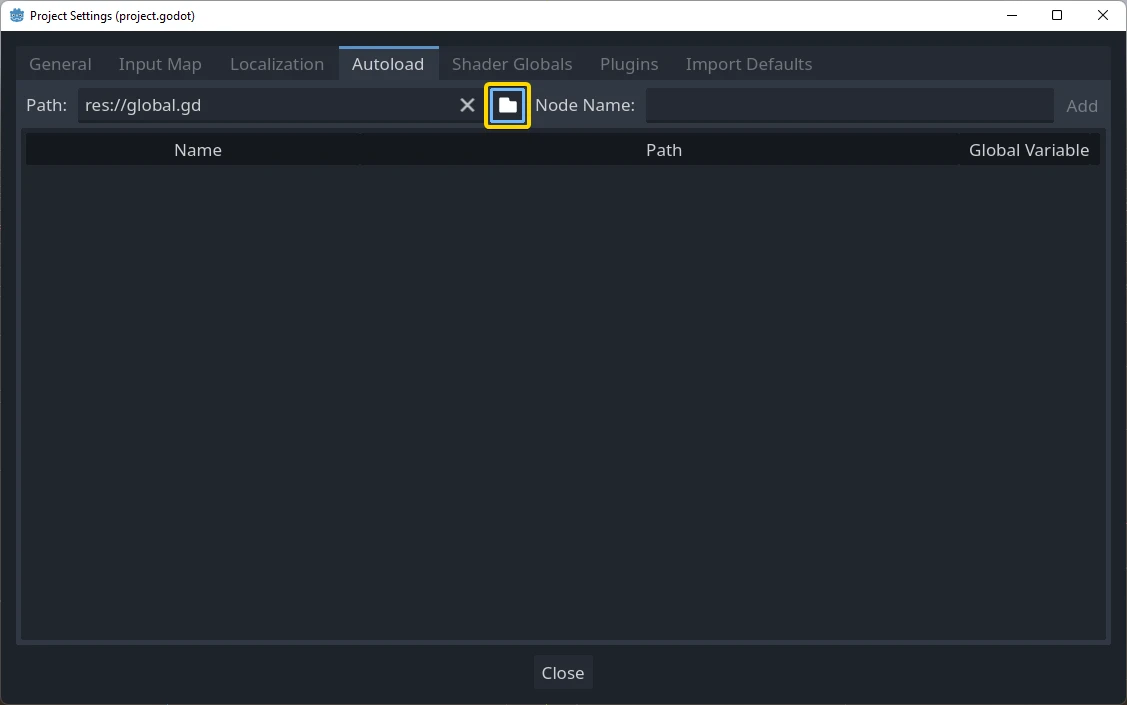
下一步就是把这个脚本添加到自动加载列表中。打开菜单栏,依次进入 项目 > 项目设置 > 全局 > 自动加载 ,然后点击浏览按钮(或者直接输入路径 res://global.gd )来选中刚才的脚本。接着按下 添加 按钮,把它加入到自动加载列表中,并将它命名为 "Global" ——这一步是必须的,因为其他脚本需要通过 "Global" 这个名字来访问它。
现在,无论何时在项目中运行任何场景,该脚本都将始终加载。
返回到脚本,它需要在 _ready() 函数中获取当前场景。当前场景(带有按钮的那个)和 global.gd 都是根节点的子节点,但是自动加载的节点始终是第一个。这意味着根节点的最后一个子节点始终是加载的场景。
extends Node

var current_scene = null

func _ready():
    var root = get_tree().root
    # Using a negative index counts from the end, so this gets the last child node of `root`.
    current_scene = root.get_child(-1)
using Godot;

public partial class Global : Node
{
    public Node CurrentScene { get; set; }

    public override void _Ready()
    {
        Viewport root = GetTree().Root;
        // Using a negative index counts from the end, so this gets the last child node of `root`.
        CurrentScene = root.GetChild(-1);
    }
}
现在我们需要一个用于更改场景的函数。这个函数需要释放当前场景,并将其替换为请求的场景。
func goto_scene(path):
    # This function will usually be called from a signal callback,
    # or some other function in the current scene.
    # Deleting the current scene at this point is
    # a bad idea, because it may still be executing code.
    # This will result in a crash or unexpected behavior.

    # The solution is to defer the load to a later time, when
    # we can be sure that no code from the current scene is running:

    _deferred_goto_scene.call_deferred(path)


func _deferred_goto_scene(path):
    # It is now safe to remove the current scene.
    current_scene.free()

    # Load the new scene.
    var s = ResourceLoader.load(path)

    # Instance the new scene.
    current_scene = s.instantiate()

    # Add it to the active scene, as child of root.
    get_tree().root.add_child(current_scene)

    # Optionally, to make it compatible with the SceneTree.change_scene_to_file() API.
    get_tree().current_scene = current_scene
public void GotoScene(string path)
{
    // This function will usually be called from a signal callback,
    // or some other function from the current scene.
    // Deleting the current scene at this point is
    // a bad idea, because it may still be executing code.
    // This will result in a crash or unexpected behavior.

    // The solution is to defer the load to a later time, when
    // we can be sure that no code from the current scene is running:

    CallDeferred(MethodName.DeferredGotoScene, path);
}

public void DeferredGotoScene(string path)
{
    // It is now safe to remove the current scene.
    CurrentScene.Free();

    // Load a new scene.
    var nextScene = GD.Load<PackedScene>(path);

    // Instance the new scene.
    CurrentScene = nextScene.Instantiate();

    // Add it to the active scene, as child of root.
    GetTree().Root.AddChild(CurrentScene);

    // Optionally, to make it compatible with the SceneTree.change_scene_to_file() API.
    GetTree().CurrentScene = CurrentScene;
}
使用 Object.call_deferred(),第二个函数将仅在当前场景中的所有代码完成后运行。因此,当前场景在仍在使用(即其代码仍在运行)时不会被删除。
最后,我们需要在两个场景中填充空的回调函数:
# Add to 'scene_1.gd'.

func _on_button_pressed():
    Global.goto_scene("res://scene_2.tscn")
// Add to 'Scene1.cs'.

private void OnButtonPressed()
{
    var global = GetNode<Global>("/root/Global");
    global.GotoScene("res://Scene2.tscn");
}
以及
# Add to 'scene_2.gd'.

func _on_button_pressed():
    Global.goto_scene("res://scene_1.tscn")
// Add to 'Scene2.cs'.

private void OnButtonPressed()
{
    var global = GetNode<Global>("/root/Global");
    global.GotoScene("res://Scene1.tscn");
}
运行该项目,并测试你可以通过按下按钮来切换场景。
备注
当场景较小时,过渡是瞬时的。但是,如果你的场景比较复杂,则可能需要花费相当长的时间才能显示出来。要了解如何处理此问题,请参阅下一个教程:后台加载。
另外,如果加载时间相对较短(少于 3 秒左右),你可以在改变场景之前,通过显示某种 2D 元素来显示一个“加载中图标”,然后在改变场景后隐藏它。这能让玩家知道场景正在载入。