Attention: Here be dragons
This is the latest
(unstable) version of this documentation, which may document features
not available in or compatible with released stable versions of Godot.
Checking the stable version of the documentation...
自定义鼠标光标
你可能希望更改游戏中鼠标光标的外观,以便适应总体设计。自定义鼠标光标有两种方法:
使用项目设置。这种方式更简单,但功能也更有限。
使用脚本。这种方式更加可定制化,但需要编写脚本。
备注
你可以通过隐藏鼠标光标,并在 _process() 方法中将 Sprite2D 移动到光标位置来显示“软件”鼠标光标,但与“硬件”鼠标光标相比,这会增加至少一帧的延迟。因此,建议尽可能使用此处描述的方法。
如果你必须使用“软件”的做法,可以考虑添加一个外推步骤,以便更好地显示实际的鼠标输入。
使用项目设置
打开项目设置并进入显示 > 鼠标光标。你将看到以下设置:自定义图像、自定义图像热点 和工具提示位置偏移。
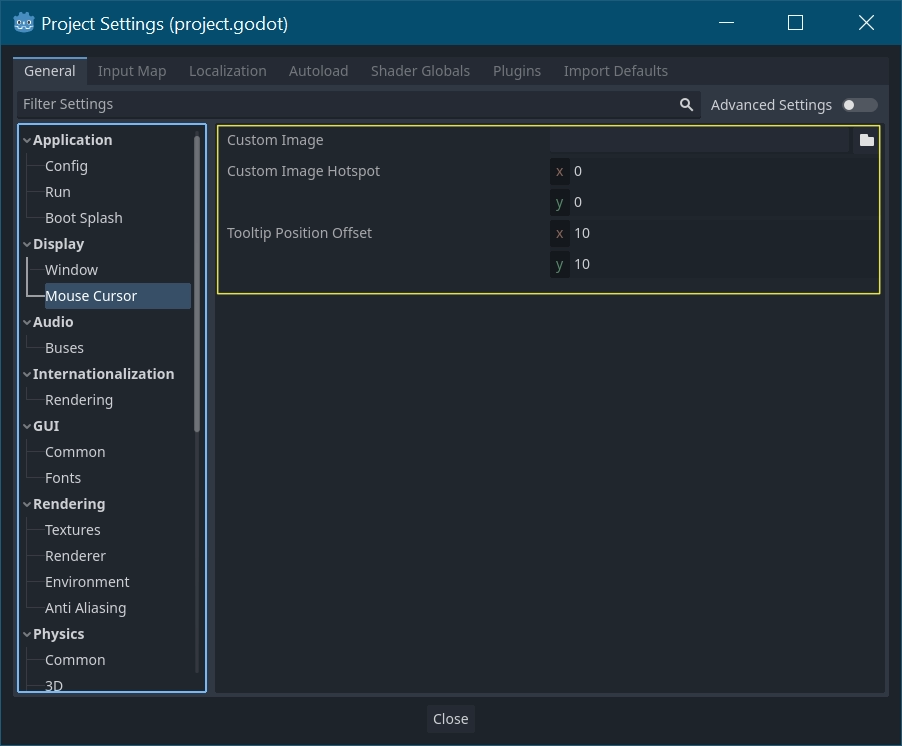
自定义图像是你希望设置为鼠标光标的图像。自定义热点 是图像中的点,你希望将其用作光标的检测点。
警告
自定义图像必须不超过 256×256 像素。为避免渲染问题,建议使用小于或等于 128×128 的大小。
在 Web 平台上,允许的最大光标图像大小为 128×128。
使用脚本
创建一个 Node 节点并附加下面的脚本。
extends Node


# Load the custom images for the mouse cursor.
var arrow = load("res://arrow.png")
var beam = load("res://beam.png")


func _ready():
    # Changes only the arrow shape of the cursor.
    # This is similar to changing it in the project settings.
    Input.set_custom_mouse_cursor(arrow)

    # Changes a specific shape of the cursor (here, the I-beam shape).
    Input.set_custom_mouse_cursor(beam, Input.CURSOR_IBEAM)
using Godot;

public partial class MyNode : Node
{
    public override void _Ready()
    {
        // Load the custom images for the mouse cursor.
        var arrow = ResourceLoader.Load("res://arrow.png");
        var beam = ResourceLoader.Load("res://beam.png");

        // Changes only the arrow shape of the cursor.
        // This is similar to changing it in the project settings.
        Input.SetCustomMouseCursor(arrow);

        // Changes a specific shape of the cursor (here, the I-beam shape).
        Input.SetCustomMouseCursor(beam, Input.CursorShape.Ibeam);
    }
}
参见
检查 Input.set_custom_mouse_cursor() 的文档,以获取有关使用和平台特定注意事项的更多信息。
光标列表
你可定义多种鼠标光标,详见 Input.CursorShape 枚举类型。具体选择取决于你的使用场景。