使用程式碼移動玩家
該輪到編寫程式碼了!我們將使用先前建立的輸入動作來移動角色。
備註
在這個專案中,我們會遵守 Godot 的命名慣例。
GDScript :類別 (節點) 使用大駝峰法 (PascalCase),變數與函式名稱使用蛇形法 (snake_case),常數則使用全大寫 (ALL_CAPS) (詳細請參考 GDScript 風格指南)。
C# :類別與匯出的變數與方法使用大駝峰法 (PascalCase),Private 欄位使用底線加小駝峰 (_camelCase),區域變數與參數使用小駝峰法 (camelCase) (請參考 C# 風格指南 )。在連接訊號的時候請特別注意不要打錯方法名稱。
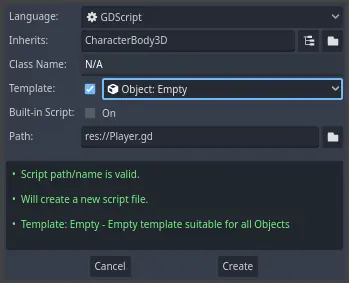
在 Player 節點上按下滑鼠右鍵,然後選擇 附加腳本 以新增一個腳本到該節點。在彈出的視窗中,在按下 建立 按鈕之前,將 範本 設定為 空的 。我們將其設定為 空的 ,因為我們想要撰寫自己的玩家移動程式碼。
先定義類的屬性。我們將定義移動速率(標量)、重力加速度,以及一個我們將用來移動角色的速度(向量)。
extends CharacterBody3D

# How fast the player moves in meters per second.
@export var speed = 14
# The downward acceleration when in the air, in meters per second squared.
@export var fall_acceleration = 75

var target_velocity = Vector3.ZERO
using Godot;

public partial class Player : CharacterBody3D
{
    // Don't forget to rebuild the project so the editor knows about the new export variable.

    // How fast the player moves in meters per second.
    [Export]
    public int Speed { get; set; } = 14;
    // The downward acceleration when in the air, in meters per second squared.
    [Export]
    public int FallAcceleration { get; set; } = 75;

    private Vector3 _targetVelocity = Vector3.Zero;
}
這是一個移動物體的常見屬性。 target_velocity 是一個組合了速度和方向的 3D 向量。在這裡,我們將其定義為屬性,因為我們希望在影格之間更新並重用其值。
備註
這些值與二維程式碼完全不同,因為距離以米為單位。在 2D 中,一千個單位(像素)可能只對應於螢幕寬度的一半,而在 3D 中,它是一千米。
那麼來編寫移動的程式碼。首先在 _physics_process() 中使用全域 Input 物件來計算輸入方向向量。
func _physics_process(delta):
    # We create a local variable to store the input direction.
    var direction = Vector3.ZERO

    # We check for each move input and update the direction accordingly.
    if Input.is_action_pressed("move_right"):
        direction.x += 1
    if Input.is_action_pressed("move_left"):
        direction.x -= 1
    if Input.is_action_pressed("move_back"):
        # Notice how we are working with the vector's x and z axes.
        # In 3D, the XZ plane is the ground plane.
        direction.z += 1
    if Input.is_action_pressed("move_forward"):
        direction.z -= 1
public override void _PhysicsProcess(double delta)
{
    // We create a local variable to store the input direction.
    var direction = Vector3.Zero;

    // We check for each move input and update the direction accordingly.
    if (Input.IsActionPressed("move_right"))
    {
        direction.X += 1.0f;
    }
    if (Input.IsActionPressed("move_left"))
    {
        direction.X -= 1.0f;
    }
    if (Input.IsActionPressed("move_back"))
    {
        // Notice how we are working with the vector's X and Z axes.
        // In 3D, the XZ plane is the ground plane.
        direction.Z += 1.0f;
    }
    if (Input.IsActionPressed("move_forward"))
    {
        direction.Z -= 1.0f;
    }
}
在這裡,我們將使用 _physics_process() 這個虛擬函式來進行所有計算,而不是 _process() 。 _physics_process() 專門設計用於處理物理相關的程式碼,例如移動運動學或剛體。它會以固定的時間間隔更新節點。
也參考
要瞭解更多關於 _process() 和 _physics_process() 之間的區別,見 空閒處理與物理處理。
我們首先將一個 direction 變數初始化為 Vector3.ZERO。然後,我們檢查玩家是否正在按下一個或多個 move_* 輸入,並相應地更新向量的 x 和 z 分量。它們對應於地平面的軸。
這四個條件給了我們八個可能性和八個可能的方向。
舉例來說,如果玩家同時按下 W 和 D 鍵,這個向量的長度會大約是 1.4 。但如果他們只按一個鍵,長度就會是 1 。我們希望向量的長度是一致的,而不是斜向移動時速度更快。為了做到這一點,我們可以呼叫它的 normalized() 方法。
func _physics_process(delta):
    #...

    if direction != Vector3.ZERO:
        direction = direction.normalized()
        # Setting the basis property will affect the rotation of the node.
        $Pivot.basis = Basis.looking_at(direction)
public override void _PhysicsProcess(double delta)
{
    // ...

    if (direction != Vector3.Zero)
    {
        direction = direction.Normalized();
        // Setting the basis property will affect the rotation of the node.
        GetNode<Node3D>("Pivot").Basis = Basis.LookingAt(direction);
    }
}
在這裡,我們只在方向的長度大於零的情況下對向量進行正規化,因為玩家正在按某個方向鍵。
我們透過建立一個朝向 direction 方向的 Basis 來計算 $Pivot 的朝向。
然後,更新速度。需要分別計算地面速度和下降速度。請確保 tab 縮進,使行在 _physics_process() 函式內部,而不在剛編寫的條件外部。
func _physics_process(delta):
    #...
    if direction != Vector3.ZERO:
        #...

    # Ground Velocity
    target_velocity.x = direction.x * speed
    target_velocity.z = direction.z * speed

    # Vertical Velocity
    if not is_on_floor(): # If in the air, fall towards the floor. Literally gravity
        target_velocity.y = target_velocity.y - (fall_acceleration * delta)

    # Moving the Character
    velocity = target_velocity
    move_and_slide()
public override void _PhysicsProcess(double delta)
{
    // ...
    if (direction != Vector3.Zero)
    {
        // ...
    }

    // Ground velocity
    _targetVelocity.X = direction.X * Speed;
    _targetVelocity.Z = direction.Z * Speed;

    // Vertical velocity
    if (!IsOnFloor()) // If in the air, fall towards the floor. Literally gravity
    {
        _targetVelocity.Y -= FallAcceleration * (float)delta;
    }

    // Moving the character
    Velocity = _targetVelocity;
    MoveAndSlide();
}
如果物體在這一影格中與地板發生了碰撞,那麼 CharacterBody3D.is_on_floor() 函式就會返回 true。這就是為什麼我們只在空中對 Player 施加重力。
對於垂直速度,我們每幀都減去墜落加速度乘以 delta 時間。這行程式碼會讓我們的角色在每一幀都墜落,只要它不在地面上或沒有與地面碰撞。
物理引擎只有在運動和碰撞發生的情況下才能偵測到在某一影格中與牆壁、地板或其他物體的相互作用。我們將在後面使用這個屬性來編寫跳躍的程式碼。
在最後一行,我們呼叫了 CharacterBody3D.move_and_slide(),這是 CharacterBody3D 類的一個強大方法,可以讓你順利地移動一個角色。如果它在運動過程中撞到了牆,引擎會試著為你把它進行平滑處理。它使用的是 CharacterBody3D 自帶的*速度*值
這就是你在地面上移動角色所需的所有程式碼。
以下是完整的 player.gd 程式碼,供您參考。
extends CharacterBody3D

# How fast the player moves in meters per second.
@export var speed = 14
# The downward acceleration when in the air, in meters per second squared.
@export var fall_acceleration = 75

var target_velocity = Vector3.ZERO


func _physics_process(delta):
    var direction = Vector3.ZERO

    if Input.is_action_pressed("move_right"):
        direction.x += 1
    if Input.is_action_pressed("move_left"):
        direction.x -= 1
    if Input.is_action_pressed("move_back"):
        direction.z += 1
    if Input.is_action_pressed("move_forward"):
        direction.z -= 1

    if direction != Vector3.ZERO:
        direction = direction.normalized()
        # Setting the basis property will affect the rotation of the node.
        $Pivot.basis = Basis.looking_at(direction)

    # Ground Velocity
    target_velocity.x = direction.x * speed
    target_velocity.z = direction.z * speed

    # Vertical Velocity
    if not is_on_floor(): # If in the air, fall towards the floor. Literally gravity
        target_velocity.y = target_velocity.y - (fall_acceleration * delta)

    # Moving the Character
    velocity = target_velocity
    move_and_slide()
using Godot;

public partial class Player : CharacterBody3D
{
    // How fast the player moves in meters per second.
    [Export]
    public int Speed { get; set; } = 14;
    // The downward acceleration when in the air, in meters per second squared.
    [Export]
    public int FallAcceleration { get; set; } = 75;

    private Vector3 _targetVelocity = Vector3.Zero;

    public override void _PhysicsProcess(double delta)
    {
        var direction = Vector3.Zero;

        if (Input.IsActionPressed("move_right"))
        {
            direction.X += 1.0f;
        }
        if (Input.IsActionPressed("move_left"))
        {
            direction.X -= 1.0f;
        }
        if (Input.IsActionPressed("move_back"))
        {
            direction.Z += 1.0f;
        }
        if (Input.IsActionPressed("move_forward"))
        {
            direction.Z -= 1.0f;
        }

        if (direction != Vector3.Zero)
        {
            direction = direction.Normalized();
            // Setting the basis property will affect the rotation of the node.
            GetNode<Node3D>("Pivot").Basis = Basis.LookingAt(direction);
        }

        // Ground velocity
        _targetVelocity.X = direction.X * Speed;
        _targetVelocity.Z = direction.Z * Speed;

        // Vertical velocity
        if (!IsOnFloor()) // If in the air, fall towards the floor. Literally gravity
        {
            _targetVelocity.Y -= FallAcceleration * (float)delta;
        }

        // Moving the character
        Velocity = _targetVelocity;
        MoveAndSlide();
    }
}
測試玩家的移動
將玩家放在 Main 場景中進行測試,這時,需要先產生實體玩家,然後新增相機。 3D 與 2D 不同,如果沒有新增相機,你將無法看到任何物體。
保存 Player 場景,然後打開 Main 場景。可以點擊編輯器頂部的 Main 分頁切換。
如果場景之前已關閉,請轉到檔案系統欄,按兩下 main.tscn 檔重新打開。
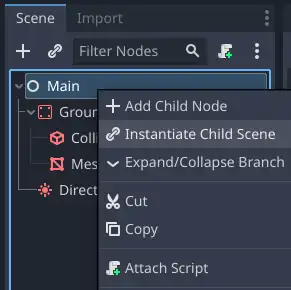
要產生實體 Player ,可按右鍵 Main 節點,然後選擇 實體化子場景 。
在快顯視窗中,按兩下 player.tscn ,角色將顯示在視窗的中心。
新增腳本
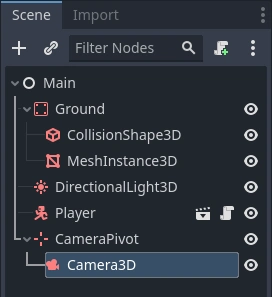
接下來我們來新增攝影機。如同我們處理 Player 的 Pivot 一樣,我們要建立一個基礎的骨架。再次右鍵點擊 Main 節點,並選擇 新增子節點 。建立一個新的 Marker3D,並將其命名為 CameraPivot 。選擇 CameraPivot ,然後在其下新增一個子節點 Camera3D。您的場景樹應該會看起來像這樣。
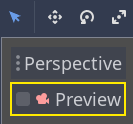
請注意當您選取 攝影機 時,3D 視窗左上方出現的 預覽 核取方塊。您可以點擊它來預覽遊戲內的攝影機投射效果。
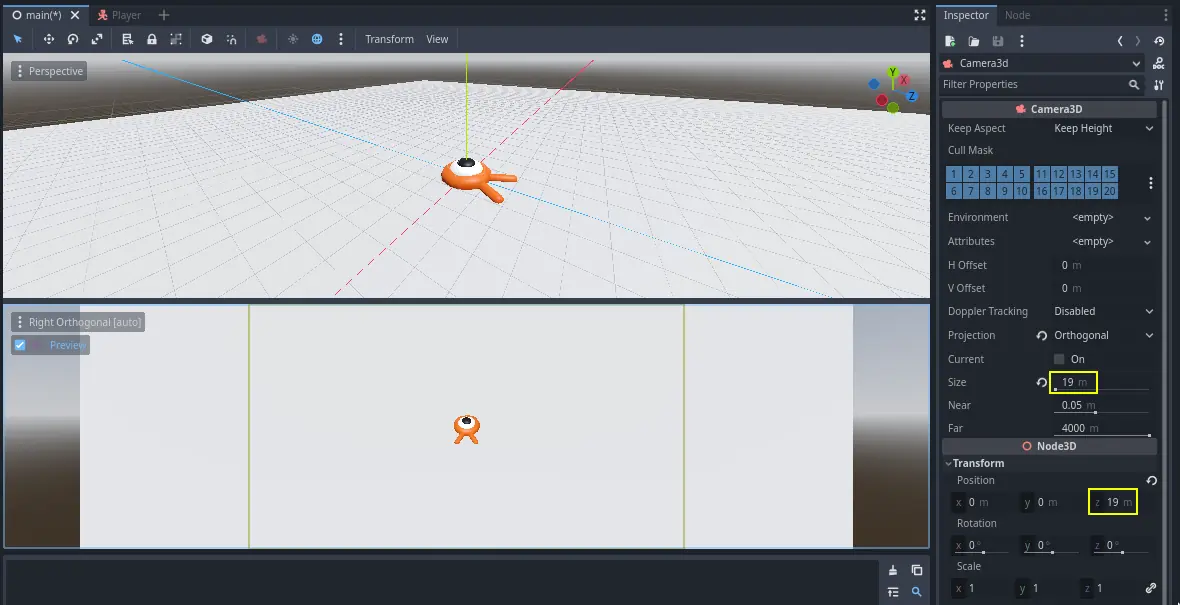
我們要使用 Pivot 來旋轉相機,讓他像被吊車吊起來一樣。讓我們先拆分 3D 視圖,以便在進行自由移動的同時觀察相機拍攝到的內容。
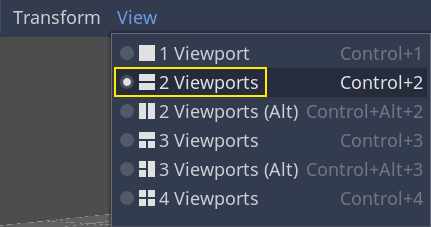
在視口上方的工具列中,按一下*視圖*,然後按一下*2 個視口*。你也可以按 Ctrl + 2`(macOS 上則為 :kbd:`Cmd + 2)。
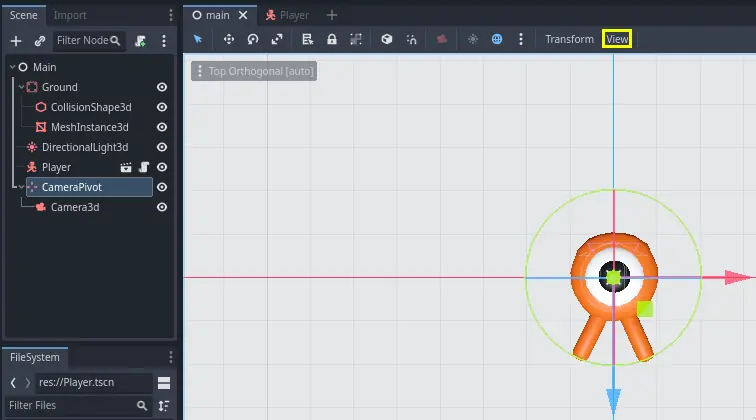
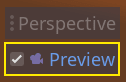
在下面那個視圖中,選中 Camera3D,然後勾選預覽核取方塊打開相機預覽。
在頂視圖中,確認您的 Camera3D 已被選取,並將攝影機在 Z 軸上移動約 19 個單位(拖曳藍色箭頭)。
接下來就是關鍵。選中 CameraPivot 並將其圍繞 X 周旋轉 -45 度(使用紅色的圓圈)。你會看到相機就像是被連上了吊車一樣移動。
你可以按 F6 運作場景,然後按方向鍵來移動角色。
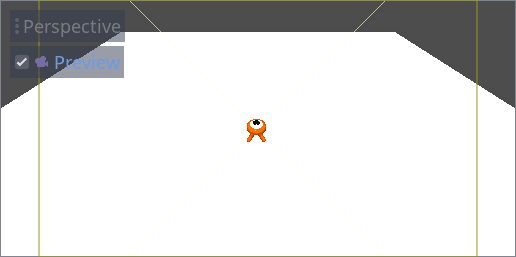
因為透視投影的緣故,我們會在角色的周圍看到一些空白區域。在這個遊戲中,我們要使用的是正交投影,從而更好地展示遊戲區域,讓玩家更易於識別距離。
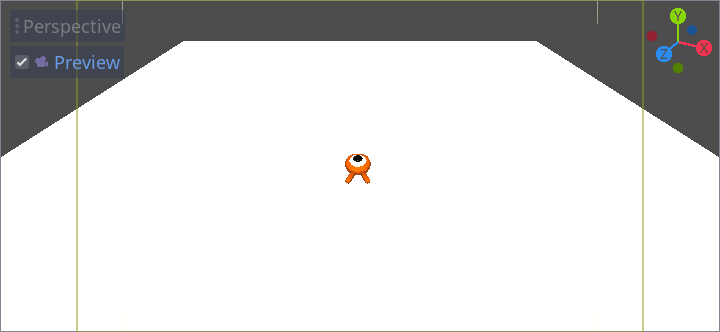
再次選擇「攝影機」,並在「屬性檢視器」中,將「投影」設定為「正交」,「尺寸」設定為 19。現在角色看起來應該會比較扁平,地面也會填滿背景。
備註
當在 Godot 4 中使用正交相機時,方向陰影的品質取決於相機的 Far 值。Far 越高,相機能夠看到的距離就更遠。然而由於更高的 Far 值會使得陰影算繪必須覆蓋到更遠的距離,這個操作也會導致陰影品質下降。
如果在切換到正交相機後方向陰影看起來變得模糊,請減小相機的 Far 屬性到更低的值,如 100 。請不要將 Far 屬性減小得太多,否則遠處的物體將會開始消失。
測試您的場景,你應該能夠在所有 8 個方向上移動,並且不會在地板上出現故障!
這樣,我們就完成了玩家的移動以及視圖。接下來,我們要來處理怪物。