單例(自動載入)
前言
Godot 的場景系統雖然強大且彈性,但有個缺點:沒有方法可以儲存多個場景間需要共享的資訊(例如玩家分數或物品欄)。
雖然可以用一些權宜之計來處理,但這些方法都有各自的限制:
你可以使用一個「主控」場景,將其他場景作為子場景載入與卸載。但這樣的話,這些子場景就無法再獨立執行並正常運作。
你可以將資訊儲存到
user://中,再讓需要的場景讀取,但頻繁的儲存與載入資料既麻煩又可能拖慢速度。
單例模式 是解決多場景間保存持續性資料的常見好工具。在這裡,只要命名不同,就能用同一個場景或類別作為多個單例。
利用此概念,你可以建立具備以下特性的物件:
無論目前執行哪個場景,都會一直被載入。
可儲存全域變數,如玩家資訊。
可處理場景切換與場景間的轉場。
行為上 如同單例,因為 GDScript 設計上並不支援全域變數。
自動載入節點與腳本便可實現這些特性。
備註
Godot 並不會讓自動載入成為「真正」的單例(如單例設計模式),如果需要,使用者仍可將自動載入重複實體化。
小訣竅
如果你是在開發編輯器外掛時建立自動載入,請考慮在啟用外掛時 自動註冊到專案設定。
自動載入
你可以建立自動載入來載入從 Node 繼承的場景或腳本。
備註
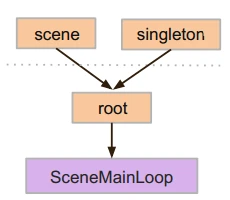
當自動載入腳本時,會建立一個 Node 並附加該腳本。此節點會在其他場景載入前被加到根檢視區。
要自動載入場景或腳本,請從選單進入 專案 > 專案設定 > 全域 > 自動載入。
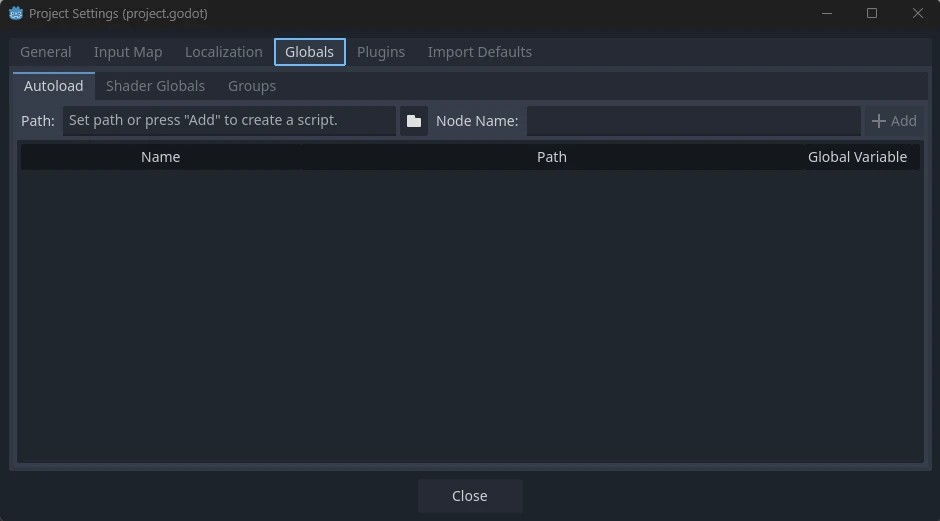
你可以在這裡新增任意數量的場景或腳本。列表中的每個項目都需指定一個名稱,這會成為節點的 name 屬性。加入全域場景樹的順序可用上下箭頭調整,和一般場景一樣,會按由上至下順序讀取這些節點。
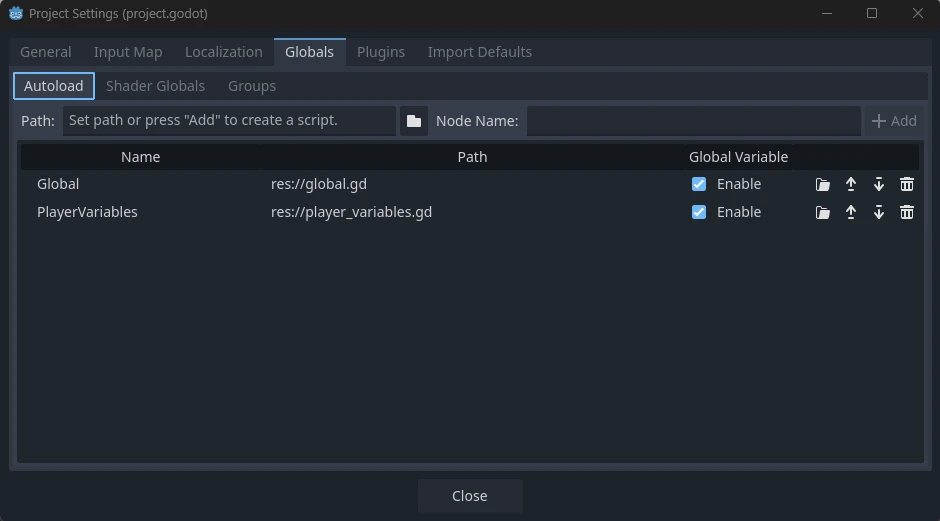
如果勾選了 Enable (啟用)欄(預設已勾選),就可以直接在 GDScript 以名稱存取這個單例:
PlayerVariables.health -= 10
Enable (啟用)欄對 C# 程式碼沒有影響。不過,如果該單例是 C# 腳本,可以透過新增一個名為 Instance 的靜態屬性,並在 _Ready() 指派來達到類似效果:
public partial class PlayerVariables : Node
{
    public static PlayerVariables Instance { get; private set; }

    public int Health { get; set; }

    public override void _Ready()
    {
        Instance = this;
    }
}
這可以讓 C# 程式碼在不使用 GetNode() 及不需型別轉換的情況下直接存取單例:
PlayerVariables.Instance.Health -= 10;
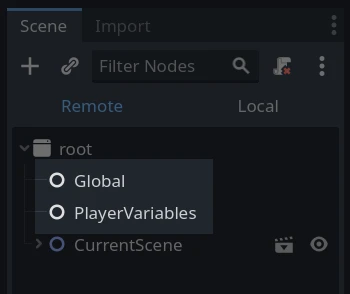
請注意,存取自動載入物件(腳本或場景)方式和場景樹中其他節點相同。事實上,檢查執行時的場景樹,就會看到自動載入的節點:
警告
執行時**絕對不能**用 free() 或 queue_free() 移除自動載入,否則引擎會崩潰。
自訂場景切換器
本教學會示範如何用自動載入來製作場景切換器。若只需基本場景切換,可用 SceneTree.change_scene_to_file() 方法(詳見 使用 SceneTree)。但如果切換場景時需要更複雜的行為,可用此方法獲得更強功能。
首先,請下載這個樣板:singleton_autoload_starter.zip 並在 Godot 開啟。
可能會出現一個視窗通知您專案上次是在較舊的 Godot 版本中開啟,這不是問題。點擊「確定」以開啟專案。
這個專案包含兩個場景:scene_1.tscn 和 scene_2.tscn。每個場景都有一個顯示場景名稱的標籤和一個連結了 pressed() 訊號的按鈕。執行專案時會從 scene_1.tscn 開始,但按下按鈕目前不會有反應。
建立腳本
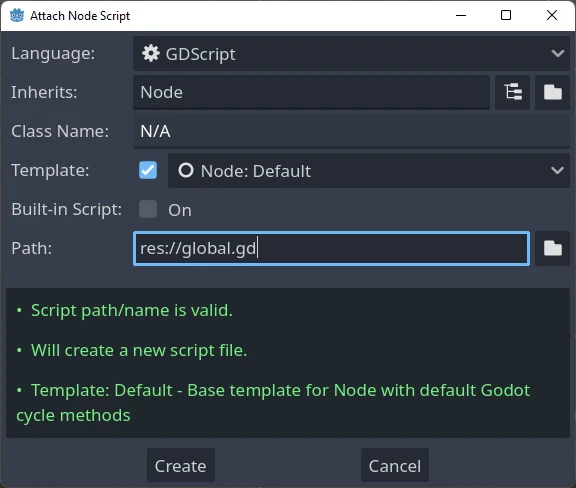
切換到 腳本 視窗,建立一個名為 global.gd 的新腳本,並確認它繼承自 Node:
下一步,將這個腳本加入自動載入清單。開啟選單的 專案 > 專案設定 > 全域 > 自動載入,點選瀏覽按鈕或直接輸入路徑 res://global.gd,按 新增 加入清單,並將名稱設為「Global」,這樣腳本才能以「Global」名稱存取它:

現在,無論執行專案裡哪個場景,這個腳本都會自動載入。
回到腳本,我們需要在 _ready() 取得目前場景。當前場景(有按鈕的那個)和 global.gd 都是根節點的子節點,但自動載入節點總是最先加入。這表示根節點的最後一個子節點永遠是目前載入的場景。
extends Node

var current_scene = null

func _ready():
    var root = get_tree().root
    # Using a negative index counts from the end, so this gets the last child node of `root`.
    current_scene = root.get_child(-1)
using Godot;

public partial class Global : Node
{
    public Node CurrentScene { get; set; }

    public override void _Ready()
    {
        Viewport root = GetTree().Root;
        // Using a negative index counts from the end, so this gets the last child node of `root`.
        CurrentScene = root.GetChild(-1);
    }
}
接著需要一個切換場景的函式,這個函式必須釋放目前的場景並換成指定的新場景。
func goto_scene(path):
    # This function will usually be called from a signal callback,
    # or some other function in the current scene.
    # Deleting the current scene at this point is
    # a bad idea, because it may still be executing code.
    # This will result in a crash or unexpected behavior.

    # The solution is to defer the load to a later time, when
    # we can be sure that no code from the current scene is running:

    _deferred_goto_scene.call_deferred(path)


func _deferred_goto_scene(path):
    # It is now safe to remove the current scene.
    current_scene.free()

    # Load the new scene.
    var s = ResourceLoader.load(path)

    # Instance the new scene.
    current_scene = s.instantiate()

    # Add it to the active scene, as child of root.
    get_tree().root.add_child(current_scene)

    # Optionally, to make it compatible with the SceneTree.change_scene_to_file() API.
    get_tree().current_scene = current_scene
public void GotoScene(string path)
{
    // This function will usually be called from a signal callback,
    // or some other function from the current scene.
    // Deleting the current scene at this point is
    // a bad idea, because it may still be executing code.
    // This will result in a crash or unexpected behavior.

    // The solution is to defer the load to a later time, when
    // we can be sure that no code from the current scene is running:

    CallDeferred(MethodName.DeferredGotoScene, path);
}

public void DeferredGotoScene(string path)
{
    // It is now safe to remove the current scene.
    CurrentScene.Free();

    // Load a new scene.
    var nextScene = GD.Load<PackedScene>(path);

    // Instance the new scene.
    CurrentScene = nextScene.Instantiate();

    // Add it to the active scene, as child of root.
    GetTree().Root.AddChild(CurrentScene);

    // Optionally, to make it compatible with the SceneTree.change_scene_to_file() API.
    GetTree().CurrentScene = CurrentScene;
}
透過 Object.call_deferred(),第二個函式只會在目前場景所有程式都執行完後才執行。如此就不會在場景還被使用(程式還在跑)時將其移除。
最後,我們要在兩個場景裡填入空的回呼函式:
# Add to 'scene_1.gd'.

func _on_button_pressed():
    Global.goto_scene("res://scene_2.tscn")
// Add to 'Scene1.cs'.

private void OnButtonPressed()
{
    var global = GetNode<Global>("/root/Global");
    global.GotoScene("res://Scene2.tscn");
}
和
# Add to 'scene_2.gd'.

func _on_button_pressed():
    Global.goto_scene("res://scene_1.tscn")
// Add to 'Scene2.cs'.

private void OnButtonPressed()
{
    var global = GetNode<Global>("/root/Global");
    global.GotoScene("res://Scene1.tscn");
}
執行專案並測試能否透過按鈕切換場景。
備註
當場景很小時,切換會即時完成。但如果場景較複雜,可能會有明顯等待時間。想瞭解如何處理,請參考下一篇教學:後臺載入。
另外,如果載入時間不長(如小於 3 秒),可以在切換場景前先顯示某些 2D 元素,作為「載入畫面」。場景切換完再隱藏這些元素。這樣可讓玩家知道場景正在載入。