GDExtension 文件系統
備註
Adding documentation for GDExtensions is only possible for Godot 4.3 and later. The support can be integrated into your project
regardless because the snippet will check if you use the appropriate godot-cpp version.
If you set the compatibility_minimum to 4.2 and you load a project with the extension through a 4.2 editor, the
documentation page for that class will be empty. The extension itself will still work.
GDExtension 的說明文件系統運作方式與內建引擎說明文件類似。它會為每個類別建立一份 XML 檔案,記錄該類別對外公開的建構子、屬性、方法、常數、訊號及主題項目。
備註
這裡假設你是依照 GDExtension C++ 範例 的專案結構進行:
gdextension_cpp_example/  # GDExtension directory
|
+--demo/                  # game example/demo to test the extension
|   |
|   +--main.tscn
|   |
|   +--bin/
|       |
|       +--gdexample.gdextension
|
+--godot-cpp/             # C++ bindings
|
+--src/                   # source code of the extension we are building
|   |
|   +--register_types.cpp
|   +--register_types.h
|   +--gdexample.cpp
|   +--gdexample.h
在你的 GDExtension 專案的 Godot 範例目錄中,執行下列終端機指令:
# Replace "godot" with the full path to a Godot editor binary
# if Godot is not installed in your `PATH`.
godot --doctool ../ --gdextension-docs
這個指令會呼叫 Godot 編輯器的可執行檔,並透過 --doctool 與 --gdextension-docs 參數來產生說明文件。由於 GDExtension 的 SConstruct 檔案通常位於上一層,所以加上 ../。執行後,Godot 會在專案目錄內建立 doc_classes 資料夾,為所有 GDExtension 類別產生對應的 XML 檔案。這些檔案可進一步編輯,以補充成員變數、方法、訊號等資訊。
要讓 Godot 編輯器載入你補充過內容的說明文件,必須在 SConstruct 檔案中加入下列設定:
if env["target"] in ["editor", "template_debug"]:
try:
    doc_data = env.GodotCPPDocData("src/gen/doc_data.gen.cpp", source=Glob("doc_classes/*.xml"))
    sources.append(doc_data)
except AttributeError:
    print("Not including class reference as we're targeting a pre-4.3 baseline.")
這段判斷式會檢查是否以 editor 以及 template_debug 編譯標誌來編譯 GDExtension 函式庫。SCons 會嘗試載入 doc_classes 目錄下所有 XML 檔案,並把它們加入到 sources 變數(這個變數已包含你的擴充原始檔)。如果載入失敗,就代表你目前使用的 godot_cpp 版本低於 4.3。
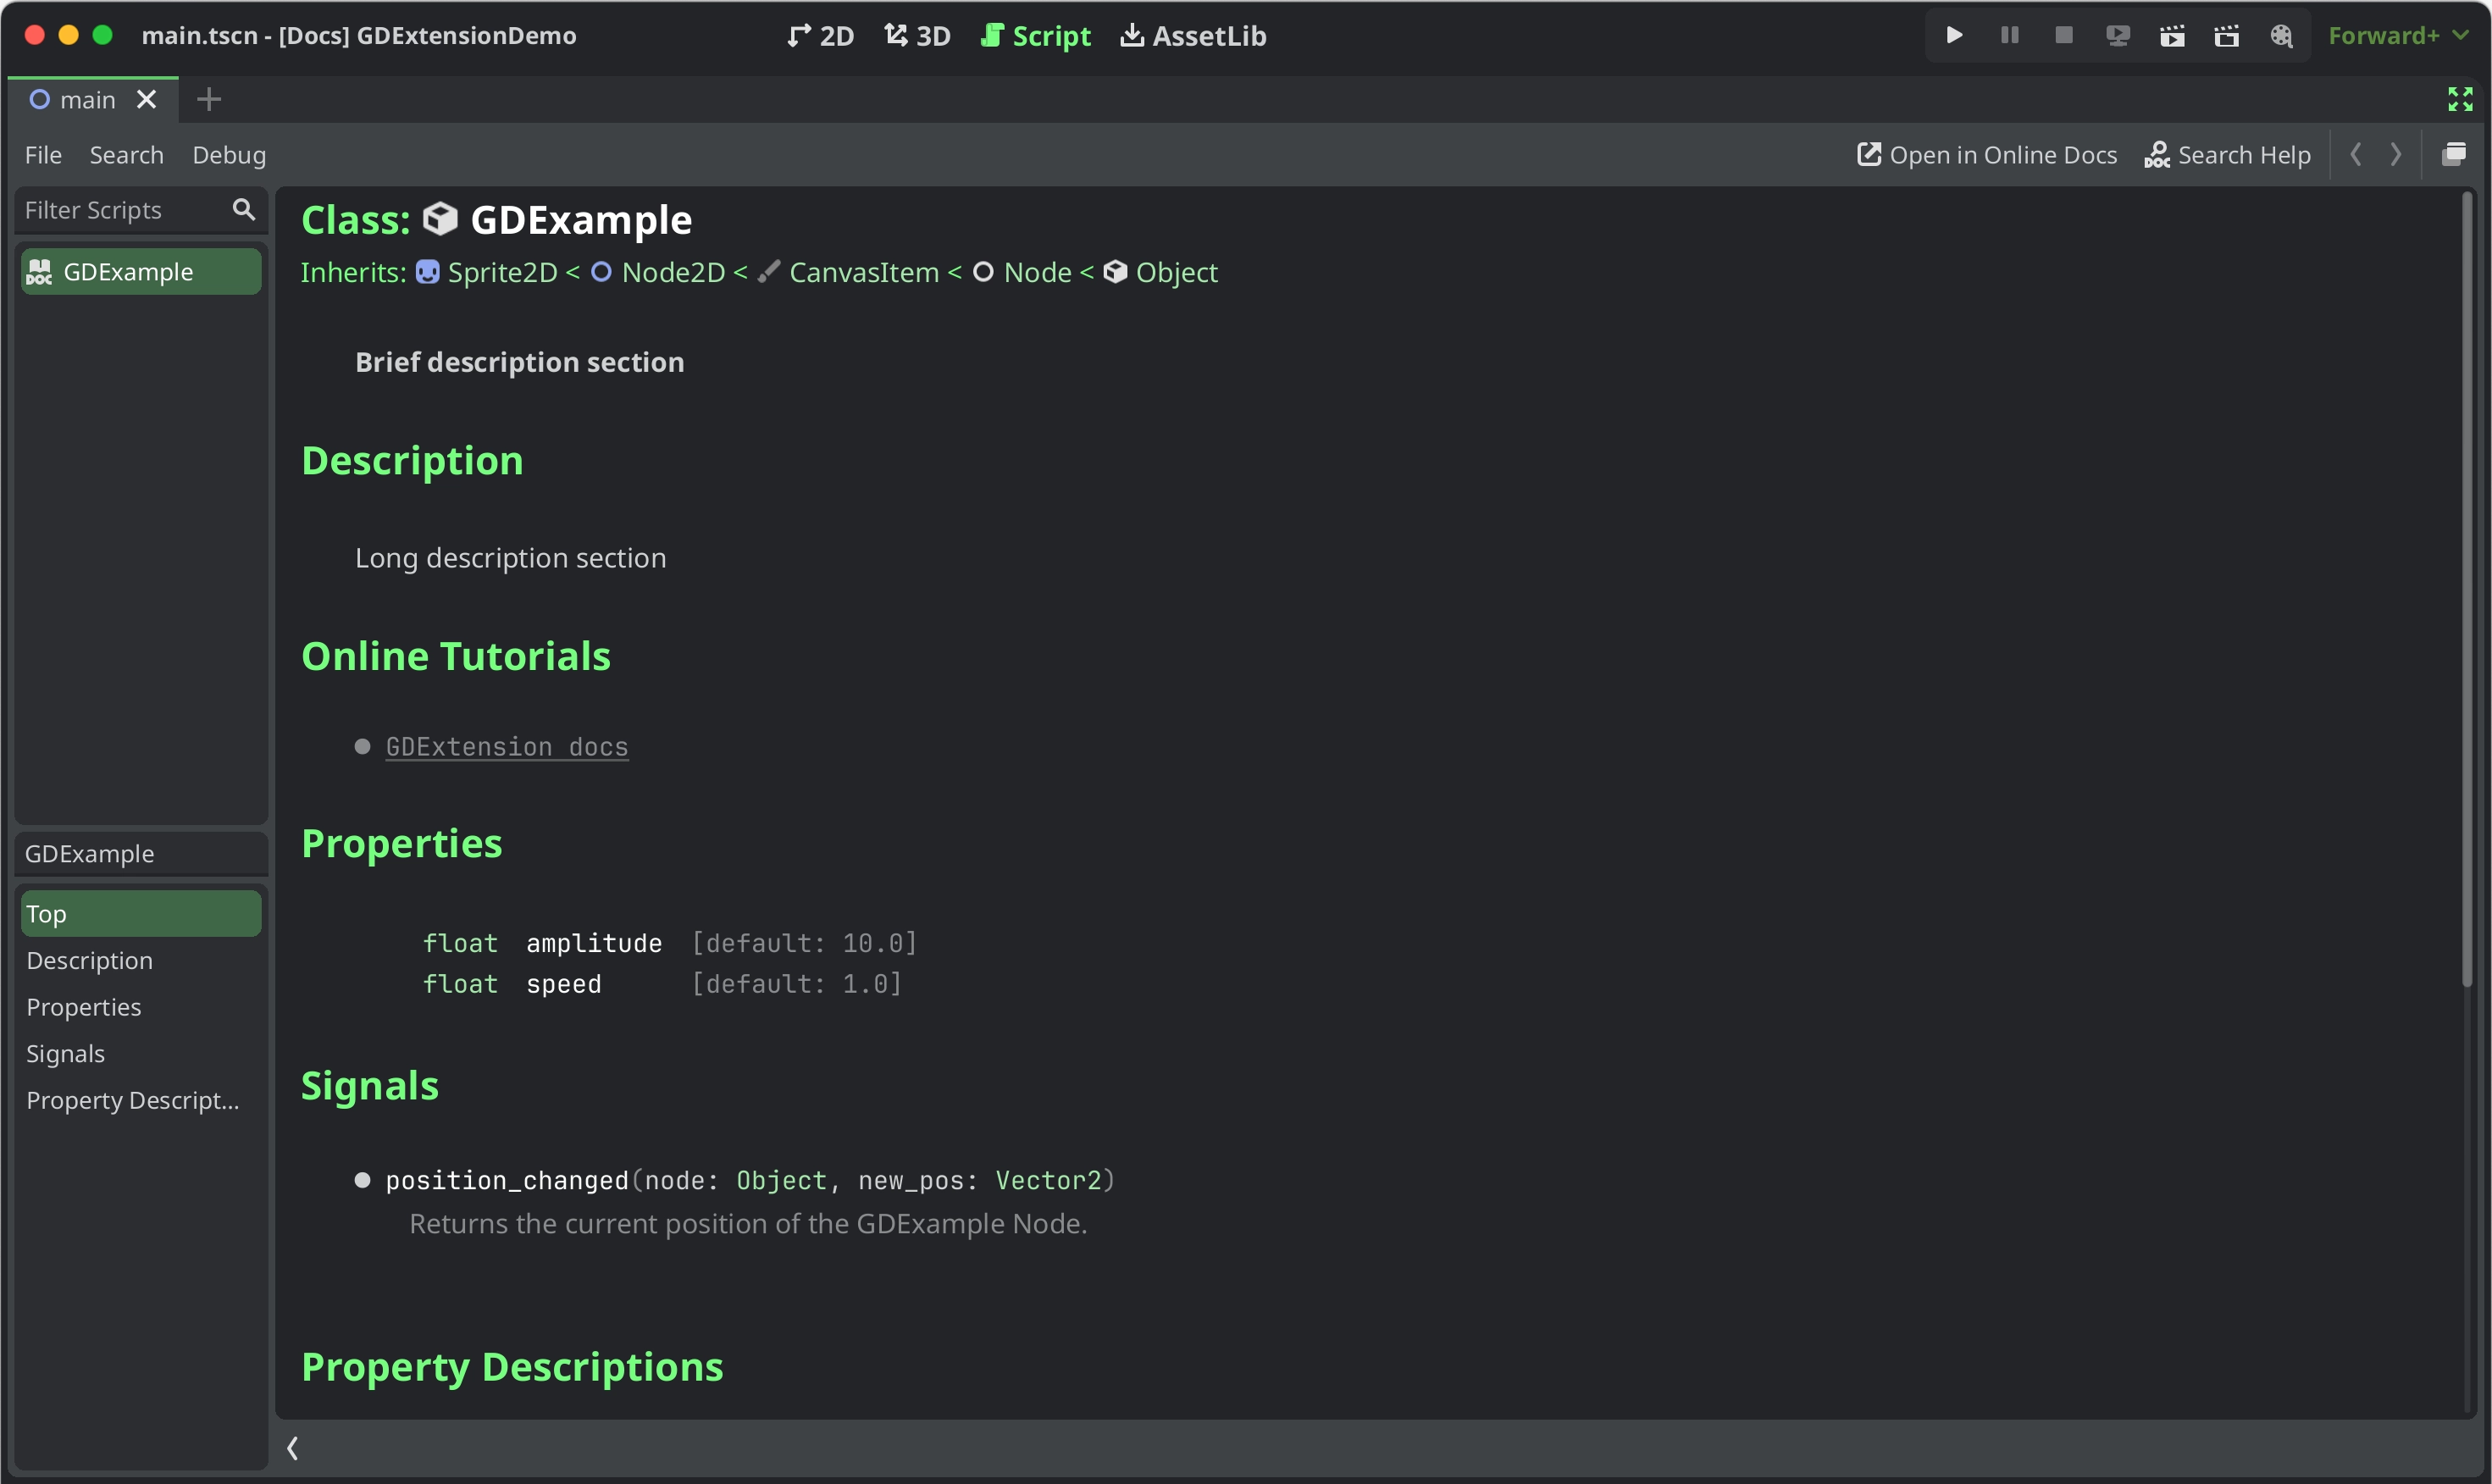
在 Godot 4.3 或更新版本的編輯器中載入該擴充套件後,可以在腳本編輯器中按 Ctrl + 點擊 類別名稱,或在編輯器說明視窗打開你的擴充類別說明頁面,就會看到類似下圖的內容:
說明文件樣式
要為說明文件的特定文字加上樣式,可以像 RichTextLabel 一樣使用 BBCode 標籤。你可以將文字設為粗體、斜體、底線、變色、程式碼區塊等,只要把文字包在如下標籤裡即可:
[b]this text will be shown as bold[/b]
目前 GDExtension 說明文件系統所支援的標籤有:
標籤 |
範例 |
b
讓
{text} 以 RichTextLabel 的粗體(或粗斜體)字型顯示。 |
|
i
讓
{text} 以 RichTextLabel 的斜體(或粗斜體)字型顯示。 |
|
u
讓
{text} 顯示底線。 |
|
s
讓
{text} 顯示刪除線。 |
|
kbd
讓
{text} 以灰色斜角背景顯示,表示鍵盤快捷鍵。 |
|
code
讓行內的
{text} 使用等寬字型,並套用程式碼專用的顏色與背景樣式。 |
|
codeblocks
讓多行
{text} 使用等寬字型,並以程式碼樣式顯示文字顏色與背景。若加上
[gdscript] 標籤,則會針對 GDScript 語法進行語法高亮。 |
[codeblocks][gdscript]{text}[/gdscript][/codeblocks] |
center
讓
{text} 水平置中。等同於
[p align=center]。 |
|
url
建立超連結(帶底線且可點擊的文字)。可以自訂顯示
{text} 或直接顯示 {link}。 |
[url]{link}[/url][url={link}]{text}[/url] |
img
由
{path} 插入圖片(可為任意有效的 Texture2D 資源)。若指定
{width},圖片會嘗試符合該寬度並維持比例。若同時指定
{width} 與 {height},圖片會縮放到該尺寸。在
{width} 或 {height} 後加 %,即可將其指定為控制元件寬度的百分比,而非像素。若提供
{valign} 設定,圖片會嘗試與周圍文字對齊,詳見 圖片與表格的垂直對齊。支援更多設定選項,詳見 圖片選項。
|
[img]{path}[/img][img={width}]{path}[/img][img={width}x{height}]{path}[/img][img={valign}]{path}[/img][img {options}]{path}[/img] |
|
發佈說明文件至線上
你可能會想將自己的 GDExtension 文件線上發佈,像 Godot 官方網站那樣。最重要的一步是將 XML 格式的類別參考檔轉換成 reStructuredText(.rst)檔案:
# You need a version.py file, so download it first.
curl -sSLO https://raw.githubusercontent.com/godotengine/godot/refs/heads/master/version.py

# Edit version.py according to your project before proceeding.
# Then, run the rst generator. You'll need to have Python installed for this command to work.
curl -sSL https://raw.githubusercontent.com/godotengine/godot/master/doc/tools/make_rst.py | python3 - -o "docs/classes" -l "en" doc_classes
此時產生的 .rst 檔會在 docs/classes/ 目錄中。之後,你可以用任何支援 reStructuredText 語法的文件產生工具,從這些檔案建立網站。
godot-docs 採用 Sphinx。你可以以此為基礎建立自己的說明文件系統。以下流程僅為基本步驟,細節還需根據你的專案調整。
將 godot-docs 加入你的
docs/資料夾作為子模組。將其
conf.py、index.rst、.readthedocs.yaml等檔案複製到你的/docs/資料夾。日後你也可以再複製與修改 godot-docs 的其他檔案,例如_templates/layout.html。根據你的專案調整這些檔案,主要是修正路徑讓其指向
godot-docs子資料夾,以及修改文字以顯示是你的專案,而非 Godot 官方。到 readthedocs.org 註冊帳號,匯入你的專案,並將其基礎的
.readthedocs.yaml檔路徑設為/docs/.readthedocs.yaml。
完成上述步驟後,你的說明文件就會發布在 <repo-name>.readthedocs.io。