GDExtension C++ 範例
前言
GDExtension 的 C++ 綁定是建立在 C GDExtension API 之上,提供了一種更優雅的方式,可以使用 C++ 來「擴充」 Godot 內建的節點與其他類別。這個新系統讓擴充 Godot 幾乎能和靜態連結的 C++ 模組一樣強大。
你可以在 GitHub 上的 godot-cpp 倉庫 的 test 資料夾中下載這個範例。
設定專案
你需要先準備以下幾項:
Godot 4 執行檔,
C++ 編譯器,
SCons 做為建構工具,
一份 godot-cpp 倉庫 的複本。
另請參閱 設定 IDE 與 編譯,因為這些建構工具與從原始碼編譯 Godot 使用的工具相同。
你可以從 GitHub 下載 godot-cpp 倉庫,或用 Git 指令自動抓取。請注意,這個倉庫針對不同的 Godot 版本有不同分支。GDExtension 僅支援 Godot 4 及以上版本,且不同版本之間不相容,所以請務必下載正確的分支。
備註
要使用 GDExtension,你必須使用與目標 Godot 版本相符的 godot-cpp 分支。例如,如果你的目標是 Godot 4.1,請使用 4.1 分支。本教學以 4.x 為例,實際操作時請依你的目標版本替換分支名稱。
master 分支是開發中的分支,會定期與 Godot 的 master 分支同步更新。
警告
我們的長期目標是,針對較舊 Godot 版本開發的 GDExtension 能在更新的小版本上正常運作,反之則不行。例如,為 Godot 4.1 開發的 GDExtension 應可在 Godot 4.2 使用,但為 Godot 4.2 開發的 GDExtension 不會在 4.1 運作。
不過,GDExtension 目前屬於*實驗性*功能,未來若需修正重大錯誤或加入關鍵功能,仍有可能破壞相容性。例如,針對 Godot 4.0 製作的 GDExtension 無法在 Godot 4.1 使用(詳情見 將 GDExtension 更新到 4.1)。
如果你有用 Git 進行專案版本管理,建議將它加為 Git 子模組:
mkdir gdextension_cpp_example
cd gdextension_cpp_example
git init
git submodule add -b 4.x https://github.com/godotengine/godot-cpp
cd godot-cpp
git submodule update --init
你也可以直接將它 clone 到專案目錄下:
mkdir gdextension_cpp_example
cd gdextension_cpp_example
git clone -b 4.x https://github.com/godotengine/godot-cpp
備註
如果你選擇直接下載或 clone 倉庫到資料夾,請務必保持資料夾結構與本教學一致,因為後續範例程式碼都假設你的專案有這樣的結構。
如果你是從前面介紹的連結 clone 範例,子模組預設並不會自動初始化,你需要手動執行以下指令:
cd gdextension_cpp_example
git submodule update --init
這會在你的專案資料夾中初始化所需的子模組。
建構 C++ 綁定
先決條件都備齊後,接下來開始建構 C++ 綁定。
倉庫裡包含了目前 Godot 版本的中繼資料副本,但如果你要針對較新版本建構綁定,請用 Godot 執行檔產生:
godot --dump-extension-api
產生的 extension_api.json 會出現在執行檔所在資料夾。請將它複製到專案資料夾,並在下方 scons 指令中加上 custom_api_file=<檔案路徑>。
要產生並編譯綁定,請使用下列指令(依你的作業系統將 <platform> 替換為 windows、linux 或 macos):
建構過程會自動偵測可用的 CPU 執行緒數量以進行平行建構。若要自訂執行緒數,可在 SCons 指令結尾加上 -jN,其中 N 是你想使用的執行緒數。
cd godot-cpp
scons platform=<platform> custom_api_file=<PATH_TO_FILE>
cd ..
這個步驟會花一點時間。完成後,你會在 godot-cpp/bin/ 看到可供專案編譯連結的靜態函式庫。
備註
在 Windows 或 Linux 下可能要在指令後加上 bits=64。
建立簡單外掛
現在來實作一個真正的外掛。我們將先建立一個空的 Godot 專案,並在裡面放入一些檔案。
開啟 Godot,建立一個新專案。這裡我們會將專案放在 GDExtension 資料夾結構下的 demo 資料夾中。
在 demo 專案裡,建立一個名為「Main」的節點並儲存為 main.tscn 場景。我們稍後會再回來用到它。
回到 GDExtension 模組的根目錄,再建立一個名為 src 的子資料夾,這之後會用來放我們的原始碼檔案。
你的 GDExtension 模組目錄下,現在應該有 demo、godot-cpp 和 src 三個資料夾。
目前的資料夾結構應該長這樣:
gdextension_cpp_example/
|
+--demo/                  # game example/demo to test the extension
|
+--godot-cpp/             # C++ bindings
|
+--src/                   # source code of the extension we are building
在 src 資料夾下,先建立我們要用來擴充的 GDExtension 節點的標頭檔,我們把它命名為 gdexample.h:
#ifndef GDEXAMPLE_H
#define GDEXAMPLE_H

#include <godot_cpp/classes/sprite2d.hpp>

namespace godot {

class GDExample : public Sprite2D {
    GDCLASS(GDExample, Sprite2D)

private:
    double time_passed;

protected:
    static void _bind_methods();

public:
    GDExample();
    ~GDExample();

    void _process(double delta) override;
};

}

#endif
上面程式碼有幾點要注意。我們引入了 sprite2d.hpp,這個檔案包含對 Sprite2D 類的綁定。我們會以這個類別做為擴充的基礎。
我們使用 godot 命名空間,因為 GDExtension 所有內容都定義在此命名空間中。
接下來是類別定義,這裡我們透過容器類別繼承自 Sprite2D。GDCLASS 巨集會幫我們處理一些必要的內部註冊。
接著宣告了一個名為 time_passed 的成員變數。
在接下來的方法區塊中,除了建構子和解構子,還有兩個你可能很熟悉的方法,另外還有一個新方法。
第一個是 _bind_methods,Godot 會呼叫這個靜態方法來註冊可以被呼叫的方法和屬性。第二個是 _process,它的功能就跟你在 GDScript 使用的 _process 一樣。
接下來,實作這些方法並建立 gdexample.cpp 檔案:
#include "gdexample.h"
#include <godot_cpp/core/class_db.hpp>

using namespace godot;

void GDExample::_bind_methods() {
}

GDExample::GDExample() {
    // Initialize any variables here.
    time_passed = 0.0;
}

GDExample::~GDExample() {
    // Add your cleanup here.
}

void GDExample::_process(double delta) {
    time_passed += delta;

    Vector2 new_position = Vector2(10.0 + (10.0 * sin(time_passed * 2.0)), 10.0 + (10.0 * cos(time_passed * 1.5)));

    set_position(new_position);
}
這部分很直接,就是把我們在標頭檔定義的每個方法實作出來。
請注意 _process 方法,它會累計經過的時間,並用正弦、餘弦計算新的精靈位置。
我們還需要另外一個 C++ 檔案,命名為 register_types.cpp。一個 GDExtension 外掛可以有多個類別,每個類別有自己的標頭和原始檔,像前面那樣實作 GDExample。現在我們需要一小段程式碼告訴 Godot 外掛裡有哪些類別。
#include "register_types.h"

#include "gdexample.h"

#include <gdextension_interface.h>
#include <godot_cpp/core/defs.hpp>
#include <godot_cpp/godot.hpp>

using namespace godot;

void initialize_example_module(ModuleInitializationLevel p_level) {
    if (p_level != MODULE_INITIALIZATION_LEVEL_SCENE) {
        return;
    }

    GDREGISTER_RUNTIME_CLASS(GDExample);
}

void uninitialize_example_module(ModuleInitializationLevel p_level) {
    if (p_level != MODULE_INITIALIZATION_LEVEL_SCENE) {
        return;
    }
}

extern "C" {
// Initialization.
GDExtensionBool GDE_EXPORT example_library_init(GDExtensionInterfaceGetProcAddress p_get_proc_address, const GDExtensionClassLibraryPtr p_library, GDExtensionInitialization *r_initialization) {
    godot::GDExtensionBinding::InitObject init_obj(p_get_proc_address, p_library, r_initialization);

    init_obj.register_initializer(initialize_example_module);
    init_obj.register_terminator(uninitialize_example_module);
    init_obj.set_minimum_library_initialization_level(MODULE_INITIALIZATION_LEVEL_SCENE);

    return init_obj.init();
}
}
Godot 載入外掛時會呼叫 initialize_example_module,解除安裝時則呼叫 uninitialize_example_module。這邊我們只做初始化綁定模組,依需求你也可以設定其他內容。對於每個類別都要呼叫 GDREGISTER_RUNTIME_CLASS 巨集,代表它們只會在遊戲執行時註冊,這與 GDScript 預設行為相同。
第三個函式 example_library_init 很重要。我們會先呼叫綁定庫的初始化函式來建立初始化物件,這個物件會註冊 GDExtension 的初始化與終結函式,也能設定初始化階段(如 core、servers、scene、editor、level)。
最後,還需要為 register_types.cpp 建立標頭檔 register_types.h。
#ifndef GDEXAMPLE_REGISTER_TYPES_H
#define GDEXAMPLE_REGISTER_TYPES_H

#include <godot_cpp/core/class_db.hpp>

using namespace godot;

void initialize_example_module(ModuleInitializationLevel p_level);
void uninitialize_example_module(ModuleInitializationLevel p_level);

#endif // GDEXAMPLE_REGISTER_TYPES_H
編譯外掛
要編譯這個專案,我們必須寫一個 SConstruct 檔案來指示 SCons 如何建構,並參照 godot-cpp 內的 SConstruct。從頭撰寫超出本教學範圍,你可以直接 下載我們準備好的 SConstruct。更細節與自訂的建構方式,會在後續教學補充。
備註
這個 SConstruct 檔案是針對最新的 godot-cpp master 分支撰寫的,如要與舊版搭配使用,可能需做些微調整或參考 Godot 4.x 文件的 SConstruct 範例。
下載好 SConstruct 檔案後,請將它放在 GDExtension 目錄下,跟 godot-cpp、src 和 demo 目錄同一層,然後執行:
scons platform=<platform>
此時你應該可以在 demo/bin/<platform> 下找到編譯出來的模組。
若要為 iOS 編譯,需將模組包裝成靜態 .xcframework,可以用以下指令完成:
# compile simulator and device modules
scons arch=universal ios_simulator=yes platform=ios target=<target>
scons arch=arm64 ios_simulator=no platform=ios target=<target>

# assemble xcframeworks
xcodebuild -create-xcframework -library demo/bin/libgdexample.ios.<target>.a -library demo/bin/libgdexample.ios.<target>.simulator.a -output demo/bin/libgdexample.ios.<target>.xcframework
xcodebuild -create-xcframework -library godot-cpp/bin/libgodot-cpp.ios.<target>.arm64.a -library godot-cpp/bin/libgodot-cpp.ios.<target>.universal.simulator.a  -output demo/bin/libgodot-cpp.ios.<target>.xcframework
備註
此範例同時將 godot-cpp 和 gdexample 函式庫都編譯為 debug 版本。若要釋出版或最佳化,請將指令加上 target=template_release 參數。
使用 GDExtension 模組
回到 Godot 之前,還需在 demo/bin/ 新增一個檔案。
這個檔案讓 Godot 知道要針對各平台載入哪些動態函式庫,以及模組的進入點。名稱為 gdexample.gdextension。
[configuration]

entry_symbol = "example_library_init"
compatibility_minimum = "4.1"
reloadable = true

[libraries]

macos.debug = "res://bin/libgdexample.macos.template_debug.framework"
macos.release = "res://bin/libgdexample.macos.template_release.framework"
ios.debug = "res://bin/libgdexample.ios.template_debug.xcframework"
ios.release = "res://bin/libgdexample.ios.template_release.xcframework"
windows.debug.x86_32 = "res://bin/libgdexample.windows.template_debug.x86_32.dll"
windows.release.x86_32 = "res://bin/libgdexample.windows.template_release.x86_32.dll"
windows.debug.x86_64 = "res://bin/libgdexample.windows.template_debug.x86_64.dll"
windows.release.x86_64 = "res://bin/libgdexample.windows.template_release.x86_64.dll"
linux.debug.x86_64 = "res://bin/libgdexample.linux.template_debug.x86_64.so"
linux.release.x86_64 = "res://bin/libgdexample.linux.template_release.x86_64.so"
linux.debug.arm64 = "res://bin/libgdexample.linux.template_debug.arm64.so"
linux.release.arm64 = "res://bin/libgdexample.linux.template_release.arm64.so"
linux.debug.rv64 = "res://bin/libgdexample.linux.template_debug.rv64.so"
linux.release.rv64 = "res://bin/libgdexample.linux.template_release.rv64.so"
android.debug.x86_64 = "res://bin/libgdexample.android.template_debug.x86_64.so"
android.release.x86_64 = "res://bin/libgdexample.android.template_release.x86_64.so"
android.debug.arm64 = "res://bin/libgdexample.android.template_debug.arm64.so"
android.release.arm64 = "res://bin/libgdexample.android.template_release.arm64.so"

[dependencies]
ios.debug = {
    "res://bin/libgodot-cpp.ios.template_debug.xcframework": ""
}
ios.release = {
    "res://bin/libgodot-cpp.ios.template_release.xcframework": ""
}
This file contains a configuration section that controls the entry function of the module.
You should also set the minimum compatible Godot version with compatibility_minimum,
which prevents older version of Godot from trying to load your extension.
The reloadable flag enables automatic reloading of your extension by the editor every time you recompile it,
without needing to restart the editor. This only works if you compile your extension in debug mode (default).
libraries 區段很重要:它會告訴 Godot 每個支援平台下動態函式庫的路徑。這也確保你匯出專案時只會包含目標平台需要的函式庫,不會把不相容的函式庫一併打包。
最後,dependencies 區段可讓你指定其他需要一併包含的動態函式庫。當你的 GDExtension 外掛依賴第三方函式庫時,這部分就很重要。
以下是正確檔案結構的總覽:
gdextension_cpp_example/
|
+--demo/                  # game example/demo to test the extension
|   |
|   +--main.tscn
|   |
|   +--bin/
|       |
|       +--gdexample.gdextension
|
+--godot-cpp/             # C++ bindings
|
+--src/                   # source code of the extension we are building
|   |
|   +--register_types.cpp
|   +--register_types.h
|   +--gdexample.cpp
|   +--gdexample.h
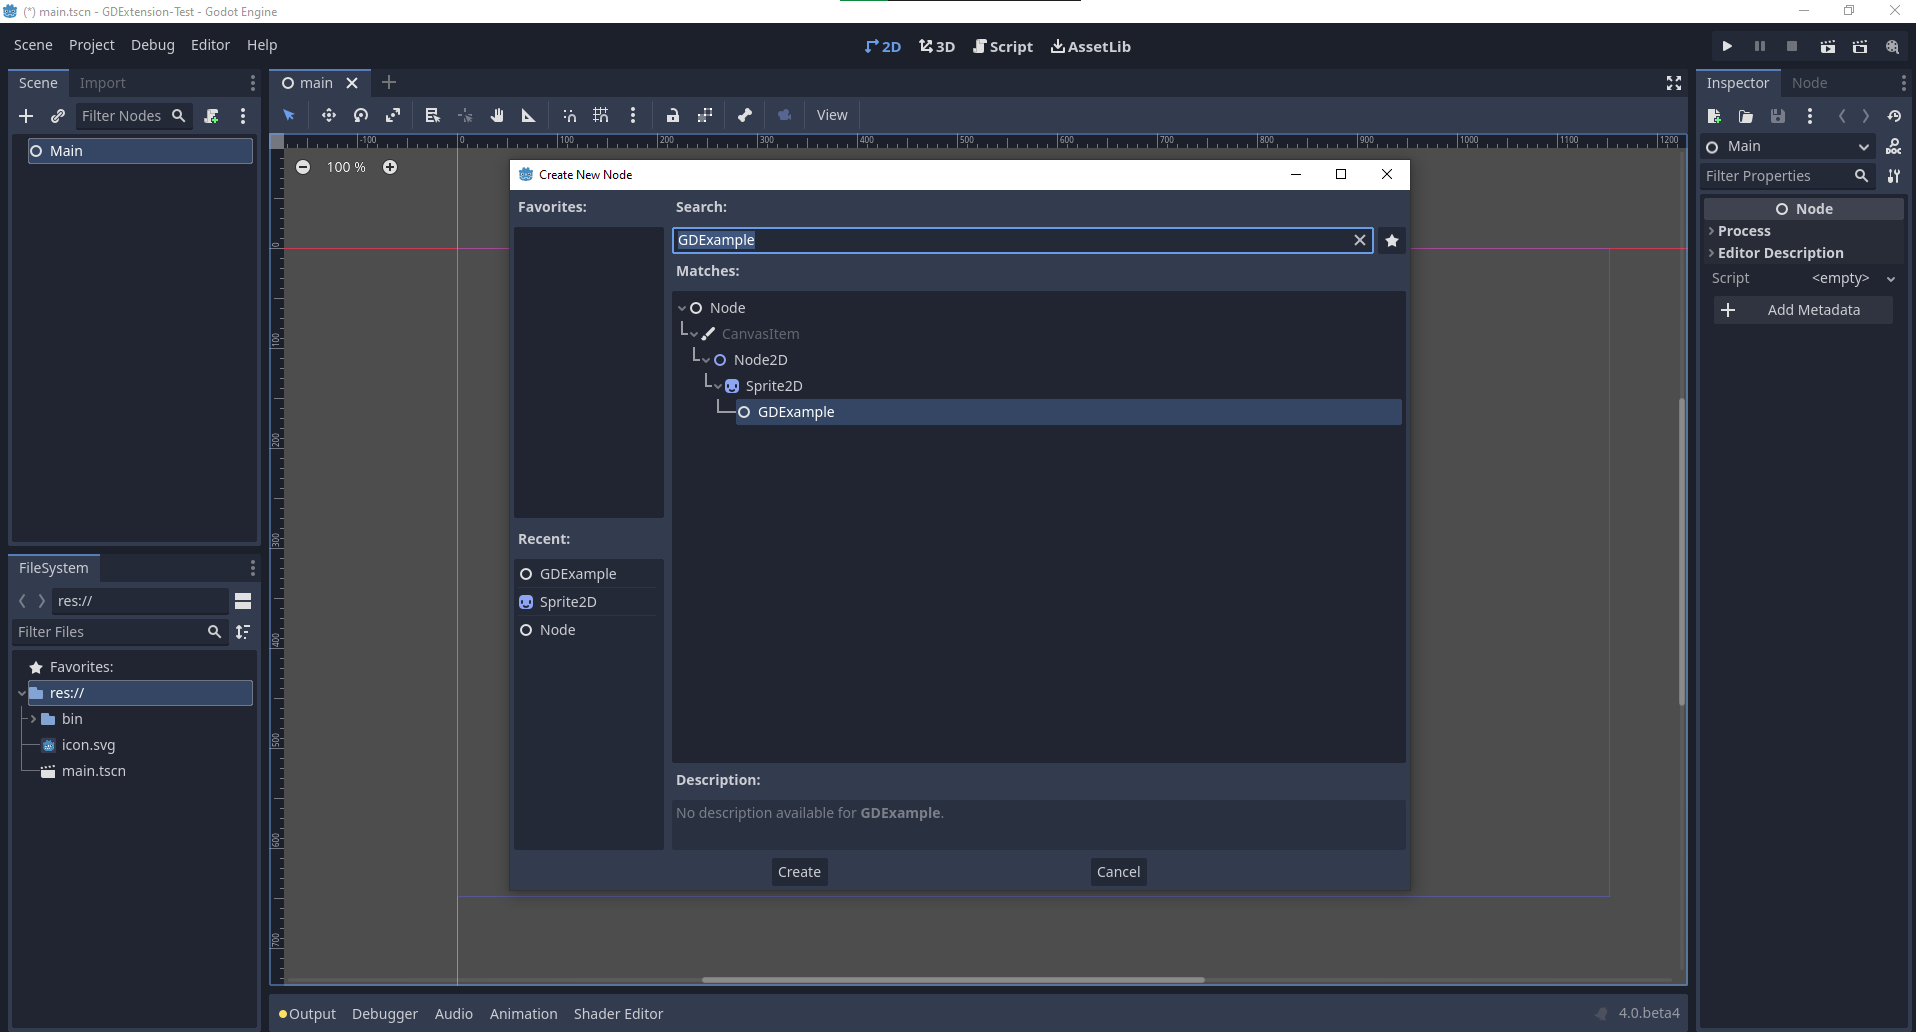
現在可以回到 Godot。請打開一開始建立的主場景,並新增一個 GDExample 節點到場景中:
我們將 Godot 標誌指定為這個節點的紋理,並將 centered 屬性關閉:
現在一切就緒,可以執行專案了:
新增屬性
GDScript 可以用 export 關鍵字讓腳本有可編輯屬性。在 GDExtension 則需用 getter 和 setter 方法註冊屬性,或直接實作物件的 _get_property_list、_get、_set 方法(但這屬進階內容,不在本教學範圍)。
現在我們來新增一個屬性,讓我們可以調整波動的振幅。
在 gdexample.h 檔案中,新增一個成員變數及 getter/setter 方法:
...
private:
    double time_passed;
    double amplitude;

public:
    void set_amplitude(const double p_amplitude);
    double get_amplitude() const;
...
在 gdexample.cpp 中也需做一些變動,以下只列出有異動的方法,未提及的行請勿移除:
void GDExample::_bind_methods() {
    ClassDB::bind_method(D_METHOD("get_amplitude"), &GDExample::get_amplitude);
    ClassDB::bind_method(D_METHOD("set_amplitude", "p_amplitude"), &GDExample::set_amplitude);

    ADD_PROPERTY(PropertyInfo(Variant::FLOAT, "amplitude"), "set_amplitude", "get_amplitude");
}

GDExample::GDExample() {
    // Initialize any variables here.
    time_passed = 0.0;
    amplitude = 10.0;
}

void GDExample::_process(double delta) {
    time_passed += delta;

    Vector2 new_position = Vector2(
        amplitude + (amplitude * sin(time_passed * 2.0)),
        amplitude + (amplitude * cos(time_passed * 1.5))
    );

    set_position(new_position);
}

void GDExample::set_amplitude(const double p_amplitude) {
    amplitude = p_amplitude;
}

double GDExample::get_amplitude() const {
    return amplitude;
}
將這些變動編譯完成後,就會看到介面多了一個屬性。你可以隨時調整它,執行專案時 Godot 圖示就會隨之變動軌跡幅度。
我們再來對動畫速度做同樣的處理,一樣用 getter 與 setter。在 gdexample.h 標頭檔只需再加幾行:
...
    double amplitude;
    double speed;
...
    void _process(double delta) override;
    void set_speed(const double p_speed);
    double get_speed() const;
...
gdexample.cpp 檔案還要再做幾個小改動,以下只列出異動的部份,其餘請保留原本內容:
void GDExample::_bind_methods() {
    ...
    ClassDB::bind_method(D_METHOD("get_speed"), &GDExample::get_speed);
    ClassDB::bind_method(D_METHOD("set_speed", "p_speed"), &GDExample::set_speed);

    ADD_PROPERTY(PropertyInfo(Variant::FLOAT, "speed", PROPERTY_HINT_RANGE, "0,20,0.01"), "set_speed", "get_speed");
}

GDExample::GDExample() {
    time_passed = 0.0;
    amplitude = 10.0;
    speed = 1.0;
}

void GDExample::_process(double delta) {
    time_passed += speed * delta;

    Vector2 new_position = Vector2(
        amplitude + (amplitude * sin(time_passed * 2.0)),
        amplitude + (amplitude * cos(time_passed * 1.5))
    );

    set_position(new_position);
}

...

void GDExample::set_speed(const double p_speed) {
    speed = p_speed;
}

double GDExample::get_speed() const {
    return speed;
}
這樣編譯後你會看到介面多一個 speed 屬性。調整它就能改變動畫快慢。此外,我們還加上了屬性範圍,前兩個參數為最小與最大值,第三個為步進值。
備註
這裡我們只用到 property 方法的 hint_range 屬性。事實上還有更多選項可以自訂屬性在 Godot 裡的顯示與設定方式。
訊號
最後,GDExtension 也完整支援訊號。如果想讓你的擴充對其他物件發出的訊號有反應,須先對該物件呼叫 connect。我們的 Godot 圖示搖擺例子不太適合這種情境,如果要示範需要更完整的範例。
語法如下:
some_other_node->connect("the_signal", Callable(this, "my_method"));
要將某個節點的 the_signal 訊號連結到我們的 my_method 方法,需在 connect 方法中指定訊號名稱與一個 Callable。Callable 持有待呼叫方法的物件資訊。本例中,它把目前物件實例 this 與 my_method 方法綁定,之後 connect 會將這個 Callable 加入 the_signal 的觀察者。每當 the_signal 發射時,Godot 就知道要呼叫對應物件的方法。
請注意,只有在你事先於 _bind_methods 註冊過 my_method,Godot 才會知道這個方法的存在,才能將訊號連結過來。
如需更多 Callable 相關資訊,請參考類別文件:Callable。
讓你的物件發出訊號也是很常見的需求。這裡我們用搖擺的 Godot 圖示作為例子,每過一秒就發出一個訊號並傳送新的座標。
在 gdexample.h 標頭檔加上新的成員變數 time_emit:
...
    double time_passed;
    double time_emit;
    double amplitude;
...
這次 gdexample.cpp 的變更較多。首先,要在 _init 方法或建構子裡設定 time_emit = 0.0 。剩下兩項修改我們分開說明。
在 _bind_methods 方法中要註冊我們的訊號,範例如下:
void GDExample::_bind_methods() {
    ...
    ADD_PROPERTY(PropertyInfo(Variant::FLOAT, "speed", PROPERTY_HINT_RANGE, "0,20,0.01"), "set_speed", "get_speed");

    ADD_SIGNAL(MethodInfo("position_changed", PropertyInfo(Variant::OBJECT, "node"), PropertyInfo(Variant::VECTOR2, "new_pos")));
}
ADD_SIGNAL 巨集的參數是 MethodInfo。第一個參數為訊號名稱,後續每個參數都是 PropertyInfo,描述訊號會帶入的資料型別與名稱。
這裡我們新增一個名為 "position_changed" 的訊號,有兩個參數:一個是 Object 型別叫做 "node",另一個是 Vector2 型別叫做 "new_pos"。
接下來修改 _process 方法:
void GDExample::_process(double delta) {
    time_passed += speed * delta;

    Vector2 new_position = Vector2(
        amplitude + (amplitude * sin(time_passed * 2.0)),
        amplitude + (amplitude * cos(time_passed * 1.5))
    );

    set_position(new_position);

    time_emit += delta;
    if (time_emit > 1.0) {
        emit_signal("position_changed", this, new_position);

        time_emit = 0.0;
    }
}
每經過一秒,就發送訊號並重設計時器。我們可以直接把參數丟給 emit_signal。
編譯好 GDExtension 後,回到 Godot 選取精靈節點,在 節點 面板就會看到剛剛新增的訊號,可以按 連接 或直接點兩下連結。主節點加上一個腳本後,訊號可以這樣處理:
extends Node

func _on_Sprite2D_position_changed(node, new_pos):
    print("The position of " + node.get_class() + " is now " + str(new_pos))
每過一秒,我們就會將座標輸出到主控台。
下一步
希望以上範例能讓你掌握基本運作流程。你可以在這基礎上開發完整的 C++ 腳本來控制 Godot 的節點。