Запуск кода в редакторе
What is @tool?
@tool is a powerful line of code that, when added at the top of your script,
makes it execute in the editor. You can also decide which parts of the script
execute in the editor, which in game, and which in both.
Вы можете использовать её для достижения многих вещей, но это наиболее полезно для дизайна уровней и визуальных представлений вещей которые сложно предсказать. Здесь показаны некоторые примеры использования:
If you have a cannon that shoots cannonballs affected by physics (gravity), you can draw the cannonball's trajectory in the editor, making level design a lot easier.
Если у вас есть прыжковые платформы с различными высотами прыжка, для каждой из них вы сможете нарисовать максимальную высоту на которую игрок может подпрыгнуть, что также делает дизайн уровней лёгким.
Если ваш игрок не использует спрайт, но рисует его из кода, вы можете сделать эту отрисовку выполняемой в редакторе так что вы увидите вашего игрока.
Опасно
@tool scripts run inside the editor, and let you access the scene tree
of the currently edited scene. This is a powerful feature which also comes
with caveats, as the editor does not include protections for potential
misuse of @tool scripts.
Be extremely cautious when manipulating the scene tree, especially via
Node.queue_free, as it can cause
crashes if you free a node while the editor runs logic involving it.
How to use @tool
To turn a script into a tool, add the @tool annotation at the top of your code.
To check if you are currently in the editor, use: Engine.is_editor_hint().
For example, if you want to execute some code only in the editor, use:
if Engine.is_editor_hint():
    # Code to execute when in editor.
if (Engine.IsEditorHint())
{
    // Code to execute when in editor.
}
On the other hand, if you want to execute code only in game, simply negate the same statement:
if not Engine.is_editor_hint():
    # Code to execute when in game.
if (!Engine.IsEditorHint())
{
    // Code to execute when in game.
}
Pieces of code that do not have either of the 2 conditions above will run both in-editor and in-game.
Here is how a _process() function might look for you:
func _process(delta):
    if Engine.is_editor_hint():
        # Code to execute in editor.

    if not Engine.is_editor_hint():
        # Code to execute in game.

    # Code to execute both in editor and in game.
public override void _Process(double delta)
{
    if (Engine.IsEditorHint())
    {
        // Code to execute in editor.
    }

    if (!Engine.IsEditorHint())
    {
        // Code to execute in game.
    }

    // Code to execute both in editor and in game.
}
Important information
Any other GDScript that your tool script uses must also be a tool. Any
GDScript without @tool used by the editor will act like an empty file!
Extending a @tool script does not automatically make the extending script
a @tool. Omitting @tool from the extending script will disable tool
behavior from the super class. Therefore the extending script should also
specify the @tool annotation.
Изменения в редакторе постоянны. Другими словами, когда вы удаляете скрипт, ваш узел будет сохранять направление вращения. Будьте осторожны чтобы не сделать нежелательных изменений.
Try @tool out
Добавьте узел Sprite2D в сцену и установите текстуру на иконку Godot. Присоедините и откройте скрипт, затем измените его следующим образом:
@tool
extends Sprite2D

func _process(delta):
    rotation += PI * delta
using Godot;

[Tool]
public partial class MySprite : Sprite2D
{
    public override void _Process(double delta)
    {
        Rotation += Mathf.Pi * (float)delta;
    }
}
Сохраните скрипт и вернитесь в редактор. Вы должны увидеть как ваш объект вращается. Если вы запустите игру, он также будет вращаться.
Предупреждение
Вам может потребоваться перезагрузить редактор. Это известная ошибка, найденная во всех версиях Godot 4: GH-66381.
Примечание
Если вы не увидели изменений, перезагрузите сцену (закройте и откройте снова).
Теперь давайте выберем когда и какой код запустится. Измените функцию _process() чтобы она выглядела вот так:
func _process(delta):
    if Engine.is_editor_hint():
        rotation += PI * delta
    else:
        rotation -= PI * delta
public override void _Process(double delta)
{
    if (Engine.IsEditorHint())
    {
        Rotation += Mathf.Pi * (float)delta;
    }
    else
    {
        Rotation -= Mathf.Pi * (float)delta;
    }
}
Сохраните скрипт. Теперь объект будет вращаться по часовой стрелке в редакторе, но если вы запустите игру он будет вращаться против часовой стрелки.
Editing variables
Add and export a variable speed to the script. To update the speed and also reset the rotation
angle add a setter set(new_speed) which is executed with the input from the inspector. Modify
_process() to include the rotation speed.
@tool
extends Sprite2D


@export var speed = 1:
    # Update speed and reset the rotation.
    set(new_speed):
        speed = new_speed
        rotation = 0


func _process(delta):
    rotation += PI * delta * speed
using Godot;

[Tool]
public partial class MySprite : Sprite2D
{
    private float _speed = 1;

    [Export]
    public float Speed
    {
        get => _speed;
        set
        {
            // Update speed and reset the rotation.
            _speed = value;
            Rotation = 0;
        }
    }

    public override void _Process(double delta)
    {
        Rotation += Mathf.Pi * (float)delta * speed;
    }
}
Примечание
Код из других узлов не выполняется в редакторе. Ваш доступ к другим узлам ограничен. Вы можете обращаться к дереву и узлам, их стандартным свойствам, но не к пользовательским переменным. Для этого другие узлы также должны выполняться в редакторе. Автозагрузочные узлы недоступны в редакторе вообще.
Getting notified when resources change
Sometimes you want your tool to use a resource. However, when you change a
property of that resource in the editor, the set() method of your tool will
not be called.
@tool
class_name MyTool
extends Node

@export var resource: MyResource:
    set(new_resource):
        resource = new_resource
        _on_resource_set()

# This will only be called when you create, delete, or paste a resource.
# You will not get an update when tweaking properties of it.
func _on_resource_set():
    print("My resource was set!")
using Godot;

[Tool]
public partial class MyTool : Node
{
    private MyResource _resource;

    [Export]
    public MyResource Resource
    {
        get => _resource;
        set
        {
            _resource = value;
            OnResourceSet();
        }
    }
}

// This will only be called when you create, delete, or paste a resource.
// You will not get an update when tweaking properties of it.
private void OnResourceSet()
{
    GD.Print("My resource was set!");
}
To get around this problem you first have to make your resource a tool and make it
emit the changed signal whenever a property is set:
# Make Your Resource a tool.
@tool
class_name MyResource
extends Resource

@export var property = 1:
    set(new_setting):
        property = new_setting
        # Emit a signal when the property is changed.
        changed.emit()
using Godot;

[Tool]
public partial class MyResource : Resource
{
    private float _property = 1;

    [Export]
    public float Property
    {
        get => _property;
        set
        {
            _property = value;
            // Emit a signal when the property is changed.
            EmitChanged();
        }
    }
}
You then want to connect the signal when a new resource is set:
@tool
class_name MyTool
extends Node

@export var resource: MyResource:
    set(new_resource):
        resource = new_resource
        # Connect the changed signal as soon as a new resource is being added.
        resource.changed.connect(_on_resource_changed)

func _on_resource_changed():
    print("My resource just changed!")
using Godot;

[Tool]
public partial class MyTool : Node
{
    private MyResource _resource;

    [Export]
    public MyResource Resource
    {
        get => _resource;
        set
        {
            _resource = value;
            // Connect the changed signal as soon as a new resource is being added.
            _resource.Changed += OnResourceChanged;
        }
    }
}

private void OnResourceChanged()
{
    GD.Print("My resource just changed!");
}
Lastly, remember to disconnect the signal as the old resource being used and changed somewhere else would cause unneeded updates.
@export var resource: MyResource:
    set(new_resource):
        # Disconnect the signal if the previous resource was not null.
        if resource != null:
            resource.changed.disconnect(_on_resource_changed)
        resource = new_resource
        resource.changed.connect(_on_resource_changed)
[Export]
public MyResource Resource
{
    get => _resource;
    set
    {
        // Disconnect the signal if the previous resource was not null.
        if (_resource != null)
        {
            _resource.Changed -= OnResourceChanged;
        }
        _resource = value;
        _resource.Changed += OnResourceChanged;
    }
}
Reporting node configuration warnings
Godot uses a node configuration warning system to warn users about incorrectly configured nodes. When a node isn't configured correctly, a yellow warning sign appears next to the node's name in the Scene dock. When you hover or click on the icon, a warning message pops up. You can use this feature in your scripts to help you and your team avoid mistakes when setting up scenes.
When using node configuration warnings, when any value that should affect or remove the warning changes, you need to call update_configuration_warnings . By default, the warning only updates when closing and reopening the scene.
# Use setters to update the configuration warning automatically.
@export var title = "":
    set(p_title):
        if p_title != title:
            title = p_title
            update_configuration_warnings()

@export var description = "":
    set(p_description):
        if p_description != description:
            description = p_description
            update_configuration_warnings()


func _get_configuration_warnings():
    var warnings = []

    if title == "":
        warnings.append("Please set `title` to a non-empty value.")

    if description.length() >= 100:
        warnings.append("`description` should be less than 100 characters long.")

    # Returning an empty array means "no warning".
    return warnings
Running one-off scripts using EditorScript
Sometimes, you need to run code just one time to automate a certain task that is not available in the editor out of the box. Some examples might be:
Use as a playground for GDScript or C# scripting without having to run a project.
print()output is displayed in the editor Output panel.Scale all light nodes in the currently edited scene, as you noticed your level ends up looking too dark or too bright after placing lights where desired.
Replace nodes that were copy-pasted with scene instances to make them easier to modify later.
This is available in Godot by extending EditorScript in a script. This provides a way to run individual scripts in the editor without having to create an editor plugin.
To create an EditorScript, right-click a folder or empty space in the FileSystem
dock then choose New > Script.... In the script creation dialog, click the
tree icon to choose an object to extend from (or enter EditorScript directly
in the field on the left, though note this is case-sensitive):
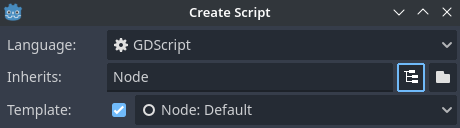
Creating an editor script in the script editor creation dialog
This will automatically select a script template that is suited for
EditorScripts, with a _run() method already inserted:
@tool
extends EditorScript

# Called when the script is executed (using File -> Run in Script Editor).
func _run():
    pass
This _run() method is executed when you use File > Run or the keyboard
shortcut Ctrl + Shift + X while the EditorScript is the currently open
script in the script editor. This keyboard shortcut is only effective when
currently focused on the script editor.
Scripts that extend EditorScript must be @tool scripts to function.
Примечание
EditorScripts can only be run from the Godot script editor. If you are using an external editor, open the script inside the Godot script editor to run it.
Опасно
EditorScripts have no undo/redo functionality, so make sure to save your scene before running one if the script is designed to modify any data.
To access nodes in the currently edited scene, use the EditorScript.get_scene method which returns the root Node of the currently edited scene. Here's an example that recursively gets all nodes in the currently edited scene and doubles the range of all OmniLight3D nodes:
@tool
extends EditorScript

func _run():
    for node in get_all_children(get_scene()):
        if node is OmniLight3D:
            # Don't operate on instanced subscene children, as changes are lost
            # when reloading the scene.
            # See the "Instancing scenes" section below for a description of `owner`.
            var is_instanced_subscene_child = node != get_scene() and node.owner != get_scene()
            if not is_instanced_subscene_child:
                node.omni_range *= 2.0

# This function is recursive: it calls itself to get lower levels of child nodes as needed.
# `children_acc` is the accumulator parameter that allows this function to work.
# It should be left to its default value when you call this function directly.
func get_all_children(in_node, children_acc = []):
    children_acc.push_back(in_node)
    for child in in_node.get_children():
        children_acc = get_all_children(child, children_acc)

    return children_acc
Совет
You can change the currently edited scene at the top of the editor even while the Script view is open. This will affect the return value of EditorScript.get_scene, so make sure you've selected the scene you intend to iterate upon before running the script.
Инстанцирование сцен
Вы можете создавать упакованные сцены обычным образом и добавлять их к сцене, открытой в данный момент в редакторе. По умолчанию узлы или сцены, добавленные с помощью Node.add_child(node), не видны в доке дерева сцены и не сохраняются на диск. Если вы хотите, чтобы узел или сцена были видны в доке дерева сцены и сохранялись на диск при сохранении сцены, вам нужно установить свойство дочернего узла owner на редактируемый корень сцены.
If you are using @tool:
func _ready():
    var node = Node3D.new()
    add_child(node) # Parent could be any node in the scene

    # The line below is required to make the node visible in the Scene tree dock
    # and persist changes made by the tool script to the saved scene file.
    node.owner = get_tree().edited_scene_root
public override void _Ready()
{
    var node = new Node3D();
    AddChild(node); // Parent could be any node in the scene

    // The line below is required to make the node visible in the Scene tree dock
    // and persist changes made by the tool script to the saved scene file.
    node.Owner = GetTree().EditedSceneRoot;
}
Если вы используете EditorScript:
func _run():
    # `parent` could be any node in the scene.
    var parent = get_scene().get_node("Parent")
    var node = Node3D.new()
    parent.add_child(node)

    # The line below is required to make the node visible in the Scene tree dock
    # and persist changes made by the tool script to the saved scene file.
    node.owner = get_scene()
public override void _Run()
{
    // `parent` could be any node in the scene.
    var parent = GetScene().GetNode("Parent");
    var node = new Node3D();
    parent.AddChild(node);

    // The line below is required to make the node visible in the Scene tree dock
    // and persist changes made by the tool script to the saved scene file.
    node.Owner = GetScene();
}
Предупреждение
Using @tool improperly can yield many errors. It is advised to first
write the code how you want it, and only then add the @tool annotation to
the top. Also, make sure to separate code that runs in-editor from code that
runs in-game. This way, you can find bugs more easily.