Work in progress
The content of this page was not yet updated for Godot
4.2
and may be outdated. If you know how to improve this page or you can confirm
that it's up to date, feel free to open a pull request.
Кодування переміщення гравця
Настав час коду! Ми будемо використовувати дії введення, які створили в останній частині, для переміщення персонажа.
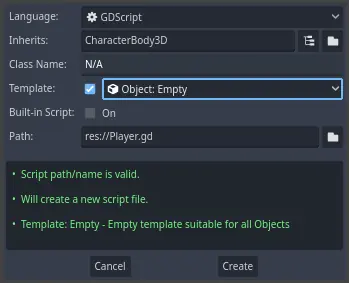
Right-click the Player node and select Attach Script to add a new script to
it. In the popup, set the Template to Empty before pressing the Create
button.
Почнемо з властивостей класу. Ми збираємося визначити швидкість руху, прискорення падіння, що являє собою гравітацію, і швидкість, яку ми будемо використовувати для переміщення персонажа.
extends CharacterBody3D

# How fast the player moves in meters per second.
@export var speed = 14
# The downward acceleration when in the air, in meters per second squared.
@export var fall_acceleration = 75

var target_velocity = Vector3.ZERO
using Godot;

public partial class Player : CharacterBody3D
{
    // Don't forget to rebuild the project so the editor knows about the new export variable.

    // How fast the player moves in meters per second.
    [Export]
    public int Speed { get; set; } = 14;
    // The downward acceleration when in the air, in meters per second squared.
    [Export]
    public int FallAcceleration { get; set; } = 75;

    private Vector3 _targetVelocity = Vector3.Zero;
}
These are common properties for a moving body. The target_velocity is a 3D vector
combining a speed with a direction. Here, we define it as a property because
we want to update and reuse its value across frames.
Примітка
Значення сильно відрізняються від 2D-коду, тому що відстані вимірюються в метрах. У той час як в 2D, тисяча одиниць (пікселів) може відповідати тільки половині ширини вашого екрану, в 3D, це кілометр.
Let's code the movement. We start by calculating the input direction vector
using the global Input object, in _physics_process().
func _physics_process(delta):
    # We create a local variable to store the input direction.
    var direction = Vector3.ZERO

    # We check for each move input and update the direction accordingly.
    if Input.is_action_pressed("move_right"):
        direction.x += 1
    if Input.is_action_pressed("move_left"):
        direction.x -= 1
    if Input.is_action_pressed("move_back"):
        # Notice how we are working with the vector's x and z axes.
        # In 3D, the XZ plane is the ground plane.
        direction.z += 1
    if Input.is_action_pressed("move_forward"):
        direction.z -= 1
public override void _PhysicsProcess(double delta)
{
    // We create a local variable to store the input direction.
    var direction = Vector3.Zero;

    // We check for each move input and update the direction accordingly.
    if (Input.IsActionPressed("move_right"))
    {
        direction.X += 1.0f;
    }
    if (Input.IsActionPressed("move_left"))
    {
        direction.X -= 1.0f;
    }
    if (Input.IsActionPressed("move_back"))
    {
        // Notice how we are working with the vector's X and Z axes.
        // In 3D, the XZ plane is the ground plane.
        direction.Z += 1.0f;
    }
    if (Input.IsActionPressed("move_forward"))
    {
        direction.Z -= 1.0f;
    }
}
Тут ми збираємося зробити всі розрахунки за допомогою віртуальної функції _physics_process(). Функція _process() дозволяє оновлювати вузол кожен кадр, _physics_process() розроблена спеціально для коду, пов'язаного з фізикою, на кшталт переміщення кінематичного або жорсткого тіла.
Дивись також
Щоб дізнатися більше про різницю між _process() та _physics_process() дивіться Idle and Physics Processing.
Починаємо з ініціалізації змінної direction з Vector3.ZERO. Потім ми перевіряємо, чи натискає гравець один, чи кілька, вводів move_*, і відповідно оновлюємо компоненти вектора x та z. Вони відповідають осям площини землі.
Ці чотири умови дають нам вісім можливостей і вісім можливих напрямків.
In case the player presses, say, both W and D simultaneously, the vector will
have a length of about 1.4. But if they press a single key, it will have a
length of 1. We want the vector's length to be consistent, and not move faster diagonally. To do so, we can
call its normalized() method.
#func _physics_process(delta):
    #...

    if direction != Vector3.ZERO:
        direction = direction.normalized()
        $Pivot.look_at(position + direction, Vector3.UP)
public override void _PhysicsProcess(double delta)
{
    // ...

    if (direction != Vector3.Zero)
    {
        direction = direction.Normalized();
        GetNode<Node3D>("Pivot").LookAt(Position + direction, Vector3.Up);
    }
}
Тут ми нормалізуємо вектор тільки в тому випадку, якщо напрямок має довжину більше нуля, а це означає, що гравець натискає дві клавіші напрямку.
In this case, we also get the Pivot node and call its look_at() method.
This method takes a position in space to look at in global coordinates and the
up direction. In this case, we can use the Vector3.UP constant.
Примітка
A node's local coordinates, like position, are relative to their
parent. Global coordinates, like global_position are relative to the world's main axes you can see
in the viewport instead.
In 3D, the property that contains a node's position is position. By
adding the direction to it, we get a position to look at that's one meter
away from the Player.
Then, we update the velocity. We have to calculate the ground velocity and the
fall speed separately. Be sure to go back one tab so the lines are inside the
_physics_process() function but outside the condition we just wrote above.
func _physics_process(delta):
    #...
    if direction != Vector3.ZERO:
        #...

    # Ground Velocity
    target_velocity.x = direction.x * speed
    target_velocity.z = direction.z * speed

    # Vertical Velocity
    if not is_on_floor(): # If in the air, fall towards the floor. Literally gravity
        target_velocity.y = target_velocity.y - (fall_acceleration * delta)

    # Moving the Character
    velocity = target_velocity
    move_and_slide()
public override void _PhysicsProcess(double delta)
{
    // ...
    if (direction != Vector3.Zero)
    {
        // ...
    }

    // Ground velocity
    _targetVelocity.X = direction.X * Speed;
    _targetVelocity.Z = direction.Z * Speed;

    // Vertical velocity
    if (!IsOnFloor()) // If in the air, fall towards the floor. Literally gravity
    {
        _targetVelocity.Y -= FallAcceleration * (float)delta;
    }

    // Moving the character
    Velocity = _targetVelocity;
    MoveAndSlide();
}
The CharacterBody3D.is_on_floor() function returns true if the body collided with the floor in this frame. That's why
we apply gravity to the Player only while it is in the air.
For the vertical velocity, we subtract the fall acceleration multiplied by the delta time every frame. This line of code will cause our character to fall in every frame, as long as it is not on or colliding with the floor.
Фізичний рушій може виявляти взаємодії зі стінами, підлогою або іншими тілами під час заданого кадру тільки в тому випадку, якщо відбуваються рухи і зіткнення. Ми скористаємося цією властивістю пізніше, щоб закодувати стрибок.
В останньому рядку ми викликаємо CharacterBody3D.move_and_slide(), який є потужним методом класу CharacterBody3D, що дозволяє плавно переміщувати персонажа. Якщо він вдаряється об стіну посеред руху, рушій спробує згладити це для вас. Для цього використовується значення velocity, що належить класу CharacterBody3D
І це весь код, який вам потрібен для переміщення персонажа по підлозі.
Ось повний код Player.gd для перевірки.
extends CharacterBody3D

# How fast the player moves in meters per second.
@export var speed = 14
# The downward acceleration when in the air, in meters per second squared.
@export var fall_acceleration = 75

var target_velocity = Vector3.ZERO


func _physics_process(delta):
    var direction = Vector3.ZERO

    if Input.is_action_pressed("move_right"):
        direction.x += 1
    if Input.is_action_pressed("move_left"):
        direction.x -= 1
    if Input.is_action_pressed("move_back"):
        direction.z += 1
    if Input.is_action_pressed("move_forward"):
        direction.z -= 1

    if direction != Vector3.ZERO:
        direction = direction.normalized()
        $Pivot.look_at(position + direction, Vector3.UP)

    # Ground Velocity
    target_velocity.x = direction.x * speed
    target_velocity.z = direction.z * speed

    # Vertical Velocity
    if not is_on_floor(): # If in the air, fall towards the floor. Literally gravity
        target_velocity.y = target_velocity.y - (fall_acceleration * delta)

    # Moving the Character
    velocity = target_velocity
    move_and_slide()
using Godot;

public partial class Player : CharacterBody3D
{
    // How fast the player moves in meters per second.
    [Export]
    public int Speed { get; set; } = 14;
    // The downward acceleration when in the air, in meters per second squared.
    [Export]
    public int FallAcceleration { get; set; } = 75;

    private Vector3 _targetVelocity = Vector3.Zero;

    public override void _PhysicsProcess(double delta)
    {
        var direction = Vector3.Zero;

        if (Input.IsActionPressed("move_right"))
        {
            direction.X += 1.0f;
        }
        if (Input.IsActionPressed("move_left"))
        {
            direction.X -= 1.0f;
        }
        if (Input.IsActionPressed("move_back"))
        {
            direction.Z += 1.0f;
        }
        if (Input.IsActionPressed("move_forward"))
        {
            direction.Z -= 1.0f;
        }

        if (direction != Vector3.Zero)
        {
            direction = direction.Normalized();
            GetNode<Node3D>("Pivot").LookAt(Position + direction, Vector3.Up);
        }

        // Ground velocity
        _targetVelocity.X = direction.X * Speed;
        _targetVelocity.Z = direction.Z * Speed;

        // Vertical velocity
        if (!IsOnFloor()) // If in the air, fall towards the floor. Literally gravity
        {
            _targetVelocity.Y -= FallAcceleration * (float)delta;
        }

        // Moving the character
        Velocity = _targetVelocity;
        MoveAndSlide();
    }
}
Тестування руху нашого гравця
We're going to put our player in the Main scene to test it. To do so, we need
to instantiate the player and then add a camera. Unlike in 2D, in 3D, you won't
see anything if your viewport doesn't have a camera pointing at something.
Save your Player scene and open the Main scene. You can click on the Main
tab at the top of the editor to do so.
If you closed the scene before, head to the FileSystem dock and double-click
main.tscn to re-open it.
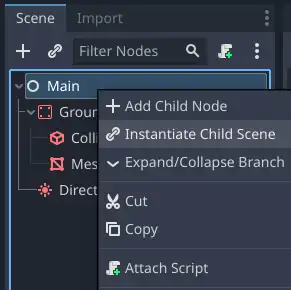
To instantiate the Player, right-click on the Main node and select Instantiate
Child Scene.
In the popup, double-click player.tscn. The character should appear in the
center of the viewport.
Додавання камери
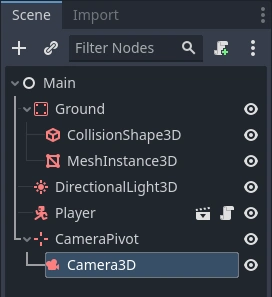
Let's add the camera next. Like we did with our Player's Pivot, we're
going to create a basic rig. Right-click on the Main node again and select
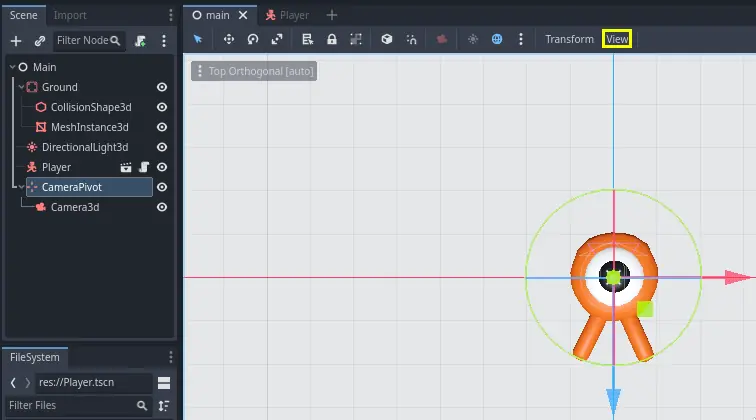
Add Child Node. Create a new Marker3D, and name it CameraPivot. Select CameraPivot and add a child node Camera3D to it. Your scene tree should look like this.
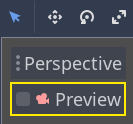
Зверніть увагу на галочку Попередній перегляд, яка відображається у верхньому лівому куті, коли вибрано камеру. Ви можете натиснути її, щоб глянути на гру через камеру.
Ми збираємося використовувати Pivot для повороту камери, ніби вона крані. Давайте спочатку розділимо 3D-вигляд, щоб мати можливість вільно переміщатися по сцені і бачити, що бачить камера.
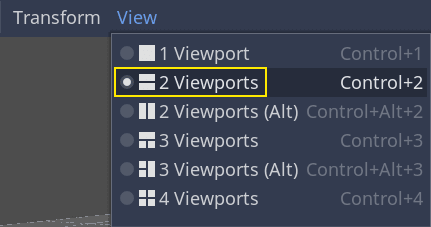
На панелі інструментів прямо над вікном перегляду, натисніть на Перегляд, а потім 2 Панелі перегляду. Ви також можете натиснути Ctrl + 2 (Cmd + 2 на macOS).
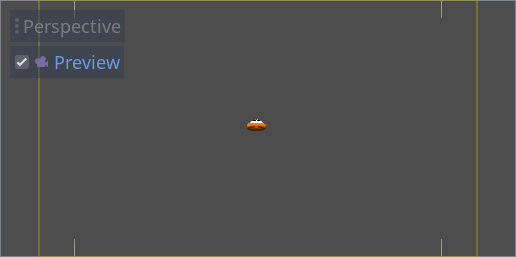
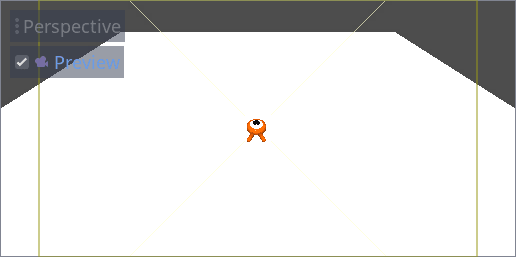
On the bottom view, select your Camera3D and turn on camera Preview by clicking the checkbox.
Зображення
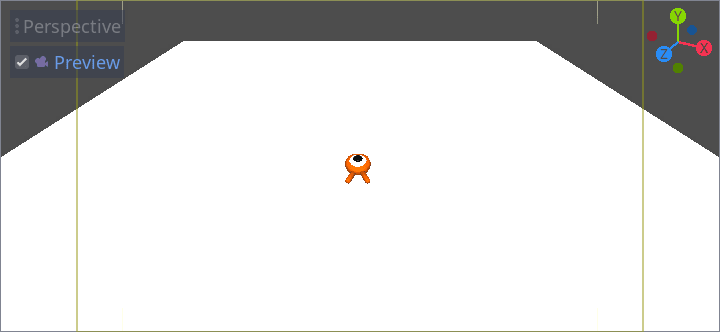
У верхньому вікні перемістіть камеру на 19 одиниць по осі Z (синій).
Here's where the magic happens. Select the CameraPivot and rotate it -45
degrees around the X axis (using the red circle). You'll see the camera move as
if it was attached to a crane.
Ви можете запустити сцену, натиснувши F6 та скористатися клавішами зі стрілками для переміщення персонажа.
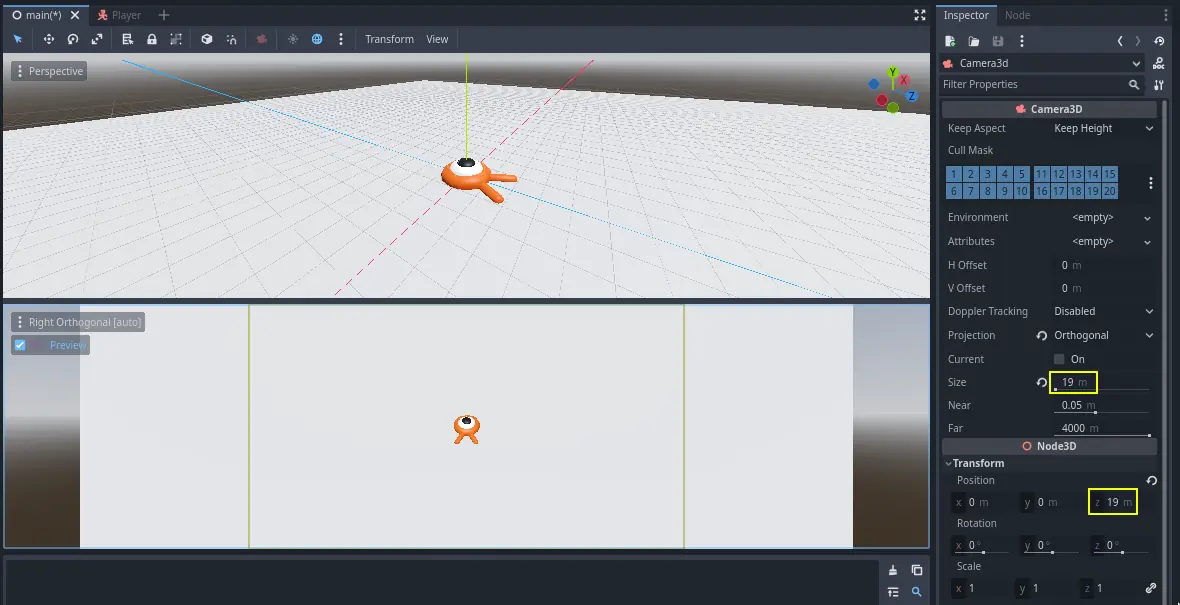
Ми можемо бачити деякий порожній простір навколо персонажа завдяки перспективній проекції. У цій грі ми збираємося використовувати ортографічну проекцію, щоб краще обрамити ігрову зону та полегшити гравцеві читання відстаней.
Знову виберіть камеру і в Інспекторі встановіть для Projection значення Orthogonal і Size на 19. Персонаж тепер повинен виглядати плоскішим, а земля повинна заповнити фон.
Примітка
When using an orthogonal camera in Godot 4, directional shadow quality is dependent on the camera's Far value. The higher the Far value, the further away the camera will be able to see. However, higher Far values also decrease shadow quality as the shadow rendering has to cover a greater distance.
If directional shadows look too blurry after switching to an orthogonal
camera, decrease the camera's Far property to a lower value such as
100. Don't decrease this Far property too much, or objects in the
distance will start disappearing.
Test your scene and you should be able to move in all 8 directions and not glitch through the floor!
Ultimately, we have both player movement and the view in place. Next, we will work on the monsters.