Up to date
This page is up to date for Godot 4.2.
If you still find outdated information, please open an issue.
Singletons (Autoload)
Вступ
Система сцен Godot, хоча потужна і гнучка, має недолік: не існує способу зберігання інформації (наприклад, рахунок гравця, або інвентар), яка потрібна більше ніж одній сцені.
Можна вирішити це деякими обхідними шляхами, але вони мають свої обмеження:
Ви можете використовувати "майстер-сцену", яка завантажує та вивантажує інші сцени в вигляді своїх нащадків. Однак це означає, що ви більше не можете запускати ці сцени окремо і очікувати від них правильної роботи.
Інформація може бути збережена на диску в
user://, а потім завантажена сценами, які цього потребують, але часте збереження та завантаження даних є громіздкими і може бути повільним.
Шаблон Singleton є корисним інструментом для вирішення загального випадку, коли вам потрібно зберігати постійну інформацію між сценами. У нашому випадку можливо повторне використання однієї і тієї ж сцени, або класу, для декількох синглтонів, якщо вони мають різні назви.
Використовуючи цю концепцію, ви можете створювати об'єкти, які:
Завжди завантажуються, незалежно від того, яка сцена працює в даний момент.
Можуть зберігати глобальні змінні, наприклад інформацію про гравця.
Можуть працювати з переключенням сцен і переходами між сценами.
Діють як синглтон, оскільки архітектура GDScript не дозволяє підтримувати глобальні змінні.
Автозавантаження вузлів та скриптів може дати нам ці характеристики.
Примітка
Godot won't make an Autoload a "true" singleton as per the singleton design pattern. It may still be instanced more than once by the user if desired.
Порада
If you're creating an autoload as part of an editor plugin, consider registering it automatically in the Project Settings when the plugin is enabled.
Autoload
You can create an Autoload to load a scene or a script that inherits from Node.
Примітка
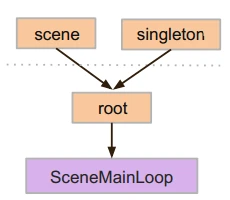
При автозавантеженні скрипту буде створений Node і цей скрипт буде прикріплений до нього. Цей вузол буде доданий до кореневого вікна перегляду перед завантаженням будь-яких інших сцен.
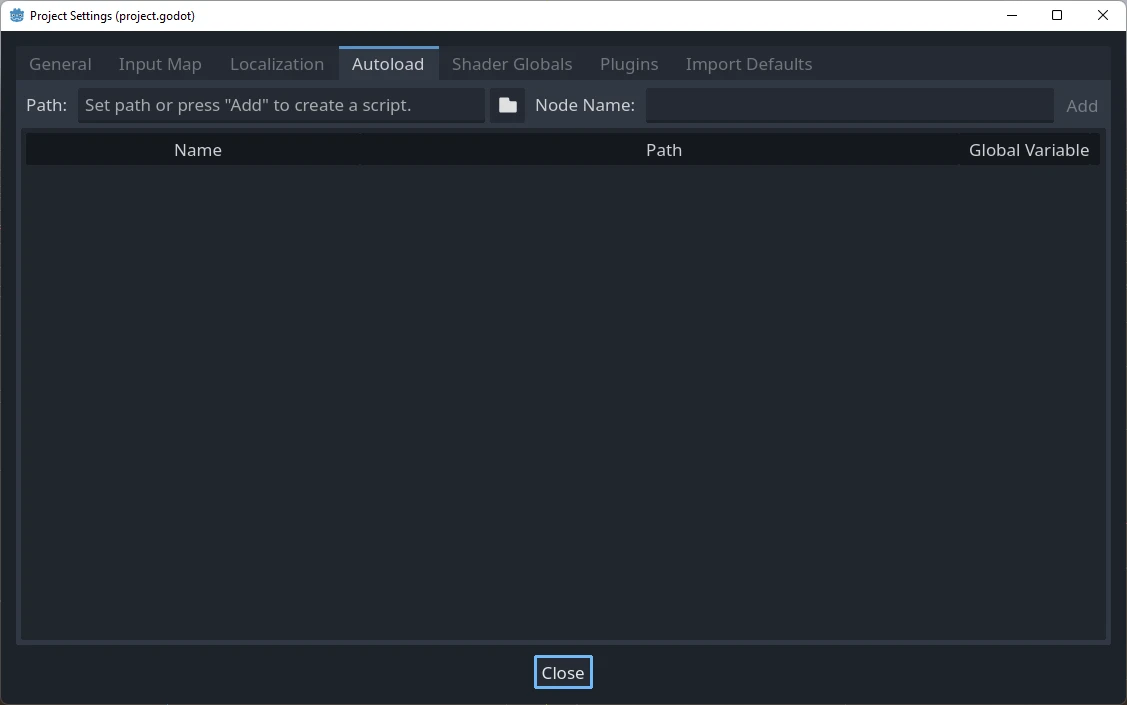
To autoload a scene or script, select Project > Project Settings from the menu and switch to the Autoload tab.
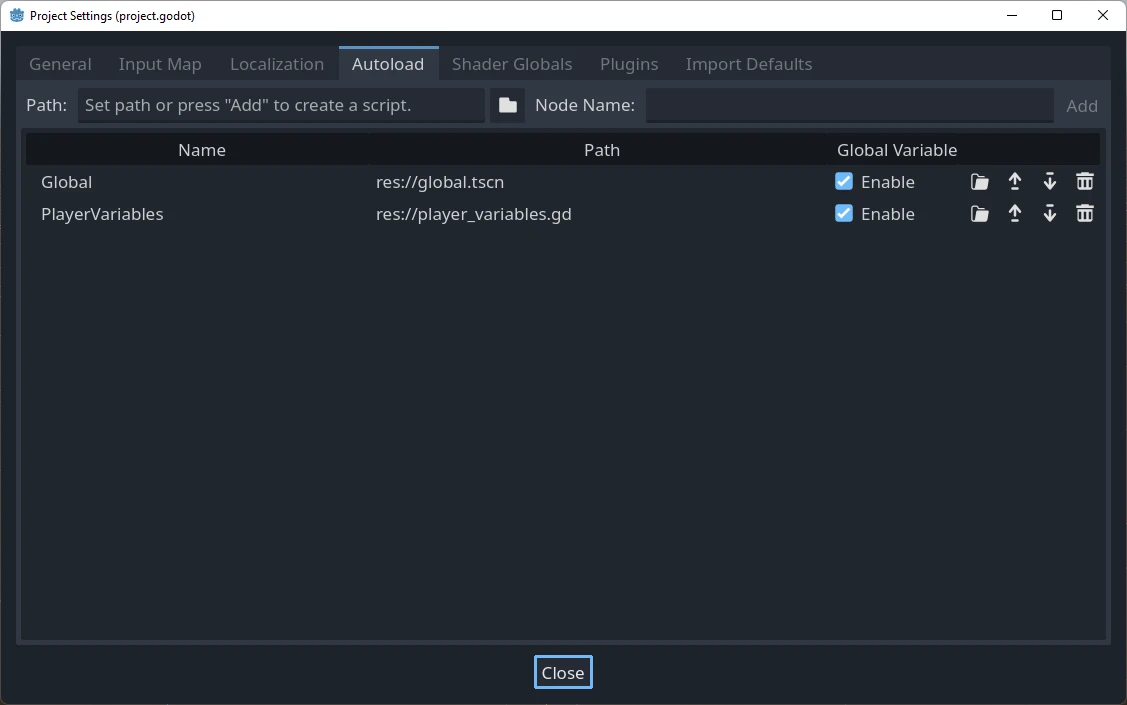
Here you can add any number of scenes or scripts. Each entry in the list
requires a name, which is assigned as the node's name property. The order of
the entries as they are added to the global scene tree can be manipulated using
the up/down arrow keys. Like regular scenes, the engine will read these nodes
in top-to-bottom order.
Це означає, що будь-який вузол може отримати доступ до синглтону по імені "PlayerVariables" за допомогою:
var player_vars = get_node("/root/PlayerVariables")
player_vars.health -= 10
var playerVariables = GetNode<PlayerVariables>("/root/PlayerVariables");
playerVariables.Health -= 10; // Instance field.
If the Enable column is checked (which is the default), then the singleton can
be accessed directly in GDScript, without requiring get_node():
PlayerVariables.health -= 10
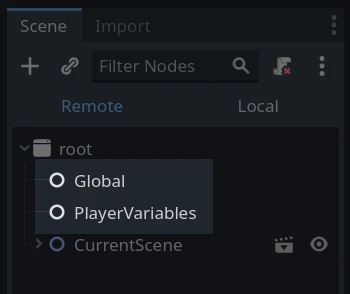
Зауважте, що до об'єктів автозавантаження (скриптів та/або сцени) доступ такий же, як і до будь-яких інших вузлів у дереві сцен. Насправді, якщо ви подивитесь на дерево запущеної сцени, ви побачите, що автоматично з'являються і завантажені вузли:
Попередження
Autoloads must not be removed using free() or queue_free() at
runtime, or the engine will crash.
Користувацький перемикач сцени
This tutorial will demonstrate building a scene switcher using autoloads. For basic scene switching, you can use the SceneTree.change_scene_to_file() method (see Використання Дерева сцени for details). However, if you need more complex behavior when changing scenes, this method provides more functionality.
To begin, download the template from here: singleton_autoload_starter.zip and open it in Godot.
The project contains two scenes: scene_1.tscn and scene_2.tscn. Each
scene contains a label displaying the scene name and a button with its
pressed() signal connected. When you run the project, it starts in
scene_1.tscn. However, pressing the button does nothing.
Creating the script
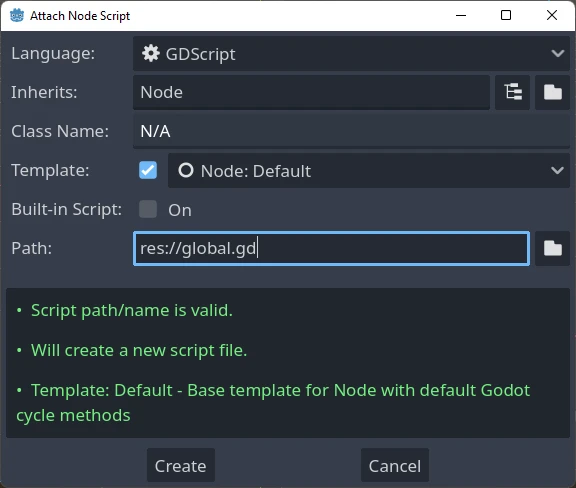
Open the Script window and create a new script called global.gd.
Make sure it inherits from Node:
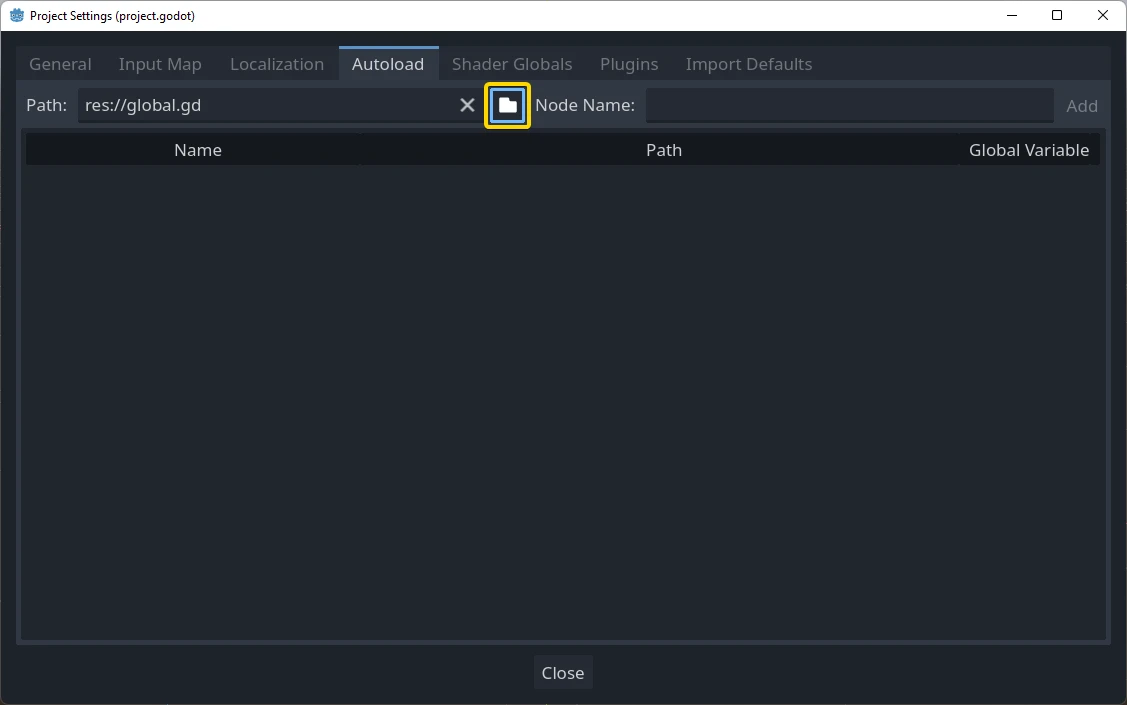
The next step is to add this script to the autoLoad list. Open
Project > Project Settings from the menu, switch to the Autoload tab and
select the script by clicking the browse button or typing its path:
res://global.gd. Press Add to add it to the autoload list:
Тепер, при запуску будь-якої сцени проєкту, цей скрипт завжди буде завантажений.
Returning to the script, it needs to fetch the current scene in the
_ready() function. Both the current scene (the one with the button) and
global.gd are children of root, but autoloaded nodes are always first. This
means that the last child of root is always the loaded scene.
extends Node

var current_scene = null

func _ready():
    var root = get_tree().root
    current_scene = root.get_child(root.get_child_count() - 1)
using Godot;

public partial class Global : Node
{
    public Node CurrentScene { get; set; }

    public override void _Ready()
    {
        Viewport root = GetTree().Root;
        CurrentScene = root.GetChild(root.GetChildCount() - 1);
    }
}
Тепер нам потрібна функція для зміни сцени. Ця функція повинна звільнити поточну сцену та замінити її на запитувану.
func goto_scene(path):
    # This function will usually be called from a signal callback,
    # or some other function in the current scene.
    # Deleting the current scene at this point is
    # a bad idea, because it may still be executing code.
    # This will result in a crash or unexpected behavior.

    # The solution is to defer the load to a later time, when
    # we can be sure that no code from the current scene is running:

    call_deferred("_deferred_goto_scene", path)


func _deferred_goto_scene(path):
    # It is now safe to remove the current scene.
    current_scene.free()

    # Load the new scene.
    var s = ResourceLoader.load(path)

    # Instance the new scene.
    current_scene = s.instantiate()

    # Add it to the active scene, as child of root.
    get_tree().root.add_child(current_scene)

    # Optionally, to make it compatible with the SceneTree.change_scene_to_file() API.
    get_tree().current_scene = current_scene
public void GotoScene(string path)
{
    // This function will usually be called from a signal callback,
    // or some other function from the current scene.
    // Deleting the current scene at this point is
    // a bad idea, because it may still be executing code.
    // This will result in a crash or unexpected behavior.

    // The solution is to defer the load to a later time, when
    // we can be sure that no code from the current scene is running:

    CallDeferred(MethodName.DeferredGotoScene, path);
}

public void DeferredGotoScene(string path)
{
    // It is now safe to remove the current scene.
    CurrentScene.Free();

    // Load a new scene.
    var nextScene = GD.Load<PackedScene>(path);

    // Instance the new scene.
    CurrentScene = nextScene.Instantiate();

    // Add it to the active scene, as child of root.
    GetTree().Root.AddChild(CurrentScene);

    // Optionally, to make it compatible with the SceneTree.change_scene_to_file() API.
    GetTree().CurrentScene = CurrentScene;
}
Використовуючи Object.call_deferred (), друга функція запуститься лише після завершення всього коду з поточної сцени. Таким чином, поточна сцена не буде видалена під час її використання (тобто її код все ще працює).
Нарешті, нам потрібно заповнити порожні функції зворотного виклику в обох сценах:
# Add to 'scene_1.gd'.

func _on_button_pressed():
    Global.goto_scene("res://scene_2.tscn")
// Add to 'Scene1.cs'.

private void OnButtonPressed()
{
    var global = GetNode<Global>("/root/Global");
    global.GotoScene("res://Scene2.tscn");
}
і
# Add to 'scene_2.gd'.

func _on_button_pressed():
    Global.goto_scene("res://scene_1.tscn")
// Add to 'Scene2.cs'.

private void OnButtonPressed()
{
    var global = GetNode<Global>("/root/Global");
    global.GotoScene("res://Scene1.tscn");
}
Запустіть проєкт і перевірте, чи можете ви перемикатися між сценами при натисканні кнопки.
Примітка
Примітка: Коли сцен мало, перехід відбувається миттєво. Однак якщо ваші сцени складніші, для їх появи може знадобитися значна кількість часу. Щоб дізнатися, як впоратися з цим, дивіться наступний урок: Тло завантаження.
Як варіант, якщо час завантаження відносно короткий (менше 3 секунд, або близько того), ви можете відобразити "талицю завантаження", показавши якийсь 2D-елемент безпосередньо перед зміною сцени. Потім ви можете приховати її відразу після зміни сцени. Це може бути використано, щоб вказати гравцеві, що сцена завантажується.