Work in progress
The content of this page was not yet updated for Godot
4.2
and may be outdated. If you know how to improve this page or you can confirm
that it's up to date, feel free to open a pull request.
Поява монстрів
У цій частині ми збираємося випадковим чином створювати монстрів уздовж шляху. Зрештою, у вас будуть монстри, що бродять по ігровій дошці.
Double-click on main.tscn in the FileSystem dock to open the Main scene.
Before drawing the path, we're going to change the game resolution. Our game has
a default window size of 1152x648. We're going to set it to 720x540, a
nice little box.
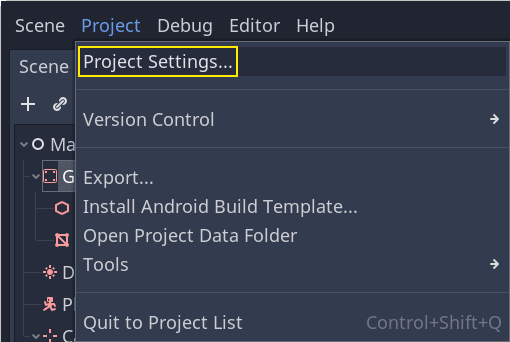
Перейдіть до Проект -> Параметри проекту.
В лівому меню перейдіть до Display -> Window. Праворуч встановіть для Width 720 і для Height 540.

Створення шляху на якому з'являтимуться монстри
Like you did in the 2D game tutorial, you're going to design a path and use a PathFollow3D node to sample random locations on it.
У 3D, однак, це трохи складніше. Ми хочемо, щоб він був навколо виду гри, щоб монстри з'являлися прямо за екраном. Але якщо ми намалюємо шлях, ми не побачимо його з попереднього перегляду камери.
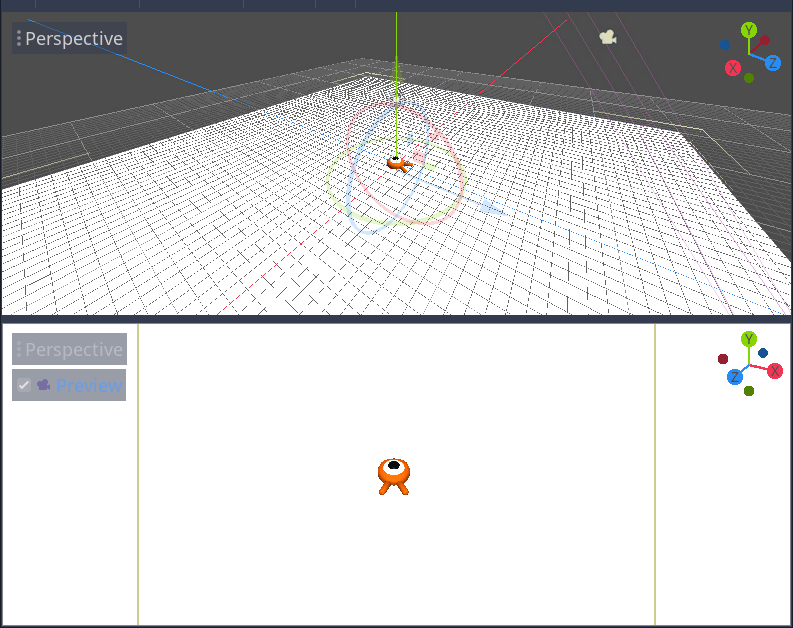
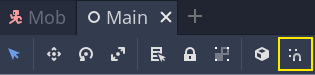
To find the view's limits, we can use some placeholder meshes. Your viewport should still be split into two parts, with the camera preview at the bottom. If that isn't the case, press Ctrl + 2 (Cmd + 2 on macOS) to split the view into two. Select the Camera3D node and click the Preview checkbox in the bottom viewport.
Додавання циліндрів-орієнтирів
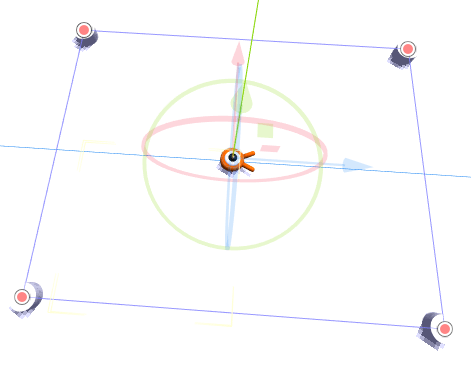
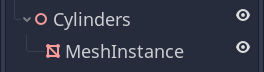
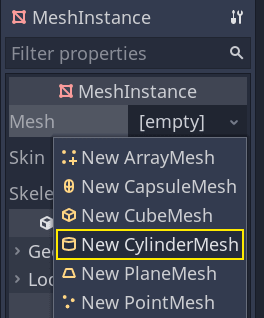
Додамо сіті-заповнювачі. Додайте новий Node3D як дочірню вершину Main і назвіть її Cylinders. Ми будемо використовувати його для групування циліндрів. Виділіть Cylinders і додайте дочірній вузол MeshInstance3D
В Інспекторі властивості Mesh призначте CylinderMesh.
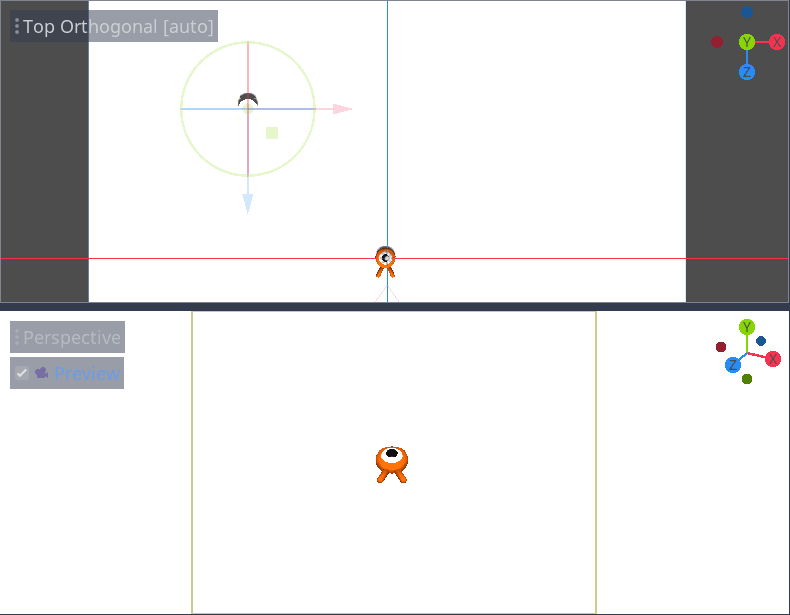
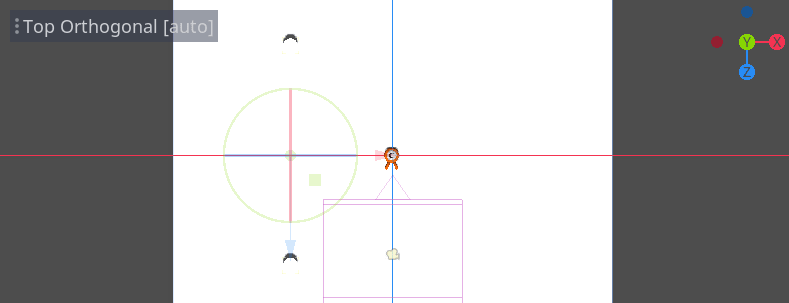
Оберіть вигляд згори верхній ортогональний використовуючи меню вікна перегляду в лівому верхньому кутку, або скориставшись клавішею 7 цифрової клавіатури.
Зображення
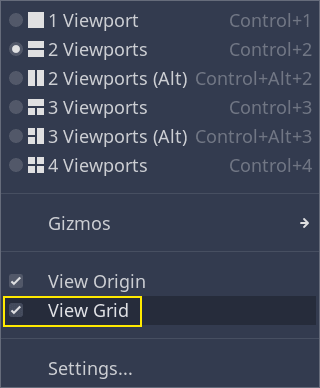
The grid may be distracting. You can toggle it by going to the View menu in the toolbar and clicking View Grid.
Тепер вам треба перемістити циліндр вздовж наземної площини, дивлячись на попередній перегляд камери в нижньому вікні перегляду. Я рекомендую робити це використовуючи прив'язку до ґратки. Ви можете перемикати прив'язку, клацаючи значок магніту на панелі інструментів, або натискаючи Y.
Move the cylinder so it's right outside the camera's view in the top-left corner.
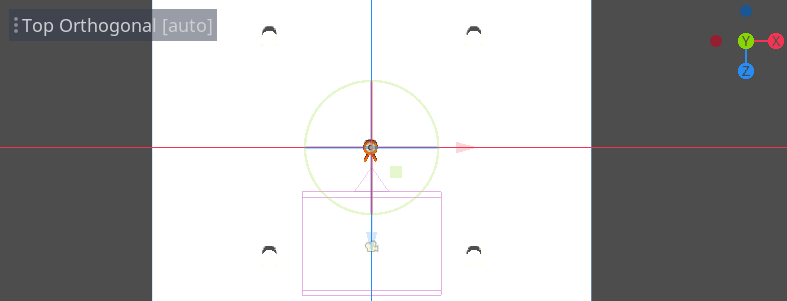
Ми збираємося створити копії меша і розмістити їх навколо ігрової зони. Натисніть Ctrl + D (Cmd + D на macOS), щоб дублювати вузол. Також можна клацнути правою кнопкою миші вузол на панелі Сцена та вибрати пункт Дублювати. Переміщуйте копію вниз по синій осі Z, доки вона не вийде за межі попереднього перегляду камери.
Виберіть обидва циліндри, натиснувши клавішу Shift і клацнувши по невибраному, і дублюйте їх.
Перемістіть їх праворуч по червоній осі X.
Білі циліндри трохи важко розгледіти, чи не так? Давайте виділимо їх, надавши їм новий матеріал.
У 3D матеріали визначають візуальні властивості поверхні, такі як її колір, те, як вона відбиває світло, тощо. Ми можемо використовувати їх для зміни кольору меша.
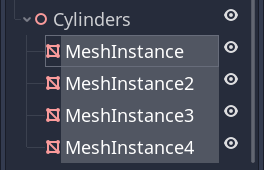
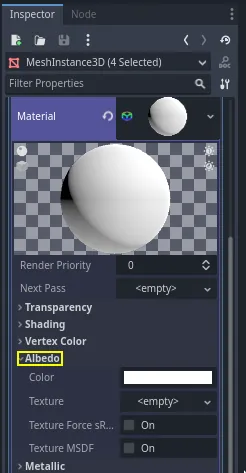
Ми можемо оновити всі чотири циліндри одночасно. Виберіть усі екземпляри меша на панелі Сцена. Для цього можна обрати перший і затиснувши Shift клацнути по останньому.
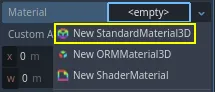
In the Inspector, expand the Material section and assign a StandardMaterial3D to slot 0.
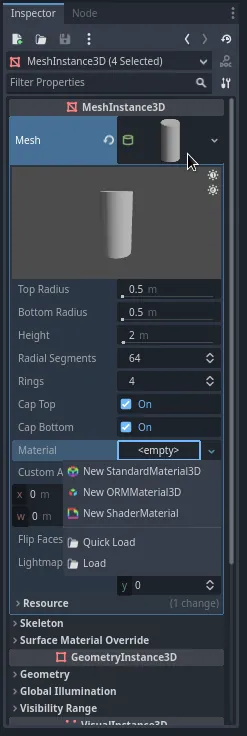
Клацніть піктограму сфери, щоб відкрити ресурс матеріалу. Ви отримуєте попередній перегляд матеріалу та довгий список розділів, заповнених властивостями. Ви можете використовувати їх для створення всіляких поверхонь, від металу до каміння, чи води.
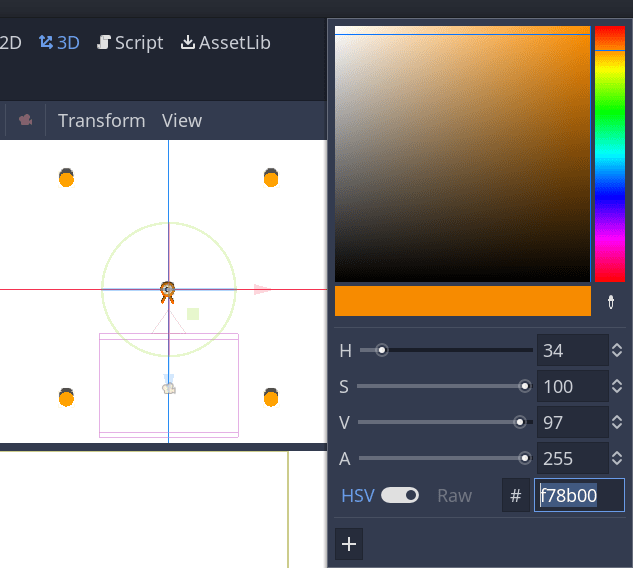
Expand the Albedo section.
Set the color to something that contrasts with the background, like a bright orange.
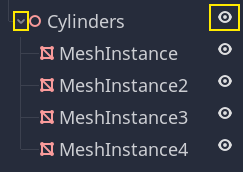
Тепер ми можемо використовувати циліндри в якості орієнтирів. Згорніть їх на панелі Сцена натиснувши сіру стрілку поруч з ними. Надалі, ви також можете перемикати їх видимість, клацнувши значок ока поруч із Cylinders.
Add a child node Path3D to Main node. In the toolbar, four icons appear. Click
the Add Point tool, the icon with the green "+" sign.

Примітка
Ви можете навести курсор на будь-яку піктограму, щоб побачити підказку з описом інструмента.
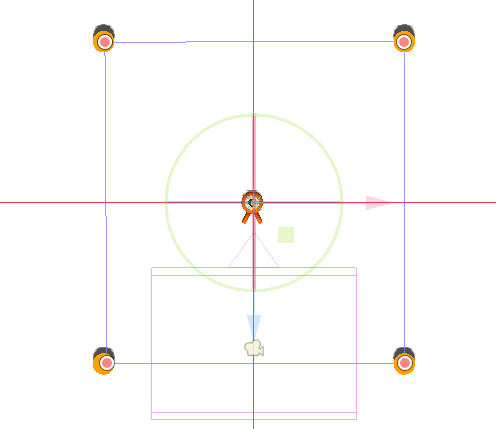
Клацніть по центру кожного циліндра, щоб створити точку. Потім клацніть піктограму Закрити криву на панелі інструментів, щоб закрити контур. Якщо якась точка трохи за межами, можете натиснути на неї і перетягнути, щоб змінити розташування.

Ваш шлях повинен виглядати так.
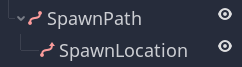
To sample random positions on it, we need a PathFollow3D node. Add a
PathFollow3D as a child of the Path3D. Rename the two nodes to SpawnPath and
SpawnLocation, respectively. It's more descriptive of what we'll use them for.
З усім цим ми готові кодувати механізм появи монстрів.
Поява монстрів
Right-click on the Main node and attach a new script to it.
We first export a variable to the Inspector so that we can assign mob.tscn
or any other monster to it.
extends Node

@export var mob_scene: PackedScene
using Godot;

public partial class Main : Node
{
    // Don't forget to rebuild the project so the editor knows about the new export variable.

    [Export]
    public PackedScene MobScene { get; set; }
}
Ми хочемо, щоб моби народжувалися через певні проміжки часу. Для цього нам потрібно повернутися на сцену і додати таймер. Але перед цим нам потрібно присвоїти файл mob.tscn властивості mob_scene вище (інакше вона буде нульовою!)
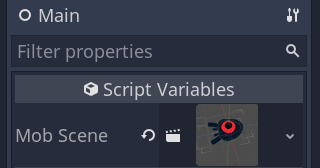
Head back to the 3D screen and select the Main node. Drag mob.tscn from
the FileSystem dock to the Mob Scene slot in the Inspector.
Add a new Timer node as a child of Main. Name it MobTimer.

У Інспекторі встановіть час очікування Wait Time на 0.5 секунди та увімкніть автозапуск Autostart, щоб таймер автоматично запускався разом із грою.

Таймери випромінюють сигнал timeout кожного разу, коли вони досягають кінця свого часу очікування Wait Time. За замовчуванням вони перезавантажуються автоматично, випромінюючи сигнал в циклі. Ми можемо підключатися до цього сигналу від головного вузла Main, щоб налаштувати появу монстрів кожні 0.5 секунди.
With the MobTimer still selected, head to the Node dock on the right, and
double-click the timeout signal.
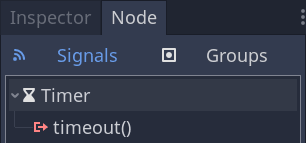
Підключіть його до головного вузла Main.
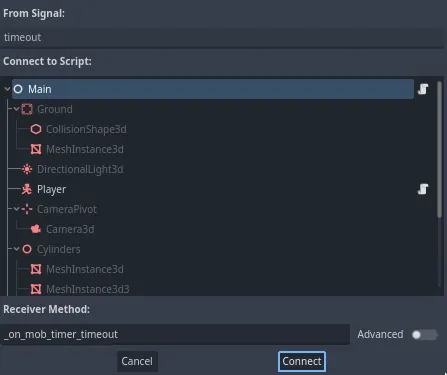
This will take you back to the script, with a new empty
_on_mob_timer_timeout() function.
Давайте кодувати логіку появи монстрів. Ми збираємося:
Вставити екземпляр (інстансувати) сцени монстра.
Отримати випадкове положення на шляху появи.
Отримати позицію гравця.
Викликати метод монстра
initialize(), передаючи йому випадкову позицію і позицію гравця.Додати монстра в якості нащадка головного вузла Main.
func _on_mob_timer_timeout():
    # Create a new instance of the Mob scene.
    var mob = mob_scene.instantiate()

    # Choose a random location on the SpawnPath.
    # We store the reference to the SpawnLocation node.
    var mob_spawn_location = get_node("SpawnPath/SpawnLocation")
    # And give it a random offset.
    mob_spawn_location.progress_ratio = randf()

    var player_position = $Player.position
    mob.initialize(mob_spawn_location.position, player_position)

    # Spawn the mob by adding it to the Main scene.
    add_child(mob)
// We also specified this function name in PascalCase in the editor's connection window
private void OnMobTimerTimeout()
{
    // Create a new instance of the Mob scene.
    Mob mob = MobScene.Instantiate<Mob>();

    // Choose a random location on the SpawnPath.
    // We store the reference to the SpawnLocation node.
    var mobSpawnLocation = GetNode<PathFollow3D>("SpawnPath/SpawnLocation");
    // And give it a random offset.
    mobSpawnLocation.ProgressRatio = GD.Randf();

    Vector3 playerPosition = GetNode<Player>("Player").Position;
    mob.Initialize(mobSpawnLocation.Position, playerPosition);

    // Spawn the mob by adding it to the Main scene.
    AddChild(mob);
}
Above, randf() produces a random value between 0 and 1, which is
what the PathFollow node's progress_ratio expects:
0 is the start of the path, 1 is the end of the path.
The path we have set is around the camera's viewport, so any random value between 0 and 1
is a random position alongside the edges of the viewport!
Here is the complete main.gd script so far, for reference.
extends Node

@export var mob_scene: PackedScene


func _on_mob_timer_timeout():
    # Create a new instance of the Mob scene.
    var mob = mob_scene.instantiate()

    # Choose a random location on the SpawnPath.
    # We store the reference to the SpawnLocation node.
    var mob_spawn_location = get_node("SpawnPath/SpawnLocation")
    # And give it a random offset.
    mob_spawn_location.progress_ratio = randf()

    var player_position = $Player.position
    mob.initialize(mob_spawn_location.position, player_position)

    # Spawn the mob by adding it to the Main scene.
    add_child(mob)
using Godot;

public partial class Main : Node
{
    [Export]
    public PackedScene MobScene { get; set; }

    private void OnMobTimerTimeout()
    {
        // Create a new instance of the Mob scene.
        Mob mob = MobScene.Instantiate<Mob>();

        // Choose a random location on the SpawnPath.
        // We store the reference to the SpawnLocation node.
        var mobSpawnLocation = GetNode<PathFollow3D>("SpawnPath/SpawnLocation");
        // And give it a random offset.
        mobSpawnLocation.ProgressRatio = GD.Randf();

        Vector3 playerPosition = GetNode<Player>("Player").Position;
        mob.Initialize(mobSpawnLocation.Position, playerPosition);

        // Spawn the mob by adding it to the Main scene.
        AddChild(mob);
    }
}
Ви можете перевірити сцену, натиснувши F6. Ви повинні побачити як монстри появляються і рухатися по прямій лінії.
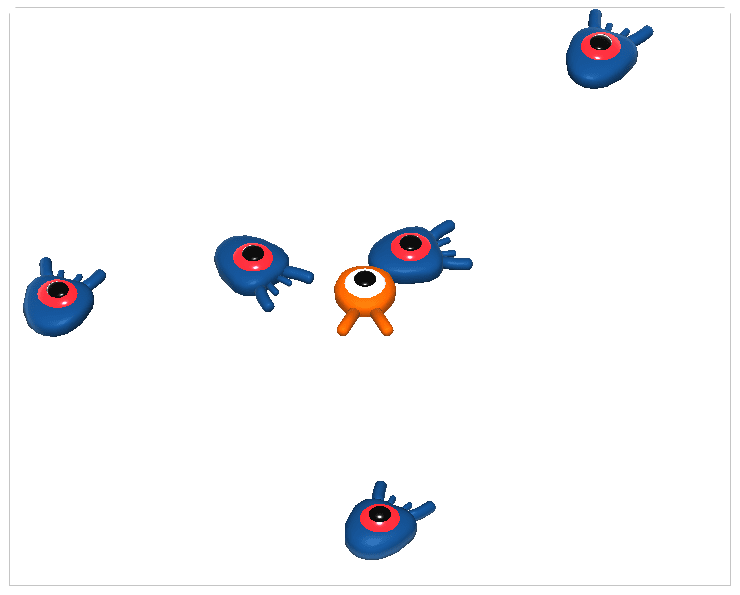
На даний момент вони стикаються і штурхаються між собою, коли їх шляхи перетинаються. Ми розглянемо це в наступній частині.