Work in progress
The content of this page was not yet updated for Godot
4.2
and may be outdated. If you know how to improve this page or you can confirm
that it's up to date, feel free to open a pull request.
Прототипування рівнів з CSG
CSG stands for Constructive Solid Geometry, and is a tool to combine basic shapes or custom meshes to create more complex shapes. In 3D modeling software, CSG is mostly known as "Boolean Operators".
Level prototyping is one of the main uses of CSG in Godot. This technique allows users to create the most common shapes by combining primitives. Interior environments can be created by using inverted primitives.
Примітка
The CSG nodes in Godot are mainly intended for prototyping. There is no built-in support for UV mapping or editing 3D polygons (though extruded 2D polygons can be used with the CSGPolygon3D node).
Якщо ви шукаєте простий у використанні інструмент дизайну рівня для проекту, ви можете використовувати Qodot замість CSG. Він дозволяє розробляти рівні за допомогою TrenchBroom і імпортувати їх в Godot.
Дивись також
You can check how to use CSG nodes to build various shapes (such as stairs or roads) using the Constructive Solid Geometry demo project.
Загальні відомості про вузли CSG
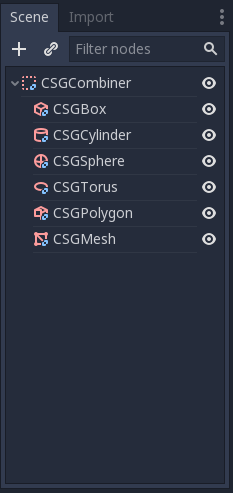
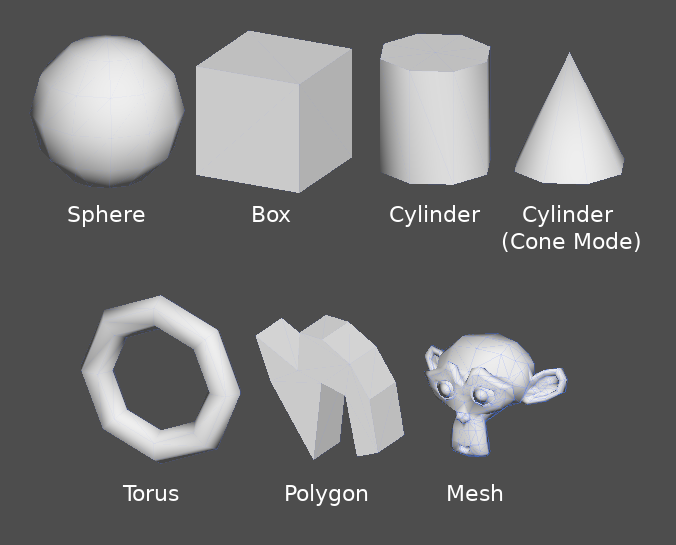
Як і інші особливості Godot, CSG підтримується у вигляді вузлів. Це вузли CSG:
CSGCylinder3D (also supports cone)
Функції інструментів CSG
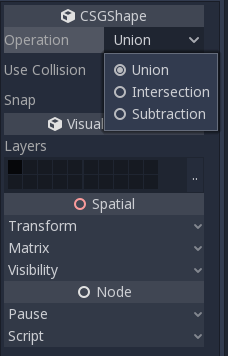
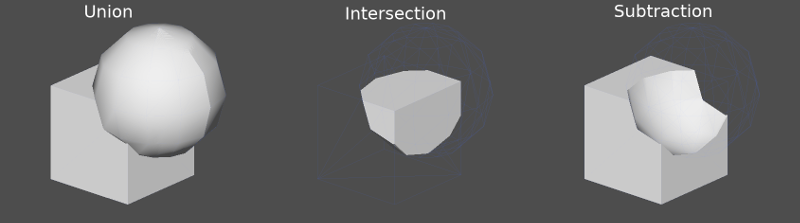
Кожен вузол CSG підтримує 3 види логічних операцій:
Union: (Поєднання) Геометрія двох примітивів поєднується, геометрія, що перетинається, видаляється.
Intersection: (Перетин) Залишається тільки геометрія, що перетинається, решта видаляється.
Subtraction: (Віднімання) Друга фігура віднімається від першої, залишаючи вм'ятину з її формою.
Вузол CSGPolygon
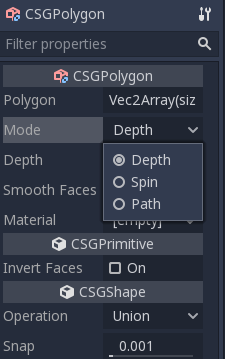
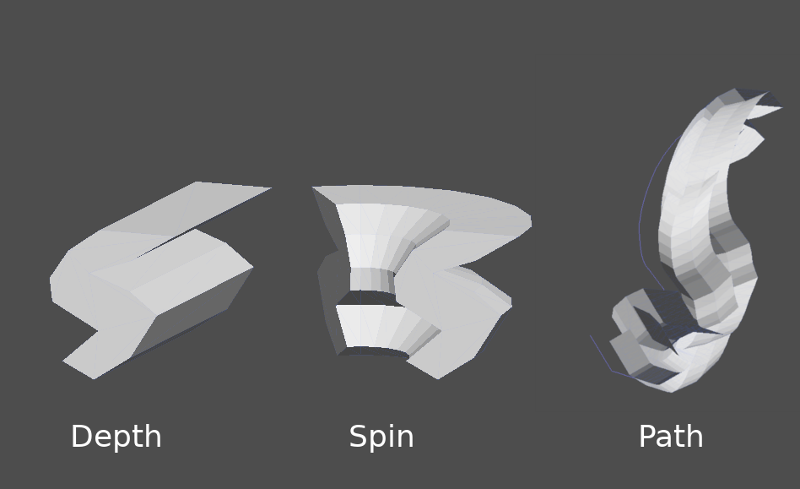
The CSGPolygon3D node extrude along a Polygon drawn in 2D (in X, Y coordinates) in the following ways:
Depth: (Вглиб) Видавити назад на певну відстань.
Spin: (Обертання) Видавити обертаючи навколо свого центру.
Path: Видавити вздовж вузла Path. Цю операцію зазвичай називають лофтингом.
Примітка
The Path mode must be provided with a Path3D node to work. In the Path node, draw the path and the polygon in CSGPolygon3D will extrude along the given path.
Власні меші
Any mesh can be used for CSGMesh3D; the mesh can be modeled in other software and imported into Godot. Multiple materials are supported. There are some restrictions for geometry:
вона повинна бути закрита,
вона не повинна сама себе перетинати,
в неї не має бути внутрішніх граней,
кожне ребро має з'єднуватися тільки з двома гранями.
CSGCombiner3D
The CSGCombiner3D node is an empty shape used for organization. It will only combine children nodes.
Порядок обробки
Every CSG node will first process its children nodes and their operations: union, intersection, or subtraction, in tree order, and apply them to itself one after the other.
Примітка
В інтересах продуктивності переконайтеся, що геометрія CSG залишається відносно простою, оскільки обробка складних мешів може зайняти деякий час. Якщо ви додаєте об'єкти разом (наприклад, об'єкти стола та кімнати), створюйте їх як окремі дерева CSG. Обробка занадто великої кількості об'єктів в одному дереві в кінцевому підсумку почне впливати на продуктивність. Використовуйте бінарні операції тільки там, де вони вам дійсно потрібні.
Прототипування рівня
Ми створимо прототип кімнати для практики використання інструментів CSG.
Порада
Робота в ортогональній проекції дає кращий вигляд на поєднання форм CSG.
Наш рівень буде містити такі об'єкти:
кімнату,
ліжко,
лампу,
стіл,
книжкову полицю.
Create a scene with a Node3D node as root node.
Порада
Типове освітлення навколишнього середовища не забезпечує чіткого затінення під деякими кутами. Змініть режим перегляду за допомогою функції "Показати каркас" у меню 3D вікна перегляду, або додайте вузол DirectionalLight, щоб ви могли все чітко бачити.
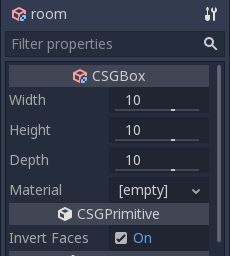
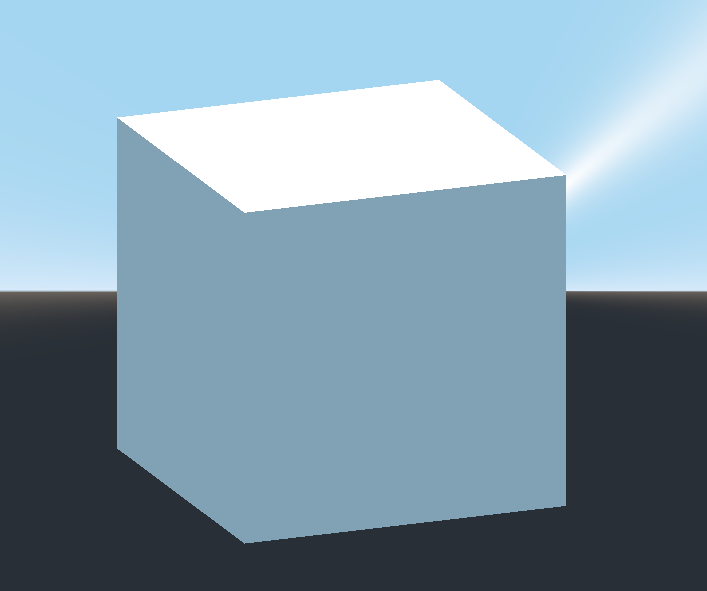
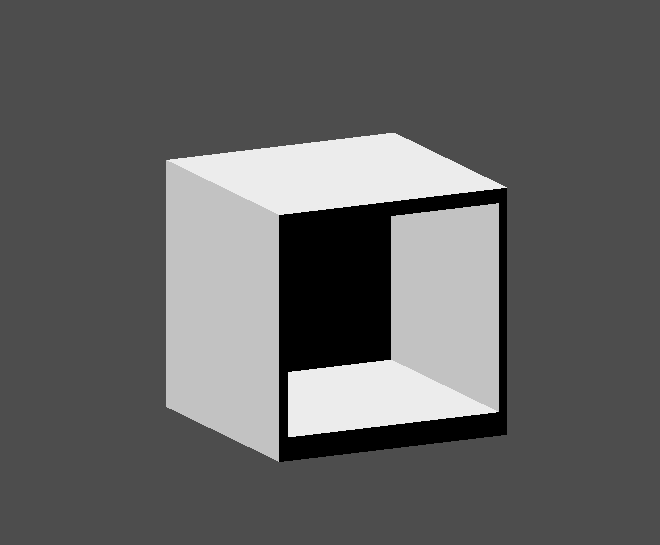
Create a CSGBox3D and name it room, enable Invert Faces and change the
dimensions of your room.
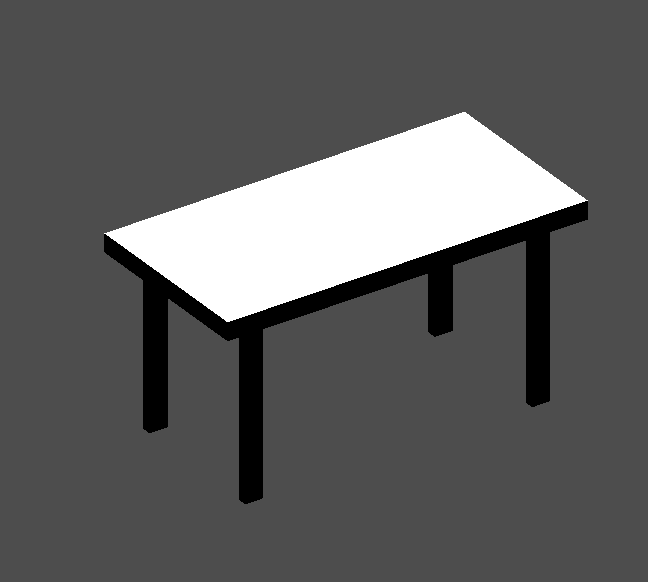
Next, create a CSGCombiner3D and name it desk.
Стіл має одну поверхню і 4 ноги:
Create 1 CSGBox3D children node in Union mode for the surface and adjust the dimensions.
Create 4 CSGBox3D children nodes in Union mode for the legs and adjust the dimensions.
Відрегулюйте їх розміщення так, щоб було схоже на стіл.
Примітка
CSG nodes inside a CSGCombiner3D will only process their operation within the combiner. Therefore, CSGCombiner3Ds are used to organize CSG nodes.
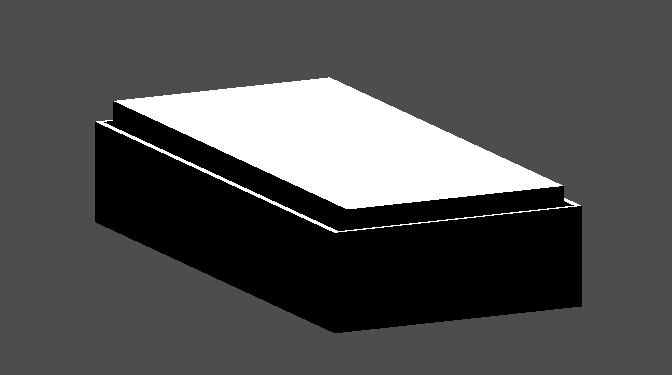
Create a CSGCombiner3D and name it bed.
Our bed consists of 3 parts: the bed, the mattress and a pillow. Create a CSGBox3D and adjust its dimension for the bed. Create another CSGBox3D and adjust its dimension for the mattress.
We will create another CSGCombiner3D named pillow as the child of bed.
The scene tree should look like this:
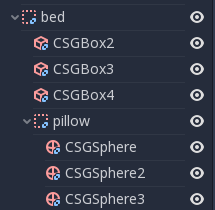
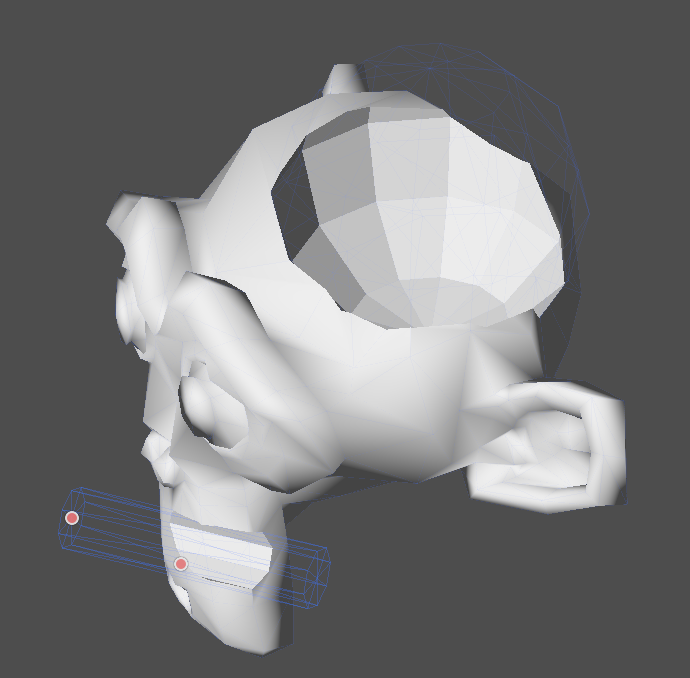
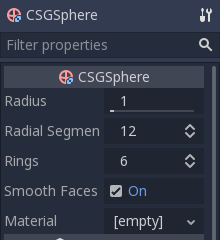
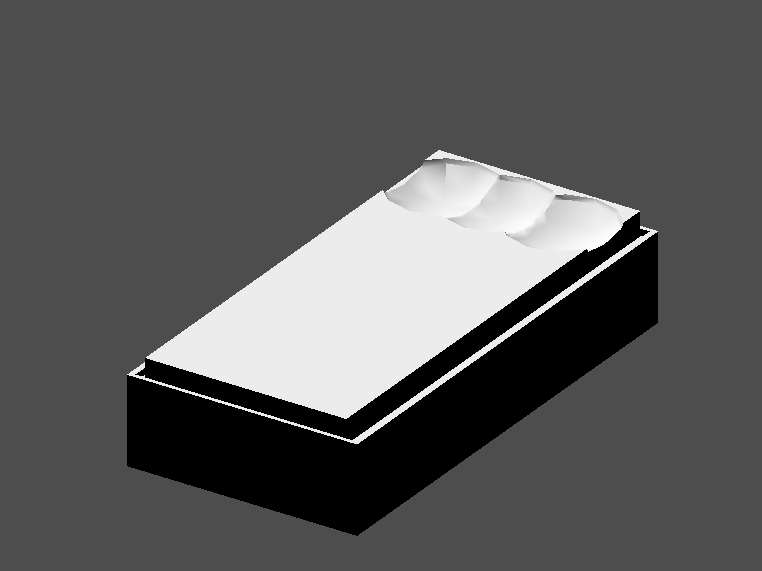
We will combine 3 CSGSphere3D nodes in Union mode to form a pillow. Scale the Y axis of the spheres and enable Smooth Faces.
Виберіть вузол pillow і переключіть режим на Subtraction; приєднані сфери виріжуть вм'ятину в матраці.
Try to re-parent the pillow node to the root Node3D node; the hole will
disappear.
Примітка
This is to illustrate the effect of CSG processing order. Since the root node is not a CSG node, the CSGCombiner3D nodes are the end of the operations; this shows the use of CSGCombiner3D to organize the CSG scene.
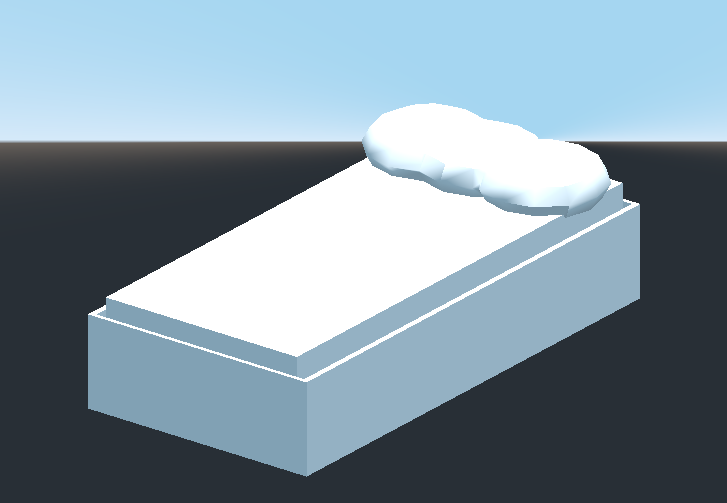
Скасуйте перепризначення після спостереження за ефектом. Ліжко, яке ви побудували, має виглядати так:
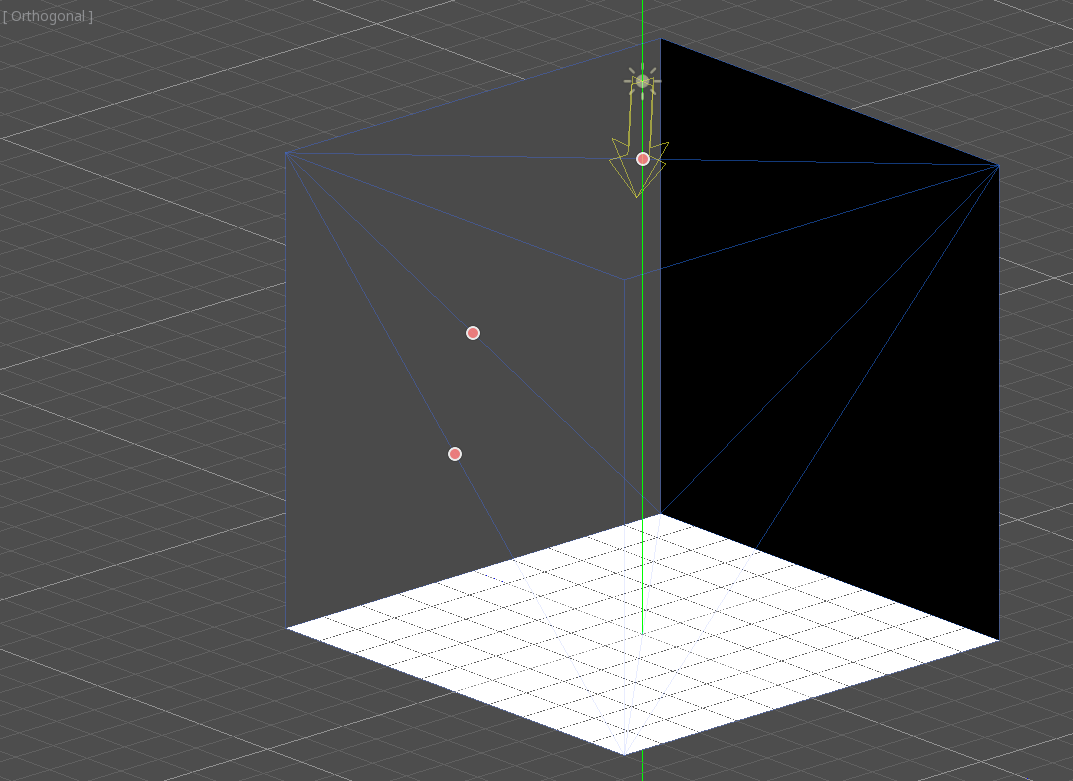
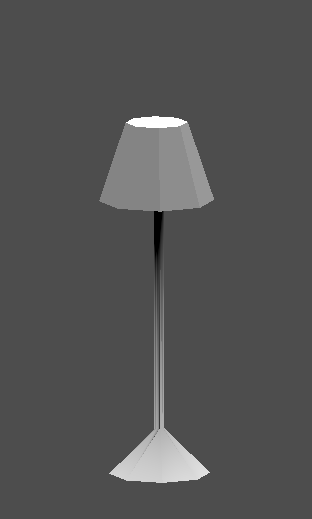
Create a CSGCombiner3D and name it lamp.
A lamp consists of 3 parts: the stand, the pole and the lampshade. Create a CSGCylinder3D, enable the Cone option and make it the stand. Create another CSGCylinder3D and adjust the dimensions to use it as a pole.
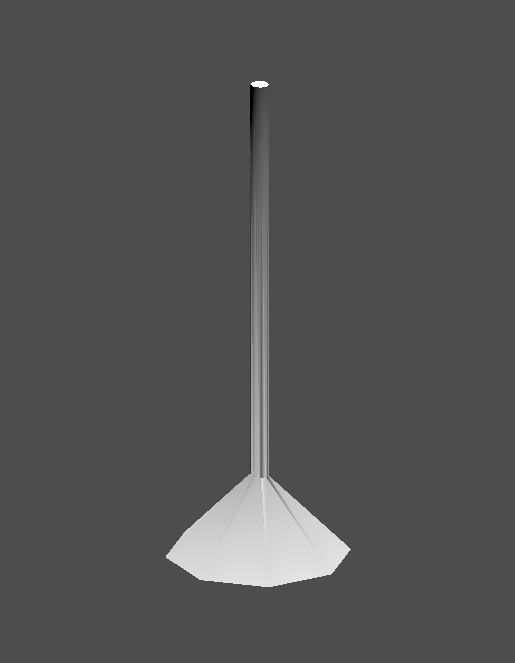
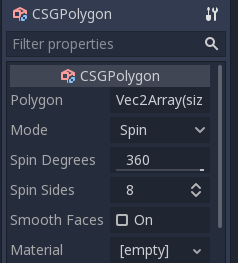
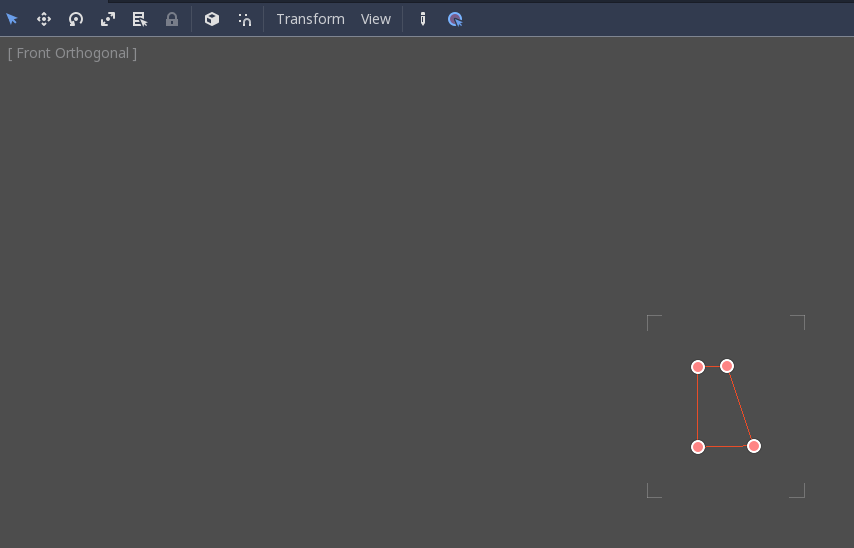
We will use a CSGPolygon3D for the lampshade. Use the Spin mode for the CSGPolygon3D and draw a trapezoid while in Front View (numeric keypad 1); this shape will extrude around the origin and form the lampshade.

Відрегулюйте розташування 3 частин, щоб вони виглядали, як лампа.
Create a CSGCombiner3D and name it bookshelf.
We will use 3 CSGBox3D nodes for the bookshelf. Create a CSGBox3D and adjust its dimensions; this will be the size of the bookshelf.
Duplicate the CSGBox3D and shorten the dimensions of each axis and change the mode to Subtraction.
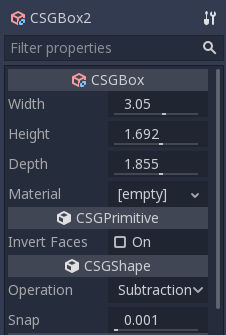
You've almost built a shelf. Create one more CSGBox3D for dividing the shelf into two levels.
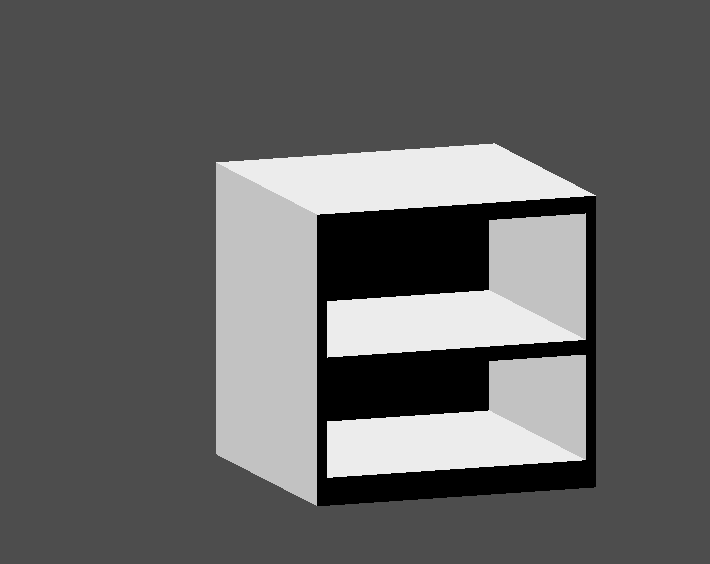
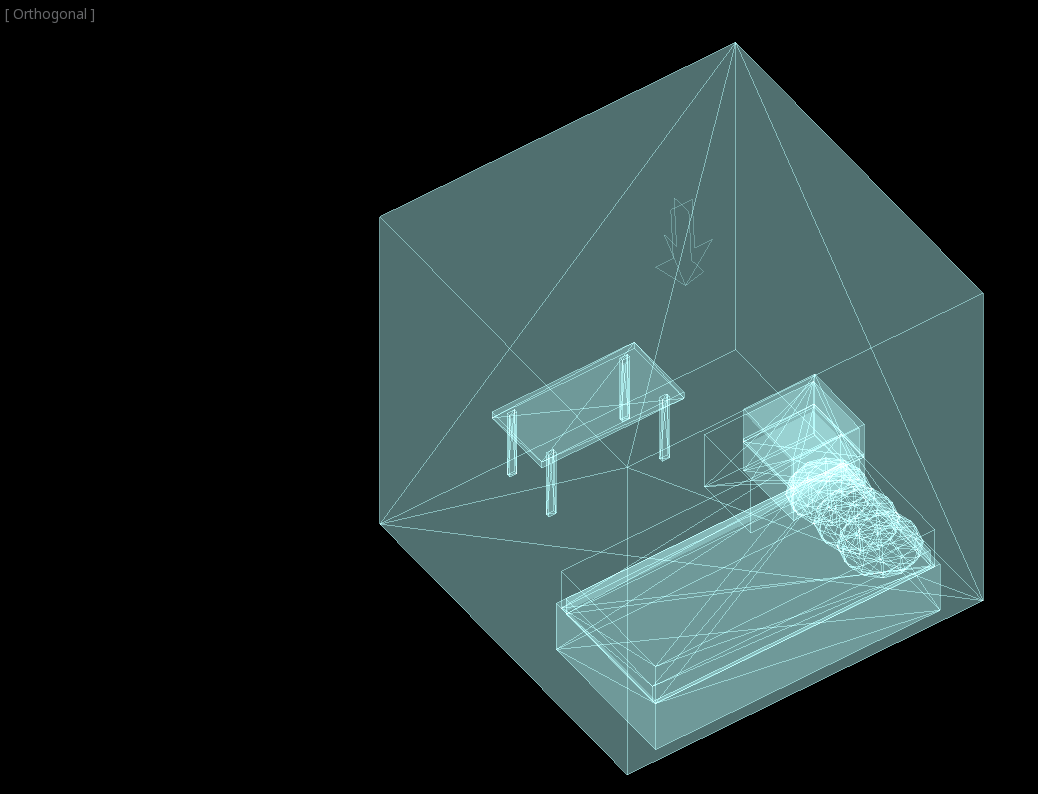
Розташуйте меблі в своїй кімнаті, як вам подобається, і ваша сцена повинна виглядати так:
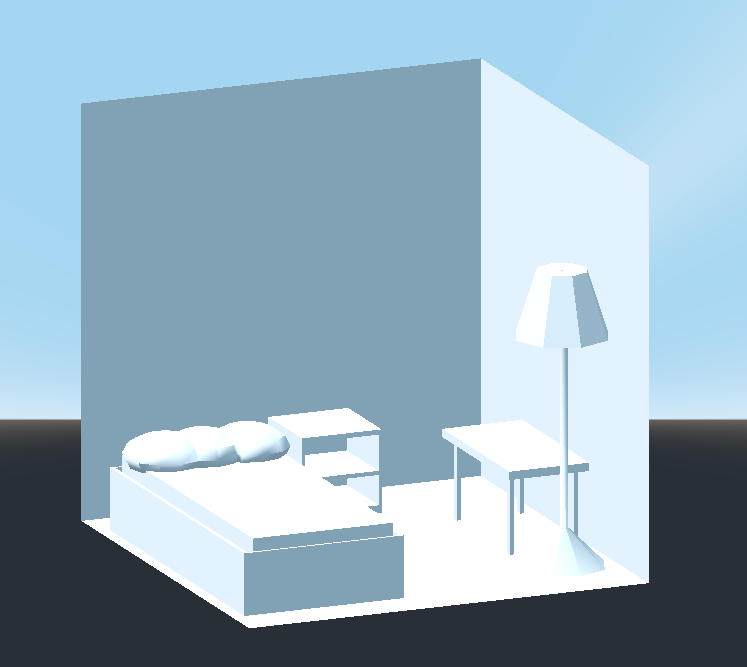
Ви успішно створили прототип рівня кімнати за допомогою інструментів CSG в Godot. Інструменти CSG можуть бути використані для проектування всіх видів рівнів, таких як лабіринт, або місто; досліджуйте їх обмеження при розробці вашої гри.
Використання текстур на прототипах
Godot's Standard Material 3D and ORM Material 3D supports triplanar mapping, which can be used to automatically apply a texture to arbitrary objects without distortion. This is handy when using CSG as Godot doesn't support editing UV maps on CSG nodes yet. Triplanar mapping is relatively slow, which usually restricts its usage to organic surfaces like terrain. Still, when prototyping, it can be used to quickly apply textures to CSG-based levels.
Примітка
Якщо вам потрібні деякі текстури для прототипування, Кенні зробив набір текстур для прототипів, на ліцензії CC0.
Існує два способи застосування матеріалу до вузла CSG:
Applying it to a CSGCombiner3D node as a material override (Geometry > Material Override in the Inspector). This will affect its children automatically, but will make it impossible to change the material in individual children.
Нанести матеріали на окремі вузли (Material в Інспекторі). Таким чином, кожен вузол CSG може мати свій зовнішній вигляд. Набудовані вузли CSG будуть застосовувати свій матеріал до вузлів, в їх підпорядкуванні.
To apply triplanar mapping to a CSG node, select it, go to the Inspector, click the [empty] text next to Material Override (or Material for individual CSG nodes). Choose New StandardMaterial3D. Click the newly created material's icon to edit it. Unfold the Albedo section and load a texture into the Texture property. Now, unfold the Uv1 section and check Triplanar. You can change the texture offset and scale on each axis by playing with the Scale and Offset properties just above. Higher values in the Scale property will cause the texture to repeat more often.
Порада
You can copy a StandardMaterial3D to reuse it across CSG nodes. To do so, click the dropdown arrow next to a material property in the Inspector and choose Copy. To paste it, select the node you'd like to apply the material onto, click the dropdown arrow next to its material property then choose Paste.
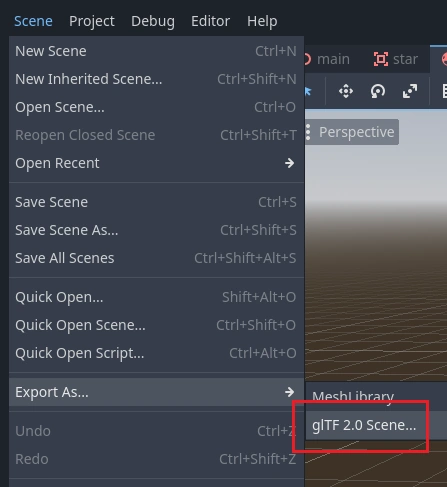
Exporting as glTF
It can be useful to block out a level using CSG, then export it as a 3d model, to import into 3D modeling software. You can do this by selecting Scene > Export As... > glTF 2.0 Scene.