Up to date
This page is up to date for Godot 4.2.
If you still find outdated information, please open an issue.
GDScript reference
GDScript is a high-level, object-oriented, imperative, and gradually typed programming language built for Godot. It uses an indentation-based syntax similar to languages like Python. Its goal is to be optimized for and tightly integrated with Godot Engine, allowing great flexibility for content creation and integration.
GDScript is entirely independent from Python and is not based on it.
Historia
Nota
La documentation sobre la historia de GDScript se ha movido a Preguntas Frecuentes.
Ejemplo de GDScript
Some people can learn better by taking a look at the syntax, so here's an example of how GDScript looks.
# Everything after "#" is a comment.
# A file is a class!

# (optional) icon to show in the editor dialogs:
@icon("res://path/to/optional/icon.svg")

# (optional) class definition:
class_name MyClass

# Inheritance:
extends BaseClass


# Member variables.
var a = 5
var s = "Hello"
var arr = [1, 2, 3]
var dict = {"key": "value", 2: 3}
var other_dict = {key = "value", other_key = 2}
var typed_var: int
var inferred_type := "String"

# Constants.
const ANSWER = 42
const THE_NAME = "Charly"

# Enums.
enum {UNIT_NEUTRAL, UNIT_ENEMY, UNIT_ALLY}
enum Named {THING_1, THING_2, ANOTHER_THING = -1}

# Built-in vector types.
var v2 = Vector2(1, 2)
var v3 = Vector3(1, 2, 3)


# Functions.
func some_function(param1, param2, param3):
    const local_const = 5

    if param1 < local_const:
        print(param1)
    elif param2 > 5:
        print(param2)
    else:
        print("Fail!")

    for i in range(20):
        print(i)

    while param2 != 0:
        param2 -= 1

    match param3:
        3:
            print("param3 is 3!")
        _:
            print("param3 is not 3!")

    var local_var = param1 + 3
    return local_var


# Functions override functions with the same name on the base/super class.
# If you still want to call them, use "super":
func something(p1, p2):
    super(p1, p2)


# It's also possible to call another function in the super class:
func other_something(p1, p2):
    super.something(p1, p2)


# Inner class
class Something:
    var a = 10


# Constructor
func _init():
    print("Constructed!")
    var lv = Something.new()
    print(lv.a)
Si tienes experiencia previa con lenguajes estáticamente tipados como C, C++ o C# pero nunca has utilizado uno dinámicamente tipado antes, es recomendable leer este tutorial: GDScript: Introducción a los lenguajes dinámicos.
Lenguaje
A continuación, se presenta un resumen de GDScript. Detalles, como qué métodos están disponibles para arrays u otros objetos deberán verse en las descripciones de las clases.
Identificadores
Cualquier cadena se restringe a caracteres del alfabeto (a a z y A a Z), dígitos (0 a 9) y _ también califica como identificador. Adicionalmente, los identificadores no deben comenzar con un dígito. Los identificadores son sensibles a mayúsculas y minúsculas (case-sensitive, foo no es lo mismo que FOO).
Identifiers may also contain most Unicode characters part of UAX#31. This allows you to use identifier names written in languages other than English. Unicode characters that are considered "confusable" for ASCII characters and emoji are not allowed in identifiers.
Palabras clave
La siguiente lista de palabras clave soportadas por el lenguaje. Como las palabras claves son palabras reservadas (símbolos), no pueden ser utilizadas como identificadores. Operadores(como in, not, and or or) y nombres de tipo integrados listados en la siguiente sección tambien son reservados.
Las palabras clave están definidas en el GDScript tokenizer en caso de que se desee ver en detalle su funcionamiento.
Palabras clave |
Descripción |
|---|---|
if |
Ver if/else/elif. |
elif |
Ver if/else/elif. |
else |
Ver if/else/elif. |
for |
Ver for. |
while |
Ver while. |
match |
Ver match. |
break |
Sale de la ejecución del bucle |
continue |
Pasa inmediatamente a la siguiente iteración del bucle |
pass |
Utilizado cuando sintácticamente se requiere una declaración pero no se desea ejecución de código, por ejemplo, en funciones vacías. |
return |
Devuelve el valor de una función. |
class |
Defines an inner class. See Inner classes. |
class_name(nombre de clase) |
Defines the script as a globally accessible class with the specified name. See Registering named classes. |
extends |
Define de qué clase extiende la clase actual. |
is |
Prueba si una variable extiende de la clase dada o es de un tipo integrado. |
in |
Tests whether a value is within a string, array, range, dictionary, or node. When used with |
as |
Convertir el valor a un tipo dado si es posible. |
self |
Se refiere a la instancia de clase actual. |
señal |
Define una señal. |
func |
Define una función. |
static |
Defines a static function or a static member variable. |
const |
Define una constante. |
enum |
Define una enum. |
var |
Define una variable. |
breakpoint |
Editor helper for debugger breakpoints. Unlike breakpoints created by clicking in the gutter, |
precarga |
Precarga una clase o variable. Ver Clases como recursos. |
await |
Waits for a signal or a coroutine to finish. See Awaiting for signals or coroutines. |
yield |
Previously used for coroutines. Kept as keyword for transition. |
assert |
Afirma una condición, registra un error si falla. Ignorado en builds que no son de depuración. Ver Palabra clave Assert. |
void |
Used to represent that a function does not return any value. |
PI |
Constante PI. |
TAU |
Constante TAU. |
INF |
Infinity constant. Used for comparisons and as result of calculations. |
NAN |
NAN (not a number) constant. Used as impossible result from calculations. |
Operadores
La siguiente lista muestra los operadores soportados y su precedencia.
Operador |
Descripción |
|---|---|
|
Grouping (highest priority) Parentheses are not really an operator, but allow you to explicitly specify the precedence of an operation. |
|
Subscription |
|
Referencia de atributo |
|
Llamada a funciones |
|
|
|
Type checking See also is_instance_of() function. |
|
Power Multiplies Note: In GDScript, the |
|
Negación lógica a nivel de bits (NOT) |
+x-x |
Identity / Negation |
x * yx / yx % y |
Multiplicación / División / Resto The Note: These operators have the same behavior as C++, which may be unexpected for users coming from Python, JavaScript, etc. See a detailed note after the table. |
x + yx - y |
Addition (or Concatenation) / Subtraction |
x << yx >> y |
Poco desplazamiento |
|
Conjunción lógica a nivel de bits (AND) |
|
Disyunción exclusiva a nivel de bits (XOR) |
|
Disyunción lógica a nivel de bits (OR) |
x == yx != yx < yx > yx <= yx >= y |
Comparison See a detailed note after the table. |
x in yx not in y |
Inclusion checking
|
not x!x |
Boolean NOT and its unrecommended alias |
x and yx && y |
Boolean AND and its unrecommended alias |
x or yx || y |
Boolean OR and its unrecommended alias |
|
if / else en una linea |
|
|
x = yx += yx -= yx *= yx /= yx **= yx %= yx &= yx |= yx ^= yx <<= yx >>= y |
Asignación (prioridad más baja) You cannot use an assignment operator inside an expression. |
Nota
The behavior of some operators may differ from what you expect:
If both operands of the
/operator are int, then integer division is performed instead of fractional. For example5 / 2 == 2, not2.5. If this is not desired, use at least one float literal (x / 2.0), cast (float(x) / y), or multiply by1.0(x * 1.0 / y).The
%operator is only available for ints, for floats use the fmod() function.For negative values, the
%operator andfmod()use truncation instead of rounding towards negative infinity. This means that the remainder has a sign. If you need the remainder in a mathematical sense, use the posmod() and fposmod() functions instead.The
**operator is left-associative. This means that2 ** 2 ** 3is equal to(2 ** 2) ** 3. Use parentheses to explicitly specify precedence you need, for example2 ** (2 ** 3).The
==and!=operators sometimes allow you to compare values of different types (for example,1 == 1.0is true), but in other cases it can cause a runtime error. If you're not sure about the types of the operands, you can safely use the is_same() function (but note that it is more strict about types and references). To compare floats, use the is_equal_approx() and is_zero_approx() functions instead.
Literales
Example(s) |
Descripción |
|
Null value |
|
Boolean values |
|
Entero base 10 |
|
Base de 16 enteros (hexadecimal) |
|
Entero base 2 (binario) |
|
Número de coma flotante (real) |
|
Regular strings |
|
Triple-quoted regular strings |
|
Raw strings |
|
Triple-quoted raw strings |
|
|
|
There are also two constructs that look like literals, but actually are not:
Ejemplo |
Descripción |
|
Abreviatura para |
|
Shorthand for |
Los enteros y los reales pueden tener sus números separados con _ para hacerlos más legibles. Las siguientes formas de escribir los números son todas válidas:
12_345_678  # Equal to 12345678.
3.141_592_7  # Equal to 3.1415927.
0x8080_0000_ffff  # Equal to 0x80800000ffff.
0b11_00_11_00  # Equal to 0b11001100.
Regular string literals can contain the following escape sequences:
Secuencias de escape |
Se expande a |
|
Nueva linea (salto de linea) |
|
Carácter de tabulador horizontal |
|
Retorno de carro |
|
Alerta(bip/bell) |
|
Retroceso |
|
Salto de página de Formfeed |
|
Carácter de tabulado vertical |
|
Dobles comillas |
|
Simples comillas |
|
Barra Invertida |
|
UTF-16 Unicode codepoint
|
|
UTF-32 Unicode codepoint
|
There are two ways to represent an escaped Unicode character above 0xFFFF:
as a UTF-16 surrogate pair
\uXXXX\uXXXX.as a single UTF-32 codepoint
\UXXXXXX.
Also, using \ followed by a newline inside a string will allow you to continue it in the next line,
without inserting a newline character in the string itself.
A string enclosed in quotes of one type (for example ") can contain quotes of another type
(for example ') without escaping. Triple-quoted strings allow you to avoid escaping up to
two consecutive quotes of the same type (unless they are adjacent to the string edges).
Raw string literals always encode the string as it appears in the source code. This is especially useful for regular expressions. Raw strings do not process escape sequences, but you can "escape" a quote or backslash (they replace themselves).
print("\tchar=\"\\t\"")  # Prints `    char="\t"`.
print(r"\tchar=\"\\t\"") # Prints `\tchar=\"\\t\"`.
GDScript also supports format strings.
Annotations
There are some special tokens in GDScript that act like keywords but are not,
they are annotations instead. Every annotation start with the @ character
and is specified by a name. A detailed description and example for each annotation
can be found inside the GDScript class reference.
Annotations affect how the script is treated by external tools and usually don't change the behavior.
For instance, you can use it to export a value to the editor:
@export_range(1, 100, 1, "or_greater")
var ranged_var: int = 50
For more information about exporting properties, read the GDScript exports article.
Any constant expression compatible with the required argument type can be passed as an annotation argument value:
const MAX_SPEED = 120.0

@export_range(0.0, 0.5 * MAX_SPEED)
var initial_speed: float = 0.25 * MAX_SPEED
Annotations can be specified one per line or all in the same line. They affect the next statement that isn't an annotation. Annotations can have arguments sent between parentheses and separated by commas.
Both of these are the same:
@annotation_a
@annotation_b
var variable

@annotation_a @annotation_b var variable
@onready annotation
Cuando se usan nodos, es muy común querer guardar referencias de partes de la escena en una variable. Las escenas sólo están garantizadas para ser configuradas al entrar en el árbol de escenas activo, por lo que los subnodos sólo se pueden obtener cuando la llamada a un Node._ready() se ha realizado.
var my_label


func _ready():
    my_label = get_node("MyLabel")
This can get a little cumbersome, especially when nodes and external
references pile up. For this, GDScript has the @onready annotation, that
defers initialization of a member variable until _ready() is called. It
can replace the above code with a single line:
@onready var my_label = get_node("MyLabel")
Advertencia
Applying @onready and any @export annotation to the same variable
doesn't work as you might expect. The @onready annotation will cause
the default value to be set after the @export takes effect and will
override it:
@export var a = "init_value_a"
@onready @export var b = "init_value_b"

func _init():
    prints(a, b) # init_value_a <null>

func _notification(what):
    if what == NOTIFICATION_SCENE_INSTANTIATED:
        prints(a, b) # exported_value_a exported_value_b

func _ready():
    prints(a, b) # exported_value_a init_value_b
Therefore, the ONREADY_WITH_EXPORT warning is generated, which is treated
as an error by default. We do not recommend disabling or ignoring it.
Code regions
Code regions are special types of comments that the script editor understands as foldable regions. This means that after writing code region comments, you can collapse and expand the region by clicking the arrow that appears at the left of the comment. This arrow appears within a purple square to be distinguishable from standard code folding.
The syntax is as follows:
# Important: There must be *no* space between the `#` and `region` or `endregion`.

# Region without a description:
#region
...
#endregion

# Region with a description:
#region Some description that is displayed even when collapsed
...
#endregion
Truco
To create a code region quickly, select several lines in the script editor, right-click the selection then choose Create Code Region. The region description will be selected automatically for editing.
It is possible to nest code regions within other code regions.
Here's a concrete usage example of code regions:
# This comment is outside the code region. It will be visible when collapsed.
#region Terrain generation
# This comment is inside the code region. It won't be visible when collapsed.
func generate_lakes():
    pass

func generate_hills():
    pass
#endregion

#region Terrain population
func place_vegetation():
    pass

func place_roads():
    pass
#endregion
This can be useful to organize large chunks of code into easier to understand sections. However, remember that external editors generally don't support this feature, so make sure your code is easy to follow even when not relying on folding code regions.
Nota
Individual functions and indented sections (such as if and for) can
always be collapsed in the script editor. This means you should avoid
using a code region to contain a single function or indented section, as it
won't bring much of a benefit. Code regions work best when they're used to
group multiple elements together.
Line continuation
A line of code in GDScript can be continued on the next line by using a backslash
(\). Add one at the end of a line and the code on the next line will act like
it's where the backslash is. Here is an example:
var a = 1 + \
2
A line can be continued multiple times like this:
var a = 1 + \
4 + \
10 + \
4
Tipos integrados
Los tipos incorporados están asignados en pila. Se pasan como valores. Esto significa que se crea una copia en cada tarea o al pasarlas como argumentos a funciones. Las excepciones son Object, Array, Dictionary y arreglos empaquetados (como PackedByteArray), los cuales se pasan por referencia para que se compartan. Todos los arreglos, `` Dictionary`` y algunos objetos (Node, Resource) poseen un método duplicate() que permite hacerles una copia.
Tipos integrados básicos
Una variable en GDScript se puede asignar a varios tipos integrados.
null
null es un tipo de dato vacío que no contiene información y no se le puede asignar ningún otro valor.
bool
Abreviatura de "booleano", solo puede contener `` verdadero`` o `` falso``.
int
Short for "integer", it stores whole numbers (positive and negative).
It is stored as a 64-bit value, equivalent to int64_t in C++.
float
Stores real numbers, including decimals, using floating-point values.
It is stored as a 64-bit value, equivalent to double in C++.
Note: Currently, data structures such as Vector2, Vector3, and
PackedFloat32Array store 32-bit single-precision float values.
String
Una secuencia de caracteres en formato Unicode <https://en.wikipedia.org/wiki/Unicode>`_.
StringName
An immutable string that allows only one instance of each name. They are slower to create and may result in waiting for locks when multithreading. In exchange, they're very fast to compare, which makes them good candidates for dictionary keys.
NodePath
A pre-parsed path to a node or a node property. It can be easily assigned to, and from, a String. They are useful to interact with the tree to get a node, or affecting properties like with Tweens.
Tipos de Vectores internos
Vector2
Tipo de vector 2D que contiene los campos x y y. También puede ser accedido como un array.
Vector2i
Same as a Vector2 but the components are integers. Useful for representing items in a 2D grid.
Rect2
El tipo 2D Rectangle contiene dos campos de vectores: position y size. También contiene un campo end el cual es position + size`.
Vector3
Tipo de vector 3D que contiene los campos x, y y z. También puede ser accedido como si fuera un array.
Vector3i
Same as Vector3 but the components are integers. Can be use for indexing items in a 3D grid.
Transform2D
Matriz 3 × 2 utilizada para transformaciones 2D.
Plane
Tipo Plano 3D en forma normalizada que contiene un vector normal y una distancia escalar d.
Quaternion
Quaternion es un tipo de datos utilizado para representar una rotación 3D. Es útil para interpolar rotaciones.
AABB
El cuadro delimitador alineado con el eje (o cuadro 3D) contiene 2 campos de vectores: `` posición '' y `` tamaño ''. También contiene un campo de `` fin '' que es `` posición + tamaño ''.
Basis
Matriz de 3x3 utilizada para la rotación y la escala 3D. Contiene 3 campos vectoriales (x, y y z) y también se puede acceder como un array de vectores 3D.
Transform3D
La clase Transform tiene un campo Basis, llamado basis y una campo Vector3 llamado origin.
Tipos integrados del motor
Color
El tipo de datos de color contiene los campos r, g, b y a. También puede ser accedido como h, s, y v, siendo estos tono/saturación/valor.
RID
ID de recurso (RID). Los servidores utilizan RID genéricos para referenciar datos opacos.
Object
Clase base para cualquier cosa que no sea un tipo incorporado.
Tipos de Container integrados
Array
Secuencia genérica de tipos de objetos arbitrarios, incluidos otros arrays o diccionarios (ver más abajo). El array puede cambiar de tamaño dinámicamente. Los arrays se indexan a partir del índice `` 0``. Los índices negativos cuentan desde el final.
var arr = []
arr = [1, 2, 3]
var b = arr[1] # This is 2.
var c = arr[arr.size() - 1] # This is 3.
var d = arr[-1] # Same as the previous line, but shorter.
arr[0] = "Hi!" # Replacing value 1 with "Hi!".
arr.append(4) # Array is now ["Hi!", 2, 3, 4].
Typed arrays
Godot 4.0 added support for typed arrays. On write operations, Godot checks that
element values match the specified type, so the array cannot contain invalid values.
The GDScript static analyzer takes typed arrays into account, however array methods like
front() and back() still have the Variant return type.
Typed arrays have the syntax Array[Type], where Type can be any Variant type,
native or user class, or enum. Nested array types (like Array[Array[int]]) are not supported.
var a: Array[int]
var b: Array[Node]
var c: Array[MyClass]
var d: Array[MyEnum]
var e: Array[Variant]
Array and Array[Variant] are the same thing.
Nota
Arrays are passed by reference, so the array element type is also an attribute of the in-memory structure referenced by a variable in runtime. The static type of a variable restricts the structures that it can reference to. Therefore, you cannot assign an array with a different element type, even if the type is a subtype of the required type.
If you want to convert a typed array, you can create a new array and use the Array.assign() method:
var a: Array[Node2D] = [Node2D.new()]

# (OK) You can add the value to the array because `Node2D` extends `Node`.
var b: Array[Node] = [a[0]]

# (Error) You cannot assign an `Array[Node2D]` to an `Array[Node]` variable.
b = a

# (OK) But you can use the `assign()` method instead. Unlike the `=` operator,
# the `assign()` method copies the contents of the array, not the reference.
b.assign(a)
The only exception was made for the Array (Array[Variant]) type, for user convenience
and compatibility with old code. However, operations on untyped arrays are considered unsafe.
Packed arrays
Las matrices GDScript se asignan linealmente en la memoria para mayor velocidad. Sin embargo, las matrices grandes (más de decenas de miles de elementos) pueden causar fragmentación de la memoria. Si esto le preocupa, hay disponibles tipos especiales de matrices. Estos solo aceptan un único tipo de datos. Evitan la fragmentación de la memoria y usan menos memoria, pero son atómicos y tienden a funcionar más lentamente que las matrices genéricas. Por lo tanto, solo se recomienda su uso para grandes conjuntos de datos:
PackedByteArray: An array of bytes (integers from 0 to 255).
PackedInt32Array: An array of 32-bit integers.
PackedInt64Array: An array of 64-bit integers.
PackedFloat32Array: An array of 32-bit floats.
PackedFloat64Array: An array of 64-bit floats.
PackedStringArray: An array of strings.
PackedVector2Array: An array of Vector2 values.
PackedVector3Array: An array of Vector3 values.
PackedColorArray: An array of Color values.
Diccionario
Container asociativo que contiene valores referenciados por claves únicas.
var d = {4: 5, "A key": "A value", 28: [1, 2, 3]}
d["Hi!"] = 0
d = {
    22: "value",
    "some_key": 2,
    "other_key": [2, 3, 4],
    "more_key": "Hello"
}
Lua-style table syntax is also supported. Lua-style uses = instead of :
and doesn't use quotes to mark string keys (making for slightly less to write).
However, keys written in this form can't start with a digit (like any GDScript
identifier), and must be string literals.
var d = {
    test22 = "value",
    some_key = 2,
    other_key = [2, 3, 4],
    more_key = "Hello"
}
Para añadir una clave a un diccionario ya existente, accede a ella como a cualquier clave ya existente y asígnala:
var d = {} # Create an empty Dictionary.
d.waiting = 14 # Add String "waiting" as a key and assign the value 14 to it.
d[4] = "hello" # Add integer 4 as a key and assign the String "hello" as its value.
d["Godot"] = 3.01 # Add String "Godot" as a key and assign the value 3.01 to it.

var test = 4
# Prints "hello" by indexing the dictionary with a dynamic key.
# This is not the same as `d.test`. The bracket syntax equivalent to
# `d.test` is `d["test"]`.
print(d[test])
Nota
Los corchetes puede pueden usarse para acceder a propiedades de cualquier Object, no sólo Dictionary. Ten en cuenta que esto puede provocar errores en scripts cuando se intenta acceder a una propiedad que no existe. Para evitar esto, una los métodos Object.get() y Object.set() en su lugar.
Signal
A signal is a message that can be emitted by an object to those who want to listen to it. The Signal type can be used for passing the emitter around.
Signals are better used by getting them from actual objects, e.g. $Button.button_up.
Callable
Contains an object and a function, which is useful for passing functions as values (e.g. when connecting to signals).
Getting a method as a member returns a callable. var x = $Sprite2D.rotate
will set the value of x to a callable with $Sprite2D as the object and
rotate as the method.
You can call it using the call method: x.call(PI).
Datos
Variables
Las variables puede existir como miembros de una clase o de forma local en una función. Se crean con la palabra clave var y pueden, opcionalmente, ser asignadas a un valor en su inicialización.
var a # Data type is 'null' by default.
var b = 5
var c = 3.8
var d = b + c # Variables are always initialized in direct order (see below).
Las variables pueden tener opcionalmente una especificación de tipo. Cuando se especifica un tipo, la variable se verá obligada a tener siempre el mismo tipo, y al intentar asignar un valor incompatible se generará un error.
Los tipos se especifican en la declaración de la variable usando un símbolo : (dos puntos) después del nombre de la variable, seguido del tipo.
var my_vector2: Vector2
var my_node: Node = Sprite2D.new()
Si la variable se inicializa dentro de la declaración, se puede inferir el tipo, por lo que es posible omitir el nombre del tipo:
var my_vector2 := Vector2() # 'my_vector2' is of type 'Vector2'.
var my_node := Sprite2D.new() # 'my_node' is of type 'Sprite2D'.
La inferencia del tipo solo es posible si el valor asignado tiene un tipo definido, de lo contrario generará un error.
Los tipos válidos son:
Tipos incorporados (Array, Vector2, int, String, etc.).
Clases del Engine(Nodo, Recurso, Referencia, etc.).
Nombres constantes si contienen un recurso de script (
MyScriptsi declaróconst MyScript = preload("res://my_script.gd")).Otras clases en el mismo script, respetando el alcance (`` Clase interna Clase anidada '' si declaró `` clase Clase anidada '' dentro de la `` clase Clase interna '' en el mismo alcance).
Clases de script declaradas con la palabra clave
class_name.Autoloads registered as singletons.
Nota
While Variant is a valid type specification, it's not an actual type. It
only means there's no set type and is equivalent to not having a static type
at all. Therefore, inference is not allowed by default for Variant,
since it's likely a mistake.
You can turn off this check, or make it only a warning, by changing it in the project settings. See Sistema de advertencias de GDScript for details.
Initialization order
Member variables are initialized in the following order:
Depending on the variable's static type, the variable is either
null(untyped variables and objects) or has a default value of the type (0forint,falseforbool, etc.).The specified values are assigned in the order of the variables in the script, from top to bottom. - (Only for ``Node``-derived classes) If the
@onreadyannotation is applied to a variable, its initialization is deferred to step 5.If defined, the
_init()method is called.When instantiating scenes and resources, the exported values are assigned.
(Only for ``Node``-derived classes)
@onreadyvariables are initialized.(Only for ``Node``-derived classes) If defined, the
_ready()method is called.
Advertencia
You can specify a complex expression as a variable initializer, including function calls. Make sure the variables are initialized in the correct order, otherwise your values may be overwritten. For example:
var a: int = proxy("a", 1)
var b: int = proxy("b", 2)
var _data: Dictionary = {}

func proxy(key: String, value: int):
    _data[key] = value
    print(_data)
    return value

func _init() -> void:
    print(_data)
Will print:
{ "a": 1 }
{ "a": 1, "b": 2 }
{  }
To fix this, move the _data variable definition above the a definition
or remove the empty dictionary assignment (= {}).
Static variables
A class member variable can be declared static:
static var a
Static variables belong to the class, not instances. This means that static variables share values between multiple instances, unlike regular member variables.
From inside a class, you can access static variables from any function, both static and non-static. From outside the class, you can access static variables using the class or an instance (the second is not recommended as it is less readable).
Nota
The @export and @onready annotations cannot be applied to a static variable.
Local variables cannot be static.
The following example defines a Person class with a static variable named max_id.
We increment the max_id in the _init() function. This makes it easy to keep track
of the number of Person instances in our game.
# person.gd
class_name Person

static var max_id = 0

var id
var name

func _init(p_name):
    max_id += 1
    id = max_id
    name = p_name
In this code, we create two instances of our Person class and check that the class
and every instance have the same max_id value, because the variable is static and accessible to every instance.
# test.gd
extends Node

func _ready():
    var person1 = Person.new("John Doe")
    var person2 = Person.new("Jane Doe")

    print(person1.id) # 1
    print(person2.id) # 2

    print(Person.max_id)  # 2
    print(person1.max_id) # 2
    print(person2.max_id) # 2
Static variables can have type hints, setters and getters:
static var balance: int = 0

static var debt: int:
    get:
        return -balance
    set(value):
        balance = -value
A base class static variable can also be accessed via a child class:
class A:
    static var x = 1

class B extends A:
    pass

func _ready():
    prints(A.x, B.x) # 1 1
    A.x = 2
    prints(A.x, B.x) # 2 2
    B.x = 3
    prints(A.x, B.x) # 3 3
@static_unload annotation
Since GDScript classes are resources, having static variables in a script prevents it from being unloaded even if there are no more instances of that class and no other references left. This can be important if static variables store large amounts of data or hold references to other project resources, such as scenes. You should clean up this data manually, or use the @static_unload annotation if static variables don't store important data and can be reset.
Advertencia
Currently, due to a bug, scripts are never freed, even if @static_unload annotation is used.
Note that @static_unload applies to the entire script (including inner classes)
and must be placed at the top of the script, before class_name and extends:
@static_unload
class_name MyNode
extends Node
See also Static functions and Static constructor.
Casting
Los valores asignados a las variables escritas deben tener un tipo compatible. Si es necesario forzar un valor para que sea de un determinado tipo, en particular para los tipos de objetos, puede usar el operador de conversión as.
La conversión entre tipos de objetos da como resultado el mismo objeto si el valor es del mismo tipo o subtipo del tipo de conversión.
var my_node2D: Node2D
my_node2D = $Sprite2D as Node2D # Works since Sprite2D is a subtype of Node2D.
Si el valor no es un subtipo, la operación de conversión dará como resultado un valor null.
var my_node2D: Node2D
my_node2D = $Button as Node2D # Results in 'null' since a Button is not a subtype of Node2D.
Para los tipos integrados, se convertirán a la fuerza si es posible, de lo contrario, el motor generará un error.
var my_int: int
my_int = "123" as int # The string can be converted to int.
my_int = Vector2() as int # A Vector2 can't be converted to int, this will cause an error.
La conversión también es útil para tener mejores variables de tipo seguro cuando interactúa con el árbol de escenas
# Will infer the variable to be of type Sprite2D.
var my_sprite := $Character as Sprite2D

# Will fail if $AnimPlayer is not an AnimationPlayer, even if it has the method 'play()'.
($AnimPlayer as AnimationPlayer).play("walk")
Constantes
Las constantes son valores que no se pueden cambiar cuando el juego está en marcha. Su valor debe ser conocido en tiempo de compilación. Usar la palabra clave const te permite dar un nombre a un valor constante. Si intentas asignar un valor a una constante después de declararla, te dará un error.
Recomendamos el uso de constantes siempre que un valor no esté destinado a cambiar.
const A = 5
const B = Vector2(20, 20)
const C = 10 + 20 # Constant expression.
const D = Vector2(20, 30).x # Constant expression: 20.
const E = [1, 2, 3, 4][0] # Constant expression: 1.
const F = sin(20) # 'sin()' can be used in constant expressions.
const G = x + 20 # Invalid; this is not a constant expression!
const H = A + 20 # Constant expression: 25 (`A` is a constant).
Aunque el tipo de constantes se deduce del valor asignado, también es posible agregar una especificación explícita:
const A: int = 5
const B: Vector2 = Vector2()
Asignar un valor de un tipo incompatible generará un error.
You can also create constants inside a function, which is useful to name local magic values.
Nota
Since objects, arrays and dictionaries are passed by reference, constants are "flat". This means that if you declare a constant array or dictionary, it can still be modified afterwards. They can't be reassigned with another value though.
Enumeraciones
Las enumeraciones básicamente son atajos para las constantes, son muy útiles si quieres asignar números consecutivos a alguna constante.
enum {TILE_BRICK, TILE_FLOOR, TILE_SPIKE, TILE_TELEPORT}

# Is the same as:
const TILE_BRICK = 0
const TILE_FLOOR = 1
const TILE_SPIKE = 2
const TILE_TELEPORT = 3
If you pass a name to the enum, it will put all the keys inside a constant Dictionary of that name. This means all constant methods of a dictionary can also be used with a named enum.
Importante
Keys in a named enum are not registered
as global constants. They should be accessed prefixed
by the enum's name (Name.KEY).
enum State {STATE_IDLE, STATE_JUMP = 5, STATE_SHOOT}

# Is the same as:
const State = {STATE_IDLE = 0, STATE_JUMP = 5, STATE_SHOOT = 6}
# Access values with State.STATE_IDLE, etc.

func _ready():
    # Access values with Name.KEY, prints '5'
    print(State.STATE_JUMP)
    # Use dictionary methods:
    # prints '["STATE_IDLE", "STATE_JUMP", "STATE_SHOOT"]'
    print(State.keys())
    # prints '{ "STATE_IDLE": 0, "STATE_JUMP": 5, "STATE_SHOOT": 6 }'
    print(State)
    # prints '[0, 5, 6]'
    print(State.values())
Funciones
Las funciones siempre pertenecen a una clase. El ámbito de prioridad de comprobación de variables es: local → miembro de clase → global. La variable self siempre está disponible y se proporciona como opción para el acceso a los miembros de la clase, pero no suele ser necesaria (y no se debe de enviar como primer parámetro a una función, al contrario que en Python).
func my_function(a, b):
    print(a)
    print(b)
    return a + b  # Return is optional; without it 'null' is returned.
Una función puede retornar, usando la palabra clave return, en cualquier punto. El valor de retorno por defecto es null.
If a function contains only one line of code, it can be written on one line:
func square(a): return a * a

func hello_world(): print("Hello World")

func empty_function(): pass
Las funciones también pueden tener una especificación de tipo para los argumentos y para el valor de retorno. Los tipos de argumentos se pueden agregar de manera similar a las variables:
func my_function(a: int, b: String):
    pass
Si un argumento de una función tiene un valor por defecto, es posible inferir el tipo:
func my_function(int_arg := 42, String_arg := "string"):
    pass
El tipo de retorno de la función se puede especificar después de la lista de argumentos usando el token de flecha (->):
func my_int_function() -> int:
    return 0
Las funciones que tienen un tipo de retorno ** deben ** devolver un valor adecuado. Establecer el tipo como void significa que la función no devuelve nada. Las funciones anuladas pueden regresar pronto con la palabra clave return, pero no pueden devolver ningún valor.
func void_function() -> void:
    return # Can't return a value.
Nota
Las funciones no nulas deben ** siempre ** devolver un valor, por lo que si su código tiene sentencias de bifurcación (como una construcción if/else), todas las rutas posibles deben tener un retorno. Por ejemplo, si tiene un return dentro de un bloque if pero no después de él, el editor generará un error porque si el bloque no se ejecuta, la función no tendrá un valor válido para devolver.
Funciones de referencia
Functions are first-class items in terms of the Callable object. Referencing a function by name without calling it will automatically generate the proper callable. This can be used to pass functions as arguments.
func map(arr: Array, function: Callable) -> Array:
    var result = []
    for item in arr:
        result.push_back(function.call(item))
    return result

func add1(value: int) -> int:
    return value + 1;

func _ready() -> void:
    var my_array = [1, 2, 3]
    var plus_one = map(my_array, add1)
    print(plus_one) # Prints [2, 3, 4].
Nota
Callables must be called with the call method. You cannot use
the () operator directly. This behavior is implemented to avoid
performance issues on direct function calls.
Lambda functions
Lambda functions allow you to declare functions that do not belong to a class. Instead a Callable object is created and assigned to a variable directly. This can be useful to create Callables to pass around without polluting the class scope.
var lambda = func(x): print(x)
lambda.call(42) # Prints "42"
Lambda functions can be named for debugging purposes:
var lambda = func my_lambda(x):
    print(x)
Note that if you want to return a value from a lambda, an explicit return
is required (you can't omit return):
var lambda = func(x): return x ** 2
print(lambda.call(2)) # Prints `4`.
Lambda functions capture the local environment. Local variables are passed by value, so they won't be updated in the lambda if changed in the local function:
var x = 42
var my_lambda = func(): print(x)
my_lambda.call() # Prints "42"
x = "Hello"
my_lambda.call() # Prints "42"
Nota
The values of the outer scope behave like constants. Therefore, if you declare an array or dictionary, it can still be modified afterwards.
Funciones estáticas
A function can be declared static. When a function is static, it has no access to the instance member variables or self.
A static function has access to static variables. Also static functions are useful to make libraries of helper functions:
static func sum2(a, b):
    return a + b
Lambdas cannot be declared static.
See also Static variables and Static constructor.
Declaraciones y estructuras de control
Las declaraciones son estándar y pueden ser asignaciones, llamadas a funciones, estructuras de control, etc (mirar abajo). Usar ; como separador de las declaraciones es opcional.
Expressions
Expressions are sequences of operators and their operands in orderly fashion. An expression by itself can be a statement too, though only calls are reasonable to use as statements since other expressions don't have side effects.
Expressions return values that can be assigned to valid targets. Operands to some operator can be another expression. An assignment is not an expression and thus does not return any value.
Here are some examples of expressions:
2 + 2 # Binary operation.
-5 # Unary operation.
"okay" if x > 4 else "not okay" # Ternary operation.
x # Identifier representing variable or constant.
x.a # Attribute access.
x[4] # Subscript access.
x > 2 or x < 5 # Comparisons and logic operators.
x == y + 2 # Equality test.
do_something() # Function call.
[1, 2, 3] # Array definition.
{A = 1, B = 2} # Dictionary definition.
preload("res://icon.png") # Preload builtin function.
self # Reference to current instance.
Identifiers, attributes, and subscripts are valid assignment targets. Other expressions cannot be on the left side of an assignment.
if/else/elif
Los condicionales básicos se crean usando la sintaxis if/else/elif. Se permite el uso de paréntesis detrás de estos, pero no son obligatorios. Dada la naturaleza del código basado en tabulaciones, se puede usar elif en lugar de else/if para mantener la sangría al mismo nivel.
if (expression):
    statement(s)
elif (expression):
    statement(s)
else:
    statement(s)
Las declaraciones cortas se pueden escribir en la misma línea que la condición:
if 1 + 1 == 2: return 2 + 2
else:
    var x = 3 + 3
    return x
A veces, es posible que desee asignar un valor inicial diferente en función de una expresión booleana. En este caso, las expresiones ternary-if son útiles
var x = (value) if (expression) else (value)
y += 3 if y < 10 else -1
Las expresiones condicionales ternarias se pueden anidar para manejar más de 2 casos. Al anidar expresiones condicionales ternarias, se recomienda envolver la expresión completa en varias líneas para preservar la legibilidad:
var count = 0

var fruit = (
        "apple" if count == 2
        else "pear" if count == 1
        else "banana" if count == 0
        else "orange"
)
print(fruit)  # banana

# Alternative syntax with backslashes instead of parentheses (for multi-line expressions).
# Less lines required, but harder to refactor.
var fruit_alt = \
        "apple" if count == 2 \
        else "pear" if count == 1 \
        else "banana" if count == 0 \
        else "orange"
print(fruit_alt)  # banana
También puede desear verificar si un valor está contenido dentro de algo. Puede usar una declaración if combinada con el operador in para lograr esto:
# Check if a letter is in a string.
var text = "abc"
if 'b' in text: print("The string contains b")

# Check if a variable is contained within a node.
if "varName" in get_parent(): print("varName is defined in parent!")
while
Simple loops are created by using while syntax. Loops can be broken
using break or continued using continue (which skips to the next
iteration of the loop without executing any further code in the current iteration):
while (expression):
    statement(s)
for
Para iterar en un rango, como un array o una tabla, se utiliza un bucle for. Cuando se itera sobre un array, el elemento actual del array se guarda en la variable del bucle. Cuando se itera sobre un diccionario, el índice se guarda en la variable del bucle.
for x in [5, 7, 11]:
    statement # Loop iterates 3 times with 'x' as 5, then 7 and finally 11.

var dict = {"a": 0, "b": 1, "c": 2}
for i in dict:
    print(dict[i]) # Prints 0, then 1, then 2.

for i in range(3):
    statement # Similar to [0, 1, 2] but does not allocate an array.

for i in range(1, 3):
    statement # Similar to [1, 2] but does not allocate an array.

for i in range(2, 8, 2):
    statement # Similar to [2, 4, 6] but does not allocate an array.

for i in range(8, 2, -2):
    statement # Similar to [8, 6, 4] but does not allocate an array.

for c in "Hello":
    print(c) # Iterate through all characters in a String, print every letter on new line.

for i in 3:
    statement # Similar to range(3).

for i in 2.2:
    statement # Similar to range(ceil(2.2)).
If you want to assign values on an array as it is being iterated through, it
is best to use for i in array.size().
for i in array.size():
        array[i] = "Hello World"
The loop variable is local to the for-loop and assigning to it will not change the value on the array. Objects passed by reference (such as nodes) can still be manipulated by calling methods on the loop variable.
for string in string_array:
    string = "Hello World" # This has no effect

for node in node_array:
    node.add_to_group("Cool_Group") # This has an effect
match
La expresión match se usa para bifurcar la ejecución del programa. Es el equivalente de la expresión switch encontrada en otros lenguajes de programación, pero ofrece funcionalidades adicionales.
Advertencia
match is more type strict than the == operator. For example 1 will not match 1.0. The only exception is String vs StringName matching:
for example, the String "hello" is considered equal to the StringName &"hello".
Sintaxis básica
match <expression>:
    <pattern(s)>:
        <block>
    <pattern(s)> when <guard expression>:
        <block>
    <...>
Curso rápido para las personas familiarizadas con las declaraciones switch
Reemplace "switch'' con " match''.
Elimina "case".
Remove any
breaks.Cambia
defaultpor un guión bajo.
Control del flujo
The patterns are matched from top to bottom.
If a pattern matches, the first corresponding block will be executed. After that, the execution continues below the match statement.
Nota
The special continue behavior in match supported in 3.x was removed in Godot 4.0.
The following pattern types are available:
- Literal pattern
Matches a literal:
match x:
    1:
        print("We are number one!")
    2:
        print("Two are better than one!")
    "test":
        print("Oh snap! It's a string!")
- Expression pattern
Matches a constant expression, an identifier, or an attribute access (
A.B):match typeof(x): TYPE_FLOAT: print("float") TYPE_STRING: print("text") TYPE_ARRAY: print("array")
- Patrón comodín
Este patrón busca emparejar cualquier cosa. Se escribe con un guión bajo.
Se puede usar como el equivalente del `` valor predeterminado '' en una declaración de `` cambio '' en otros idiomas
match x:
    1:
        print("It's one!")
    2:
        print("It's one times two!")
    _:
        print("It's not 1 or 2. I don't care to be honest.")
- Patrón vinculante
Un patrón de enlace introduce una nueva variable. Al igual que el patrón comodín, coincide con todo, y también le da un nombre a ese valor. Es especialmente útil en patrones de matriz y diccionario
match x:
    1:
        print("It's one!")
    2:
        print("It's one times two!")
    var new_var:
        print("It's not 1 or 2, it's ", new_var)
- Patrón de matriz
Coincide con una matriz. Cada elemento individual del patrón de matriz es un patrón en sí mismo, por lo que puede anidarlos.
Se comprueba primero la longitud del array, este tiene que tener el mismo tamaño que el patrón, de otra manera no habrá coincidencia.
** Matriz abierta **: una matriz puede ser más grande que el patrón haciendo el último subpatrón `` ..``.
Cada subpatrón tiene que estar separado por comas.
match x:
    []:
        print("Empty array")
    [1, 3, "test", null]:
        print("Very specific array")
    [var start, _, "test"]:
        print("First element is ", start, ", and the last is \"test\"")
    [42, ..]:
        print("Open ended array")
- Patrón de diccionario
Funciona de la misma manera que el patrón de array. Cada clave tiene que ser un patrón de constante.
Se comprueba primero el tamaño del diccionario y tiene que ser igual al del patrón, de otro modo el patrón no coincidirá.
** Diccionario abierto **: un diccionario puede ser más grande que el patrón haciendo el último subpatrón `` ..``.
Cada sub-patrón tiene que estar separado por comas.
Si no especificas un valor, solo se comprobará la existencia de la clave.
Un patrón de valor se separa del patrón clave con un ``: ``.
match x:
    {}:
        print("Empty dict")
    {"name": "Dennis"}:
        print("The name is Dennis")
    {"name": "Dennis", "age": var age}:
        print("Dennis is ", age, " years old.")
    {"name", "age"}:
        print("Has a name and an age, but it's not Dennis :(")
    {"key": "godotisawesome", ..}:
        print("I only checked for one entry and ignored the rest")
- Patrones múltiples
También puede especificar múltiples patrones separados por una coma. No se permite que estos patrones tengan enlaces en ellos.
match x:
    1, 2, 3:
        print("It's 1 - 3")
    "Sword", "Splash potion", "Fist":
        print("Yep, you've taken damage")
Pattern guards
Only one branch can be executed per match. Once a branch is chosen, the rest are not checked.
If you want to use the same pattern for multiple branches or to prevent choosing a branch with too general pattern,
you can specify a guard expression after the list of patterns with the when keyword:
match point:
    [0, 0]:
        print("Origin")
    [_, 0]:
        print("Point on X-axis")
    [0, _]:
        print("Point on Y-axis")
    [var x, var y] when y == x:
        print("Point on line y = x")
    [var x, var y] when y == -x:
        print("Point on line y = -x")
    [var x, var y]:
        print("Point (%s, %s)" % [x, y])
If there is no matching pattern for the current branch, the guard expression is not evaluated and the patterns of the next branch are checked.
If a matching pattern is found, the guard expression is evaluated.
If it's true, then the body of the branch is executed and
matchends.If it's false, then the patterns of the next branch are checked.
Clases
Por defecto, todos los archivos de script son clases sin nombre. En este caso, solo puede hacer referencia a ellos utilizando la ruta del archivo, utilizando una ruta relativa o absoluta. Por ejemplo, si nombra un archivo de script `` character.gd``
# Inherit from 'character.gd'.

extends "res://path/to/character.gd"

# Load character.gd and create a new node instance from it.

var Character = load("res://path/to/character.gd")
var character_node = Character.new()
Registrar clases con nombres
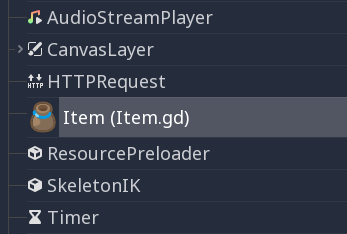
You can give your class a name to register it as a new type in Godot's
editor. For that, you use the class_name keyword. You can optionally use
the @icon annotation with a path to an image, to use it as an icon. Your
class will then appear with its new icon in the editor:
# item.gd

@icon("res://interface/icons/item.png")
class_name Item
extends Node
Truco
SVG images that are used as custom node icons should have the Editor > Scale With Editor Scale and Editor > Convert Icons With Editor Theme import options enabled. This allows icons to follow the editor's scale and theming settings if the icons are designed with the same color palette as Godot's own icons.
Aquí hay un ejemplo de archivo de clase:
# Saved as a file named 'character.gd'.

class_name Character


var health = 5


func print_health():
    print(health)


func print_this_script_three_times():
    print(get_script())
    print(ResourceLoader.load("res://character.gd"))
    print(Character)
If you want to use extends too, you can keep both on the same line:
class_name MyNode extends Node
Nota
Godot initializes non-static variables every time you create an instance, and this includes arrays and dictionaries. This is in the spirit of thread safety, since scripts can be initialized in separate threads without the user knowing.
Herencia
Una clase (guardada como un archivo) puede heredar de:
Una clase global.
Otro archivo de clase.
Una clase interna situada dentro de otro archivo de clase.
La herencia múltiple no está permitida.
La herencia usa la palabra clave extends:
# Inherit/extend a globally available class.
extends SomeClass

# Inherit/extend a named class file.
extends "somefile.gd"

# Inherit/extend an inner class in another file.
extends "somefile.gd".SomeInnerClass
Nota
If inheritance is not explicitly defined, the class will default to inheriting RefCounted.
Para comprobar si una instancia concreta hereda de una clase determinada, se puede usar la palabra clave is:
# Cache the enemy class.
const Enemy = preload("enemy.gd")

# [...]

# Use 'is' to check inheritance.
if entity is Enemy:
    entity.apply_damage()
To call a function in a super class (i.e. one extend-ed in your current
class), use the super keyword:
super(args)
This is especially useful because functions in extending classes replace
functions with the same name in their super classes. If you still want to
call them, you can use super:
func some_func(x):
    super(x) # Calls the same function on the super class.
If you need to call a different function from the super class, you can specify the function name with the attribute operator:
func overriding():
    return 0 # This overrides the method in the base class.

func dont_override():
    return super.overriding() # This calls the method as defined in the base class.
Advertencia
One of the common misconceptions is trying to override non-virtual engine methods
such as get_class(), queue_free(), etc. This is not supported for technical reasons.
In Godot 3, you can shadow engine methods in GDScript, and it will work if you call this method in GDScript. However, the engine will not execute your code if the method is called inside the engine on some event.
In Godot 4, even shadowing may not always work, as GDScript optimizes native method calls.
Therefore, we added the NATIVE_METHOD_OVERRIDE warning, which is treated as an error by default.
We strongly advise against disabling or ignoring the warning.
Note that this does not apply to virtual methods such as _ready(), _process() and others
(marked with the virtual qualifier in the documentation and the names start with an underscore).
These methods are specifically for customizing engine behavior and can be overridden in GDScript.
Signals and notifications can also be useful for these purposes.
Constructor de clase
The class constructor, called on class instantiation, is named _init. If you
want to call the base class constructor, you can also use the super syntax.
Note that every class has an implicit constructor that it's always called
(defining the default values of class variables). super is used to call the
explicit constructor:
func _init(arg):
   super("some_default", arg) # Call the custom base constructor.
Esto se explica mejor con ejemplos. Consideremos este escenario:
# state.gd (inherited class).
var entity = null
var message = null


func _init(e=null):
    entity = e


func enter(m):
    message = m


# idle.gd (inheriting class).
extends "state.gd"


func _init(e=null, m=null):
    super(e)
    # Do something with 'e'.
    message = m
Hay algunas cosas a tener en cuenta aquí:
If the inherited class (
state.gd) defines a_initconstructor that takes arguments (ein this case), then the inheriting class (idle.gd) must define_initas well and pass appropriate parameters to_initfromstate.gd.idle.gdcan have a different number of arguments than the base classstate.gd.In the example above,
epassed to thestate.gdconstructor is the sameepassed in toidle.gd.If
idle.gd's_initconstructor takes 0 arguments, it still needs to pass some value to thestate.gdbase class, even if it does nothing. This brings us to the fact that you can pass expressions to the base constructor as well, not just variables, e.g.:# idle.gd func _init(): super(5)
Static constructor
A static constructor is a static function _static_init that is called automatically
when the class is loaded, after the static variables have been initialized:
static var my_static_var = 1

static func _static_init():
    my_static_var = 2
A static constructor cannot take arguments and must not return any value.
Clases internas
Un archivo de clase puede contener otras clases internas. Las clases internas se definen usando la palabra clave class. Para instanciarlas se usa la función ClassName.new().
# Inside a class file.

# An inner class in this class file.
class SomeInnerClass:
    var a = 5


    func print_value_of_a():
        print(a)


# This is the constructor of the class file's main class.
func _init():
    var c = SomeInnerClass.new()
    c.print_value_of_a()
Clases como recursos
Las clases guardadas como archivos se tratan como recursos. Estos recursos se deben de cargar desde disco para acceder a ellos desde otras clases. Esto se hace usando cualquiera de estas dos funciones: load o preload (ver abajo). Instanciar una clase cargada como recurso se hace llamando a la función new en el objeto de dicha clase:
# Load the class resource when calling load().
var MyClass = load("myclass.gd")

# Preload the class only once at compile time.
const MyClass = preload("myclass.gd")


func _init():
    var a = MyClass.new()
    a.some_function()
Exports
Nota
La documentación sobre exportaciones está ahora en GDScript exported properties.
Properties (setters and getters)
Sometimes, you want a class' member variable to do more than just hold data and actually perform some validation or computation whenever its value changes. It may also be desired to encapsulate its access in some way.
For this, GDScript provides a special syntax to define properties using the set and get
keywords after a variable declaration. Then you can define a code block that will be executed
when the variable is accessed or assigned.
Example:
var milliseconds: int = 0
var seconds: int:
    get:
        return milliseconds / 1000
    set(value):
        milliseconds = value * 1000
Nota
Unlike setget in previous Godot versions, the properties setter and getter are always called (except as noted below),
even when accessed inside the same class (with or without prefixing with self.). This makes the behavior
consistent. If you need direct access to the value, use another variable for direct access and make the property
code use that name.
Alternative syntax
Also there is another notation to use existing class functions if you want to split the code from the variable declaration or you need to reuse the code across multiple properties (but you can't distinguish which property the setter/getter is being called for):
var my_prop:
    get = get_my_prop, set = set_my_prop
Esto puede hacerse también en la misma línea:
var my_prop: get = get_my_prop, set = set_my_prop
The setter and getter must use the same notation, mixing styles for the same variable is not allowed.
Nota
You cannot specify type hints for inline setters and getters. This is done on purpose to reduce the boilerplate. If the variable is typed, then the setter's argument is automatically of the same type, and the getter's return value must match it. Separated setter/getter functions can have type hints, and the type must match the variable's type or be a wider type.
When setter/getter is not called
When a variable is initialized, the value of the initializer will be written directly to the variable.
Including if the @onready annotation is applied to the variable.
Using the variable's name to set it inside its own setter or to get it inside its own getter will directly access the underlying member, so it won't generate infinite recursion and saves you from explicitly declaring another variable:
signal changed(new_value)
var warns_when_changed = "some value":
    get:
        return warns_when_changed
    set(value):
        changed.emit(value)
        warns_when_changed = value
This also applies to the alternative syntax:
var my_prop: set = set_my_prop

func set_my_prop(value):
    my_prop = value # No infinite recursion.
Advertencia
The exception does not propagate to other functions called in the setter/getter. For example, the following code will cause an infinite recursion:
var my_prop:
    set(value):
        set_my_prop(value)

func set_my_prop(value):
    my_prop = value # Infinite recursion, since `set_my_prop()` is not the setter.
Modo Tool
By default, scripts don't run inside the editor and only the exported
properties can be changed. In some cases, it is desired that they do run
inside the editor (as long as they don't execute game code or manually
avoid doing so). For this, the @tool annotation exists and must be
placed at the top of the file:
@tool
extends Button

func _ready():
    print("Hello")
Ver :ref:`doc_running_code_in_the_editor`para más información.
Advertencia
Tenga cuidado al liberar nodos con `` queue_free () `` o `` free () `` en un script de herramienta (especialmente el propietario del script). A medida que los scripts de herramientas ejecutan su código en el editor, usarlos incorrectamente puede provocar el bloqueo del editor.
Gestión de la memoria
Godot implements reference counting to free certain instances that are no longer
used, instead of a garbage collector, or requiring purely manual management.
Any instance of the RefCounted class (or any class that inherits
it, such as Resource) will be freed automatically when no longer
in use. For an instance of any class that is not a RefCounted
(such as Node or the base Object type), it will
remain in memory until it is deleted with free() (or queue_free()
for Nodes).
Nota
If a Node is deleted via free() or queue_free(),
all of its children will also recursively be deleted.
To avoid reference cycles that can't be freed, a WeakRef function is provided for creating weak references, which allow access to the object without preventing a RefCounted from freeing. Here is an example:
extends Node

var my_file_ref

func _ready():
    var f = FileAccess.open("user://example_file.json", FileAccess.READ)
    my_file_ref = weakref(f)
    # the FileAccess class inherits RefCounted, so it will be freed when not in use

    # the WeakRef will not prevent f from being freed when other_node is finished
    other_node.use_file(f)

func _this_is_called_later():
    var my_file = my_file_ref.get_ref()
    if my_file:
        my_file.close()
Por otra parte, cuando no se utilizan referencias, el is_instance_valid(instance) puede usarse para comprobar si un objeto ha sido liberado.
Señales
Las señales son una forma de emitir mensajes desde un objeto, mensaje con el que otros objetos pueden reaccionar. Para crear señales personalizadas, usa la palabra clave signal.
extends Node


# A signal named health_depleted.
signal health_depleted
Nota
Las señales son un mecanismo de devolución de llamada <https://en.wikipedia.org/wiki/Callback (computer_programming)> _. También cumplen el papel de observadores, un patrón de programación común. Para obtener más información, lea el `Tutorial del observador <https://gameprogrammingpatterns.com/observer.html> _ en el libro electrónico Patrones de programación de juegos.
You can connect these signals to methods the same way you connect built-in signals of nodes like Button or RigidBody3D.
In the example below, we connect the health_depleted signal from a
Character node to a Game node. When the Character node emits the
signal, the game node's _on_character_health_depleted is called:
# game.gd

func _ready():
    var character_node = get_node('Character')
    character_node.health_depleted.connect(_on_character_health_depleted)


func _on_character_health_depleted():
    get_tree().reload_current_scene()
Puedes emitir todos los argumentos que necesites con una señal.
Aquí hay un ejemplo donde esto es útil. Digamos que queremos una barra de vida en la pantalla para reaccionar a los cambios de salud con una animación, pero queremos mantener la interfaz de usuario separada del jugador en nuestro árbol de escenas.
In our character.gd script, we define a health_changed signal and emit
it with Signal.emit(), and from
a Game node higher up our scene tree, we connect it to the Lifebar using
the Signal.connect() method:
# character.gd

...
signal health_changed


func take_damage(amount):
    var old_health = health
    health -= amount

    # We emit the health_changed signal every time the
    # character takes damage.
    health_changed.emit(old_health, health)
...
# lifebar.gd

# Here, we define a function to use as a callback when the
# character's health_changed signal is emitted.

...
func _on_Character_health_changed(old_value, new_value):
    if old_value > new_value:
        progress_bar.modulate = Color.RED
    else:
        progress_bar.modulate = Color.GREEN

    # Imagine that `animate` is a user-defined function that animates the
    # bar filling up or emptying itself.
    progress_bar.animate(old_value, new_value)
...
En el nodo Juego, obtenemos ambos nodos Personaje y barra_de_vida, los conectamos al personaje, que emite la señal, al recibidor, en este caso el nodo barra_de_vida.
# game.gd

func _ready():
    var character_node = get_node('Character')
    var lifebar_node = get_node('UserInterface/Lifebar')

    character_node.health_changed.connect(lifebar_node._on_Character_health_changed)
Esto permite a la barra_de_vida reaccionar a los cambios de salud sin acoplarse al nodo personaje.
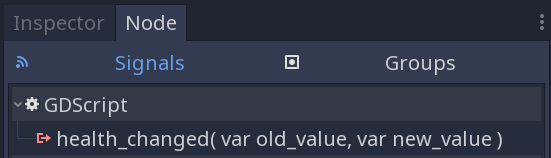
Puede escribir nombres de argumentos opcionales entre paréntesis después de la definición de la señal
# Defining a signal that forwards two arguments.
signal health_changed(old_value, new_value)
Estos argumentos se muestran en el panel de nodos del editor, y Godot puede usarlos para generar funciones de llamadas de vuelta para usted. Sin embargo, usted puede seguir emitiendo cualquier número de argumentos cuando emite señales, está en sus manos emitir los valores correctos.
GDScript puede asociar argumentos a las conexiones entre una señal y un método. Cuando la señal es emitida, llamando así al método conectado, el argumento asociado es pasado al método. Estos argumentos asociados son en realidad específicos a la conexión y sus valores se mantendrán iguales.
Puedes usar este array de valores para añadir información constante extra a la conexión si la señal emitida por sí misma no te da acceso a todos los datos que necesitas.
Tomando el ejemplo anterior, digamos que queremos mostrar un registro del daño recibido por cada personaje en pantalla, como Jugador1 recibió 22 de daño.. La señal health_changed no nos dice el nombre del personaje que recibió daño. Entonces cuando conectemos la señal a la consola del juego, podemos agregar el nombre del personaje en el array pasado como argumento:
# game.gd

func _ready():
    var character_node = get_node('Character')
    var battle_log_node = get_node('UserInterface/BattleLog')

    character_node.health_changed.connect(battle_log_node._on_Character_health_changed, [character_node.name])
Nuestro nodo BattleLog (registro de batalla) recibe cada elemento en el array como un argumento extra:
# battle_log.gd

func _on_Character_health_changed(old_value, new_value, character_name):
    if not new_value <= old_value:
        return

    var damage = old_value - new_value
    label.text += character_name + " took " + str(damage) + " damage."
Awaiting for signals or coroutines
The await keyword can be used to create coroutines
which wait until a signal is emitted before continuing execution. Using the await keyword with a signal or a
call to a function that is also a coroutine will immediately return the control to the caller. When the signal is
emitted (or the called coroutine finishes), it will resume execution from the point on where it stopped.
For example, to stop execution until the user presses a button, you can do something like this:
func wait_confirmation():
    print("Prompting user")
    await $Button.button_up # Waits for the button_up signal from Button node.
    print("User confirmed")
    return true
In this case, the wait_confirmation becomes a coroutine, which means that the caller also needs to await for it:
func request_confirmation():
    print("Will ask the user")
    var confirmed = await wait_confirmation()
    if confirmed:
        print("User confirmed")
    else:
        print("User cancelled")
Note that requesting a coroutine's return value without await will trigger an error:
func wrong():
    var confirmed = wait_confirmation() # Will give an error.
However, if you don't depend on the result, you can just call it asynchronously, which won't stop execution and won't make the current function a coroutine:
func okay():
    wait_confirmation()
    print("This will be printed immediately, before the user press the button.")
If you use await with an expression that isn't a signal nor a coroutine, the value will be returned immediately and the function won't give the control back to the caller:
func no_wait():
    var x = await get_five()
    print("This doesn't make this function a coroutine.")

func get_five():
    return 5
This also means that returning a signal from a function that isn't a coroutine will make the caller await on that signal:
func get_signal():
    return $Button.button_up

func wait_button():
    await get_signal()
    print("Button was pressed")
Nota
Unlike yield in previous Godot versions, you cannot obtain the function state object.
This is done to ensure type safety.
With this type safety in place, a function cannot say that it returns an int while it actually returns a function state object
during runtime.
Palabra clave Assert
La palabra clave assert puede ser usada para revisar condiciones en compilaciones de depuración. Esas comprobaciones son ignoradas en compilaciones que no son de depuración. Esto quiere decir que la expresión pasada como argumento no será evaluada en un proyecto exportado como release. Debido a esto, estas comprobaciones no deben contener expresiones que tengan efectos secundarios. De otro modo, el comportamiento del script variará dependiendo de si el proyecto se ejecuta o no en una versión de depuración.
# Check that 'i' is 0. If 'i' is not 0, an assertion error will occur.
assert(i == 0)
Cuando corre un proyecto desde el editor, el proyecto será pausado si ocurre un error con la aserción.
You can optionally pass a custom error message to be shown if the assertion fails:
assert(enemy_power < 256, "Enemy is too powerful!")
Comentarios
Todo lo escrito después de
#hasta terminar la linea, es ignorado y se interpretá como un comentario.# This is a comment.Truco
In the Godot script editor, special keywords are highlighted within comments to bring the user's attention to specific comments:
Critical (appears in red):
ALERT,ATTENTION,CAUTION,CRITICAL,DANGER,SECURITYWarning (appears in yellow):
BUG,DEPRECATED,FIXME,HACK,TASK,TBD,TODO,WARNINGNotice (appears in green):
INFO,NOTE,NOTICE,TEST,TESTINGThese keywords are case-sensitive, so they must be written in uppercase for them to be recognized:
The list of highlighted keywords and their colors can be changed in the Text Editor > Theme > Comment Markers section of the Editor Settings.